manuals.online logo
Brands
  1. Home
  2. •
  3. Brands
  4. •
  5. HYDROCOWL
  6. •
  7. Enclosure
  8. •
  9. HYDROCOWL SAFE-T-COVER 1000TDS-AL User manual

HYDROCOWL SAFE-T-COVER 1000TDS-AL User manual

Page 1 www.safe-t-cover.com 1-800-245-6333
Version 2.0
Model No. 1000TDS-AL (4/5/23)
ASSEMBLY INSTRUCTIONS - PLEASE READ CAREFULLY
Enclosure Plan View
1. Do not remove the PVC masking film until the enclosure is fully assembled. The PVC masking film
will protect the enclosure’s outer finish during installation.
2. The concrete base should be 6”thick, 188”long and 104”wide. Please note that the concrete base
should be level, or the “C”(access) panels may be difficult to install.
3. Mark the concrete base for outside the enclosure (933/8”wide by 1771/8”long).
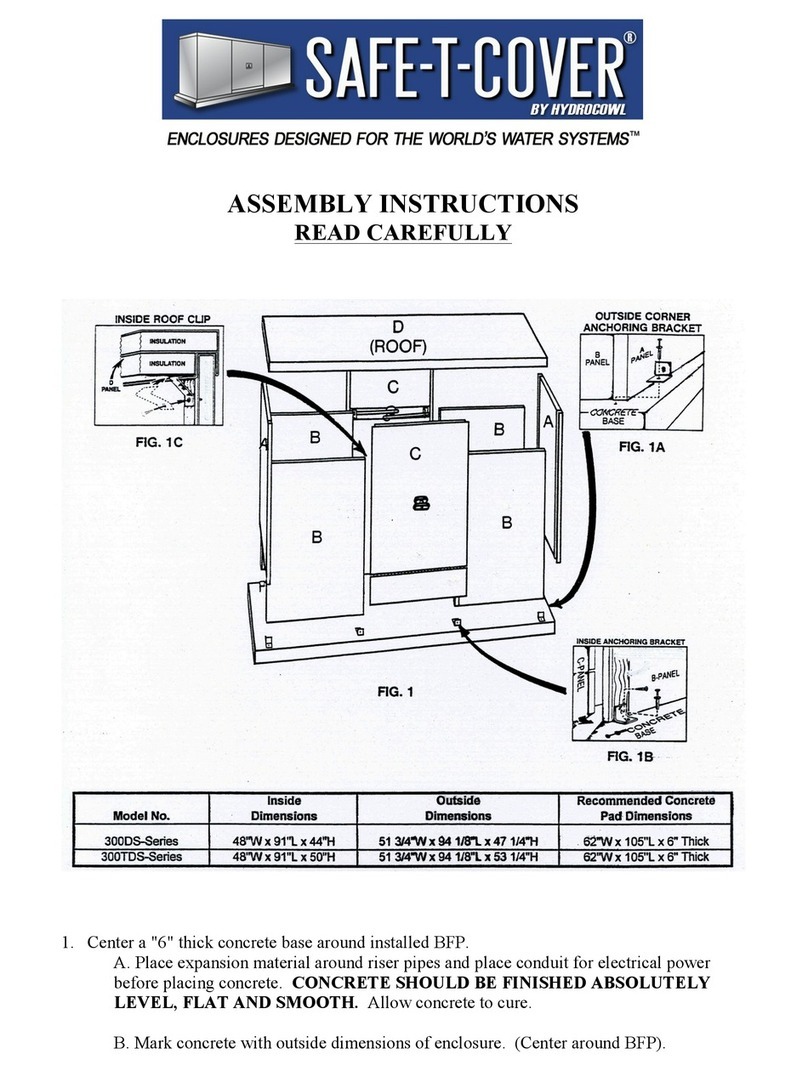
4. Assemble the “A#-B”(corner) assemblies through the holes provided using Hex Head Screws. (For
best results, insert a bead of silicone caulk into the inside bend of the “A#”panel corners.) Set them on
the marked concrete base (Fig. 1).
Page 2 www.safe-t-cover.com 1-800-245-6333
Version 2.0
FIG. 1
NOTE: model sizes and configurations vary, see the Enclosure Plan View.
5. Position the “A1”and “A2”(end) panels firmly together and then assemble them using Hex Head
Screws through the holes provided making sure that the panels are pulled tightly together before
tightening the screws. (For best results, insert a bead of silicone caulk into the inside bend of the “A1”
panel flanges.)
6. Position the “C”(access) panels and “F”(support) posts with roughly 3/16”gaps on both sides of each
“C”panel during roof assembly. Check and adjust the inside length to match the Enclosure Plan View
periodically by modifying the 3/16”gaps, while maintaining uniform gap widths.
7. Place one of the “D1”(roof) panels on a “B-A1-A2-B”(corner-end-corner) assembly and then fasten
the roof as shown through the holes provided (Fig. 2) using three (3) Hex Head Screws.
8. Insert an Inside Roof Clip into the “D1”(roof) panel at the “A2”panel stud (Fig. 2C) and then attach
it as shown using one (1) Hex Head Screw.
9. Repeat the “D1”(roof) panel assembly on the other “B-A1-A2-B”(corner-end-corner) assembly.
Page 3 www.safe-t-cover.com 1-800-245-6333
Version 2.0
FIG. 2
NOTE: model sizes and configurations vary, see the Enclosure Plan View.
10. Inspect the alignment of the “C”(access) panels during assembly. Verify that their removal and
replacement allow adequate space and positioning with the adjacent panels prior to attaching brackets
to the concrete.
11. Position the “D2”and “D3”(roof) middle panels (Fig. 3) between the “D1”(roof) end panels and set
them in place. Place the “D3”(roof) panel at one end, and then fit the “D2”(roof) panel into the final
position.
12. Place Inner Roof Connection Brackets under all “D#-D#”2x6 panel connections on the inside and then
fasten them into place (Fig. 2E) using Hex Head Screws.
FIG. 3
Page 4 www.safe-t-cover.com 1-800-245-6333
Version 2.0
13. Complete the bracket and clip installations in the following steps on one side and one end before moving
on to the other side and end of the enclosure. Fastening each anchoring bracket will require two (2)
Hex Head Screws installed first and then one (1) Anchor per bracket installed last. Fastening each
Inside Roof Clip will require one (1) Hex Head Screw per clip.
14. Attach Outside Corner Anchoring Brackets (small) at both “A1-B”(corner) assemblies on the first side
of the enclosure (Fig. 2A) oriented as shown in the Enclosure Plan View, and then fasten them to the
concrete.
15. Attach Inside Anchoring Brackets (large) to the “B”(corner) panel studs at the bottom, inside on the
first side of the enclosure (Fig. 2B) oriented as shown in the Enclosure Plan View, and then fasten them
to the concrete.
16. With the “F”(support) post aligned in the space between the “C”(access) panels allowing
approximately a 3/16”gap between panels, install an Inside Anchoring Bracket (large) (Fig. 2B) at the
bottom of the “F”(support) post on the first side of the enclosure.
17. Position a Wide Roof Bracket under the “D2-D3”panel rafter connection at the “F”(support) post stud
(Fig. 3) on the first side of the enclosure and then fasten it in place using four (4) Hex Head Screws.
18. Position Narrow Roof Brackets under the “D1-D#”panel rafter connections at the “B”(side) panel stud
locations (Fig. 3) on the first side of the enclosure and then fasten them in place using two (2) Hex Head
Screws per bracket.
19. Attach an Inside Anchoring Bracket to the “A2”panel stud at the bottom, inside on one end of the
enclosure (Fig. 2B) and then fasten it to the concrete.
20. Repeat these bracket and clip steps on the other side and end. Note that all provided anchoring
brackets, Narrow Roof Brackets and Inside Roof Clips must be installed for the enclosure to withstand
strong winds.
21. Install Roof Cover Plates on the “D#-D#”seams (Fig. 2D) using four (4) Hex Head Screws per plate.
22. Provide a ground-fault interrupter device in all electrical circuits per all applicable codes. Install the
heater(s) as per the manufacturer’s instructions and governing local and national codes.
23. For maximum protection, it is suggested that the area between the bottom of the enclosure and the
concrete base should be caulked except for the “C”panels. DO NOT CAULK THE BOTTOM OF
THE “C”PANELS.
24. REMOVE THE PVC MASKING FILM IMMEDIATELY AFTER INSTALLATION. If the panels get
wet with the masking film in place, water will irreversibly stain the panels. Summertime heat will bake
the masking film onto the panels.
Page 5 www.safe-t-cover.com 1-800-245-6333
Version 2.0
Model No. 1000TDS-AL
CONTENTS
1. Assembly parts included:
A. 2- “A1”(end corner) Panels
B. 2- “A2”(end corner) Panels
C. 4- “B”(corner side) Panels
D. 2- “C”(access) Panels
E. 2- “C”(access) Panels with Drain Flaps
F. 2- “D1”(roof end) Panels
G. 1- “D2”(roof middle) Panel
H. 1- “D3”(roof middle) Panel
I. 2- “F”(support) Posts
J. 4- Outside Corner Anchoring Brackets (1½ x2½ x2½”Stainless Steel)
K. 8- Inside Anchoring Brackets (3 x33/16 x33/16”Aluminum)
L. 2- Inside Roof Clips (2 x21/16 x85/16”Stainless Steel for No Notch 2x6 Rafters)
M. 2- Wide Roof Brackets (3x31/16 x31/16”Stainless Steel)
N. 4- Narrow Roof Brackets (15/8 x31/16 x31/16”Stainless Steel)
O. 6- Roof Cover Plates (3 x13/16 x7¼”with Four Holes for No Notch 2x6 Rafters)
P. 3- Inner Roof Connection Brackets
Q. 1- Package of Anchors
R. 1- Package of Hex Head Screws
S. 1- Masonry Bit
T. 1- Magnetic Chuck
2. Tools needed:
A. Hammer
B. Screw Gun
C. ¾”Wrench
D. Hammer Drill

Other HYDROCOWL Enclosure manuals

HYDROCOWL SAFE-T-COVER 1000DS Series User manual

HYDROCOWL

HYDROCOWL SAFE-T-COVER 1000DS Series User manual

HYDROCOWL Safe-T-Cover 300 Series User manual

HYDROCOWL

HYDROCOWL Safe-T-Cover 300 Series User manual

HYDROCOWL SAFE-T-COVER 600TD Series User manual

HYDROCOWL

HYDROCOWL SAFE-T-COVER 600TD Series User manual

HYDROCOWL Safe-T-Cover 800S Series User manual

HYDROCOWL

HYDROCOWL Safe-T-Cover 800S Series User manual

HYDROCOWL SAFE-T-COVER 600DS Series User manual

HYDROCOWL

HYDROCOWL SAFE-T-COVER 600DS Series User manual

HYDROCOWL Safe-T-Cover 800 Series User manual

HYDROCOWL

HYDROCOWL Safe-T-Cover 800 Series User manual

HYDROCOWL Safe-t-Cover 300DS Series User manual

HYDROCOWL

HYDROCOWL Safe-t-Cover 300DS Series User manual

Popular Enclosure manuals by other brands

Crestron Automation Enclosures CAEN Series Specification sheet

Crestron

Crestron Automation Enclosures CAEN Series Specification sheet

Sumvision Cyclone MKV 2 user manual

Sumvision

Sumvision Cyclone MKV 2 user manual

MAXDATA SR1202 M1 user guide

MAXDATA

MAXDATA SR1202 M1 user guide

StarTech.com DRW110ATA Instruction guide

StarTech.com

StarTech.com DRW110ATA Instruction guide

Thermaltake A2398 user guide

Thermaltake

Thermaltake A2398 user guide

Lenovo D1224 Product guide

Lenovo

Lenovo D1224 Product guide

Genesis Titan 303 Quick installation guide

Genesis

Genesis Titan 303 Quick installation guide

HighPoint SSD6540 Quick installation guide

HighPoint

HighPoint SSD6540 Quick installation guide

Roger ME-16 user manual

Roger

Roger ME-16 user manual

Elite 311 quick start guide

Elite

Elite 311 quick start guide

MAG FORGE M100R user guide

MAG

MAG FORGE M100R user guide

StarTech.com SECTBLTPOS2 user manual

StarTech.com

StarTech.com SECTBLTPOS2 user manual

extronics iSCAN301S operating manual

extronics

extronics iSCAN301S operating manual

ioi FWBU2SATA35DMR installation guide

ioi

ioi FWBU2SATA35DMR installation guide

Macally G-S350SUAB user manual

Macally

Macally G-S350SUAB user manual

Alto ELVIS MKII owner's manual

Alto

Alto ELVIS MKII owner's manual

Antec VSK-1000 user manual

Antec

Antec VSK-1000 user manual

Panduit PANZONE PZBASE3 instructions

Panduit

Panduit PANZONE PZBASE3 instructions

manuals.online logo
manuals.online logoBrands
  • About & Mission
  • Contact us
  • Privacy Policy
  • Terms and Conditions

Copyright 2025 Manuals.Online. All Rights Reserved.