The Aspenair uses only 1 1/2watts of power so it is cost
efficient to run.
We recommend that the Aspenair be placed 6 feet away
from walls if possible to avoid the particles it attracts
from being collected on the walls.
The Aspenair is a bi-polar precipitation system. The
effects of static electricity common to ordinary negative
ion generators have been reduced, while retaining the
ability to produce an abundance of negative ions. We
still recommend, however, that the unit be placed more
than three feet away from computers or other static sen-
sitive devices.
SET-UP
Use this list to be sure that all parts are in place.
Read the instructions carefully.
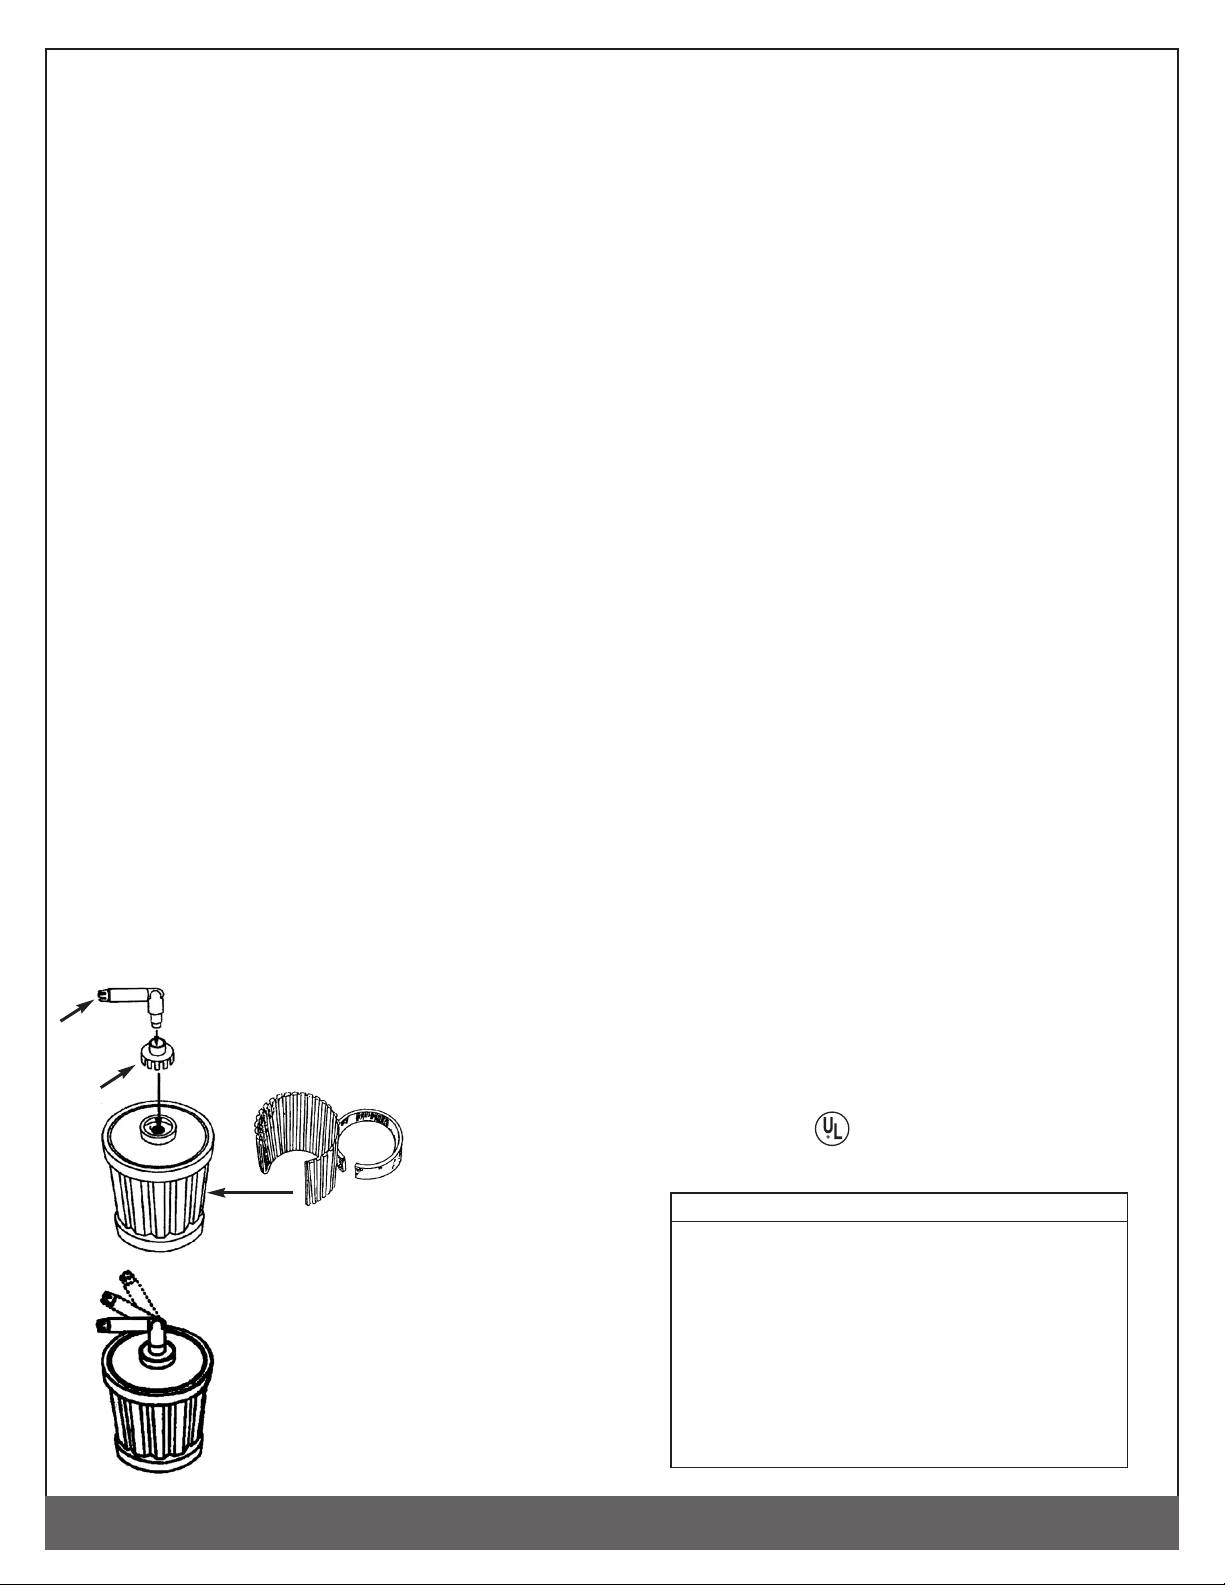
1. Remove emitter parts from small plastic bag and
place the emitter base in the top of the ionizer as
shown. Make sure the conductive foam is provided
in case you lose one. Your ionizer will not func-
tion without it.
2. Insert the Flexible Emitter into the emitter as shown.
3. Use the Flexible Emitter to direct ionization where
you want it. Direct it toward burning cigarettes, or
toward odor, bacteria, and pollen sources to keep
these pollutants from entering your breathing
space. Direct it away from walls and other
unwashable surfaces.
4. Control ionization range by adjusting emitter posi-
tion as shown. Point it straight up for intensive air
cleaning over a wide area. Lower it to
narrow the range. The horizontal posi-
tion will spread ions over the smallest
area and intensify localized collection.
5. For lower-
powered air
freshening,
remove the
Flexible Emitter
and emitter base,
and operate your ionizer with only
the permanent soft emitter in place.
6. Do not immerse the emitter or
ionizer in water or detergents. When
the emitter pin becomes dusty, it
may be cleaned with a cotton swab
and vinegar.
CARE
The disposable filter should be replaced when over 50%
of its surface is discolored with accumulated dirt. Filter
life will vary depending on the growing environment.
Your system comes with an extra disposable filter.
Additional replacements are available directly from the
place of purchase.
STANDARD SAFEGUARDS
FOR ALL ELECTRICAL APPLIANCES
When using any electrical appliance the following basic
safety precautions should be followed:
1. Read and understand all instructions.
2. Close supervision is necessary when any appli-
ance is used by or near children.
3. Unplug the unit when not in use. Never yank
the cord to disconnect it from the wall; grasp
plug and pull to disconnect.
4. To protect against electrical shock hazards, do
not immerse unit in water or other liquids.
5. To protect your warranty, do not attempt to dis-
assemble the Aspenair. Any tampering with the
unit voids your warranty. There are no con-
sumer replaceable parts inside the unit.
AVAILABLE REPLACEMENT PARTS
Filters • Conductive Foam • Flexible Emitter
AC 120V 60 HZ 1.5W
SERIES 10 EPA REG.#48463-CA-01
LISTED 1459
GUARANTEE
Your Aspenair Ionizer is guaranteed to the original
owner for one year from the date of purchase.
Misuse, abuse, or failure to follow instructions are
not covered. If you have a problem, recheck your
system to isolate the problem. If this doesn’t reme-
dy the situation, call the place of purchase to get a
return authorization for the faulty part. Send only
that part. Unauthorized returns will not be accept-
ed. Save your receipt/invoice — a copy is required
for all warranty work.
©HYDROFARM 2003 PETALUMA CA
Emitter
Base
Flexible
Emitter