manuals.online logo
Brands
  1. Home
  2. •
  3. Brands
  4. •
  5. hyfire
  6. •
  7. Control Unit
  8. •
  9. hyfire TAURUS TAU-MO-SB-01 User manual

hyfire TAURUS TAU-MO-SB-01 User manual

THE BOX
QR code
Part number
Product name
UNBOXING
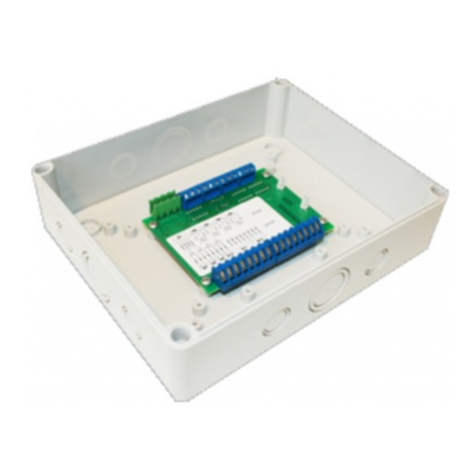
• When unboxing the output module you will find the unit and its lid.
• This comes with pre-formed mounting holes to drill out and mount the backbox.
• Securing screws are supplied for the lid.
• A resistor pack is supplied for the monitored load connection (10KΩR ).
For more information, please refer to the complete product manual.
IMPORTANT TO CONSIDER
When mounting a wireless device a comprehensive radio survey
should have been carried out to establish the location that provides
the best coverage and optimum reach. Taking into consideration the building
structure and materials, the survey identifies the wireless infrastructure
required and product locations for optimum performance, identifying
any factor that could prevent radio integrity.
Avoid fixing or mounting the unit close to the following:
• Equipment that utilises large electrical currents
• Large metal objects or structures
• Fluorescent lighting fittings
• Metal ceiling structures
• IT cabling.
Keep 2 meters minimum spacing between other wireless equipment
in the area to avoid signal interference.
EN54 approved environmental temperature range is -10°C to +55°C
INSIDE THE BOX
• 1 x Output Module
• 2 x CR123A batteries
• 4 x Securing screws
• 1 x Resistor pack
• 1 x Product manual
• 1 x Quick start guide
• 1 x QR code
MOUNTING STEPS
The Input Module is designed to meet IP65 rating, suitable for external mounting.
Proceed as follows to complete the device installation.
Remove the lid from the back box, removing the screws
on the corners.
1
3
2
4
BATTERY
COMPARTMENTS
• Remove the appropriate knock out on the underside or lower
rear of the casing, install the M16/20 IP rated gland.
• Note: pay attention to avoid damages to the PCB, while
removing the knock out, or remove it before starting.
• Ensure the switch on the PCB is in position ON.
• Fit the 2x CR123A batteries ensuring you have checked
they are the correct way round observing the polarity
indications on the PCB.
• The LED will signal 4 times red.
• Move the switch on the PCB to position 1. The LED will blink
few seconds green and then signal alternatively green/red
4 times.
LED
DIP
SWITCH
ON 1
• To retain IP rating, please ensure you use the outer holes
on the casing.
• Using a pencil, mark through the outer holes on the desired
surface you will attach the unit to.
• Using a suitable-sized drill bit (6 mm) drill the marked screw
points on your chosen surface.
• Ensure you use the correct fixings for the type of surface
you are mounting to.
• Screw the backbox to the desired surface using all fixing holes
and appropriate-sized roundhead screws (not countersunk).
EOL
TAU-MO-SB-01
HYFIRE TAURUS OUTPUT MODULE
QUICK START GUIDE
Unit B12a, Holly Farm Business Park, Honiley, Warwickshire, CV8 1NP
T: +44 (0)1926 485282, E: info@hyfirewireless.co.uk, W: www.hyfirewireless.com
TAU-MO-SB-01
Hyfire Taurus
Output Module
+
-
+
-
• Refit the lid to the back box, using the supplied screws.
• Put the QR code available in the box either on the system
map or on the dedicated pages at the end of translator
or expander manual.
6
5
+
Unsupervised relay
switch output
WIRING EXAMPLE FOR THE RELAY SWITCH OUTPUT
• Ensure the device connected to the unit is not drawing
more than 2 A at 30V (no 220 VAC). Drawing too much
current through the output relay or connecting mains
voltage could possibly damage the unit and void warranty.
Note: install a properly fire rated cable (according
to national code of practice) between the third-party
device and the output module.
REOL
Supervised relay switch
output (needs polarised load)
V
EXTERNAL
DEVICE
- +
- +
- +
- +
port B
input
port A
output
power supply
V+
External
device
REOL
WIRING EXAMPLE FOR 100MA/12 VDC OR 50 MA/24
VDC EXTERNAL DEVICE DRIVING CAPABILITY
• The 10KΩR resistor monitors whether the cable
has been damaged or the connection is no longer available.
• If you fail to install these resistors correctly the device will
not operate as intended.
- +
- +
REOL
REOL 10 KΩ
external
device
- +
- +
EOL
REOL 10 KΩ
TAU-MO-SB-01
HYFIRE TAURUS OUTPUT MODULE
QUICK START GUIDE
Unit B12a, Holly Farm Business Park, Honiley, Warwickshire, CV8 1NP
T: +44 (0)1926 485282, E: info@hyfirewireless.co.uk, W: www.hyfirewireless.com

Other hyfire Control Unit manuals

hyfire HFW-CEM-02 User manual

hyfire

hyfire HFW-CEM-02 User manual

hyfire HFI-IO-404-01 User manual

hyfire

hyfire HFI-IO-404-01 User manual

hyfire TAURUS TAU-MI-S-01/NB User manual

hyfire

hyfire TAURUS TAU-MI-S-01/NB User manual

hyfire TAURUS TAU-CEM-01/NB User manual

hyfire

hyfire TAURUS TAU-CEM-01/NB User manual

Popular Control Unit manuals by other brands

Daza 8014 PRO user manual

Daza

Daza 8014 PRO user manual

Leser 526 API Assembly instructions

Leser

Leser 526 API Assembly instructions

Kontron CU 5 -2 Series user guide

Kontron

Kontron CU 5 -2 Series user guide

LEGRAND 882 01 manual

LEGRAND

LEGRAND 882 01 manual

mods4cars smartTOP Installation

mods4cars

mods4cars smartTOP Installation

Stanley 70500 Instruction and service manual

Stanley

Stanley 70500 Instruction and service manual

Audio Technica RP32 Setup and use

Audio Technica

Audio Technica RP32 Setup and use

Ebyte E73-2G4M08S1EX manual

Ebyte

Ebyte E73-2G4M08S1EX manual

Festo MS6-SV Series instructions

Festo

Festo MS6-SV Series instructions

Huawei ME906V user manual

Huawei

Huawei ME906V user manual

Ara-Unicontrol UNICONTROL user manual

Ara-Unicontrol

Ara-Unicontrol UNICONTROL user manual

ROBBE-Futaba FX-32 instruction manual

ROBBE-Futaba

ROBBE-Futaba FX-32 instruction manual

ADTRAN SFP+ 10G quick start

ADTRAN

ADTRAN SFP+ 10G quick start

Zipato ZIPABOX installation guide

Zipato

Zipato ZIPABOX installation guide

Epson RX-8025SA Applications manual

Epson

Epson RX-8025SA Applications manual

Meyer C Series manual

Meyer

Meyer C Series manual

LGB 55075 Instruction

LGB

LGB 55075 Instruction

CFH SB 118 Instructions for use

CFH

CFH SB 118 Instructions for use

manuals.online logo
manuals.online logoBrands
  • About & Mission
  • Contact us
  • Privacy Policy
  • Terms and Conditions

Copyright 2025 Manuals.Online. All Rights Reserved.