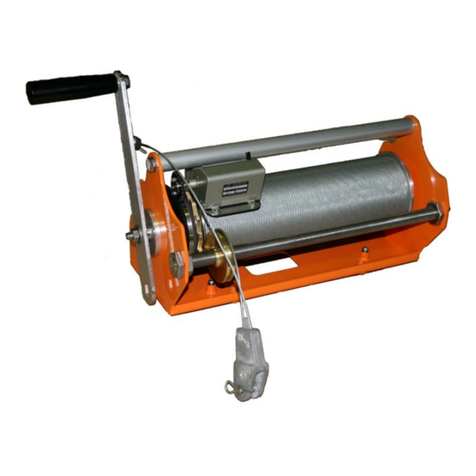
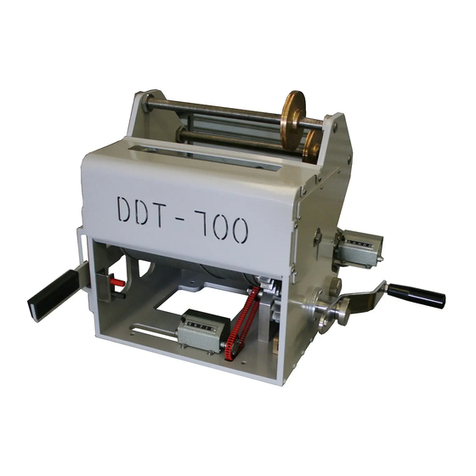
HyQuest Solutions BAROSSA DDT700 User manual

DDT700
User Manual
04-2023 – 01-02-000

© 2023 HyQuest Solutions 2
Table of Contents
Disclaimer 3I
II Scope of Delivery 4
III Safety Instructions 5
Part I Introduction 6
Part II Installation 7
2.1 Initial Setup & Operational Procedure ...................................................................................................... 7
Part III Operation 15
3.1 Dismantling Procedure ................................................................................................................................ 15
3.2 Winch Mode .................................................................................................................................................... 22
3.3 Traversing Mode ............................................................................................................................................ 22
3.4 Counters ........................................................................................................................................................... 23
Part IV Maintenance 25
4.1 Lubrication ...................................................................................................................................................... 25
4.2 Weston Brake ................................................................................................................................................. 27
4.3 Inspection ........................................................................................................................................................ 31
Part V Troubleshooting 33
Part VI Repair 35
Part VII Technical Data 36
Part VIII Obligations of the Operator and Disposal 37
8.1 Obligations of the Operator ....................................................................................................................... 37
8.2 Dismantling / Disposal ................................................................................................................................ 37
Part IX Appendices 39
9.1 Fitting C1 Connector to Amergraph Cable ............................................................................................. 40
9.2 Fitting Angle Plug to Amergraph Cable .................................................................................................. 41
9.3 Fitting Tee Plug to Amergraph Cable ...................................................................................................... 42
9.4 Break-away kit manual ............................................................................................................................... 43

Copyright Notice: No parts of this work may be
reproduced in any form or by any means without the
written permission of the publisher. HyQuest
Solutions waives copyright for users to print out
parts of the documentation in hard copy for their
own use only.
Trademark Notice: HyQuest Solutions (HS) and
KISTERS products and services referred to in this
document are trademarks or registered trademarks
of HyQuest Solutions or KISTERS AG. Other product
names used may or may not be the trademarks of
their respective owners.
© 2020 HyQuest Solutions, a KISTERS Group
Company. Any rights not expressly granted herein
are reserved.
The information provided in this manual was deemed
accurate as of the publication date. However, updates
to this information may have occurred.
This manual does not include all of the details of
design, production, or variation of the equipment
nor does it cover every possible situation which may
arise during installation, operation or maintenance.
HyQuest Solutions shall not be liable for any
incidental, indirect, special or consequential damages
whatsoever arising out of or related to this
documentation and the information contained in it,
even if HyQuest Solutions has been advised of the
possibility of such damages.
Any errors found in any HyQuest Solutions product
should be reported to HyQuest Solutions where
every effort will be made to quickly resolve the
problem.
This document is public.
3© 2023 HyQuest Solutions
I Disclaimer

© 2023 HyQuest Solutions 4
II Scope of Delivery
DDT Barossa winch/DDT 1000 Riverian winch with:
§
Banana style connections to suit most current meter counters
§
Winch to counter connecting lead (2 metres long)
§
4 × 10 mm mounting bolts
§
Mounting tools (allen keys)
§
Breakaway kit
§
Breakaway pins (5 sets)
Not included (opt. avail.):
§
Post head sheave assembly for operating side post and far side post
§
Traveller Block Assembly
§
Traversing Cable
§
Carry case for winch
© 2023 HyQuest Solutions 4

§
Read the user manual including all operating instructions prior to installing, connecting and powering up the HyQuest
Solutions DDT700/DDT1000. The manual provides information on how to operate the product. The manual is
intended to be used by qualified personnel, i.e. personnel that have been adequately trained, are sufficiently familiar
with installation, mounting, wiring, powering up and operation of the product.
§
Keep the user manual on hand for later reference!
§
If you encounter problems understanding the information in the manual (or part thereof), please consult the
manufacturer or its appointed reseller for further support.
§
HyQuest Solutions DDT700/DDT1000 is intended to be used in hydrometeorological or environmental monitoring
applications.
§
Before starting to work, you have to check the functioning and integrity of the system.
§
Check for visible defects on the DDT700/DDT1000, this may or may not include any or all of the following
mounting facilities, connectors and connections, mechanical parts, internal or external communication devices,
power supplies or power supply lines, etc.
§
If defects are found that jeopardize the operational safety, work must be stopped. This is true for defects found
before starting to work as well as for defects found while working.
§
Do not use the HyQuest Solutions DDT700/DDT1000 in areas where there is a danger of explosion.
§
The present user manual specifies environmental/climatic operating conditions as well as mechanical and electrical
conditions. Installation, wiring, powering up and operating the HyQuest Solutions DDT700/DDT1000 must strictly
comply with these specifications.
§
Perform maintenance only when tools or machinery are not in operation.
§
If guards are removed to perform maintenance, replace them immediately after servicing.
§
Never make any electrical or mechanical diagnostics, inspections or repairs under any circumstances. Return the
product to the manufacturer’s named repair centre. You can find information on how to return items for repair in the
relevant section of the HyQuest Solutions website.
§
Disposal instructions: After taking the HyQuest Solutions DDT700/DDT1000 out of service, it must be disposed
of in compliance with local waste and environmental regulations. The HyQuest Solutions DDT700/DDT1000 is never to
be disposed in household waste!
§
Inputs and outputs of the device are protected against electric discharges and surges (so-called ESD). Do not
touch any part of the electronic components! If you need to touch any part, please discharge yourself, i.e. by touching
grounded metal parts.
III Safety Instructions
© 2023 HyQuest Solutions 5

© 2023 HyQuest Solutions 6
Introduction
1Introduction
Thank you for choosing our product. We hope you will enjoy using the device.
HyQuest Solutions manufactures, sells, installs and operates quality instrumentation, data loggers and communication
technology. Products are designed with passion for environmental monitoring and with a deep understanding of the
quality, accuracy and robustness needed to fulfil the requirements of measurement practitioners in the field.
The present User Manual will help you understand, install and deploy the device. If, however, you feel that a particular
information is missing, incomplete or confusing, please do not hesitate to contact us for further support!
HyQuest Solutions’ DDT700 Barossa and DDT1000 Riverina winches are hand-operated double drum winches capable of
handling gauging weights up to 70 kg (154 lb) using the DDT700 Barossa and 110 kg (242 lb) using the DDT1000 Riverina.
The design shows two main advantages: Firstly, it enables the operator to change from sounding mode to traversing
mode very quickly by engaging the drive gears on each drum. Secondly, the double drum concept eases traversing, as
the forces exerted by the gauging weight are largely cancelled out. The winch can be used on small travellerways up to 60
m (200 ft) span using the DDT700 Barossa or 150 m (492 ft) using the DDT1000 Riverina winch.

© 2023 HyQuest Solutions 7
Installation
2Installation
The current meter can be fitted with a stabiliser tail fin which is attached to a hanger bar and Columbus gauging weight in
sizes of 7, 14, 23, 34, 45 and 68Kg. This assembly is suspended from the gauging winch by the amergraph signal cable.
HyQuest Solutions provides a range of counters to operate with the winch. The models available are CMC20A, CMCsp,
PVD200 and HydroTab/CMCbt.
§
Initial Setup & Operational Procedure
2.1 Initial Setup & Operational Procedure
The layout shown in the next subsections is based on HyQuest Solutions standard steelwork components, all of which can
be supplied ready for installation in kit form.
Alternatively, drawings can be provided for the components to be fabricated locally. However, as a minimum, the sheave
block assembly should be supplied by HyQuest Solutions.
1. Using the 4 bolts supplied secure the winch base to the operating side of the post as shown below (DDT700 mounts
are marked in red, DDT1000 mounts are marked in blue).
2. Fit handle, screw knob onto the shaft.
7

© 2023 HyQuest Solutions 8
Installation
3. Remove lower section of Traveller Block by removing the two pins (R-clips to be removed) and place top section of
the Traveller Block on the main cable of the cableway (use a temporary tether connecting the Traveller Block to the
Cableway post to ensure the unit does not slide away towards the stream during the set up phase).

© 2023 HyQuest Solutions 9
Installation
4. Disconnect Cl cable connector from tension spring on winch, wind out amergraph cable over layer winding sheave of
winch and then over·the sounding sheave of the Traveller Block (as shown above). The bottom section of the Traveller
Block can then be re-attached to the top section using the two pins and R-clips removed earlier. Connect the C1
connector to the current meter hanger bar and insert the angle plug into the current meter with the tailfin assembly
attached.

© 2023 HyQuest Solutions 10
Installation
5. Remove the end of the upper traversing cable from its anchorage and connect to the stream side of the traversing
block (seen in red above).
6. Similarly, release the lower traversing cable and pass end over the layer winding sheave of the traversing drum.

© 2023 HyQuest Solutions 11
Installation
7. Remove soft clamp from traversing cable and main cable.

© 2023 HyQuest Solutions 12
Installation
8. With traversing drum disengaged, wind the weight up to the traveller block - engage traversing drum and lower the
weight to the ground. Repeat this procedure until the traversing cables are tensioned.
9. Connect the current meter revolution counter to the winch terminals and check circuit operation.

© 2023 HyQuest Solutions 13
Installation
10. Position weight over zero chainage indicator and zero traversing counter.

© 2023 HyQuest Solutions 14
Installation
11. Proceed with the discharge measurement.

© 2023 HyQuest Solutions 15
Operation
3Operation
For the most part, the Barossa winch is maintenance free. However, periodic maintenance is required as set out below.
§
Dismantling Procedure
§
Winch Mode
§
Traversing Mode
§
Counters
3.1 Dismantling Procedure
1. Lift the Gauging weight and current meter from the water and remove the current meter connecting lead and counter
from the winch, remove the connecting lead and current meter counter before traversing the Traveller Block to the
operating side position.
2. Disengage the winch drums and lower the Gauging Weight and Current Meter to the Ground and Detach the Hanger
Bar from the C1 Connector (thus reducing tension in the cables). Unplug the Angle Plug, remove the Current Meter
from the Hanger Bar and pack both the current meter and the gauging weight into their respective carry cases.
15
22
22
23

© 2023 HyQuest Solutions 16
Operation
3. If the winch is to be relocated to another cableway site, attach a temporary tether to the Traveller Block and cableway
support post to prevent the Traveller Block running towards the stream.
4. Remove the bottom section of the Traveller Block (removing the two pins and R-clips described earlier) allowing
removal of the C1 connector from the Traveller Block.

© 2023 HyQuest Solutions 17
Operation

© 2023 HyQuest Solutions 18
Operation
5. Re-attach the bottom section of the Traveller Block to the top section using the two pins and R-clips and attach the C1
connector to the tensioning spring on the winch.

© 2023 HyQuest Solutions 19
Operation
6. Remove the traversing cable from the winch drum and connect to a secure anchorage point (example shown shows an
eye bolt on the main cable support post, the cable can also be padlocked for additional security).

© 2023 HyQuest Solutions 20
Operation
7. Attach a soft clamp to secure the traversing cable to the main cable on the cableway.
Other manuals for BAROSSA DDT700
1
Table of contents
Other HyQuest Solutions Winch manuals
Popular Winch manuals by other brands

Hilka
Hilka 35084 Safety & operation manual

Warn
Warn 72492 installation instructions

BRADEN
BRADEN CH SERIES Installation maintenance and service manual

Antal
Antal W6 Installation and maintenance manual

NORDFOREST
NORDFOREST Capstan winch 1800 operating manual

WARRIOR
WARRIOR 20SPS12 Assembly & operating instructions

Fieryred
Fieryred WIN14500R-ROPE user manual

Comeup
Comeup CWS-160 manual

AGI
AGI A296 installation instructions

Greenlee
Greenlee Super Tugger 6000 Series instruction manual

Columbus McKinnon
Columbus McKinnon Yale Mtrac Mini Translated Operating Instructions

Gude
Gude 01709 Translation of original operating instructions