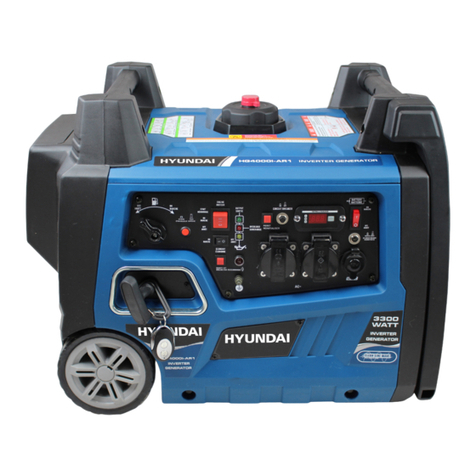
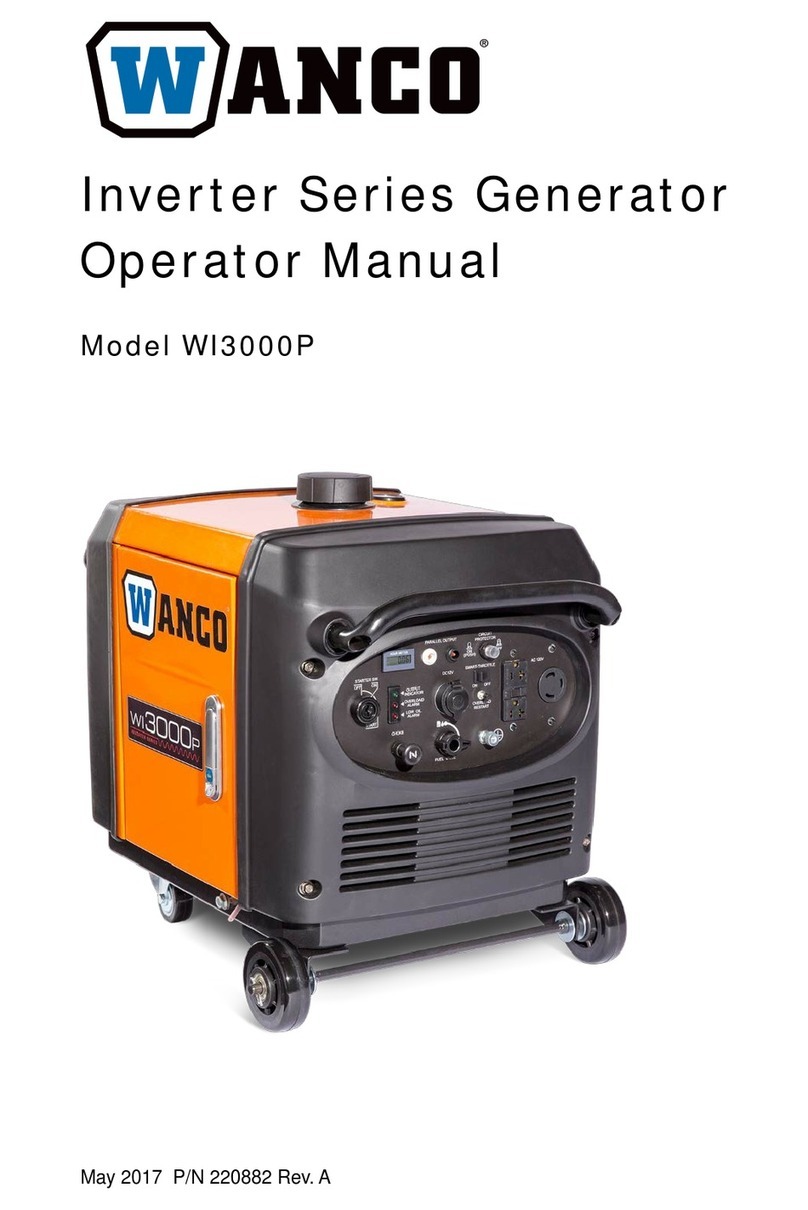
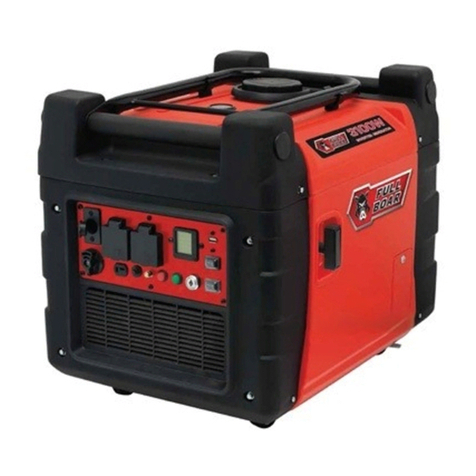
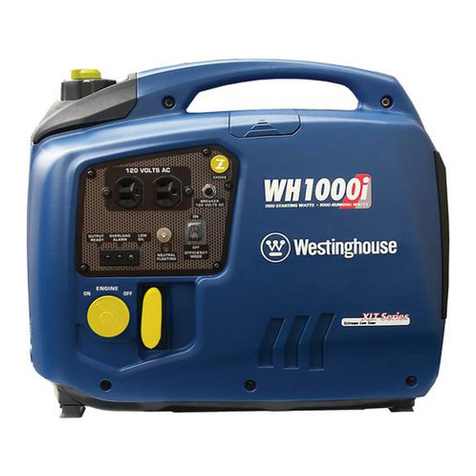
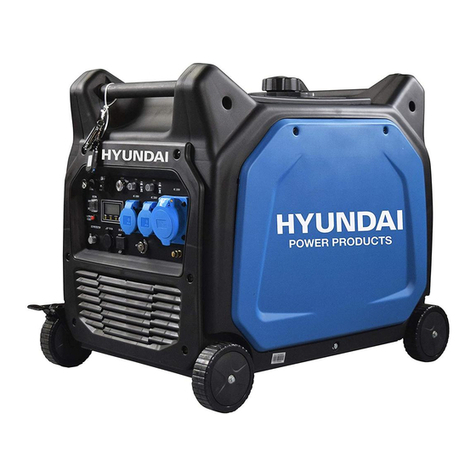
Hyundai power products HG4000l-A1 User manual

WARNING: Read thoroughly the instruction manual before use.

IMPORTANT ─
Please fully read and understand this instruction manual before operating the device.
1. SAFETY INSTRUCTION
Warning:
1. Attention! Exhaust gases are toxic. Do not operate the generator in a room without
ventilation system!
2. Children should be protected by keeping them at a safe distance from the generator
set!
3. Refilling of the generating sets are not allowed during the operation!
4. If the generator will be mounted in a closed room, relevant safety regulations against
fire and explosion should be followed!
5. Do not connect to household circuit!
6. Do not use in wet condition!
7. Keep in flammable away!
8. When refuelling:
a) stop engine;
b) no smoking;
c) do not spill.
General security instructions
The operator must know the principles of functioning and the structure of the generator and the
motor. He must know how to stop the motor in case of urgency and how to manipulate the controls.
Never let children use this device.
Never let people who do not know these instructions use this device. Local regulations may impose
restrictions on the age of the user.
Please do not use this device when people, especially children, or pets are nearby. Direct them away
from the working area.
The operator or the user are responsible for possible accidents or damage to other persons or to their
property.
Do not wear loose clothing or jewellery as this can get caught in the machinery as it runs.
Use safety equipment. Wear protective gear such as an anti-dust mask, non-slip safety shoes, a helmet
or hearing protection.
Stay vigilant, watch what you are doing and show good sense when you use the generator. Do not use
if you are tired or under the influence of drugs, alcohol or medicines.
Install the generator in a place that is well ventilated and make sure that there is at least 1.5 metres
between the generator and the walls of the building or other equipment. Do not place flammable
liquids or gases near the generator.
Do not run the generator in an enclosed or badly-ventilated space. The exhaust gas from the motor
contains carbon monoxide which is toxic and may lead to a loss of consciousness or death.

Run the generator in respect of the power indicated in the user’s manual. Do not run the generator
with an overload or at excessive speed.
The silencer of the generator becomes extremely hot when the motor runs or even for a time after it
has stopped. Do not touch it as it will burn you.
Do not transport or move the generator until it has cooled down.
Perform periodic maintenance and resolve problems that appear immediately. Do not run the
generator before correcting any fault detected.
The generator uses a system of air-cooling, and it is necessary to clean its components regularly,
including the grilles, the cover of the fan and the fan itself so as to ensure cooling.
Keep the fuel filter clean, and change the oil of the motor regularly.
Periodically check the installation of the connections and the tightness of the fixations, re-tightening
them if necessary.
Clean the components of the air filter periodically, and replace the air filter when necessary.
Remove any electrical equipment that is plugged in before starting or stopping the generator.
Before transporting the generator, you must empty the fuel tank.
Maintenance and repair of the generator must be carried out by a qualified technician from an
authorised after-sales service centre.
Warning: when you start the generator with the cord, watch out for sudden changes in the rotation
of the motor!!! Risk of wounding!!! Never cover the generator when it is running. The cut-out
mounted on the generator has the aime of reducing the risk of electric shock. If it needs to be
replaced with another cut-out, the latter must correspond to the technical specifications of the
generator. Due to important mechanical constraints, it is necessary to use a flexible sheathed cable
with a strong rubber protective layer (conforming to IEC 245-4) or a similar cable. If using an electrical
extension cable, the total length of the extension must not exceed 60m when the section of the wire
is 1.5mm2and must not exceed 100m when the section of the wire is 2.5mm2.
Additional requirements for low-power generating sets for use by laymen
Protect children by keeping them at a safe distance from the generating set.
Fuel is combustible and easily ignited. Do not refuel during operation. Do not refuel while smoking or
near naked flames. Do not spill fuel.
Some parts of the internal combustion engine are hot and may cause burns. Pay attention to the
warnings on the generating set.
Engine exhaust gases are toxic. Do not operate the generating set in unventilated rooms. When
installed in ventilated rooms, additional requirements for fire and explosion protection shall be
observed.

Before use, the generating set and its electrical equipment (including lines and plug connections)
should be checked to ensure that they are not defective.
Protection against electrical shock depends on circuit breakers specially matched to the generating set.
If the circuit breakers require replacement, they should be replaced with a circuit breaker having
identical ratings and performances characteristics.
Due to high mechanical stresses, only tough rubber-sheathed flexible cable (in accordance with IEC
60245-4) or the equivalent should be used.
The user shall conform to regulations of electrical safety applicable to the place where the generating
sets are used.
The user must respect the requirements and precautions in the case of resupply by generating sets of
an installation, depending on existing protective measures in this installation and applicable
regulations.
Generating sets should only be loaded up to their rated power under the rated ambient conditions.
Prior to commencing maintenance work it shall be ensured that untimely start-up is not possible.
Security measures when filling the fuel tank
The fuel is extremely flammable and poisonous.
This generator only uses petrol (gasoline); any other kind of fuel will damage the motor.
Do not overfill the tank with petrol to avoid spilling. If you notice a spill, it must be wiped up
completely with a dry cloth before starting the motor.
If you swallow fuel by mistake, if you inhale fuel vapours or if you get drops of fuel in your eyes, see a
doctor immediately. If a certain quantity of fuel is spilt on your skin or clothing, wash or change your
clothes.
Always stop the motor of the generator when filling it with fuel.
Never fill the fuel tank while smoking or near a naked flame.
Make sure you don’t spill fuel on the motor and the exhaust grille of the generator during filling with
fuel.
Keep the fuel in an appropriate recipient and sheltered from any sources of fire.
Carry out filling in a safe place, and slowly open the fuel cap to release the pressure which has built up
inside the tank. Wipe up any drops of petrol that have spilled before starting the motor.
To prevent fire, move the generator at least 4 metres away from the area for filling with fuel.
Make sure that the fuel cap is tightly closed before starting.
Do not keep petrol in the tank for a long time.

While using or transporting the generator, make sure you keep the generator upright,
otherwise the fuel may escape from the carburettor or the fuel tank.
Electrical safety
Before each use ensure that the load to be connected does not exceed the power of the
current produced by the generator.
To avoid electric shock, you must follow the following instructions:
Do not touch the generator with wet hands.
Do not run the generator under rain or snow.
Do not run the generator near water.
Connect the generator to earth. Use a sufficiently thick conductor for the earth wire.
Do not operate the generator in parallel with another generator.
If using electrical extensions, make sure that they are sufficiently thick to transport the current and
that they are used correctly.
The connection of a generator used for auxiliary power to the electrical installation of a
building must be performed by a qualified electrician, and in conformity to the provisions of
the applicable laws and norms in the field of electricity. Incorrect connections will cause
leakage of the current from the generator into the lines of the public electricity company.
Such leakage could electrocute the workers of the public electricity company working on the
network or other persons in contact with the line during a power cut. Also, when the public
power supply is re-established, the generator can explode, catch fire or generate fires in the
building’s electrical installation.
Before connecting electrical devices to the generator, make sure that their
voltage specifications and frequency of functioning correspond to the technical characteristics
of the generator. There may be damage if the device connected is not designed to function
with a voltage tolerance of +/- 10% or a frequency tolerance of +/- 3 % compared with those
of the generator.

Protection of the environment
You must periodically check the silencer (Before doing this, switch off the generator and let it cool
completely). A damaged silencer increases noise.
Do not throw motor oil into the drains but deposit it at a collection point set up for that purpose.
The fuel for this machine is combustible and explosive. After stopping the machine, you must handle
the remaining fuel correctly and meet local environmental requirements.
To dispose of residual fluids, proceed as follows:
Close the fuel tap
Drain fuel from the fuel tank
Empty carburettor fuel
2. SYMBOLS
The following symbols are used in this manual to allow differentiating different types of information. The
safety symbol is used as a keyword to warn you of potential hazards in operating and owning power
equipment.
Observe all safety instructions to avoid or limit the risk of serious injury or even death.
This is the safety alert symbol. It is used to warn you of a risk of injury and material damage. Observe
all safety messages following this symbol to avoid possible injury or death or material damage.
In order to reduce the risk of injury and material damage, the user should read and understand this
manual before using this product.
Running the electric generator in a closed room is forbidden, as the exhaust gas emissions may lead
men or animals to coma and death.
This symbol indicates that the surface is very hot and should not be touched. Be careful not to touch
the crankcase and exhaust muffler of the engine.
The engine and exhaust grid become hot after a certain amount of time the engine is running. When
servicing or repairing prior to complete cooling, be sure to avoid contact of your skin or clothes with
the engine and exhaust grid.
No open flames.
Do not connect to the electricity system.
Do not dispose of old appliances with household waste.
This equipment complies with the European standards and directives.

Guaranteed noise emission level.
This symbol indicates the surface is very hot and not touching
Exhaust emissions are harmful to health of body
No naked fire near the machine!
Danger ! Electrical shock !

3. CONTROLS AN FEATURES
Read this owner’s manual before operating your generator. Familiarize yourself with the location and function
of the controls and features. Save this manual for future reference.
Inverter
(1) Fuel Cap – Remove to add fuel.
(5) Maintenance Cover

(2) Recoil Starter – Used to start the engine.
(6) Never Flat Wheels
(3) Power Panel
(7) Carrying Handle
(4) Muffler
Parts Included
Your Gasoline Powered Generator is shipped
with the following parts:
– Oil funnel............................................................1
– Spark plug socket................................................1
– Automotive style battery charge cables.............1
Power Panel
(1) Fuel Valve Knob
(2) Choke
(9) Oil Warning Light – Check oil level when this
light turns on. Engine will not run when indicator is lit.
(3) Economy Control Switch
(10) Overload Indicator Light – This light turns ON

(4) Ground Terminal – Consult an electrician for
local grounding regulations.
when the generator is overloaded and will cut power
to the receptacles.
(5) 12 V DC Automotive Outlet*.
(6) DE Socket – 230 V, AC 50 Hz, single-phase
loads.
(11) Output Light – Remains ON during normal
operating conditions. Shuts OFF when generator is
overloaded.
(7) FR Socket – 230 V, AC 50 Hz, single-phase
loads.
(12) Engine Switch
(8) Circuit Breaker (Push button) – Protects the
generator against electrical overload.
(13) Parallel socket – Use this socket with the
parallel kit to connect two HG4000i-A1.
*Warning: Do not operate a device while it is plugged into the 12 V DC outlet. Prolonged exposure to engine
exhaust can cause serious injury or death. While charging a device do no place on the exhaust side of the
generator. Extreme heat caused by exhaust can damage the device, and cause a potential fire hazard.
4. ASSEMBLY
Your generator requires some assembly. This unit ships
from our factory without oil. It must be properly
serviced with fuel and oil before operation.
Remove the Generator from the Shipping Carton
1. Set the shipping carton on a solid, flat surface.
2. Remove everything from the carton except the
generator.
3. Using the handle of the unit, carefully remove the
generator from the box.
Add Engine Oil (continued)

Add Engine Oil
1. Place the generator on a flat, level surface.
2. Loosen the cover screw and remove the cover for
maintenance.
3. Remove oil fill cap / dipstick to add oil.
4. Add up to 0.6 qt. (0.6 L) of oil and replace oil fill cap
/ dipstick. DO NOT OVERFILL.
5. Check engine oil level daily and add as needed.
Add Fuel
1. Use clean, fresh, regular unleaded fuel with a
minimum octane rating of 85 and an ethanol
content of less than 10% by volume.
2. DO NOT mix oil with fuel.
3. Clean the area around the fuel cap.
4. Remove the fuel cap.
5. Slowly add fuel to the tank. DO NOT OVERFILL.
Fuel can expand after filling. A minimum of 6.4
mm (¼ in.) of space left in the tank is required for
fuel expansion, more than 6.4 mm (¼ in.) is
recommended. Fuel can be forced out of the tank
as a result of expansion if it is overfilled, and can
affect the stable running condition of the
product. When filling the tank, it is recommended
to leave enough space for the fuel to expand.
Add Fuel (continued)

6. Screw on the fuel cap and wipe away any spilled
fuel.
Grounding
Your generator must be properly connected to an
appropriate ground to help prevent electric shock.
A ground terminal connected to the frame of the
generator has been provided on the power panel. For
remote grounding, connect of a length of heavy gauge
(12 AWG minimum) copper wire between the generator
ground terminal and a copper rod driven into the
ground. We strongly recommend that you consult with
a qualified electrician to ensure compliance with local
electrical codes.

5. OPERATION
Generator Location
NEVER operate the generator inside any building,
including garages, basements, crawlspaces and
sheds, enclosure or compartment, including the
generator compartment of a recreational vehicle.
Please consult your local authority. In some areas,
generators must be registered with the local utility.
Generators used at
construction sites may be subject to additional
rules and regulations. Generators should be on a
flat, level surface at all times (even while not in
operation). Generators must have at least 5 ft. (1.5
m) of clearance from all combustible material. In
addition to clearance from all combustible
material, generators must also have at least 3 ft.
(91.4 cm) of clearance on all sides to allow for
adequate cooling, maintenance and servicing.
Generators should never be started or operated in
the back of a SUV, camper, trailer, in the bed of a
truck (regular, flat or otherwise), under staircases
/ stairwells, next to walls or buildings, or in any
other location that will not allow for adequate
cooling of the generator and/or the muffler. DO
NOT contain generators during operation. Allow
generators to properly cool before transport or
storage. Place the generator in a well-ventilated
area. DO NOT place the generator near vents or
intakes where exhaust fumes could be drawn into
occupied or confined spaces. Carefully consider
wind and air currents when positioning generator.
Failure to follow proper safety precautions may
void manufacturer’s warranty.
Grounding
The generator system ground connects the frame to the
ground terminals on the power panel.
– The generator (stator winding) is isolated from the
frame and from the AC receptacle ground pin.
– Electrical devices that require a grounded receptacle
pin connection will not function if the receptacle
ground pin is not functional.
Engine Start
1. Make certain the generator is on a flat, level surface.
2. Disconnect all electrical loads from the generator.
Never start or stop the generator with electrical
devices plugged in or turned on.
3. Turn the fuel valve to the “On” position.
4. Pull choke lever out to the “Choke” position.
5. Turn the engine switch to the “On” position.

Engine Start (continued)
6. Pull the starter cord slowly until resistance is felt
and then pull rapidly.
7. As engine warms up, push the choke lever in to the
“Run” position.
Economy Control Switch
The Economy Control switch can be activated in order
to minimize fuel consumption and noise while
operating the unit during times of reduced electrical
output, allowing the engine speed to idle during
periods of non-use. The engine speed returns to
normal when an electrical load is connected. When
the economy switch is off, the engine runs at normal
speed continuously.
Connecting Electrical Loads
1. Let the engine stabilize and warm up for a few
minutes after starting
2. Plug in and turn on the desired 230 Volt AC single
phase, 50 Hz electrical loads.
– DO NOT connect 3-phase loads to the generator.
– DO NOT connect 60 Hz loads to the generator.
– DO NOT overload the generator.
12 V DC Outlet
The 12 V DC outlet can be used with the supplied
charge cable and USB charger and other commercially
available 12 V DC automotive style plugs. The DC
output is unregulated and can damage some
or stop the generator with electrical devices plugged
in or turned on.
2. Let the generator run at no-load for several
minutes to stabilize internal temperatures of the
engine and generator.

products. Confirm your accessory input voltage range
is at least 12-21 V DC. When using the DC outlet turn
the Economy mode switch to the “OFF” position.
12 V DC Outlet – Battery Charging
1. Before connecting the battery charging cable to a
battery that is installed in a vehicle, disconnect the
vehicle battery ground cable from the negative (–)
battery terminal.
2. Plug the battery charging cable into the 12 V DC
receptacle of the generator.
3. Connect the red (+) battery charger lead to the red
(+) battery terminal.
4. Connect the black (–) battery charger lead to the
black (–) battery terminal.
5. Start the generator.
Important: The 12 V DC outlet is ONLY to be used
with the supplied 12 V DC battery charging cable. The
12 V DC output is unregulated and will damage other
12 V DC products. When using the 12 V DC outlet,
turn the
Economy mode switch to the “OFF” position. Be sure
all electric devices including the lines and plug
connections are in good condition before connection
to the generator.
Engine Stop
1. Turn off and unplug all electrical loads. Never start
3. Turn the Fuel Valve to the “OFF” position.
4. Let the engine run until fuel starvation has stopped
the engine. This usually takes a few minutes.
5. Turn the engine switch to the “Off” position.
6. Turn the fuel cap lever vent to the “Off” position
after the generator has cooled down completely.
Important: Always ensure that the Fuel Valve and the
Engine Switch are in the “OFF” position when the
engine is not in use.
Do Not Overload Generator
Capacity
Follow these simple steps to calculate the running and
starting watts necessary for your purposes.
1. Select the electrical devices you plan on running at
the same time.
2. Total the running watts of these items. This is the
amount of power you need to keep your items
running.
3. Identify the highest starting wattage of all devices
identified in step 1. Add this number to the number
calculated in step 2. Surge wattage is the extra
burst of power needed to start some electric driven
equipment. Following the steps listed under “Power
Management” will guarantee that only one device
will be starting at a time.
Power Management
Use the following formula to convert voltage and
amperage to watts: Volts x Amps = Watts
To prolong the life of your generator and attached
devices, follow these steps to add electrical load:
1. Start the generator with no electrical load
attached.
2. Allow the engine to run for several minutes to
stabilize.
3. Plug in and turn on the first item. It is best to
attach the item with the largest load first.
4. Allow the engine to stabilize.
5. Plug in and turn on the next item.
6. Allow the engine to stabilize.
7. Repeat steps 5-6 for each additional item.

6. MAINTENANCE AND STORAGE
Overload Operation
The overload indicator light will turn on when the
rated load is exceeded. When the maximum load is
reached, the LED will blink and cut power to the
receptacles. To recover the power, shut down the
engine, wait until the light turns off and restart the
generator. The owner / operator is responsible for all
periodic maintenance.
Complete all scheduled maintenance in a timely
manner. Correct any issue before operating the
generator.
Engine Maintenance
To prevent accidental starting, remove and ground
spark plug wire before performing any service.
Oil
Change oil when the engine is warm. Refer to the oil
specification to select the proper grade of oil for your
operating environment.
1. Set the generator on top of a work bench or table.
For any assistance regarding after-sales service
or spare parts.
2. Loosen the cover screws and remove the
maintenance cover.
3. Pop up the rubber maintenance plug, from below
the drain bolt.
4. Remove the 12 mm drain bolt.
5. Tilt the generator on its side and allow the oil to
drain completely.
6. Add 0.6 qt. (0.6 L) of oil and replace oil fill cap /
dipstick. DO NOT OVERFILL.
7. Reinstall the maintenance cover and tighten the
cover screws.
8. Dispose of used oil at an approved waste
management facility.
Spark Plugs
1. Remove the maintenance cover.
2. Remove the spark plug cable from the spark plug.
3. Use the spark plug tool that shipped with your
generator to remove the plug.
4. Remove the spark plug.
5. Inspect the electrode on the plug. It must be clean
and not worn to produce the spark required for
ignition.
6. Make certain the spark plug gap is 0.7 - 0.8 mm
(0.028 - 0.031 in.).
7. Carefully thread the plug into the engine.
8. Use the spark plug tool to firmly install the plug.
9. Attach the spark plug cap to the plug.
10. Reinstall the spark plug access cap, and
maintenance cover.
Air filter
1. Remove the maintenance cover.
Spark Arrester (continued)

2. Locate the air filter plastic cover.
3. Unsnap the locking hinge on the cover.
4. Remove the old filter.
5. Place the new filter in the assembly.
6. Re-snap the hinge on the air filter cover.
7. Reinstall the maintenance cover and tighten the
cover screw securely.
Cleaning
Use a damp cloth to clean exterior surfaces of the
engine. Use a soft bristle brush to remove dirt and
oil.
Use an air compressor (25 PSI) to clear dirt and debris
from the engine.
Spark Arrester
1. Allow the engine to cool completely before
servicing the spark arrester.
2. Remove the two screws holding the cover plate
which retains the end of the spark arrester to the
muffler.
3. Remove the spark arrester screen.
4. Carefully remove the carbon deposits from the
spark arrester screen with a wire brush.
5. Replace the spark arrester if it is damaged.
6. Position the spark arrester in the muffler and
attach with the two screws.
Adjustments
The air-fuel mixture is not adjustable. Tampering with
the governor can damage your generator and your
electrical devices and will void your warranty.
Maintenance Schedule
Follow the service intervals indicated in the following
maintenance schedule.
Service your generator more frequently when
operating in adverse conditions.
Every 8 hours or daily
Check oil level
Clean around air intake and muffler
First 5 hours
Change oil
Every 50 hours or every season
Clean air filter
Change oil if operating under heavy load
or in hot environments
Every 100 hours or every season
Change oil
Clean/adjust spark plug
Check/adjust valve clearance*
Clean spark arrester
Clean fuel tank and filter*
Every 250 hours
Clean combustion chamber*
Every 3 years
Replace fuel line
*To be performed by knowledgeable, experienced
owners or Champion Power Equipment certified
dealers.

Generator Maintenance
Make certain that the generator is kept clean and
stored properly. Only operate the unit on a flat, level
surface in a clean, dry operating environment. DO NOT
expose the unit to extreme conditions, excessive dust,
dirt, moisture or corrosive vapours.
Use a damp cloth to clean exterior surfaces of the
generator. Use a soft bristle brush to remove dirt and
oil.
Use an air compressor (1724 hPa/25 psi) to clear dirt
and debris from the generator.
Inspect all air vents and cooling slots to ensure that
they are clean and unobstructed.
Storage
The generator should be started at least once every
14 days and allowed to run for at least 20 minutes.
For longer term storage, please follow these
guidelines.
Generator Storage
1. Add a properly formulated fuel stabilizer to the
tank.
2. Be sure all appliances are disconnected from the
generator.
3. Run the generator for a few minutes so the treated
fuel cycles through the fuel system and carburetor.
4. Turn the fuel valve to the “Off” position.
5. Let the generator run until fuel starvation has
stopped the engine. This usually takes a few
minutes.
6. The generator needs to cool completely before
cleaning and storage.
7. Remove the spark plug cap, then pull the recoil
grip 3 times to drain the gasoline from the
carburetor jets.
8. Change the engine oil.
9. Remove the spark plug and pour about a
tablespoon of oil into the cylinder. Crank the
engine slowly to distribute the oil and lubricate the
cylinder.
10. Reattach the spark plug.
11. Store the unit in a clean, dry place out of direct
sunlight.

7. TECHNICAL SPECIFICATIONS
Engine Specifications
‒ Type: Four-stroke engine with overhead valve
‒ Start Type: recoil start
‒ Rating power 4.2kW,3800/min
‒ Max power: 4.4 kW,
‒ Displacement: 192 cm3
‒ Fuel capacity: 6 L
‒Engine oil capacity: 0.6 L
‒Sound power level guatanteed: 96dB(A)
‒Sound power level measured at 4 m:
LpA =75.80 dB (A)
LwA = 95.82 dB (A)
K = 0.424 dB (A)
‒Noise level (measured at 7 m): 58 dB (A)
Generator Specifications
‒ AC Voltage: 230 V~
‒ Frequency: 50 Hz
‒ Nominal power: (COP) 3.1 kW
‒ Maximum power: 3.3 kW (S2:5 min)
‒ AC nominal current: 13.5 A
‒ DC output power: 12 V/6.5 A
‒ Power factor: 1.0
‒ Protection class: IP23M
‒ Altitude max.:1000m
‒ Net weight: 43 kg
‒ Height: 46.4 cm
‒ Width: 44 cm
‒ Length: 57 cm
Fuel
Fuel capacity is 6 L (1.6 gal.). Use regular unleaded
gasoline with a minimum octane rating of 85 and an
ethanol content of less than 10% by volume.
Oil
Use 10W-30 automotive oil. Oil capacity is 0.6 qt.
(0.6 L). DO NOT OVERFILL.
Please reference the following chart for
recommended oil types for use in the generator.
Spark Plugs
OEM spark plug: NHSP F6RTC
Replacement spark plug: NGK BPR6ES or equivalent
Make certain the spark plug gap is 0.7 - 0.8 mm or
(0.028 - 0.031 in.).
Maintenance Valve Clearance
– Intake: 0.06 - 0.12 mm (0.002 - 0.005 in.)
– Exhaust: 0.08 - 0.14 mm (0.003 - 0.006 in.)
Note: Tech bulletin regarding the valve adjustment
procedure is on www.championpowerequipment.com.
An Important Message About Temperature
Your Champion Power Equipment product is designed
and rated for continuous operation at ambient
temperatures up to 40°C (104°F). When your product is
needed your product may be operated at temperatures
ranging from -15°C (5°F) to 50°C (122°F) for short
periods. If the product is exposed to temperatures
outside this range during storage, it should be brought
back within this range before operation. In any event,
the product must always be operated outdoors, in a
well-ventilated area and away from doors, windows
and other vents.

Table of contents
Other Hyundai power products Portable Generator manuals

Hyundai power products
Hyundai power products HP7500CXE User manual

Hyundai power products
Hyundai power products HG4000I-AR1 User manual

Hyundai power products
Hyundai power products 65156 User manual

Hyundai power products
Hyundai power products HY6500SEi User manual

Hyundai power products
Hyundai power products DHY8600SE User manual

Hyundai power products
Hyundai power products HY6500SEi User manual

Hyundai power products
Hyundai power products HG2700-A User manual

Hyundai power products
Hyundai power products HY3100L User manual

Hyundai power products
Hyundai power products HG4000-A User manual

Hyundai power products
Hyundai power products HOME Series User manual