manuals.online logo
Brands
  1. Home
  2. •
  3. Brands
  4. •
  5. I.H.T
  6. •
  7. Door Lock
  8. •
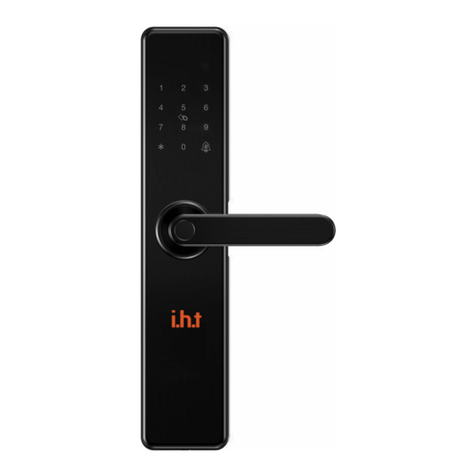
  9. I.H.T IDL707 User manual

I.H.T IDL707 User manual

IDL707
(WIFI)
i.h.t Smart Lock Installation Instructions
Please read this manual carefully before use
Installation
1. Installation Instructions
a. It is recommended to look for professionals to install, Watch the video carefully before
installing.
b. Please note that the connection line can't be pressed or folded during installation.
c. Before the installation, the lock must be positioned according to the door opening direction,
because the handle can't be adjusted after.
d. While installing, the door must be half opened until the installation is completed.
e. After the installation is completed, with the fingerprint, card, password (1234567890) and #,
APP and key unlocked, test whether the front and back handle can unlock/lock.
f. If it does not work properly, please check if there is an improper installation or if the power
cord is loose.
2. Installation Overview
1. Front Panel
2. Connection Column
3. Square Steel
4. Lock Body
5. Connection Line
6. Back Panel
7. Battery Cover
8. Connection Column Screws
9. Back Handle
10. Connection Column Screws
11. Latch-bolt
12. Dead-bolt
13. Lock Body Screws
14. Connection Column
15. Key Hole
16. Emergency Power Port
17. Front Handle
18. 'SET' Button
Feature
5-Way Access Methods Fingerprint, Password, Card, APP, Back-up Key
Battery Type / Life 4×AA Battery / 1 Year
Storage Capacity 100 (Passwords, Fingerprints & Cards)
Identity Time 0.3 Seconds
Low Voltage Warning ≤4.6V
Privacy Password Random Numbers Can Be Added Before or After
Fire Rating 120 Minutes (AU 1530.4:2014)
3. Confirm The Direction of The Door
This smart lock is suitable for Left Out/Left In/Right Out/Right In - 4 kinds of door opening directions.
4. Open Hole
Please refer to the opening hole drawing, and drill the correct holes on the door.
5. Install Body Lock
a. Choose the installation direction of the latch-bolt of the lock body by the door opening
directions.
b. Change the direction of lock body
i. a. Push the reversing block to the other side.
ii. b. Push the latch-bolt into the lock and turn
180 degrees.
iii. c. Put back the reversing block, and the
latch-boll will pop up automatically.
iv. 5.3. Put the lock body into the door frame
and tighten 2 fixing screws.
6. Open Hole
Choosesuitablepartsaccordingtothefollowingtable.
Door Thickness Square Steel
Length
Connection
Column Length
Connection Column
Screw Length
1.57-2.16 Inch 3.15 Inch 1.38 Inch 1.18 and 1.97 Inch
2.17-2.36 Inch 3.15 Inch 2.17 Inch 1.18 and 1.97 Inch
2.76-3.15 Inch 3.94 Inch 2.17 Inch 1.97 and 2.76 Inch
3.55-3.94 Inch 4.72 Inch 2.17 Inch 2.76 and 3.54 Inch
>3.94 Inch (optional) 5.51 Inch 2.17 Inch 3.54 and 4.33 Inch
7. Install the Lock
a. Install two connection columns on the front panel
b. Install the front panel
i. Insert the suitable square steel into the lock body.
ii. Pass the connection line through the door hole.
iii. Align the square steel with the square steel hole of the front panel and fix the front
panel on the door, then press the other end of the square steel.
c. Install the back panel.
i. Press the front panel, and connect the connection line with the corresponding
interface of the back panel. Then Insert the excess line into the door hole.
ii. Align the square steel with the square steel hole of the back panel, and compress
the back panel.
iii. Lock two connection column screws to fix the back panel.
8. Install Buckle Plate & Buckle Box
9. Debugging
a. Always keep the door half open when debugging.
b. Check whether the following functions can be achieved or not.
i. Press down front handle, latch-bolt/dead-bolt remains in locking status.
ii. Press down front handle, latch-bolt/dead-bolt retract in unlocking status.
iii. Press down back handle, latch-bolt/dead-bolt retract in any status.
iv. Lift up front handle or back handle, dead-bolt stretches out in any status.
c. Verify whether other functions are normal or not, including Self-locking, virtual
password, ‘Set’ button, Pickproof alarm, APP etc.
Warranty Activation
Please go to our website: www.innihome.com.au/warranty-support to activate your warranty.
Other I.H.T Door Lock manuals

I.H.T 707 User manual

I.H.T

I.H.T 707 User manual

I.H.T IHTSDL707 User manual

I.H.T

I.H.T IHTSDL707 User manual

Popular Door Lock manuals by other brands

Assa Abloy Sargent 10X Line installation instructions

Assa Abloy

Assa Abloy Sargent 10X Line installation instructions

Allegion Schlage F Series installation instructions

Allegion

Allegion Schlage F Series installation instructions

Weiser 62833 / 01 installation guide

Weiser

Weiser 62833 / 01 installation guide

Schlage Ease S2 quick start guide

Schlage

Schlage Ease S2 quick start guide

ANXELL ML-605M-30 Installation instruction

ANXELL

ANXELL ML-605M-30 Installation instruction

Gainsborough Z5R Series installation instructions

Gainsborough

Gainsborough Z5R Series installation instructions

Schlage Schlage LiNK brochure

Schlage

Schlage Schlage LiNK brochure

Itec iHTL quick start guide

Itec

Itec iHTL quick start guide

Von Duprin StrikeForce 6210 installation instructions

Von Duprin

Von Duprin StrikeForce 6210 installation instructions

Mul-t-lock HaspLock Diamond Installation and service instructions

Mul-t-lock

Mul-t-lock HaspLock Diamond Installation and service instructions

Hydro WICONA WICLINE evo Hardware installation

Hydro

Hydro WICONA WICLINE evo Hardware installation

TAGnology SmaFinger user manual

TAGnology

TAGnology SmaFinger user manual

FingerTec Q2i installation guide

FingerTec

FingerTec Q2i installation guide

LOCKEY SUMO GL2LINX installation instructions

LOCKEY

LOCKEY SUMO GL2LINX installation instructions

Ingersoll-Rand Schlage BE365 user guide

Ingersoll-Rand

Ingersoll-Rand Schlage BE365 user guide

Sylvan SL35E user manual

Sylvan

Sylvan SL35E user manual

Salto AF i 0 Series installation guide

Salto

Salto AF i 0 Series installation guide

Major Manufacturing HIT-41 SERIES instructions

Major Manufacturing

Major Manufacturing HIT-41 SERIES instructions

manuals.online logo
manuals.online logoBrands
  • About & Mission
  • Contact us
  • Privacy Policy
  • Terms and Conditions

Copyright 2025 Manuals.Online. All Rights Reserved.