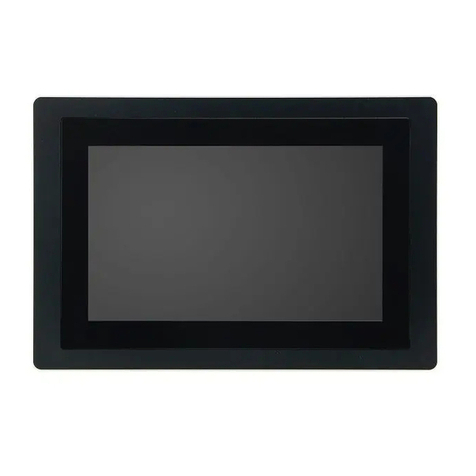
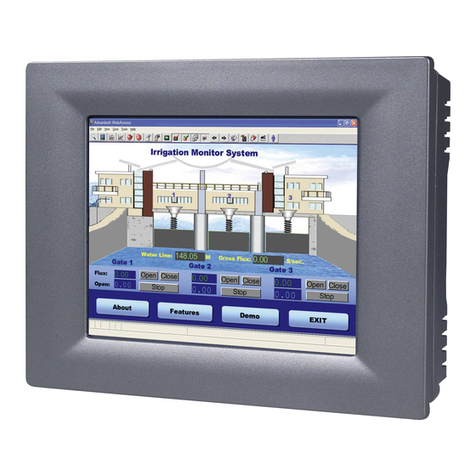
IBASE Technology UPC-6210-J19 User manual

UPC-6210
21.5” Ultra-Slim Retail Panel PC
User’s Manual
Version 1.0
(Feb. 2019)

ii
UPC-6210 User Manual
Copyright
©2019 IBASE Technology, Inc. All rights reserved.
No part of this publication may be reproduced, copied, stored in a retrieval system, translated
into any language or transmitted in any form or by any means, electronic, mechanical,
photocopying, or otherwise, without the prior written consent of IBASE Technology, Inc.
(hereinafter referred to as “IBASE”).
Disclaimer
IBASE reserves the right to make changes and improvements to the products described in
this document without prior notice. Every effort has been made to ensure the information in
the document is correct; however, IBASE does not guarantee this document is error-free.
IBASE assumes no liability for incidental or consequential damages arising from
misapplication or inability to use the product or the information contained herein, nor for any
infringements of rights of third parties, which may result from its use.
Trademarks
All the trademarks, registrations and brands mentioned herein are used for identification
purposes only and may be trademarks and/or registered trademarks of their respective
owners.

UPC-6210 User Manual
iii
Compliance
This product may cause radio interference in which case users may be required to
take adequate measures.
This product has been tested and found to comply with the limits for a Class B
device, pursuant to Part 15 of the FCC Rules. These limits are designed to provide
reasonable protection against harmful interference in a residential installation. This
equipment generates, uses and can radiate radio frequency energy and, if not
installed and used in accordance with manufacturer’s instructions, may cause
harmful interference to radio communications.
Operation is subject to the following two conditions:
•This product may not cause harmful interference
•This product must accept any interference received including interference that may cause
undesired operation.
However, there is no guarantee that interference will not occur in a particular installation. If
this equipment causes harmful interference to radio or television reception which can be
determined by turning the equipment off and on, you may correct the interference by one or
more of the following measures:
•Reorient or relocate the receiving antenna.
•Increase the separation between the equipment and the receiver.
•Connect the equipment to an outlet on a circuit different from that to which the receiver is
connected.
•Consult the distributor or an experienced radio/TV technician for help.
WEEE
This product must not be disposed of as normal household waste, in
accordance with the EU directive of for waste electrical and electronic
equipment (WEEE - 2012/19/EU). Instead, it should be disposed of by
returning it to a municipal recycling collection point. Check local
regulations for disposal of electronic products.

iv
UPC-6210 User Manual
Green IBASE
This product complies with the current RoHS restrictions that prohibit
the use of the following substances in concentrations exceeding 0.1%
by weight (1000 ppm) except for cadmium, limited to 0.01% by weight
(100 ppm).
•Lead (Pb)
•Mercury (Hg)
•Cadmium (Cd)
•Hexavalent chromium (Cr6+)
•Polybrominated biphenyls (PBB)
•Polybrominated diphenyl ether (PBDE)
Important Safety Information
Carefully read the precautions before using the device.
Environmental conditions:
•Put the device horizontally on a stable and solid surface during installation in
case the device may fall, causing serious damage.
•Leave plenty of space around the device for ventilation.
•Use this product in environments with ambient temperatures between 0˚C and
40˚C.
•DO NOT LEAVE THIS DEVICE IN AN ENVIRONMENT WHERE THE
STORAGE TEMPERATURE MAY BE BELOW -20°C OR ABOVE 60°C. To
prevent from damages, the device must be used in a controlled environment.
•Keep the device away from humidity to avoid fog or condensation from
accumulating on the inner surface of the panel.
Care for your IBASE products:
•Before cleaning the device, turn it off and unplug all cables in case a small
amount of electrical current may still flow.
•Use neutral cleaning agents or diluted alcohol to clean the device chassis with a
cloth. Then wipe the chassis with a dry cloth.
•Use a computer vacuum cleaner to remove dust to prevent the air vent or slots
from getting clogged.

UPC-6210 User Manual
v
WARNING
Attention during use:
•Do not use this product near water.
•Do not spill water or any other liquids on your device.
•Do not place heavy objects on the top of the device.
•Operate this device from the type of power indicated on the marking label. If you
are not sure of the type of power available, consult your distributor or local
power company.
•Ensure to use the correct power supply voltage.
•Do not walk on the power cord or allow anything to rest on it.
•If you use an extension cord, make sure that the total ampere rating of the
product plugged into the extension cord does not exceed its limits.
Avoid Disassembly
Disassembly, modification, or any attempt at repair could generate hazards and
cause damage to the device, even bodily injury or property damage, and will void any
warranty on the product.
Warranty Policy
•IBASE standard products:
24-month (2-year) warranty from the date of shipment. If the date of shipment
cannot be ascertained, the product serial numbers can be used to determine
the approximate shipping date.
•3rd-party parts:
12-month (1-year) warranty from delivery for the 3rd-party parts that are not
manufactured by IBASE, such as CPU, CPU cooler, memory, storage devices,
power adapter, panel and touch screen.
*Products, however, that fail due to misuse, accident, improper installation or
unauthorized repair shall be treated as out of warranty and customers shall be
billed for repair and shipping charges.

vi
UPC-6210 User Manual
Technical Support & Services
1. Visit the IBASE website at www.ibase.com.tw to find the latest information about
the product.
2. If you need any assistance from your distributor or sales representative
concerning problems that you may have encountered, please prepare the
following information:
•Product model name
•Product serial number
•Detailed description of the problem
•Error messages in text or in screenshots if there is any
•The arrangement of the peripherals
•Software used (such as OS and application software, including the version
numbers)
3. For repair service, please download the RMA form from
http://www.ibase.com.tw/english/Supports/RMAService/.
Fill out the form and contact your distributor or sales representative.

UPC-6210 User Manual
vii
Table of Contents
Compliance....................................................................................................iii
Important Safety Information.......................................................................iv
WARNING .......................................................................................................v
Warranty Policy..............................................................................................v
Technical Support & Services .....................................................................vi
Chapter 1 General Information................................................................1
1.1 Introduction.............................................................................................2
1.2 Features..................................................................................................2
1.3 Packing List ............................................................................................2
1.4 Optional Accessories ..............................................................................2
1.5 Specifications..........................................................................................3
1.6 Overview.................................................................................................5
1.7 Dimensions.............................................................................................6
Chapter 2 Hardware Configuration.........................................................7
2.1 Installations.............................................................................................8
2.1.1 SSD Replacement....................................................................8
2.1.2 Rear Cover Removal................................................................9
2.1.3 Memory Replacement...............................................................9
2.1.4 Mini-PCIe Card Installation.....................................................10
2.1.5 VESA Mounting Installation ....................................................10
2.2 Pinout for COM RS-232/422/485 Port...................................................11
2.3 Setting the Jumpers..............................................................................12
2.3.1 How to Set the Jumpers .........................................................12
2.4 Jumper & Connector Locations.............................................................13
2.5 Jumpers Quick Reference.....................................................................14
2.5.1 LVDS Panel Power Selection (JP1) .....................................14
2.5.2 LVDS Panel Brightness Control Selection (JP2) ..................14
2.5.3 Clearing CMOS Data (JP4)..................................................15
2.5.4 Clearing ME Register (JP5)..................................................15
2.6 Connectors Quick Reference................................................................16
2.6.1 Audio Connector (J1)...........................................................17
2.6.2 Amplifier Connector (J3) ......................................................17
2.6.3 LCD Backlight Connector (J7)..............................................18

viii
UPC-6210 User Manual
2.6.4 SATA HDD Power Connector (J10, J11)..............................18
2.6.5 Front Panel Setting Connector (J16)....................................19
2.6.6 Motherboard Power Input Connector (J17) ..........................19
2.6.7 COM2 RS-232 Port (J18).....................................................20
2.6.8 Digital I/O Connector (J19)...................................................20
2.6.9 USB 2.0 Connector (J22).....................................................21
Chapter 3 Driver Installation .................................................................22
3.1 Introduction...........................................................................................23
3.2 Intel®Chipset Software Installation Utility..............................................23
3.3 Graphics Driver Installation...................................................................24
3.4 HD Audio Driver Installation..................................................................24
3.5 Intel®Trusted Execution Engine Installation..........................................25
3.6 USB 3.0 Driver Installation....................................................................25
3.7 LAN Driver Installation ..........................................................................26
Chapter 4 BIOS Setup............................................................................27
4.1 Introduction...........................................................................................28
4.2 BIOS Setup...........................................................................................28
4.3 Main Settings........................................................................................29
4.4 Advanced Settings................................................................................30
4.4.1 ACPI Settings.........................................................................31
4.4.2 iSmart Controller.....................................................................32
4.4.3 Super IO Configuration...........................................................34
4.4.4 Hardware Monitor...................................................................37
4.4.5 CPU Configuration..................................................................37
4.4.6 IDE Configuration...................................................................38
4.4.7 USB Configuration..................................................................39
4.5 Chipset Settings....................................................................................40
4.5.1 North Bridge...........................................................................40
4.6 Security Settings...................................................................................41
4.7 Boot Settings.........................................................................................42
4.8 Save & Exit Settings..............................................................................43
Appendix ......................................................................................................44
A. I/O Port Address Map............................................................................45
B. Interrupt Request Lines (IRQ) ...............................................................47
C. Digital I/O Sample Code........................................................................48
D. Watchdog Timer Configuration..............................................................53

1
Chapter 1
General Information
The information provided in this chapter includes:
•Features
•Packing List
•Specifications
•Overview
•Dimensions

2
UPC-6210 User Manual
1.1 Introduction
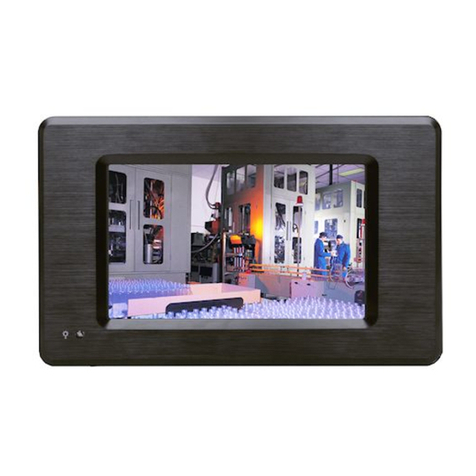
UPC-6210 is a 21.5” retail Panel PC with IPS LCD and projected capacitive
touchscreen and supports multiple touch and 1920 x 1080 full HD for display.
With a fanless design, the ultra slim system operates in 0°C ~ 50°C wide-range
temperature. The system is empowered by Intel®Celeron®J1900 or Atom™
E3825 processor and has an IP65 ingress protection rating for flat front bezel.
Wireless solution is available for option.
1.2 Features
•21.5”1920 x 1080 IPS LCD panel
•Projected capacitive touch screen
•IP65 rated front panel
•Built-in Intel®Celeron®J1900 / Atom™E3825 processor
•Optional wireless solution
•Three Mini-PCIe expansion slots
•Easy replacement for SSD from the rear side
1.3 Packing List
Your product package should include the items listed below. If any of the
items below is missing, contact the distributor or the dealer from whom you
have purchased the product.
•UPC-6210
•Power Cord
•Motherboard Driver DVD Disk
1.4 Optional Accessories
•Wi-Fi Cable Kit

General Information
UPC-6210 User Manual
3
1
1.5 Specifications
Product Name
UPC-6210-J19
UPC-6210-I25
Motherboard
IB898
Operating
System
•Windows 10 & 7 (32 / 64-bit)
•Linux Kernel 3+
System
CPU
•Intel®Celeron®J1900, 2.0 GHz ~ 2.4 GHz, 2 MB cache
(for UPC-6210-J19)
•Intel®Atom™ E3825, 1.33 GHz, 1 MB cache
(for UPC-6210-I25)
Memory
1 x DDR3L SO-DIMM 4GB (max. and default)
Membrane
Control
N/A
Built-in speaker
/ Microphone
2 x 2W 4Ωspeakers
Power
DC 12V
Super I/O
Nuvoton NCT5523D
BIOS
AMI BIOS
Watchdog
Watchdog Timer 256 segments, 0, 1, 2…255 sec/min
iSmart
Yes (auto-scheduler / power resume)
Chassis
AL 5052, all black
Mounting
VESA 100 x 100 mm
Dimensions
(W x H x D)
529.50 x 321 x 59 mm (20.85” x 12.28” x 2.32")
Net Weight
9 kg (19.84 lb)
Ingress
Protection
IP65 rated front side
RoHS
Yes
Certificate
CE, FCC Class B, LVD
Display & Touchscreen
Display Type
21.5” IPS LCD panel
Touch Type
Projected capacitive touch
Resolution
Max. 1920 x 1080
Luminance
250 cd/m2
Contrast
1:1000
Colors
Max. 16.2M

4
UPC-6210 User Manual
Viewing Angle
H/V: 178°/ 178°
Backlight
Lifetime
30,000 hrs
Touch Interface
USB
Light
Transmission
89%
Point of Touch
10 points multi-touch
I/O Ports
Display
•1 x VGA
•1 x DisplayPort
LAN
1 x GbE LAN port
Serial
1 x RS-232/422/485 (selectable in BIOS)
SATA
1 x SATA III connector on board
USB
•1 x USB 3.0
•1 x USB 2.0
Audio
1 x 3.5 mm Line-Out jack
Storage
1 x 2.5” SATA HDD (64G SSD by default)
Internal
Expansion
•2 x full-sized Mini-PCIe, one with mSATA and the other with
USB2.0
•1 x half-sized Mini-PCIe with USB
Environment
Temperature
•Operating: 0°C ~ 50°C (32 ~ 140 °F)
•Storage: --20°C ~ 70°C (-4 ~ 158 °F)
Relative
Humidity
10 ~ 90% at 40°C (non-condensing)
All specifications are subject to change without prior notice.

General Information
UPC-6210 User Manual
5
1
1.6 Overview
Front View
I/O View
No.
Name
No.
Name
1
Power Jack
6
DisplayPort
2
Audio Jacks
(From left to right: Line-Out,
Line-In, Mic-In)
7
VGA Port
3
USB 2.0 Port
8
COM RS-232/422/485 Port
4
USB 3.0 Port
9
Power Switch
5
GbE LAN Port

6
UPC-6210 User Manual
1.7 Dimensions
Unit: mm

7
Chapter 2
Hardware Configuration
The information provided in this chapter includes:
•Memory installation and membrane keypad extension
•Information and locations of connectors

8
UPC-6210 User Manual
2.1 Installations
Avoid system disassembly: Disassembly, modification, or any attempt at repair
could generate hazards and cause damage to the system, injury, or property
damage, and will void any warranty. If you need to make any changes to the system,
be sure to unplug the power cord of the system and have qualified engineers or
technicians do the disassembly or installation.
2.1.1 SSD Replacement
1. Remove the following 2 screws from the rear side.
2. Remove the SSD tray by loosening the 4 screws below.
3. Unplug the cables of the SSD. Then unscrew the indicated 4 screws to
release the SSD and replace it with a new one.
4. Connect the cables to the new SSD and secure it to the tray. Then fix the
SSD along with the tray back to the system.

Hardware Configuration
UPC-6210 User Manual
9
2
2.1.2 Rear Cover Removal
In case you need to remove the rear cover to install or replace a memory
module or mini-PCIe card, remove the 16 screws shown below to remove the
rear cover.
2.1.3 Memory Replacement
To replace or install memory modules, perform the following steps after
removing the system rear cover.
1. Locate the memory slot and align the key of the memory module with that
on the memory slot.
2. Insert the module slantwise and gently push the module straight down
until the clips of the slot close to hold the module in place when the
module touches the bottom of the slot.
.
To remove the module, press the clips outwards with both hands.

10
UPC-6210 User Manual
2.1.4 Mini-PCIe Card Installation
To replace or install a mini-PCIe card, perform the following steps after
removing the rear cover.
1. Locate the mini-PCIe slot, align the key of the card to the interface, and
insert the card slantwise.
2. Push the card down and fix it with the supplied flat head screw.
2.1.5 VESA Mounting Installation
You will need to prepare the VESA mounting bracket in advance. Attach
VESA mounting brackets to the rear side of the system and tighten four M4
screws as indicated below.

Hardware Configuration
UPC-6210 User Manual
11
2
2.2 Pinout for COM RS-232/422/485 Port
➔
This COM port features jumperless selection for RS-232/422/485, which is
configurable in the BIOS setting.
Pin
Signal Name
Pin
Signal Name
1
DCD, Data carrier detect
6
DSR, Data set ready
2
RXD, Receive data
7
RTS, Request to send
3
TXD, Transmit data
8
CTS, Clear to send
4
DTR, Data terminal ready
9
RI, Ring indicator
5
Ground
Pin
Signal Name
RS-232
RS-422
RS-485
1
DCD
TX-
DATA-
2
RX
TX+
DATA+
3
TX
RX+
NC
4
DTR
RX-
NC
5
Ground
Ground
Ground
6
DSR
NC
NC
7
RTS
NC
NC
8
CTS
NC
NC
9
RI
NC
NC
1
65
9

12
UPC-6210 User Manual
2.3 Setting the Jumpers
Configure the jumpers with the settings required to be able to use the features
needed for your application. Contact your supplier if you have doubts about
the best configuration for your use.
2.3.1 How to Set the Jumpers
Jumpers are short-length conductors consisting of several metal pins with a
non-conductive base mounted on the circuit board. Jumper caps are used to
have the functions and features enabled or disabled. If a jumper has 3 pins,
you can connect either PIN1 to PIN2 or PIN2 to PIN3 by shorting with the
jumper cap.
A 3-pin jumper
A jumper cap
Refer to the illustration below to set the jumpers.
Pin closed
Oblique view
Illustration
Open
1-2
2-3
When two pins of a jumper are encased in a jumper cap, this jumper is
closed, i.e. turned On.
When a jumper cap is removed from two jumper pins, this jumper is open, i.e.
turned Off.
Pin# 1 23
1 2 3
1 2 3
1 2 3
This manual suits for next models
2
Table of contents
Other IBASE Technology Touch Panel manuals

IBASE Technology
IBASE Technology BYARM-181-PC User manual

IBASE Technology
IBASE Technology UMT-7211 User manual

IBASE Technology
IBASE Technology ASTUT-152-RE1S User manual

IBASE Technology
IBASE Technology OFP-151-PC User manual

IBASE Technology
IBASE Technology BYTEM-123-PC User manual

IBASE Technology
IBASE Technology BYTEM-W071-PC User manual

IBASE Technology
IBASE Technology MRS-800 User manual

IBASE Technology
IBASE Technology IPPC1505-RE User manual

IBASE Technology
IBASE Technology BYTEM-103-PC User manual

IBASE Technology
IBASE Technology MRS-801-RE User manual