©Copyright LOTRONIC 2015 DJ21USB-BT 10
Povezave
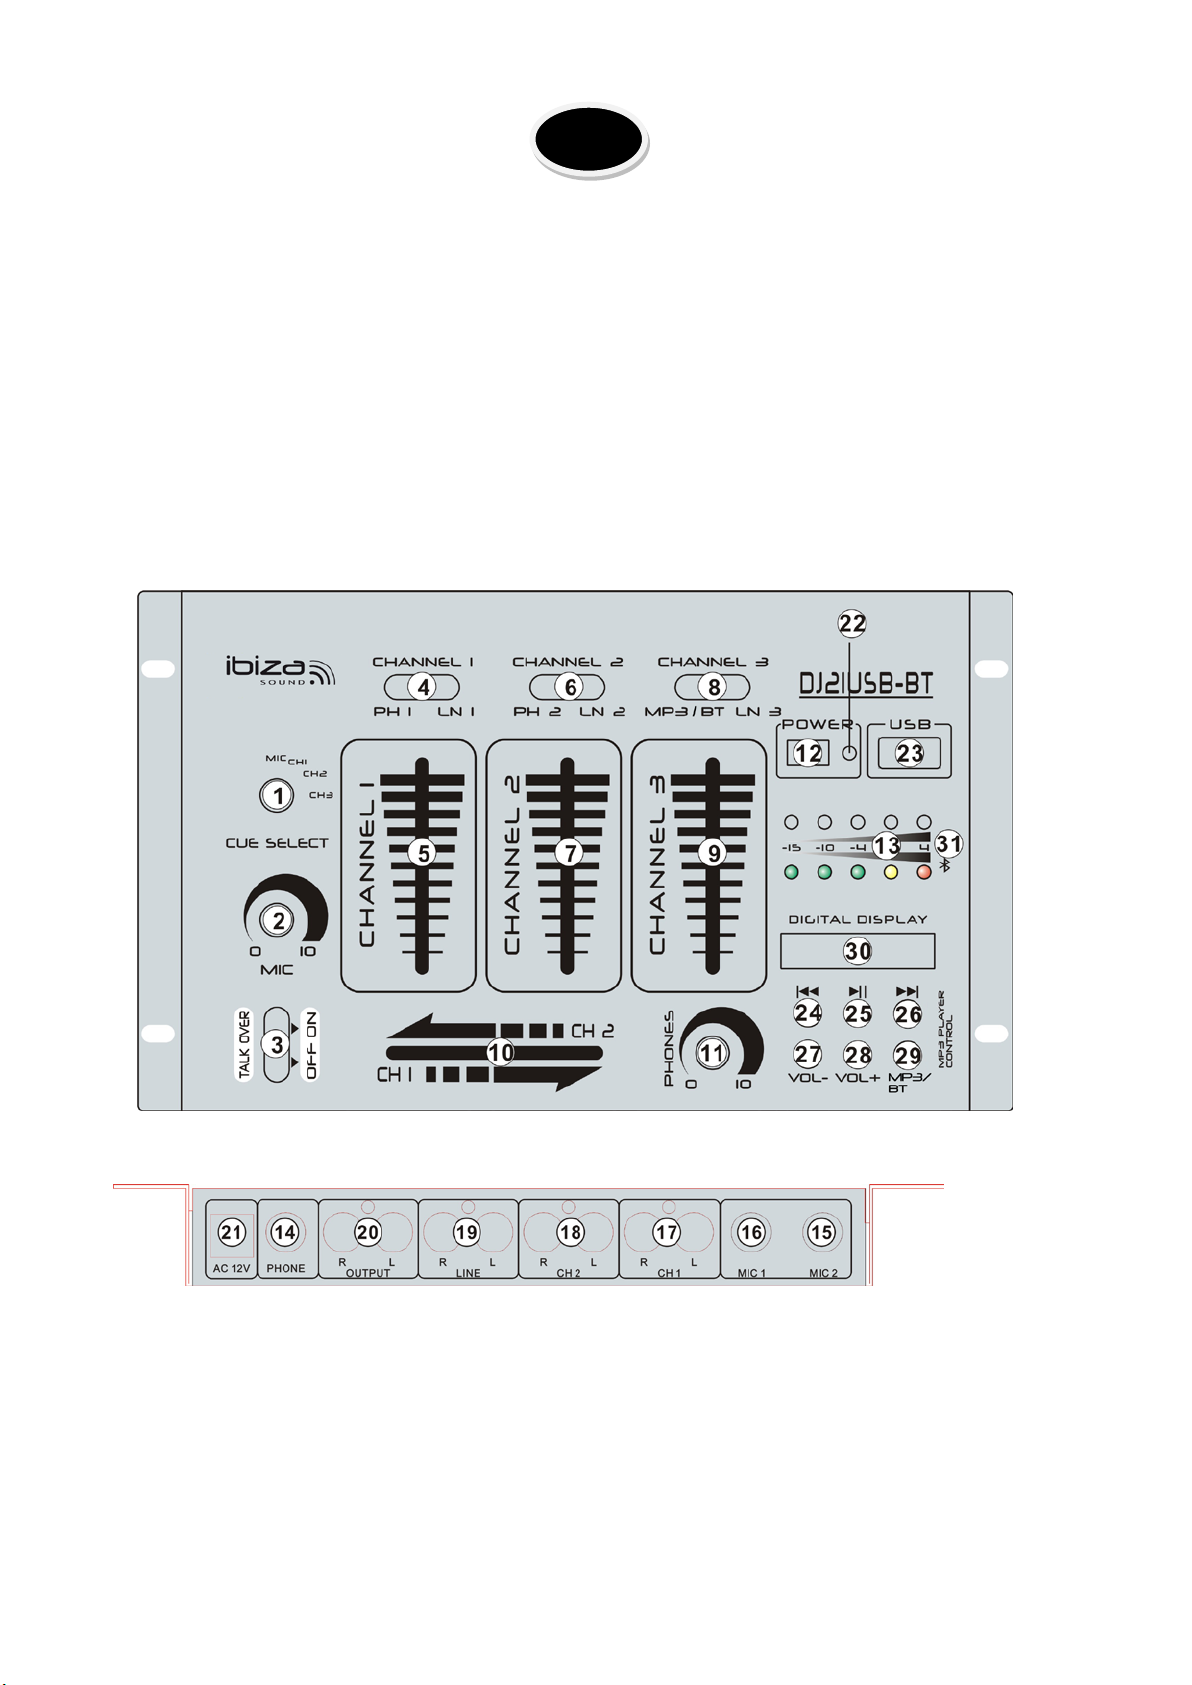
1. Pred uporabo te naprave, se prepričajte, da je AC Adapter (21),pravilne napetosti.
2. Naprava je dobavljena s priključki AMP output. AMP (20) priključki so nebalansirani in se uporablja za
povezavo z ojačevalcem.
3. MIC L (15) in MIC R (16) vhod sprejema 1/4 " priključek.
4. Na hrbtni strani sta dva stereo PHONO / LINE (17) in (18) vhoda in 1 stereo LINE (19) vhod.PHONO / LINE
(4) omogoča, da nastavite (17) enoto na Phono ali Line.PHONO / LINE (6) vam omogoča, da nastavite (18)
enoto na Phono ali Line.MP3 / BT - LINE (8) vam omogoča, da nastavite vhod na USB ali Line (19).
Slušalke lahko priključite na zadnji plošči na jack vtičnico (14).
Delovanje
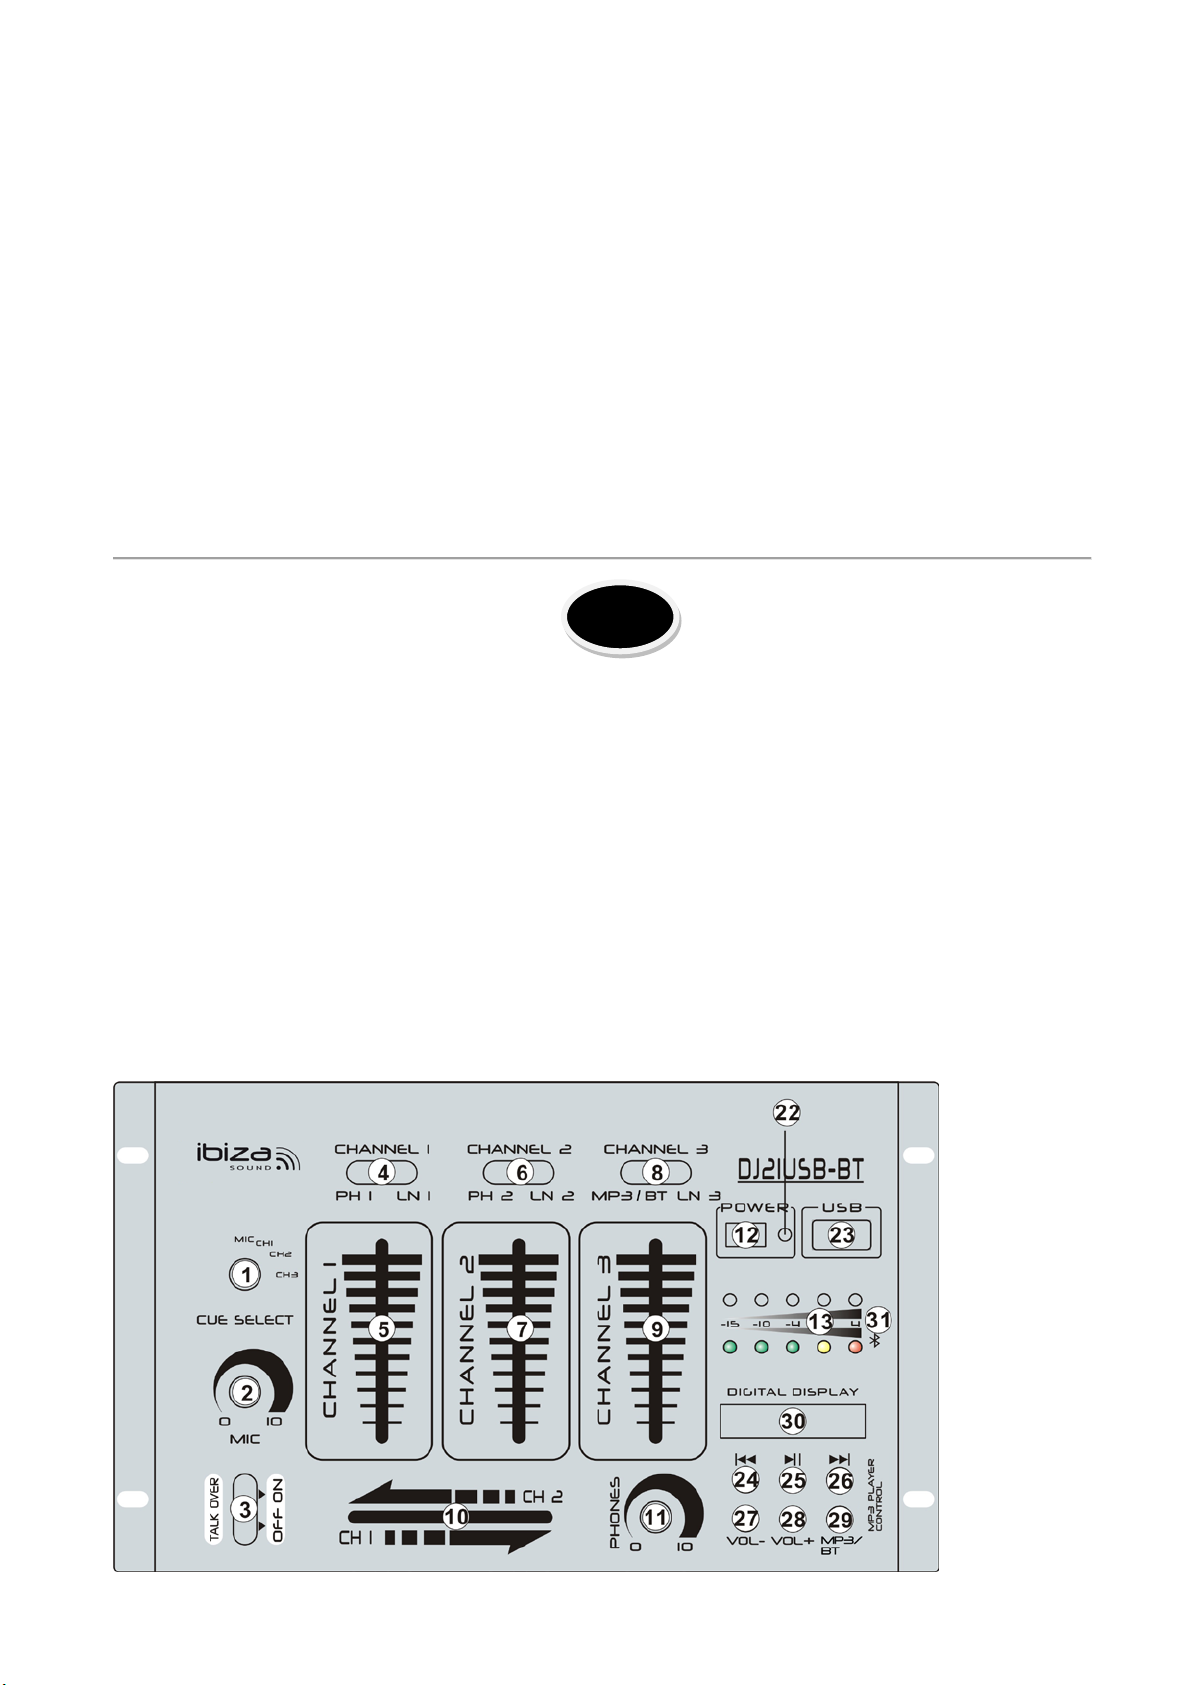
1. POWER ON: Ko ste naredili vse,glede povezave do vašega mikserja, pritisnite tipko POWER
(12).Napajanje se bo vklopilo in POWER LED (22) bo zasvetil RDEČ.
2. CHANNEL 1: PREKLOPNIK (4) vam omogoča, da izberete PHONO 1/LINE 1 (17) priključke za Phono vhod
ali Line. DRSNIK KANALA (5) kontrolira vhodni nivo tega kanala.
3. CHANNEL 2: PREKLOPNIK (6) vam omogoča, da izberete PHONO 2/LINE 2 (18) priključke za Phono vhod
ali Line. DRSNIK KANALA (7) )kontrolira vhodni nivo tega kanala.
4. CHANNEL 3: PREKLOPNIK (8) vam omogoča, da izberete USB/LINE 3 (19) priključke za USB vhod ali Line. .
DRSNIK KANALA (9) kontrolira vhodni nivo tega kanala.
5. CROSSFADER: CROSSFADER (10) dovoljuje mešanje med kanalima CH1/CH2.
6. TALKOVER (3): Pritisnite ta gumb, če želite uporabljati mikrofon. Ko pritisnete na gumb, vsi ostali viri
signala se zmanjšajo za 12dB, tako da se lahko mikrofon jasno sliši. V položaju OFF, vse signale vrne na
prvotni nivo.
7. Priključite SLUŠALKE na priključek za slušalke in izberite želeni kanal (kanal 1-3 ali MIC) za spremljanje s
CUE STIKALO (1).S tem gumbom PHONO (11), lahko nastavite glasnost slušalk..
8. PRIKAZOVALNIK: PRIKAZOVALNIK (13) prikazuje nivoje levo in desno za MASTER.
9. USB (23) Priključek za priključitev USB ključa.
10. |<< (24): Uporabite ta gumb za ponovni zagon skladbo ali, da izberete prejšnjo skladbo.
11. Play/Pause (25): Vsakič, ko pritisnete na ta gumb, se delovanje spremeni iz predvajanja v začasno
ustavitev ali obratno.
12. >>| (26): Uporabite ta gumb za izbiro naslednje skladbe.
13. VOL-(27): Uporabite ta gumb za zmanjšanje nivoja glasnosti.
14. VOL+ (28): Uporabite ta gumb za zvišanje nivoja glasnosti.
15. MP 3/ B T (29): Izberite med MP3 in Bluetooth, ko MP3 / BT je bil izbran na kanalu 3.
16. LED PRIKAZOVALNIK (30): Prikaz MP3 informacij.
17. BLUETOOTH LED (31): Prikazuje stanje delovanja Bluetooth. Ko vklopite, Bluetooth LED utripa počasi,
kar pomeni, da je pripravljen za povezavo z napravo Bluetooth. Če se ugotovi, da ni povezave po 1 minuti, se
LED ugasne in preide v stanje pripravljenosti. Če je uspostavljena povezava Bluetooth s predvajalnikom, lučka
utripa počasi, približno 2-3 sekunde enkrat. Lahko uporabite bluetooth predvajalnik za predvajanje glasbe.
Bluetooth povezava
DJ21USB-BT je opazen, ko je izbran Bluetooth vhod. Ko izberete način vhoda Bluetooth na DJ21USB-BT,
vklopite funkcijo Bluetooth na mobilnem telefonu in poiščite DJ21USB-BT. Njegovo ime Bluetooth naprave je
"DJ21USB-BT". Seznanite in povežite po iskanju. Ni kode za seznanjanje.