Iccons GT-6 User manual

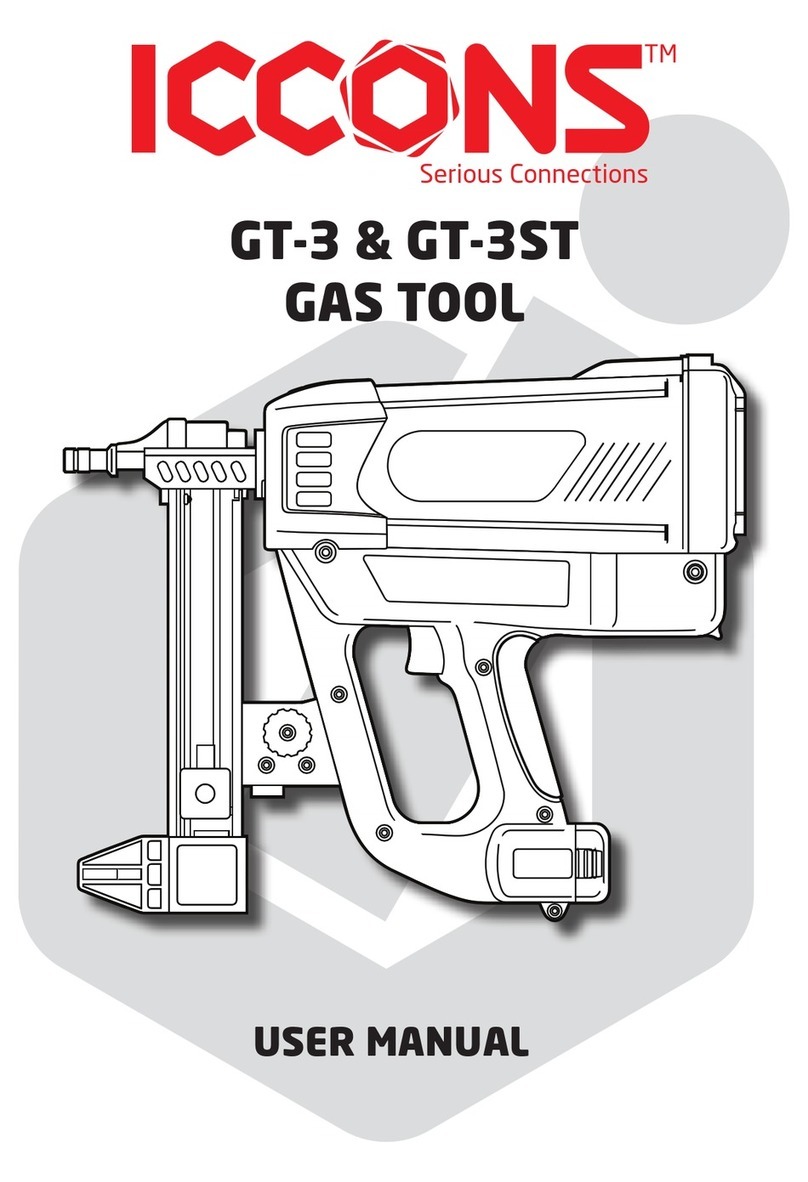
USER MANUAL
GT-6 & GT-6ST
GAS TOOL

ICCONS®GAS TOOL GT-6 & GT-6ST USER MANUAL
2
March 2017 revision 1
Table of Contents
Section Page
1 GENERAL SAFETY INSTRUCTIONS 3
1.1 Introduction 3
1.2 Safety Of The Fastener Driving Tool 3
1.3 Safety At Work 4
1.4 Safety For Handling Fasteners 4
1.5 Safety For Gas-Operated Nailer Tool 4
2 THE USE OF FUEL CELL 4
2.1 Introduction 5
2.2 Safety For Handling Fuel Cell 5
2.3 Transport 5
2.4 Storage 5
2.5 First Aid 5
3THE USE OF BATTERY & CHARGING
SYSTEM 5
3.1 Introduction 5
3.2 Before Charging 6
3.3 Safety For Handling Battery 6
3.4 Storage 6
4 OPERATIONS 6
4.1 Charging 6
4.2 Installing And Removing The Battery 7
4.3 Battery Light Indicator 7
4.4 Preparing The Fuel Cell 7
4.5 Installing/Removing Fuel Cell 7
4.6 Loading/Unloading The Pins 8
4.7 Driving The Pins 8
4.8 Clearing Jammed Pins 8
4.9 Adjust The Driving Depth 9
4.10 Cleaning Filter 9
4.11 Regular Maintenance 9
5 TROUBLE SHOOTING 10
5.1 Battery / Charger Problems 10
5.2 Normal Stage Operation 10
5.3 Pre-Combustion /
Combustion Stage Of Operation 11
5.4 Power/Exhaust Stage Of Operation 11
5.5 Returning/Purging Stage Of Operation
6 TECHNICAL SPECIFICATIONS 13
7 PARTS LIST / TOOL SCHEMATIC 14
8 WARRANTY 16
9 COPYRIGHT 19
10 DISPOSAL 19
ICCONS CONTACT DETAILS 19

3
ICCONS®GAS TOOL GT-6 & GT-6ST USER MANUAL
March 2017 revision 1
1. GENERAL SAFETY INSTRUCTIONS
This appliance is not intended for use by person
with reduced physical, sensory and mental
capabilities, or lack of experience and knowledge,
unless they have been given supervision or
instruction concerning use of the appliance by a
person responsible for their safety.
WARNING: READ ALL SAFETY
WARNINGS AND ALL INSTRUCTIONS
TO REDUCE THE RISK OF INJURY,
READ THE INSTRUCTION MANUAL
BEFORE USE.
A. THE USE OF INTERNAL COMBUSTION,
GAS OPERATED NAILER TOOL
DANGER ! THE TOOL MUST NOT USED
IN A COMBUSTIBLE ENVIRONMENT
OR CONFINED SPACE.
WARNING ! CHECK THE SAFETY
YOKE IS FUNCTIONAL ON EVERY
OPERATION. It must reliably return
to its starting position.
WARNING ! KEEP TOOL AWAY FROM
SMOKE AND FIRE.
WEAR EAR PROTECTION
WEAR EYE PROTECTION
USE PROTECTIVE HAND WEAR
The ICCONS® Gas Nailer is referred to as “tool”
in this general safety instruction. ICCONS® is
referred to as “manufacturer” in this general safety
instruction.
1.1 Introduction
- Only those fasteners which are specified in the
operating instructions shall be used in the tool.
The tool, the fastener, the fuel cell and the
battery specified in the operating instructions
are to be considered as one unit safety system.
- Only spare parts specified by the manufacturer or
their authorized representative shall be used in
the service or repair of the tool.
- Repairs shall be carried out only by the
manufacturer or their authorized representative.
- Keep the tool, fasteners, fuel cell, battery and
charger out of the reach of children.
1.2 Safety Of The Fastener Driving Tool
- Check prior to each operation that the safety
mechanism is functioning properly. Rectify any
loose fasteners or defects on the tool before use.
- Only use the tool for nailing application for which
it was designed.
- It is not permitted to make any modification
to the tool, fuel cell or battery, other than
those specified by the manufacturer. If the
tool is weakened or damaged by: punching or
engraving; modification not authorized by the
manufacturer; guiding against templates made
of hard material; dropping or pushing across the
floor; use as a hammer; apply excessive force
of any kind; it should be taken to service and
inspected by the manufacturer or authorized
agents.

ICCONS®GAS TOOL GT-6 & GT-6ST USER MANUAL
4
March 2017 revision 1
- Operator should carry out regular maintenance
(cleaning and lubrication) in accordance with
the operation manual to keep the tool in good
working order.
- The fastener driving tool should be serviced
properly and at regular intervals in accordance
with the operation manual.
1.3 Safety At Work
WARNING! Always assume the tool is loaded.
Never point any tool at yourself or at any other person.
- Make sure the workplace is clean and well lit.
- Stay alert, watch what are you doing, and use
common sense when operating the tool. Do not
use tool while tired or under the influence of
drugs, alcohol, or medication.
- The tool must be carried pointed downward while
moving locations. Never carry the tool with your
finger on the trigger.
- Never press your hand on the front of the tool.
The tool must be operated only when it is in
contact with the material to be fixed.
- The operator must be in a stable position when
using the tool. Operate the tool in the manner
that should the tool recoil, there is no risk of
injury to the operator.
- When using the tool, the operator and any
bystanders must wear appropriate eye and ear
protection.
- When not in use, remove the battery, fuel cell
and fasteners, return the fastener follower to
guide locking position, and return the tool to its
carrying case.
1.4 Safety For Handling Fasteners
- Do not load the fasteners with the trigger and/or
work-contacting element pressed.
- Ensure that you use the correct length of
fastener with the depth adjuster correctly set, so
that nails do not protrude when a fixing is made.
- Do not drive fasteners on top of other fasteners.
- Never drive fasteners into free space or areas
with concealed hazards. This will avoid a hazard
caused by free flying fasteners and excessive
strain of the tool. Take particular care when
nailing close to edges as fasteners can break-out
and deflect out of the substrate.
- If tool jams or misfires, always remove the
battery and fuel cell prior to examination of
the tool. If the problem persists stop operating
the tool, unload the fasteners, and contact the
manufacturer or authorized agents for service.
1.5 Safety For Gas-Operated Nailer Tool
- The tool must not be used in a combustible
environment.
- The tool must be used in well-ventilated areas.
Exhaust gases in a confined space can be
hazardous. Do not use the tool outside in the
rain or where excessive moisture in present.
- Keep the tool from heat sources as the
pressurized fuel cell could be damaged.
- Do not smoke when handling the fuel cell.
- Keep away from your face and eyes. Do not
inhale its content.
- The temperature of the tool may increase
depending on the firing frequency. Observe the
maximum cycle rates given in the operating
instructions.
2. THE USE OF FUEL CELL
DANGER ! KEEP FUEL CELL AWAY
FROM SMOKE AND FIRE
WARNING ! LIQUID GAS CAN CAUSE
INJURY IN THE CONTACT WITH THE
SKIN OR EYES
WARNING ! FUEL CELL CONTENTS
ARE EXTREMELY FLAMMABLE
WEAR EYE PROTECTION
USE PROTECTIVE HAND WEAR

5
ICCONS®GAS TOOL GT-6 & GT-6ST USER MANUAL
March 2017 revision 1
2.1 Introduction
The fuel cell is an aerosol product corresponding to
the 2008/47/EC regulations. It contains:
- Liquefied hydrocarbon gases (Butane & Propane).
- Lubricant to help tool work smooth.
2.2 Safety For Handling Fuel Cell
- The fuel cell is always pressurized with
propellant to sustain the fuel supply to the
metering valve, even if the fuel is used up. Its
contents are extremely flammable. The fuel cell
is not reusable. Do not attempt to refill.
- Do not spray towards a flame or an incandescent
body. Keep away from any heat sources and from
electrostatic charges.
- Do not smoke when handling or loading fuel cells.
- Do not expose to temperatures exceeding 50°C.
- Store and use the cartridge in a well-ventilated
area only. Do not inhale.
- Do not pierce or burn the cartridge after use.
- Keep away from children.
- Dispose of only in designated places.
- For optimum performance, use before the date
indicated at the bottom of the cartridge.
2.3 Transport
The regulations by transport categories are:
- Road/Rail: ADR/RID – UN code 2037 class 2.1
- Sea: IMDG – UN code 2037 class 2.1 EmS F-D, S-U
- Air: IATA – UN code 2037 class 2.1
Goods must be accompanied by a transport
emergency card for road UN 2037
Transport by post is not permitted.
2.4 Storage
- Stores and showrooms must comply with building
regulations. All local instructions corresponding
to fire regulations must be followed.
- Where possible, store fuel at stable temperature
in the range: 5 to 25°C. Do not expose to
temperatures exceeding 50°C. Do not use a
tool that emit flames, sparks or reach high
temperatures in the vicinity that fuel cells are
stored.
- Do not store in designated thoroughfares,
hallways or stairwells.
- Store in a well-ventilated area. Fuel cells must
not be displayed in shop windows.
- Storage with pyrotechnic products is not
permitted.
2.5 First Aid
- Direct contact with liquid gas may cause burns or
frostbite.
- In case of inhalation remove the person to fresh
air, and encourage breathing. Should the casualty
become unconscious, or breathing does not
quickly return to normal, summon urgent medical
assistance.
- If gas gets into the eyes they should be flushed
out with copious amounts of water. Skin
contaminations should be removed with soapy
water.
- If symptoms persist, seek medical assistance.
3. THE USE OF BATTERY & CHARGING
SYSTEM
3.1 Introduction
The adaptor, charger and the battery are designed
to operate together as one system.
Only use the ‘ICCONS®’ Adaptor & ‘ICCONS®’
Charger for charging the ‘ICCONS®’ Batteries.
READ INSTRUCTIONS
CLASS II DEVICE
FOR INDOOR USE ONLY
TIME-LAG FUSE-LINK
DISPOSE SEPARATELY FROM
HOUSEHOLD-TYPE WASTE
The charging system is intended to use in covered
areas. Do not expose it to rain or to excessive
humidity.

ICCONS®GAS TOOL GT-6 & GT-6ST USER MANUAL
6
March 2017 revision 1
3.2 Before Charging
- Arrange the supply cord appropriately to avoid
unnecessary damage, avoid laying the supply
cord across walkway or doorway.
- When charging the battery pack, use a specified
battery charger. Check the output and the
polarity of the battery charger are match with
the battery pack intended to charge.
- Check the system before use. Maintenance
and servicing are not required under normal
conditions. Do not dismantled the battery
charger or the battery pack.
- If the battery pack or charger enclosure is
damaged, disconnect the supply and stop
charging the battery immediately. If cable
or plug is damaged, do not use for charging
battery. Contact authorized service agent for
replacement.
- Keep the charger exhaust area clean and unblock
to have the best cooling eect. Use dry cloth to
clean the body and the contact of the charger
while it disconnected with the main power.
- Charge the battery in room temperature. If the
temperature is less than 0°C or greater than
45°C will harm the performance or degrade the
battery
- If the battery charger abnormally heats up or
gives o fumes during charging, disconnect the
power supply of the charger immediately.
3.3 Safety For Handling Battery
- Do not place the battery on or near fires, stoves
or other high-temperature locations. Do not place
the battery or store inside cars under direct
sunshine.
- Do not short circuit the battery pack, apply
isolation cap while not in use.
- Do not pierce or open the battery pack, the
protective device may damage.
- Only charge one battery pack at a time.
- Battery pack and charger must be recycled or
taken to a designated disposal area.
3.4 Storage
- Store the batteries in a cool and dry place.
-
Recharge it once a year to about 30-50%
of capacity can help to compensate the self-
discharged and keep the battery in a good
condition.
- The charging systems should store at a place
that children cannot easy gain access to.
- Children should be supervised to ensure that
they do not play with the appliance.
- Always disconnect the batteries with tools or
charger while storage.
4 - OPERATIONS
4.1 Charging
Steps:
1. Plug the battery charger into the proper AC
voltage source, green light will be flashing.
2. Insert the battery into charger, red light will
alight indicating the battery is charging.
3. It takes about 60 minutes for charging.
4. When fully charged, green light will remain alight.
5. After charging, unplug the charger from the
power source.
• If orange light is blinking, remove the battery
cartridge and plug again.
• If this happens continuously, the battery
cartridge or charger may be damaged. Consult
authorized service agent for replacement of
new battery cartridge.
NOTE:
• Never attempt to open the charger or battery
cartridge.
• The battery charger is for charging specific
battery pack. Never attempt to charge battery
pack from other manufacturer’s battery
cartridge. Unsuitable battery cartridges may
cause fire that causes injury.
• When the battery charger is being used, keep
out of direct sunlight.
• To get better cooling eect, keep the exhaust
area clean.

7
ICCONS®GAS TOOL GT-6 & GT-6ST USER MANUAL
March 2017 revision 1
• Do not remove the cap when it is unused.
• Never drill a hole on the fuel cell.
• Do not inhale the gas. Breathing in the gas
could cause sleepiness, dizziness or nausea.
• The fuel cell is not refillable, do not attempt
to refill the gas.
Steps:
First ensure to use the correct colour valve, Please
refer to the technical specifications.
1. Detach the storage cap from the valve, attach
the valve to the fuel cell by pushing in the
front edge.
2. Pushing the rear edge until it has “clicked”.
NOTE:
• Make sure the fuel cell valve is attached
firmly, if not, gas leakage may occur and
create hazards to users and bystanders.
4.5 Installing / Removing Fuel Cell
Caution !
• Make sure the trigger is not held while
inserting fuel cell.
• Empty fasteners in the magazine before
installing fuel cell.
• Do not press on the surface ground while
installing.
Steps:
1. Push up and pull to open the fuel door.
2. Insert the fuel cell, direct the jet nozzle into
the adaptor.
3. Put the can door over the valve and push it
down to latch.
4. For removing fuel cell, reverse the above
steps.
4.2 Installing And Removing The Battery
Steps:
1. Empty fasteners from the magazine and make
sure the trigger is not pulled while installing
the battery.
2. To install the battery, insert the battery
cartridge until hearing a “click”.
3. To remove the battery, grip the buttons on
both side of battery cartridge and pull out.
4.3 Battery Light Indicator
LED Battery Level
All LEDs 100%
1 Green and 1 Red LED 50%
1 Red LED 25%
NOTE:
• After using the tool, remove the battery from
the tool to prevent the tool from being fired.
4.4 Preparing The Fuel Cell
Caution !
• Never attempt to use fuel cell from other
manufacturer.

ICCONS®GAS TOOL GT-6 & GT-6ST USER MANUAL
8
March 2017 revision 1
4.6 Loading / Unloading The Pins
Caution !
• Make sure the trigger is not held while
loading the pins.
• Do not press on the surface ground while
loading.
Steps:
1. Load the pins into the slit in the rear of the
magazine until they reach in front of the nail
stopper.
2. Pull the follower holder to the bottom of the
magazine and release gently.
3. For removing the pins, pull the follower to the
bottom and allow the nails to slide to the nail
stopper.
4. Press the nail stopper behind the channel and
remove the pins from magazine channel.
4.7 Driving The Pins
Caution !
• Please READ and UNDERSTAND the section
“General Safety Instructions” for personal and
working environment safety.
• If you spot of any abnormality about the tool,
contact nearest authorized service agent for
inspection and repairing.
Steps:
1. Press the Nose of the contact arm against
working surface (90° against the surface)
firmly until you hear the fan motor is working.
2. Pull the trigger, the pins are driven to the
object.
3. Release the trigger and lift the tool.
4.8 Clearing Jammed Pins
Jamming of pins could be evident if users cannot
drive the fasteners properly, try following steps in
subsequent order.
Caution !
• Place the tool on a flat surface prior to
releasing the magazine, (magazine may pop
o suddenly).
• Read previous sections to fully understand
battery cartridge installation/removal and
unloading fasteners.
Steps:
1. Remove the pins, fuel cell and battery from
tool.
2. Pull the knob and rotate clockwise to release
magazine channel.
3. Clean any residue along the driving path in the
nose piece and pin guide.
4. To install the magazine, first engage the
magazine in the slot of the nose piece.
5. Push the connecting plate into the handle
until it “clicks”.
NOTE:
• Do not release the magazine with fasteners
inside. The follower may pop the pins out and
cause injury.
• Wear safety goggles, the jammed fastener
may jump out and hurt the user.

9
ICCONS®GAS TOOL GT-6 & GT-6ST USER MANUAL
March 2017 revision 1
4.9 Adjust The Driving Depth
Caution !
• Please READ and UNDERSTAND the section 1
“General Safety Instructions” for personal and
working environment safety.
• Never press the pin guide by bare hand or by
any parts of the body.
• Never point the tools at anybody.
• Only pull the pin guide to separate the pin lock
Steps:
1. Remove the pins, fuel cell and battery
attached on the tool.
2. Adjust the knob clockwise to increase the
driving depth, or vice versa.
4.10 Cleaning Filter
The filter at the back of the tool acts crucially to
suck in air into the chamber. For maintaining the best
performance of the tool users should always keep it clean.
1. Unscrew the socket screw on the filter.
2. Take out the filter and clean the mesh with
brush or air.
3. Put the filter on the machine and fasten with
the socket screw.
NOTE:
• Do not attempt to use water to clean the
mesh. The cover and mesh must be dry when
operating the tool. If wet it may easily cause
malfunction to the tool.
4.11 Regular Maintenance
ICCONS® GT6 tool allows user to perform regular
maintenance easily. It helps maximizing the
performance and durability of the tool.
1. Unscrew 4 socket screws and remove the head
cover.
2. Pivoting the cylinder head.
3. Now you can perform cleaning for crucial parts
including spark, fan blade, cylinder with de-
carbonizer spray.
4. Wipe them clean completely, lubricate and
reassemble.

ICCONS®GAS TOOL GT-6 & GT-6ST USER MANUAL
10
March 2017 revision 1
5 - TROUBLESHOOTING
WARNING:
To reduce the risk of seri-
ous personal injury, ALWAYS
unload the battery, the pins
and fuel cell from the tool
before all repairs.
5.1. Battery / Charger Problems
SYMPTOM 1
Battery Cell does not appear to accept charge.
Green charger light does not come on after several
hours.
Possible reasons Services
Inoperative
indicator lights on
charger.
Try Battery in tool after 1
hour on charge cycle. If tool
functions properly charger
lights are not working
correctly. Replace charger,
or monitor time to ensure
Battery Cell has adequate
time for recharging. It’s
normal for Battery to
feel warm after properly
charging.
Damaged charger. Discontinue use
immediately and unplug
from power source.
Replace charger and tag
or dispose of charger to
prevent accidental reuse
or connection to power
source.
SYMPTOM 2
Red LED on charger is blinking.
Possible reasons Services
Battery is hot. Remove battery from
charger and allow to cool.
Inspect battery charger and
cartridge.
SYMPTOM 3
Orange LED on charger is blinking.
Possible reasons Services
Charger damaged. Replace Charger.
5.2 Normal Stage Of Operation
SYMPTOM 1
Fan does not run.
Possible reasons Services
Battery is not
charged.
Charge Battery according to
Operating Manual.
Battery
Terminals or
Handle battery
contacts are oily,
dirty, or corroded.
Clean Battery Cell terminals
Clean Handle Battery Cell
contacts as required.
There is electrical
short somewhere.
The tool must be looked
into by Authorized Service
agent.
SYMPTOM 2
Fan does not run, or runs slower than normal.
Possible reasons Services
Battery is
discharged.
Charge Battery Cartridge.
SYMPTOM 3
Fan runs intermittently.
Possible reasons Services
Battery is loose or
contacts are bent.
Snap battery back into
its locked position. Bend
contacts back into proper
position by Authorized
Service agent.

11
ICCONS®GAS TOOL GT-6 & GT-6ST USER MANUAL
March 2017 revision 1
5.3 Pre-Combustion / Combustion
Stage Of Operation
SYMPTOM 1
Contact Arm does not depress fully, tool does not
operate.
Possible reasons Services
Lockout Bar is
stuck in lockout
position.
Check if there is not
enough pins in the channel,
load extra pins according to
Operating Manual.
The nose piece
is bent, or the
channel is stuck
with dirt.
Inspect if the nose piece
and channel is clean. If
it is damaged, consult
authorized service agent
for repair and replacement
of the parts.
Follower holder
positions wrongly
at the top of
the magazine
strip.
Slide the follower holder
to the bottom and release
gently.
Cylinder head
O-Ring pinched.
Contact authorized service
agent for repair.
Jammed fasteners. Clear jam according to User
Manual.
SYMPTOM 2
Failure to install fasteners to nose piece.
Possible reasons Services
Piston positioned
wrongly.
Return piston to original
position with a rod or
screwdriver.
O-Ring is
damaged and
causing leakage
of gas.
Contact authorized service
agent for repair.
Damaged valve
plate or reed of
the cylinder body.
Contact authorized service
agent for repair.
SYMPTOM 3
Tool will not cycle - fan runs.
Possible reasons Services
Fuel Cell is empty. Replace Fuel Cell.
Spark does not
occur.
Contact authorized service
agent for repair.
SYMPTOM 4
Fail to drive fasteners.
Possible reasons Services
Water vapour
surrounding spark
causing short
circuit.
Dry the spark area or
contact authorized service
agent for repair.
Sealing ring
damaged.
Contact authorized service
agent for repair.
Piston guide stuck
with dirts.
Contact authorized service
agent for repair.
5.4 Power / Exhaust Stage Of
Operation
SYMPTOM 1
Tool operates properly, but fasteners do not drive
fully.
Possible reasons Services
Battery is
discharged.
Charge battery.
Fuel Cell is low. Replace fuel cell according
to User Manual

ICCONS®GAS TOOL GT-6 & GT-6ST USER MANUAL
12
March 2017 revision 1
SYMPTOM 2
Tool operates, but no fastener is driven.
Possible reasons Services
Fastener strip
may be binding.
Use only fasteners meeting
designated specifications.
Follower holding
wrong at the top
of the pin strip.
Slide follower holder gently
to the bottom and release
to reset the pin strip in the
magazine.
Jammed fasteners Clear jam according to User
Manual.
SYMPTOM 3
Operation of the tool is not stable.
Possible reasons Services
Fuel Cell is low. Replace fuel cell according
to User Manual.
Spark Plug wire is
loose.
Contact authorized service
agent for repair.
Filter element
is dirty,
causing tool to
overheat.
Remove filter element and
clean according to User
Manual.
Tool sleeve or
O-Rings are dirty.
Contact authorized service
agent for repair.
SYMPTOM 4
Unstable performance.
Possible reasons Services
Built-up dirt and
debris inside
cylinder
Contact authorized service
agent for repair.
SYMPTOM 5
Diminishing power.
Possible reasons Services
Damaged piston
or cylinder.
Contact authorized service
agent for repair.
5.5 Returning/Purging Stage of
Operation
SYMPTOM 1
Tool operated and drove fastener, but piston did
not return to up position.
Possible reasons Services
Mushrooming of
Piston Tip.
Contact authorized service
agent for repair.
Exhaust ports on
the sleeve are
dirty or clogged
Contact authorized service
agent for repair.
Tool (Sleeve) or
O-Rings are dirty.
Contact authorized service
agent for repair.
SYMPTOM 2
Combustion Chamber does not drop after tool
cycles.
Possible reasons Services
Contact arm is
bent, or tool is
dirty.
Clean tool or replace
contact arm as require

13
ICCONS®GAS TOOL GT-6 & GT-6ST USER MANUAL
March 2017 revision 1
6 - TECHNICAL SPECIFICATIONS
A. GAS NAILER
Model No. GT-6
Dimensions
Length 435 mm
Height 380 mm
Width 120 mm
Weight 3.76 kg
Magazine Capacity 30/40
Recommended Usage 800/Hr
4,000/Day
Vibration
The vibration/mechanical impact risk is
low, it is the users’ responsibility to ensure
that the operators are not put at risk due to
environmental and work piece specifications.
B. FUEL CELL
Model No. GT3FUEL
Dimensions
Height 152 mm
Diameter 32 mm
Fuel cell contains pre-mixed fuel and
lubrication. No extra lubrication required.
Warning! Only specified Fuel Cell and
Lubricant by ICCONS® can be used on the
tools, please consult the ICCONS® agents or
local distributors.
C. FASTENER
Dimensions
Head Ø6.3 mm
Length 13-45 mm
Shank Ø2.6-3.7 mm
Applications
Steel to Steel Ø3.0 mm step
Steel Plate to Concrete Ø2.6-3.7 mm
Steel Plate to Hard Concrete Ø3.0 mm step
Only those fasteners which are specified in
this specification shall be used in ICCONS®
Gas Tools. The ICCONS® Gas Tool and the
fasteners specified are to be considered as
one unit safety system.
The charger and the battery are designed to
operate together as one system.
D. BATTERY CHARGER
Art. No. GT-6BCU
Model No. RLC07220
Input 100-240V ~ 50/60Hz
Output 7.2V ⎓ 2.0A
Charging Time 1 Hour
Battery Type ICCONS® RBL-07220
E. BATTERY
Art. No. GT-6BCP
Model No. RBL-07220
Output 7.2V ⎓
Capacity 2.0Ah / 14.4Wh
2 - TOOL SERIAL NUMBER
Located on the tool handle near the track
connection.
CC YY MM KK XXXX
CC - Customer Code
YY - Year of construction (last two digits)
MM - Month of construction
KK - Model Type (17/19)
XXXX - Tool serial number

ICCONS®GAS TOOL GT-6 & GT-6ST USER MANUAL
14
March 2017 revision 1
7. PARTS LIST
MODEL: SUNGRACE C6-P
BUILD: 00170118
REV: 1
DATE: 16-Jan-2017
PARTS SCREWS
1 SOCKET SCREW 21 SPRING PIN 1 M4 x 12
2 CAP 22 PROBE 3 M5 x 25
3 SOCKET SCREW 23 PIN GUIDE 9 M4 x 8
4 BUSHING 24 NOSEPIECE 10 M5 x 35
5 SHIELD 25 SOCKET SCREW 25 M5 x 8
6 HOUSING 26 ARM CONNECTOR 32 M5 x 10
7 HEAD COVER 27 ARM 72 M4 x 20
8 FILTER 28 SPRING 82 M5 x 20
9 SOCKET SCREW 29 CYLINDER 85 M5 x 14
10 SOCKET SCREW 30 CYLINDER RING 87 M4 x 14
11 FUEL DOOR 95 ST3 x 9
111 ST4 x 25
31 VALVE COVER 41 RUBBER SLEEVE 117 ST4 x 10
32 SOCKET SCREW 42 STEEL PIN
33 FILTER 43 CHAMBER PLATE NUTS
34 REED 44 CHAMBER 89 M4
35 VALVE PLATE 51 BUMPER 104 M4
36 PERFRORATED PLATE 52 PISTON
37 SEALING RING 53 PISTON RING WASHER
38 CYLINDER BODY 54 RETAINING RING 71 M4
83 10 x 5.5 x 1
60 HEAD RING 81 HANDLE HOUSING 86 12 x 5.5 x 1
61 BLADE ASSEMBLY 82 SOCKET SCREW 88 9 x 4.2 x 1
62 CYLINDER HEAD 83 WASHER
63 SPARK PLUG 84 BUSHER APPLY LOCTITE BLUE
64 FUEL NOZZLE 85 SOCKET SCREW
65 MOTOR SLEEVE 86 WASHER
66 MOTOR BUMPER 87 SOCKET SCREW
67 MOTOR 88 WASHER
68 MOTOR GUIDE 89 LOCKNUT
69 CONNECTOR HOLDER
70 MOTOR HOLDER
71 SPRING WASHER
72 ROUND HEAD SCREW
91 TRIGGER 101 TRACK GUIDE 111 SELF TAP SCREW
92 CHAMBER STOP 102 FOLLOWER 112 SPRING
93 TRIGGER SPRING 103 TRACK 113 KNOB
94 TRIGGER SWITCH 104 TRACK NUT 114 SPRING
95 SELF TAP SCREW 105 CONNECTING PLATE 115 TRACK LOCK
96 MOTOR SWITCH 106 END CAP 116 TRACK LATCH
97 CONTROL UNIT 108 TRACK ASSEMBLY 117 SELF TAP SCREW
98 HOOK
99 BATTERY HOLDER
100 BATTERY

15
ICCONS®GAS TOOL GT-6 & GT-6ST USER MANUAL
March 2017 revision 1
POS. CODE DESCRIPTION Thread lock
1NB1371 SOCKET SCREW Blue 242
217 006 0 CAP
3NB1040 SOCKET SCREW Blue 242
4NB1050 BUSHING
517 009 0 SHIELD
617 801 0 HOUSING
717 802 0 HEAD COVER
817 087 0 FILTER
9NB1160 SOCKET SCREW Blue 242
10 17 286 0 SOCKET SCREW
11 17 062 0 FUEL DOOR
21 17 202 0 SPRING PIN
22 17 803 0 PROBE
23 17 010 0 PIN GUIDE
24 17 804 0 NOSE PIECE
25 NB4400 SOCKET SCREW Blue 242
26 17 015 0 ARM CONNECTOR
27 17 016 0 ARM
28 17 026 0 SPRING
29 17 805 0 CYLINDER
30 17 024 0 CYLINDER RING
31 17 023 0 VALVE COVER
32 17 214 1 SOCKET SCREW Blue 242
33 17 018 0 FILTER
34 17 022 0 REED
35 17 021 0 VALVE PLATE
36 17 020 0 PERFORATED PLATE
37 17 019 0 SEALING RING
38 17 017 0 CYLINDER BODY
41 17 031 0 RUBBER SLEEVE
42 17 032 0 STEEL PIN
43 17 034 0 CHAMBER PLATE
44 17 806 0 CHAMBER
51 17 025 0 BUMPER
52 17 807 0 PISTON
53 17 028 0 PISTON RING
54 17 029 0 RETAINING RING
60 17 038 0 HEAD RING
61 NB1620 BLADE ASSEMBLY
62 17 808 0 CYLINDER HEAD
63 NB1650 SPARK PLUG
64 17 048 0 FUEL NOZZLE
65 NB1670 MOTOR SLEEVE
POS. CODE DESCRIPTION Thread lock
66 17 042 0 MOTOR BUMPER
67 17 043 0 MOTOR
68 17 044 0 MOTOR GUIDE
69 17 049 0 CONNECTOR HOLDER
70 17 045 0 MOTOR HOLDER
71 NB1720 SPRING WASHER
72 NB1730 ROUND HEAD SCREW
81 17 809 0 HANDLE HOUSING
82 17 256 0 SOCKET SCREW
83 NB1290 WASHER
84 17 810 0 BUSHER
85 NB110A SOCKET SCREW
86 NB1110 WASHER
87 17 280 0 SOCKET SCREW
88 NB1380 WASHER
89 NB1170 LOCKNUT
91 17 811 0 TRIGGER
92 17 078 0 CHAMBER STOP
93 17 076 0 TRIGGER SPRING
94 17 812 0 TRIGGER SWITCH
95 NB1270 SELF TAP SCREW
96 17 813 0 MOTOR SWITCH
97 17 072 0 CONTROL UNIT
98 17 083 0 HOOK
99 17 071 0 BATTERY HOLDER
100 17 102 0 BATTERY
101 17 097 0 TRACK GUIDE
102 17 814 1 FOLLOWER
103S 17 098 1 TRACK 30
103L 17 098 3 TRACK 40
104 17 099 0 TRACK NUT
105 17 100 0 CONNECTING PLATE
106 17 101 1 END CAP
108S 17 815 1 TRACK ASSEMBLY 30
108L 17 815 3 TRACK ASSEMBLY 40
111 17 270 0 SELF TAP SCREW
112 17 069 0 SPRING
113 17 068 0 KNOB
114 17 067 0 SPRING
115 17 066 0 TRACK LOCK
116 17 065 0 TRACK LATCH
117 NB1142 SELF TAP SCREW

ICCONS®GAS TOOL GT-6 & GT-6ST USER MANUAL
16
March 2017 revision 1
8. Warranty
ICCONS® Pty Ltd warrants the original purchaser of the GT-6/GT-6ST against defective
workmanship and faulty materials for 12 months from date of purchase.
It is a condition of the warranty period that;
• Proof of original purchase and ownership, including address and phone number must be
provided.
• The GT-6/GT-6ST has not been subjected to misuse, (beyond the recommendations or
limitations specified and as outlined in the ICCONS® GT-6/GT-6ST User manual), neglect
or been damaged, modified or repaired without the approval of ICCONS®.
• The tool is presented on return in a condition that displays it has been cleaned and
serviced as outlined in the ICCONS® GT-6/GT-6ST User manual.
• The Repairs to the tool are not required as a result of normal wear and tear (eg: Piston /
Piston Rings )
WHERE LAWFUL, UNDER NO CIRCUMSTANCES SHALL ICCONS® PTY LTD BE LIABLE
FOR INCIDENTAL, CONSEQUENTIAL, SPECIAL DAMAGES OR DIRECT OR INDIRECT LOSS
OF ANY KIND, INCLUDING BUT NOT LIMITED TO BODILY INJURY, DEATH OR PROPERTY
DAMAGE. ICCONS® ENTIRE LIABILITY IS LIMITED TO THE PURCHASE PRICE OF THIS
PRODUCT.
If you wish to make a warranty claim, then the tool or part must be returned to ICCONS®
Pty Ltd at the owner’s expense. ICCONS® will inspect the returned tool/parts, and at
its own option may replace the tool/ parts and return it to the owner at its own cost if
deemed to fall within the scope of the warranty conditions.
ICCONS® Pty Ltd cannot be held responsible for any repair other than those
carried out by it or one of its Authorised Service Agents.
IMPORTANT NOTE FOR AUSTRALIAN CONSUMERS:
Our goods come with guarantees that cannot be excluded under the Australian Consumer Law.
You are entitled to a replacement or refund for a major failure and for compensation for any other reasonably
foreseeable loss or damage. You are also entitled to have the goods repaired or replaced if the goods fail to
be of acceptable quality and the failure does not amount to a major failure.
PLEASE RETAIN A COPY OF THE TAX INVOICE FOR YOUR WARRANTY.
OWNERS COPY AND RECORD
(original purchase receipt is still required for claims)
SERIAL No:
DATE PURCHASED:
DISTRIBUTOR / DEALERS NAME:
DEALER ADDRESS:

17
ICCONS®GAS TOOL GT-6 & GT-6ST USER MANUAL
March 2017 revision 1
NOTES

ICCONS®GAS TOOL GT-6 & GT-6ST USER MANUAL
18
March 2017 revision 1
NOTES

19
ICCONS®GAS TOOL GT-6 & GT-6ST USER MANUAL
March 2017 revision 1
9. COPYRIGHT
Copyright:
ICCONS® Pty Ltd
12-18 Produce Drive
Dandenong South
Victoria, 3175
Australia
Passing on and duplication of this
document, exploitation and disclosure
of its contents are forbidden unless
expressly approved. Violations render
the oender liable to damages. All rights
reserved for the event of patent, utility
model or registered design applications.
This operating manual has been drawn
up with the greatest care. Nevertheless,
ICCONS® Pty Ltd assumes no liability for
possible errors in this operating manual
and their consequences. Furthermore,
no liability is assumed for direct or
consequential damages resulting from
the improper use of the tool.
The national safety and occupational
safety regulations and the safety
precautions given in this operating
manual
10. DISPOSAL
Separate collection. Local
regulations may provide for
separate collection of electrical
products from the household, at
municipal waste sites or by the
retailer when you purchase the
new product.
Separate collection of packaging
and failed rechargeable battery
in accordance with the recycling
regulations applicable in your
country.
ICCONS® Pty Ltd
12-18 Produce Drive
Dandenong South
Victoria, 3175
Australia
Tel: +61 (03) 9706 4344
Fax: +61 (03) 9768 3329
Email: inf[email protected]om.au
Web: www.iccons.com.au

This manual suits for next models
1
Table of contents
Other Iccons Nail Gun manuals
Popular Nail Gun manuals by other brands

Power Shot
Power Shot PRO 9100 instruction manual

Central Pneumatic
Central Pneumatic 93656 Assembly and operating instructions

Central Pneumatic
Central Pneumatic 68020 owner's manual

Powermate
Powermate PM-GZP-18GAM user manual

Bostitch
Bostitch N100C Operation and maintenance manual

Makita
Makita GN01 instruction manual