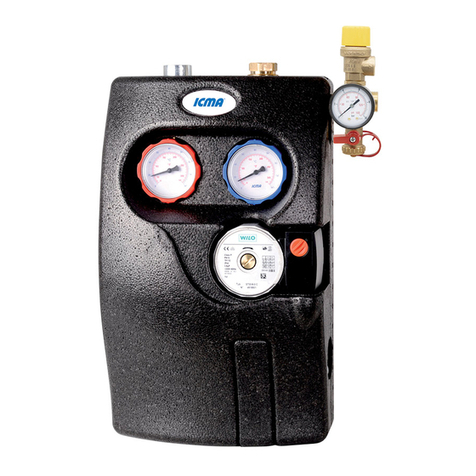
ICMA TAS001 User manual

Solar module
Art. TAS001
1
Function
Technical specications
Product range
The solar module is employed in the primary circuits of solar
systems to manage the thermodynamic cycle of the heat-transfer
uid between the solar panels and the hot water storage tank.
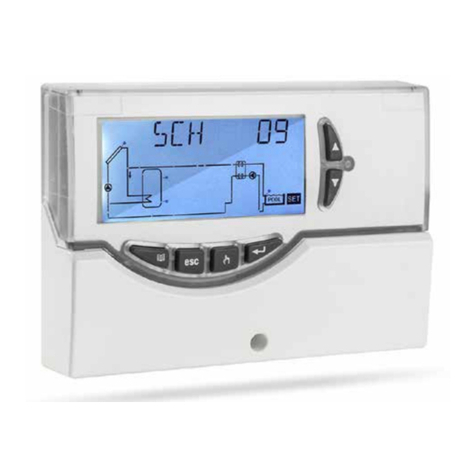
The TAS001 module is also equipped with electronic controller which,
through a sophisticated monitoring system and safety functions,
ensures the total protection of the system during its operation.
PERFORMANCE
Fluids used: Water and glycol solutions
Maximum percentage of glycol: 50%
Maximum operating pressure: 10 bar
Calibration of safety valve: 6 bar
Temperature of the heat transfer uid: See circulator specications page 7
Safety valve temperature range: +160°C
Minimum pressure on the intake side: See circulator specications page 7
Opening check valves minimum pressure: Δp: 2Kpa (200 mm c.a.)
Manometer scale: 0 ÷ 10 bar
Thermometers scale: 0 ÷ 160°C
Circulators: See circulator specications page 7
Art. Size Circulator
Circulator control
signal PWM signal
cable Code
ON/OFF PWM
TAS001 ●3/4" Wilo ST 20/6 √X X TAS001AE05
TAS001●3/4" Grundfos 15/6 √X X TAS001AE05G
TAS001 3/4” Taco ES2 15-70/130 √X X TAS001AES05166
TAS001 3/4” UPM3 15-75
ELECTRONIC CIRCULATOR √ √ NOT INCLUDED* TAS001AE05S163
TAS001 3/4” Wilo RSTG 15/7.5
ELECTRONIC CIRCULATOR √ √ INCLUDED TAS001AE05S164
TAS001 3/4” Wilo Para ST 15/6
ELECTRONIC CIRCULATOR √X X TAS001AE05S165
● Products equipped with circulators “Wilo ST 20/6” and “Grundfos 15/6” are intended for sale in non-EU countries.
*To be purchased separately in case of connection with electronic controller with PWM signal.

Solar module
Art. TAS001
2
0120
Interception valve
Legenda
Pump
CONNECTIONS
System connections: G3/4” M
Safety valve connections : G1/2” F
Connection with expansion tank: G3/4” M
Filling/emptying connections with hose: Ø13 mm
MATERIALS
Brass components: Brass CW617N - EN 12165
Seals: PTFE
Sealing elements: EPDM Perox
Flat seals: Betaex
Insulation shell: PPE
Conductivity of isulation shell λ(ΔT): 0.041 (W/mK)
Principle of operation
Icma solar module TAS001 is employed in the primary circuits of solar systems to manage the thermodynamic cycle
of the heat-transfer uid between the solar panels and the hot water storage tank.
In thermal solar panels the solar radiation increases the heat-transfer uid temperature and therefore its thermal
power.
In the storage tank, instead, the heat-transfer uid carries through a heat exchanger most of its heat to the water in
the tank.
The hot water in the tank will be then
used for space heating or domestic
use.
The solar module manage this
process and is equipped with a
circulator pump having proper
performances (ow and head) as
well as several regulation and control
devices that run the operation of the
circuit.

Solar module
Art. TAS001
3
Components
Dimensions
310 140
480
140
60
155
370 70
425
G ¾”M
G ¾”M G ¾”M
G ¾”M
8
9
2
112
13
11
10
3
4
5
6
3
7
1. Safety valve for solar energy systems
2. Instrument holder connection with manometer
3. Taps for lling, emptying and washing the system
4. Shut o valve with thermometer and built-in check valve
5. Circulator
6. Pump connector
7. Flowmeter
8. Shut o valve with thermometer and built-in check valve
9. Deaerator
10. Preformed insulating base
11. Hose connection
12. Preformed insulating cover
13. Inspection compartment insert
Tab. 1
Tab. 2

Solar module
Art. TAS001
4
Filling the system
Technical specications
The solar module receive a signal from the external controller which, having at least two temperature sensors (one
is positioned on the panel outlet pipe and the other is an immersion sensor in the boiler), constantly reads the
temperature dierence and keeps it within the established range, which normally varies between 5 and 8 °C. If the
Δt between the panel and the boiler is found to be over the established set point, the controller starts up the pump
on the module to provide the lacking thermal load. If, on the other hand, the Δt is narrower than the one set, the
internal pump will be disabled.
For further clarication about the electronic controller functioning, consult the technical documentation about
art. S303 and S305.
1. Open the shut o valves connected with the air vent valves (Pict.1). These valves must be located at the highest
point of the system to optimize their function of air expulsion from the circuit.
2. Open both the shut o valves 4 and 8 (Table1-page 3) turning their handles to 45° (see the operating specications
of these valves on pagee 11 of
this data sheet).
3. 3. Fully open the ow meter 7
(Table1-page 3) carrying the
reference mark of the ow
meter in vertical position (see
operating specications on
page 10). Check that the drain
tap 3 is closed.
4. 4. Connect an external pump
to the tap 3 of the instrument
holder connection 2 (Table1-
page 3) with a rubber pipe. This
pump will get the heat-transfer
uid, previously prepared, from
an external container.
5. 5. Open the tap 3 of the
instrument holder connection
2 (Table1-page 3) and start the
external pump to ll the system
6. Fill the system until air stops
coming out of the air vent
valves (Pict.1).
7. Close the tap 3 and disconnect
the external pump.
8. Close the shut o valves
connected with the air vent
valves (Pict.1).
0120
Air vent valve
Legenda
Pump
Fig. 1
Shut-off valve

Solar module
Art. TAS001
5
Emptyng the system
Start-up
Washing the system
1. Open both the shut o valves 4 and 8 (Table1-page 3) turning their handles to 45° (see the operating specications
of these valves on page 11 of this data sheet).
2. Close the ow meter 7 (Table1-page 3), carrying the reference mark of the owmeter in horizontal position (see
operating specications on page 10).
3. Connect the drain cock 3 of the ow meter 7 (Table1-page 3) to a point of discharge using a rubber pipe.
4. Connect an external pump to the tap 3 of the instrument holder connection 2 (Table1-page 3) with a rubber pipe.
This pump will get the washing liquid (or the new heat-transfer uid) from an external container.
5. Start the external pump and open both taps 3, the washing uid will enter into the system while the one inside
will be discharged through the lower tap 3 of the ow meter 6 (Table1-page 3).
6. Open slightly and for a ⚠ short time ⚠ the ow meter 7 (Table1-page 3) to let the washing uid running also
through the system pump.
7. For a proper washing let the pump running for a ⚠ few minutes ⚠, then close the taps, switch o the pump
and disconnect the rubber pipes.
1. The system must be emptied if it has been lled with water only and will be exposed to a risk of freezing..
2. Open the shut o valves connected with the air vent valves (Pict.1).
3. Open both the shut o valves 4 and 8 (Table1-page 3) turning their handles to 45° (see the operating specications
of these valves on page 11 of this data sheet).
4. Open the drain cock of the owmeter 7 (Table1-page 3) or the tap located at the lowest point in the system.
1. Connect an external pump to the tap 3 of the instrument holder connection 2 (Table1-page 3) The pump is used
to increase the pressure in the system.
2. Operate the pump, open the tap 3 and increase the system pressure to the maximum operating value of the solar
thermal system. Read the pressure value on the manometer 2 (Table1-page 3), then close the tap 3 and stop the
pump.
3. Open the shut o valves 4 and 8 (Table1-page 3) by turning them counter-clockwise until they stop.
4. Fully open the owmeter 7 (Table1-page 3) carrying the reference mark of the owmeter in vertical position (see
operating specications on page 10). Check that the drain cock 3 is closed.
5. Start the circulator 5 (Table1-page 3).
6. Let the system running for a while, check the hydraulic seals of the system.
7. Open both the shut o valves 4 (Pict.1) and let drain any remaining air in the system, then close the valves.
8. Stop the circulator 5 (Table1-page 3)
9. Restore the pressure to the desired operating value as described above in step 2.
10. The system ow can be regulated by using the owmeter 7 (Table1-page 3), and reading the ow value on the
scale “ow indicator” (see operating specications on page 10). During this operation, the circulator 5 has to run
at its maximum power. To choose the ow rate suitable to the system follow the instructions of the solar panels
manufacturer.
11. After a few hours of operation, remove air from the solar system once again with the air vent valves A (Pict.1)
and the deaerator 9 (Table1-page 3). After all air has been removed, check once again the pressure in the system
with the manometer 2 (Table1-page 3) and, if necessary, restore the desired operating value as described above
in step
⚠ WARNING: It is necessary to comply with the warnings and instructions provided by the supplier of washing liquid.

Solar module
Art. TAS001
6
Installazion and wall mounting
The xing of the delivery part (A) and return part (B) to the insulation shell (C) and the supporting plate (D) is made
in the factory by two screws and two washers in the holes (E).
The dowels for the wall xing are optional.
To install the solar module please proceed as follows:
1. Lay the pipes inside the solar system, leaving enough space for the solar module considering the measures
reported in Tab.2 (page 3).
2. Dene the positioning of the module on the wall and mark the position of the 3 holes for the xing (F).
3. Drill the wall and insert the dowels (dowels are not included).
4. Fix the solar module to the wall and connect it to the system pipes.
5. Check that all unions are properly tight.
6. Proceed with the electrical wiring.
B
A
C
D
E
FE
F

Solar module
Art. TAS001
7
Art. S160 - Synchronous circulation pump
with 3 speeds
Art. S160G - Synchronous circulation pump
with 3 speeds
HYDRAULIC CHARACTERISTICS
Circulators range
Technical specications
Brand: Wilo
Model: Solar ST20/6
Centre to centre distance 130 mm.
Connections: G1” M
Electrical power supply: 230 V - 50/60 Hz
Operating temperature: 2 ÷ 110°C
Max temperature: 140°C for short periods
Max operating pressure: 10 bar
Protection level: IP44
Energy class (EEI): C
Maximum percentage of glycol: 50%
Minimum pressure on the intake side: 0,049 bar
Technical specications
Brand: Grundfos
Model: Solar 15/65
Centre to centre distance 130 mm.
Connections: G1” M
Electrical power supply: 230 V - 50/60 Hz
Operating temperature: 2 ÷ 110°C
Max temperature: 140°C for short periods
Max operating pressure: 10 bar
Protection level: IP44
Energy class (EEI): C
Maximum percentage of glycol: 50%
Minimum pressure on the intake side:
● T=85°C 0,049 bar
● T=90°C 0,270 bar
● T=110°C 1,080 bar
0
0
1
2
3
4
5
6
7
0,5 1 1,5
Water flow (m3/h)
Head (m)
2 3 42,5 1,5
0.0
0
1
2
3
H [m]
QH Chart
4
5
6
7
0.2 0.4 0.6 0.8 1.0 1.2 1.4 1.6 1.8

Solar module
Art. TAS001
8
HYDRAULIC CHARACTERISTICS
S163 - Circulator with 4 constant curves, 4 PWM
curves prole C
Art. S165 - Circulator with 3 constant curves,
ΔP variable
Technical specications
Brand: Grudfos
Model: UPM3 SOLAR 15-75 130
Centre to centre distance 130 mm.
Connections: G1” M
Electrical power supply: 230 V - 50Hz
Working temperature (cast iron body): 2 ÷ 110°C
Working temperature (PPS body): 2 ÷ 95°C
Max temperatura (cast iron body): 130°C for short periods
Max operating pressure: 10 bar
Protection level: IPX4D
Energy class (EEI): ≤0.20
PWM signal cable code: C64P3280153 (NOT INCLUDED)
Maximum percentage of glycol: 50%
Minimum pressure on the intake side:
● T=75°C/95°C/110°C 0,050 bar
Technical specications
Brand: Wilo
Model: Para 15-6
Centre to centre distance 130 mm.
Connections: G1” M
Electrical power supply: 230 V - 50/60 Hz
Operating temperature:
● Ambient temperature = 58°C 2 ÷ 100°C
● Ambient temperature = 62°C 2 ÷ 90°C
● Ambient temperature = 66°C 2 ÷ 80°C
● Ambient temperature = 71°C 2 ÷ 70°C
Max operating pressure: 10 bar
Protection level: IPX4D
Energy class (EEI): ≤0.20
Maximum percentage of glycol: 50%
Minimum pressure on the intake side:
● T=85°C 0,049 bar
● T=90°C 0,270 bar
0.0
0
1
2
3
4
5
6
7
8
9
0.5 1.0
Constant Curve PWM MIN
1.5 2.0 2.5 3.0
Q [m3/h]
H [m]

Solar module
Art. TAS001
9
Technical specications
Brand: Grudfos
Model: UPM3 SOLAR 15-75 130
Centre to centre distance 130 mm.
Connections: G1” M
Electrical power supply: 230 V - 50Hz
Working temperature (cast iron body): 2 ÷ 110°C
Working temperature (PPS body): 2 ÷ 95°C
Max temperatura (cast iron body): 130°C for short periods
Max operating pressure: 10 bar
Protection level: IPX4D
Energy class (EEI): ≤0.20
PWM signal cable code: C64P3280153 (NOT INCLUDED)
Maximum percentage of glycol: 50%
Minimum pressure on the intake side:
● T=75°C/95°C/110°C 0,050 bar
Technical specications
Brand: Wilo
Model: Para 15-6
Centre to centre distance 130 mm.
Connections: G1” M
Electrical power supply: 230 V - 50/60 Hz
Operating temperature:
● Ambient temperature = 58°C 2 ÷ 100°C
● Ambient temperature = 62°C 2 ÷ 90°C
● Ambient temperature = 66°C 2 ÷ 80°C
● Ambient temperature = 71°C 2 ÷ 70°C
Max operating pressure: 10 bar
Protection level: IPX4D
Energy class (EEI): ≤0.20
Maximum percentage of glycol: 50%
Minimum pressure on the intake side:
● T=85°C 0,049 bar
● T=90°C 0,270 bar
Art. S164 - Circulator with 3 constant curves,
ΔP variable, 2 PWM curves
Technical specications
Brand: Wilo
Model: Yonos PARA RSTG 15/7.5 RK
Centre to centre distance 130 mm.
Connections: G1” M
Electrical power supply: 230 V - 50/60 Hz
Operating temperature:
● Ambient temperature = 52°C 2 ÷ 110°C
● Ambient temperature = 57°C 2 ÷ 95°C
● Ambient temperature = 60°C 2 ÷ 90°C
● Ambient temperature = 67°C 2 ÷ 70°C
Max temperature: 130°C for short periods
Max operating pressure: 10 bar
Protection level: IPX4D
Energy class (EEI): ≤0.21
Maximum percentage of glycol: 20%
Minimum pressure on the intake side:
● T=50°C 0,049 bar
● T=95°C 0,441 bar
● T=110°C 1,079 bar
HYDRAULIC CHARACTERISTICS

Solar module
Art. TAS001
10
HYDRAULIC CHARACTERISTICS
Art. S166 - Circulator with 1 proportional-pressure curve - min-max mode – Fixed speed
Technical specications
Brand: Taco
Model: ES2 solar 15-70
Centre to centre distance 130 mm.
Connections: G1” M
Electrical power supply: 230 V - 50/60 Hz
Operating temperature:
● Ambient temperature = 30°C 30 ÷ 110°C
● Ambient temperature = 35°C 35 ÷ 90°C
● Ambient temperature = 40°C 40 ÷ 70°C
Max operating pressure: 10 bar
Protection level: IP44
Energy class (EEI): ≤0.21
Maximum percentage of glycol: 50%
Minimum pressure on the intake side:
● T=85°C 0,049 bar
● T=90°C 0,270 bar
● T=110°C 1,080 bar
min
max
PP
0
1050 15 Q [US.gpm]
Q [m3/h]
Q [l/s]
0.5 1.0 1.5 2.0 2.5 3.0 3.5 4.00.0
0.0 0.2
H [m]
Q [IMS.gpm]105
6
7
5
4
3
2
1
0
H [ft]
20
15
10
5
0
0.4 0.6 0.8 1.0
min - max
max
min

Solar module
Art. TAS001
11
Flow meter
Flow rate reading
The owmeter 7 (Tab.1-page 3) is an instrument to measure the ow of the heat-transfer uid circulating in the
system.
It is possible to read in real time the value of the ow in the circuit with the ow indicator (Fig.3), This device is
equipped with a glass having a graduated rate of ow scale, with a calibration spring and with a movable indicator
that varies its position according to the ow inside the glass. The ow rate reading are explained the paragraph
below.
The ow meter is also equipped with a manual ow regulator, adjustable with a screwdriver.
For proper operation, the ow meter must be installed in a vertical position.
The scale range is 0-12 l/min.
Flow controller
Open position
Example of reading: 5 l/min
Vertical screwdriver
cut
Close position
Horizontal
screwdriver cut
CONTROLLER CONTROLLER
Drain cock
Flow indicator
Graduated rate
of scale (l/min)
Level
indicator
Fig. 3
Fig. 4

Solar module
Art. TAS001
12
45°
Shut/o valve and check valve
Deaerator
The group is equipped with shut-o valves with thermometer and built-in check valve 4 and 8 (Table1-page 3). The
valves intercept the delivery and return ow to let ll, wash and discharge the system. They also enable a quick and
easy replacement of the pump without emptying the system.
The shut-o valves are also equipped with check valves which ensure the proper ow of the heat-transfer uid inside
the solar circuit preventing undesired reuxing when the pump is not working
1. To fully close the shut-o valves turn the regulatig handles clockwise until they stop (Pict.5).
2. To allow the uid to pass through the valves in both directions and open the check valve, turn the regulating
handles to 45° (Pict.6).
3. During the normal operating cycle instead, the valves must be in the position shown in Pict.7 by turning the
regulating handles counter-clockwise until they stop.
The solar modules S001, S002, and S004 is equipped with a deaerator 9 (Table1-
page 3).
During the normal functioning of the solar circuit, the air present in the heat-
transfer uid is separated and collected in the upper part of the deaerator.
During the start-up, the air collected in the deaerator has to be periodically
discharged by the manual air vent located in the upper part of the deaerator
by turning its spindle counter-clockwise with a screwdriver. After discharging
all the air in the deaerator, close the vent by turning its spindle clockwise until
it stops.
Once the star-up is completed, for a rst period, this operation must be repeated
every month.
Then it will be sucient to repeat this operation every 6 months to mantain the
solar system ecient.
Reference
notches Reference
notches
Reference
notches
Open
passage
Pict. 5 Pict. 6 Pict. 7
RISK OF BURNS!
When bleeding the system, depending on the pressure and temperature of the heat-transfer uid in the system,
opening the air vent may cause a high-speed jet of high-temperature liquid or water vapour, dangerous for the operator.
To prevent any accidents, please follow these instructions:
- Wear appropriate protective equipment to protect hands and face.
- Carefully turn the air vent
- Keep your face away from the deaerator to avoid accidental burns.
- Protect all components and electrical connections from water.

Solar module
Art. TAS001
13
Safety
Operating conditions
Safety standards for assembly and inspection
Electrical connections
Maintenance
Read assembly and operating instructions carefully before starting up the system in order to prevent accidents and
damage to the system caused by improper use. Remember that your rights under the warranty will be forfeited if
you make any changes to the system or tamper with it during assembly and construction without authorisation.
In addition, you must follow the requirements of the regulations listed below:
The limits on operating values specied must not be exceeded under any circumstances. Safe operation is guaranteed
if you comply with the general conditions and limits on operating valves described in this information sheet.
Assembly and inspection operations must always be performed by qualied, authorised personnel familiar with the
instructions contained herein. Make sure the system is shut down before performing any work on it.
Electrical connections must be made by qualied personnel. Connecting cables must be positioned in the cavity
provided for the purpose in the insulating shell so as to avoid contact with the body of the pump motor and with
pipes.
Check that the power supply voltage is as specied on the plate before turning on the pump. All connections must
be made as required by law.
Maintenance work must always be performed by qualied, authorised personnel familiar with the instructions
contained herein. Make sure the system is shut down before performing any work on it. When replacing the pump,
turn the on/o valve, return connection4 (Table1-page 3) and ow control valve 7 (Table1-page 3) to the o position.
WARNING! Depending on operating conditions in the pump and the system, the surface temperature
could be very high. Touching the pump directly comports a risk of burning!
Table of contents
Other ICMA Control Unit manuals
Popular Control Unit manuals by other brands

WABCO
WABCO MICO ACV-DMO-RV Product Explanation, Operating Information, and Service Instructions

Woodward
Woodward 9907-252 Installation and operation manual

Comelit
Comelit VEDO operating manual

Bosch
Bosch MM100 Installation instructions for installers

Sony
Sony CCU-700A Maintenance manual

nologo
nologo START-S9PV Manual for the installer

White Rodgers
White Rodgers 50T35-743 installation instructions

Leroy-Somer
Leroy-Somer R 450 M Installation and Maintenance

Power Dynamics
Power Dynamics PDVC100 instruction manual

Parrot
Parrot FC6100 ASPEN Use manual

SMC Networks
SMC Networks ASR Series instruction manual

Monacor
Monacor PA-1200EX Mounting instructions