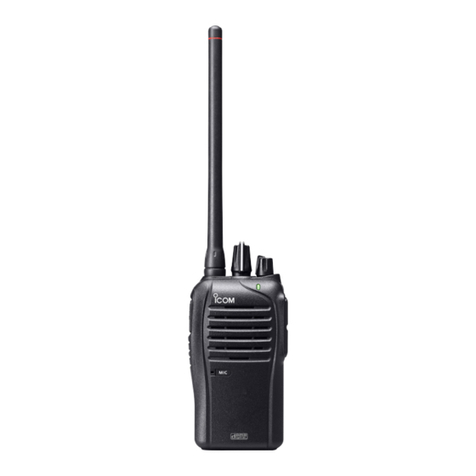
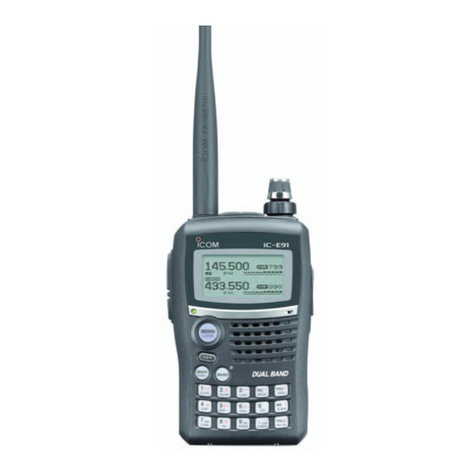
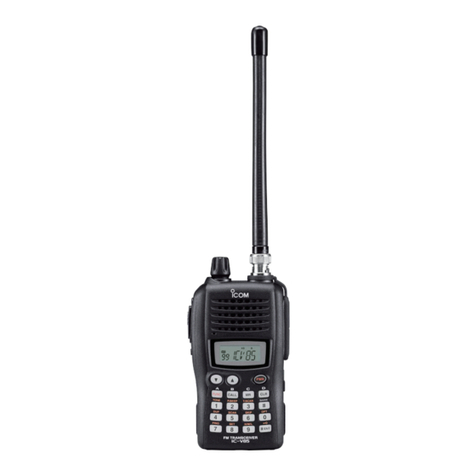
Icom IC-A16 Installation instructions

FULL MANUAL
INDEX
11 TROUBLESHOOTING
10 SPECIFICATIONS AND OPTIONS
9 SET MODE
7 OTHER FUNCTIONS
6 MEMORY OPERATION
5 SCAN OPERATION
4 BASIC OPERATION
3 BATTERY CHARGING
2 PANEL DESCRIPTION
1 ACCESSORIES ATTACHMENTS
INTRODUCTION
iA16
iA16E
VHF AIR BAND TRANSCEIVERS
8 HEADSET CONNECTION

i
INTRODUCTION
Thank you for choosing this Icom product.
This product is designed and built with Icom’s state of the art technology and craftsmanship.
With proper care, this product should provide you with years of trouble-free operation.
Important
READ ALL INSTRUCTIONS carefully before using the transceiver.
This FULL MANUAL contains advanced features and operating instructions for the IC-A16 and IC-A16E.
READ also the BASIC MANUAL that supplied with the transceiver.
KEEP MANUALS, because it contains important operating information that may be useful in the future.
Icom, Icom Inc. and the Icom logo are registered trademarks of Icom Incorporated (Japan) in Japan, the United States, the
United Kingdom, Germany, France, Spain, Russia, Australia, New Zealand and/or other countries.
The Bluetooth®word mark and logos are registered trademarks owned by Bluetooth SIG, Inc. and any use of such marks by
Icom Inc. is under license.
Other trademarks and trade names are those of their respective owners.
3M, PELTOR, and WS are trademarks of 3M Company.
All other products or brands are registered trademarks or trademarks of their respective holders.
Table of contents
INTRODUCTION..................................................... i
■Important ....................................................... i
1 ACCESSORIES ATTACHMENTS .................... 1
■Supplied accessories .................................... 1
■Attaching accessories ................................... 1
2 PANEL DESCRIPTION ..................................... 4
■Front, top, and side panels............................ 4
■Keypad .......................................................... 4
■Function display ............................................ 5
3 BATTERY CHARGING ..................................... 6
■Battery charger.............................................. 6
4 BASIC OPERATION ......................................... 7
■Receiving and transmitting............................ 7
■Selecting the 121.5 MHz emergency frequency
. 7
5 SCAN OPERATION .......................................... 8
■Using the Scan function ................................ 8
■Scan types..................................................... 8
■TAG setting.................................................... 8
6 MEMORY OPERATION .................................... 9
■Description .................................................... 9
■Editing Memory channels.............................. 9
7 OTHER FUNCTIONS........................................ 11
■Using the Home function............................... 11
■Using a Weather channel.............................. 11
■Using the Duplex function ............................ 11
8 HEADSET CONNECTION ................................ 12
■Using a Bluetooth®headset ......................... 12
■Using a wired headset................................... 13
9 SET MODE........................................................ 14
■Using the Set mode....................................... 14
■Set mode items ............................................. 14
10
SPECIFICATIONS AND OPTIONS................... 16
■Specications ............................................... 16
■Options.......................................................... 17
11 TROUBLESHOOTING...................................... 18
■Troubleshooting............................................. 18
INDEX..................................................................... 19
1
1ACCESSORIES ATTACHMENTS
Supplied accessories
Antenna
Belt clip HandstrapBattery pack
Power adapter*Battery charger*
* May not be supplied, or the shape may be different, depending on the transceiver version.
Attaching accessories
DAntenna
Connect the supplied antenna to the antenna
connector.
CAUTION:
• DO NOT carry the transceiver by holding only the
antenna.
•DO NOT connect an antenna other than the
supplied antenna, or those listed in this manual.
•DO NOT transmit without an antenna.

ACCESSORIES ATTACHMENTS
2
1
DBattery pack/Battery case
To attach:
1. Slide the battery pack in the direction of the arrow.
(q)
2. Push the battery pack until the battery sliding
locks make a ‘click’ sound. (w)
To detach:
1. Pull both battery sliding locks in the direction of
the arrow. (z)
• The battery pack is then released.
2. Lift up to detach the battery pack. (x)
CAUTION: DO NOT attach or detach the battery
pack or the battery case when the transceiver is wet
or soiled. This may result in water or dust getting into
the transceiver, battery pack, or battery case and
may damage them.
NOTE: Keep the battery pack terminals clean. It’s a
good idea to occasionally clean them.
q
w
q
Battery pack
Battery sliding locks
z
z
x
Attaching accessories (Continued)

ACCESSORIES ATTACHMENTS
3
1
Attaching accessories (Continued)
DBelt clip
To attach:
1. Remove the battery pack from the transceiver, if it
is attached.
2. Slide the belt clip in the direction of the arrow until
the belt clip is locked and makes a ‘click’ sound.
To detach:
Lift the tab up (1), and slide the belt clip in the
direction of the arrow (2).
BE CAREFUL! Don’t break your ngernail.
Belt clip
2
1

4
2PANEL DESCRIPTION
Front, top, and side panels
1
2
Microphone
3
4
5
6
7
8
9
Keypad
1ANTENNA CONNECTOR
Connect the supplied antenna. (p. 1)
2PTT SWITCH [PTT]
Hold down to transmit, release to receive. (p. 7)
3SQUELCH ADJUSTMENT KEYS [SQL∫]/[SQL√]
Push to adjust the squelch level.
4UP/DOWN KEYS [∫]/[√]
zPush to change or select the frequency, Memory
channel, Set mode settings, and so on.
zWhile scanning, push to change the scanning
direction.
5CLEAR/HOME KEY [CLR]/[HOME]
zPush to return to the VFO mode.
zHold down for 2 seconds to reset the Set mode
settings to default.
6MEMORY/MEMORY WRITE KEY [MR]/[MW]
zPush to enter the Memory Channel Selection
mode. (p. 7)
zPush [FUNC], and then push this key to enter the
Memory Write mode. (p. 9)
7 HEADSET JACK
Connects a third party headset through the optional
headset adapter. (p. 13)
8LOCK KEY [ ]
zPush to lock the keypad.
zHold down for 2 seconds to unlock the keypad.
9 VOLUME/POWER SWITCH [VOL]
zRotate to turn the transceiver ON or OFF.
zRotate to adjust the audio output level.
Keypad
zPush to set the frequency, select a Memory
channel, and so on.
zPush [FUNC], and then push or hold down another
key within 3 seconds to use the secondary functions
listed below.
KEYS FUNCTIONS
Push [1]/[ANL] Turn the Automatic Noise
Limiter (ANL) function ON or
OFF.
Push [2]/[SCAN] Start a scan.
LPush [CLR] to stop a scan.
Push [3]/[GRP] In the Memory mode, enter
the Memory Selection mode.
Push [4]/[WX-ALT]* Turn the Weather Alert
function ON or OFF.
Push [5]/[DUP-W]* Enter the Duplex Frequency
Entry mode.
LConrm the NAV band
frequency is selected.
Push [6]/[DUP]* Turn the Duplex function ON
or OFF.
LConrm the NAV band
frequency is selected.
Push [7]/[WX]* Enter the Weather Channel
Selection mode.
Push [8]/[BEEP] Turn the Key beep ON or OFF.
Push [9]/[TAG] Tag or untag the selected
Memory channel or Weather
Channel*.
Hold down
[ENT]/[SET] for 1
second
Enter the Set mode.
Push [0]/[121.5] Select the emergency
frequency.
*For only the USA version.

PANEL DESCRIPTION
5
2
Function display
1 2 3 4 5 6
7
8 9
1FUNCTION ICON
Displayed for 3 seconds when you push [FUNC], to use secondary functions assigned to a key.
2MEMORY CHANNEL ICON
Displayed when a Memory channel is selected. (p. 7)
3TAG ICON
Displayed when a tagged Memory channel is selected. (p. 8)
4BLUETOOTH ICON (For only the transceiver with the built-in Bluetooth unit)
Displayed when a Bluetooth headset is connected. (p. 12)
5RX/TX ICON
Displayed while receiving or transmitting. (p. 7)
6DUPLEX ICON
zDisplayed when the Duplex function is ON. (p. 11)
zBlinks while entering a duplex frequency into a Memory channel. (p. 11)
7 AUTOMATIC NOISE LIMITER ICON
Displayed when the Automatic Noise Limiter function is ON. (p. 7)
8WEATHER ALERT ICON (For only the USA version.)
Displayed when the Weather Alert function is ON. (p. 11)
9 LOCK ICON [ ]
Displayed when the Lock function is ON. (p. 4)
LOW BATTERY ICON
zDisplayed when charging is required.
zBlinks when the battery exhausted.

6
3BATTERY CHARGING
Battery charger
NOTE: Before attaching or detaching a battery pack, BE SURE to turn OFF the transceiver by rotating [VOL] fully
counter clockwise until it makes a “click” sound. Otherwise, a transceiver malfunction could occur.
DSupplied battery charger
Charging time:
Approximately 3.5 hours for the BP-280
The CP-23L (for a 12 V cigarette lighter socket) can
be used instead of the power adapter.
* May not be supplied, or the shape may be different,
depending on the transceiver version.
NOTE: If the charging indicator alternately blinks
green and orange, remove the battery pack or the
transceiver from the charger, then reinsert it.
Power adapter*
Battery
pack
Battery
charger
Charging indicator
Lights orange: Charging
Lights green: Charged
Turn OFF
DOptional BC-214 MULTI CHARGER
Charging time:
Approximately 2 to 3 hours for the BP-280
Additionally needed item (purchase separately):
The BC-157S AC ADAPTER or
the OPC-656 DC POWER CABLE
CAUTION: DO NOT reverse the polarity when
connecting the OPC-656 to a power source. This will
ruin the battery charger.
Red: +, Black: _
Turn OFF
Power
adapter*
Battery
pack
Charger adapter*2OPC-656
Connect to a DC power supply:
12 to 16 V, at least 7 A
Red: +, Black: _
*1A different type, or no power adapter is supplied,
depending on the charger version.
*2Charger adapter’s shape may differ, depending on
the charger version.
To an
AC outlet

7
4BASIC OPERATION
Receiving and transmitting
DSetting the frequency
LIf the transceiver is in the Memory mode, push
[CLR]/[HOME] to exit the Memory mode.
zUse the keypad to set the frequency.
Selecting a Memory channel
1. Push [MR]/[MW] to enter the Memory mode.
• “ ” is displayed.
• The memory channelʼs frequency or name is
displayed, if it is entered.
2. Push [∫] or [√] to select a channel.
TIP: To change the selected group:
L Conrm the transceiver is in the Memory mode.
1. Push [FUNC], and then push [GRP].
2. Push [∫] or [√] to select a group, and then
push [ENT]/[SET].
DReceiving
When receiving a signal, “RX” is displayed and audio
should be heard.
LRotate [VOL] to adjust the audio output level.
DAdjusting the squelch level
zPush [SQL∫]/[SQL√] to adjust the squelch level
until the noise just disappears when no signal is
received.
• The squelch level is displayed while adjusting.
DUsing the Automatic Noise Limiter
(ANL) function
The function reduces noise components in the
received signal, such as those caused by engine
ignition systems.
zPush [FUNC], and then push [ANL] to turn the
function ON or OFF.
• “ANL” is displayed while the function is ON.
DTransmitting
CAUTION: DO NOT transmit without an antenna.
zHold down [PTT], and then speak at your normal
voice level.
• “TX” is displayed.
NOTE: When the battery is exhausted, beep sounds
and the transceiver stops transmitting, even if you
hold down [PTT].
In case of an emergency, you can immediately select
the 121.5 MHz emergency frequency.
zPush [FUNC], and then push [121.5] to select the
emergency frequency.
LPush [CLR] to return to the previously selected
frequency.
Selecting the 121.5 MHz
emergency frequency

8
5SCAN OPERATION
The transceiver has 2 scan functions, as shown below.
DVFO scan
Repeatedly scans all frequencies over the COM band.
*The USA version transceiver scans NAV band
frequencies as well, depending on the presetting.
DMemory channel scan
Repeatedly scans tagged memory channels belonging
to the same group.*
*Skips all untagged memory channels.
DWeather channel scan
(For only the USA version)
Repeatedly scans Weather channels. See page 11 for
details.
Scan types
Mch 1
Mch 2
Mch 3
Mch 10
Untagged
channel
Using the Scan function
zPush [FUNC], and then push [2]/[SCAN] to start a
scan.
LPush [▲] or [▼] to change the scanning direction.
LWhen receiving a signal, the scan pauses and “RX” is
displayed until the signal disappears.
LPush [CLR]/[HOME] to stop a scan.
TAG setting
Select whether or not to tag selected channels for
scanning. Untagged channels are skipped during a
scan.
1. Push [MR]/[MW] to enter the Memory mode.
2. Select a channel to tag or untag.
3. Push [FUNC], and then push [9]/[TAG] to tag or
untag the selected channel.
L“ ” is displayed if the channel is tagged.
TIP: To change the selected group:
1. Push [FUNC], and then push [3]/[GRP].
2. Push [▼] or [▲] to select a group, and then
push [ENT]/[SET].
Scan
Jump
118.000
MHz
108.000
MHz 136.9917 MHz
NAV band* COM band

9
6MEMORY OPERATION
Description
The transceiver has 200 memory channels to save
often-used frequencies. The frequency and channel
name can be saved into each memory channel.
NOTE:
• Editing Memory channels may be disabled,
depending on the transceiver’s presetting. Ask your
dealer for details.
• Preset Memory channel contents may differ, or
nothing may be preset.
DEntering frequencies into the Memory
channels
You can enter often-used frequencies by following the
steps below.
1. Setting the frequency to enter
zUse the keypad, or push [▲] or [▼] to set the
frequency.
LConrm the VFO mode is selected.
2. Selecting a channel to enter the frequency
1. Push [FUNC], and then push [MR]/[MW] to enter
the Memory Write mode.
• “MCH” blinks.
2. Push [▲] or [▼] to select a channel to enter the
frequency.
LThe group and channel number is displayed for
1 second, when the channel without a name or
frequency is entered.
3. Push [ENT] to enter the frequency into the
Memory channel.
• The transceiver automatically returns to the VFO
mode.
DEntering/Editing the Memory channel
name
The memory channel can display an 8 character
name instead of the channel frequency.
To enter a memory name, or edit a existing memory
name, follow the steps below.
1. Selecting the channel to enter/edit the name
1. Push [FUNC], and then push [MR]/[MW] to enter
the Memory Write mode.
• A memory channel name may be displayed.
2. Push [▲] or [▼] to select a channel to edit.
2. Entering/editing the name
1. Push [MR]/[MW].
• “MCH” blinks.
2. Enter a memory name.
LYou can enter the characters A to Z, 0 to 9, -, and a
space.
Usable characters and key assignment:
InformationL
• Push [ ] to enter a dot.
• Push [▼] or [▲] to move the cursor.
• The cursor automatically moves forward when a
different key is pushed.
• Push [CLR] to cancel entering or editing.
• To erase a character, overwrite with a space
(displayed as “_”).
3. Push [ENT] to save the entered name and exit the
Memory Write mode.
TIP: To change the selected group:
1. Push [FUNC], and then push [3]/[GRP].
2. Push [▼] or [▲] to select a group, and then
push [ENT]/[SET].
Editing Memory channels
12ABC 3DEF
4GHI 5JKL 6MNO
8TUV7PQRS 9WXYZ
0,-,Space

MEMORY OPERATION
10
6
Editing memory channels (Continued)
DCopying a frequency from a Memory
channel
You can copy the selected channelʼs frequency to the
VFO mode. The function is useful to search signals
around the selected channelʼs frequency.
1. Push [MR]/[MW] to enter the Memory mode.
2. Push [▲] or [▼] to select a channel to copy.
3. Push [FUNC], and then push [MR]/[MW] to copy
the channelʼs frequency.
• The frequency is copied into the VFO mode.
DDeleting a Memory channel
You can delete an unwanted memory channel.
1. Push [MR]/[MW] to enter the Memory mode.
2. Push [▲] or [▼] to select a channel to delete.
3. Push [FUNC], and then push [CLR].
• “DELETE?” is displayed.
4. Push [ENT] to delete the channel.

11
7OTHER FUNCTIONS
Using the Home function
The Home function resets the Set mode settings to
default.
zHold down [CLR]/[HOME] for 2 seconds to reset the
transceiver to its default settings.
Using a Weather channel
(For only the USA version)
The transceiver has 10 preset Weather channels.
You can use these channels to monitor broadcasts
from the National Oceanographic and Atmospheric
Administration (NOAA). The transceiver automatically
detects a Weather alert tone on the selected Weather
channel, or while scanning.
DSelecting a Weather channel
zPush [FUNC], and then push [7]/[WX] to enter the
Weather Channel Selection mode.
LPush [▲] or [▼] to select a weather channel.
LPush [CLR]/[HOME] to exit the Weather Channel
Selection mode.
DReceiving a Weather Alert
NOAA broadcast stations transmit a weather alert
tone before any important weather announcements.
The transceiver can detect the Weather Alert and
sounds a beep tone.
zPush [FUNC], and then push [4]/[WX-ALT] to turn
the Weather Alert function ON or OFF.
L“WX” is displayed when the function is ON.
DScanning Weather channel
Repeatedly scans Weather channels.
1. Push [FUNC], and then push [7]/[WX] to enter the
Weather Channel Selection mode.
2. Push [FUNC], and then push [2]/[SCAN] to start a
scan.
LPush [▲] or [▼] to change the scanning direction.
LWhen receiving a signal, the scan pauses and “RX”
is displayed until the signal disappears.
LPush [CLR]/[HOME] to stop a scan.
The duplex function enables you to call a ight service
station while receiving on a VOR frequency. Turn
ON the function, and set the ight service station’s
frequency on the Menu screen.
DSetting the Duplex frequency
LConrm the VFO mode is selected.
1. Set the NAV band frequency (108.000 ~ 117.975 MHz).
2. Push [FUNC], and then push [5]/[DUP-W].
• “DUP” blinks and the transmit frequency is displayed.
3. Set the flight service station frequency, and then
push [ENT]/[SET].
• The NAV band frequency is displayed.
DUsing the Duplex function
LConrm the VFO mode is selected.
1.
Set the NAV band frequency (108.000 ~ 117.975 MHz).
2. Push [FUNC], and then push [6]/[DUP] to enable
the function.
• “DUP” is displayed.
3. Hold down [PTT] to transmit on the entered flight
service station frequency.
LPush [FUNC], and then push [6]/[DUP] to disable the
function.
Using the Duplex function
(For only the USA version)

12
8HEADSET CONNECTION
Transceivers with the built-in Bluetooth unit can
operate with Bluetooth headsets.
The communication range of Bluetooth is
approximately 10 meters (33 ft).
Bluetooth®
NOTE: The Bluetooth communication range may
vary, depending on the environment where you
operate the device.
DElectromagnetic Interference
When you use a Bluetooth device, pay attention to the
following:
Bluetooth devices operate in the 2.4 GHz band. The
2.4 GHz band is also used by other devices, such
as Wireless LAN products, microwave ovens, RFID
systems, amateur radio stations, and so on.
When using this device near such devices,
interference may occur, causing a decrease in
communication speed, and an unstable connection.
In such cases, use this device away from the other
devices, or stop using those devices.
DPairing with a device
You can pair maximum of 4 Bluetooth headsets to the
transceiver.
LThese instructions describe pairing with the VS-3
Bluetooth®headset, as an example.
1. Turning ON the transceiver’s Bluetooth function
1. Push [FUNC], and then hold down [ENT]/[SET]
for 1 second to enter the Set mode.
2. Select “BT SET,” and then push [ENT]/[SET].
3. Select “ON,” and then push [ENT]/[SET].
4. Push [CLR]/[HOME] to exit the Set mode.
2. Entering the VS-3 Pairing mode
Refer to the VS-3’s instruction manual for details.
3. Pairing and connecting the Bluetooth headset
1. Push [FUNC], and then hold down
[ENT]/[SET] for 1 second to enter the Set mode.
2. Select “PAIRING,” and then push [ENT]/[SET].
BT SET > PAIRING
• The transceiver searches for a headset.
LPush [CLR] to cancel searching.
• “SUCCESS” and “ ” is displayed if the headset or
device is correctly connected.
3. Push [CLR]/[HOME] twice to exit the Set mode.
DDisconnecting a paired device
You can disconnect a paired Bluetooth device if it is
not being used.
1. Push [FUNC], and then hold down
[ENT]/[SET] for 1 second to enter the Set mode.
2. Select “DISCON,” and then push [ENT]/[SET].
BT SET > DISCON
• “SUCCESS” is displayed and the headset is
disconnected.
3. Push [CLR]/[HOME] twice to exit the Set mode.
DUnpairing a device
Disconncet a connected headset or device before
unpairing.
1. Push [FUNC], and then hold down
[ENT]/[SET] for 1 second to enter the Set mode.
2. Select “CONNECT,” and then push [ENT]/[SET].
BT SET > CONNECT
• A paired deviceʼs name is displayed.
LPush [MR]/[MW] to display the Bluetooth device
address.
LPush [∫] or [√] to select other paired headsets, if
necessary.
3. Push [FUNC], and then push [CLR]/[HOME].
• “DELETE?” is displayed.
4. Push [ENT]/[SET].
5. Push [CLR]/[HOME] twice to exit the Set mode.
Bluetooth headset
(Example: Optional VS-3)
Using a Bluetooth®headset
(For only transceivers with the built-in Bluetooth unit)

HEADSET CONNECTION
13
8
Using a wired headset
Connect your headset through the optional OPC-2401 headset adapter.
PTT switch (User supplied, if necessary)
Use a PTT switch with a 3.5 mm (1/8 inch) plug.
OPC-2401
Headset
(User supplied)

14
9SET MODE
You can use the Set mode to set infrequently changed
values or function settings.
1. Push [FUNC], and then hold down [ENT]/[SET]
for 1 second.
LSet mode item is displayed.
2. Push [MR]/[MW] to select an item.
LPush [ENT]/[SET] to go to the next tree level, go
back a level by pushing [CLR]/[HOME].
3. Push [▲] or [▼] to select an option.
4. Push [CLR]/[HOME] to exit the Set mode.
NOTE: The Set mode items contained in the
transceiver may be different, depending on the
transceiver’s version or presettings.
■Backlight “ ”
Selects the backlight options.
• OFF: The backlight is OFF.
• ON: The backlight is always ON.
• AUTO: The backlight is ON for 5 seconds when a key
other than [PTT] is pushed.
■MIC gain “ ”
Select a MIC gain option from H (High), M (Medium),
or L (Low).
■MIC Audio Input “ ”
Select a microphone to input the audio.
• AUTO: Transmit the audio from the device whose
[PTT] is pushed.
• INT:
Transmit the audio from the internal microphone.
• EXT:
Transmit the audio from the external microphone.
• BT*:
Transmit the audio from the Bluetooth headset.
*For only the transceiver with built-in Bluetooth unit.
■VOX setting “ ”
Turn the VOX function ON or OFF.
The function automatically switches between receive
and transmit by detecting your voice.
• OFF: Turns OFF the function.
• ON: Switches between receive and transmit by
detecting your voice.
■VOX Level “ ”
Set the VOX gain level to between 1 and 6.
Higher values make the VOX function more sensitive
to your voice.
■VOX delay “ ”
Set the VOX Delay to between 0.5 seconds and 3.0
seconds. The VOX Delay is the amount of time that
the transmitter stays ON after you stop speaking, until
the VOX switches to receive.
■Time Out Timer “ ”
Turn the Time Out Timer (TOT) function ON or OFF.
This function limits continuous transmissions on the
channel, to prevent from occupying the channel for a
long period of time.
• OFF: Turns OFF the function.
• 20 to 180: Set the Time-out Timer to between 20 seconds
and 180 seconds.
■Battery voltage “ ”
Displays the battery voltage.
Set mode items
Using the Set mode

SET MODE
15
9
■Bluetooth settings “ ”
(For only the transceiver with built-in Bluetooth unit)
DBluetooth “ ”
Turn the Bluetooth function ON or OFF.
• OFF: Turns OFF the function.
• ON: Turns ON the function.
DAuto connect “ ”
Select whether or not to automatically connect to the
last bonded Bluetooth device.
• OFF: The user must manually connect to the bonded
device.
• ON: Automatically connects to the last bonded
device.
DConnect/Disconnect
“” / “ ”
Select this item, and then push [ENT]/[SET] to
connect or disconnect a Bluetooth headset.
DPairing “ ”
Select this item, and then push [ENT]/[SET] to pair the
Bluetooth headset.
DHeadset settings “ ”
SCO “ ”
Select an audio connection option.
• AUTO: Connects only when receiving or transmitting
audio.
Select this option to share a Bluetooth headset
with the transceiver and other devices.
• ALWS: Always connect the audio.
SP Output “ ”
Select whether or not to output audio from the internal
speaker or wired headset when the Bluetooth headset
is connected.
• OFF: Output audio from the Bluetooth headset.
• ON: Output audio from the internal speaker, wired
headset, and the Bluetooth headset.
Icom headset “ ”
Power save “ ”:
Select whether or not to operate in the Bluetooth
headset’s battery saving mode while the optional VS-3
Bluetooth®HEADSET is connected.
• OFF: The Power Save mode is OFF.
• ON: The Power Save mode is activated when there
is no communication or operation for 120
seconds.
PTT “ ”:
Set the One-Touch PTT function while the optional
VS-3 Bluetooth®HEADSET is connected.
The function enables you to communicate with a
single push of the VS-3’s [PTT].
• PUSH: Push [PTT] to transmit and release to receive.
• HOLD: Push [PTT] to transmit and push again to
receive.
PTT Beep “ ”:
Set the beep sound when pushing [PTT] on the
optional VS-3 Bluetooth®HEADSET.
• OFF: No beep sounds when pushing PTT.
• ON: A beep sounds when pushing PTT.
DInitialize Bluetooth unit “ ”
Initialize the built-in Bluetooth unit.
L“INIT BT?” is displayed for conrmation. Push
[ENT]/[SET] to initialize.
■CPU version “ ”
Displays your transceiver’s rmware version.
■Bluetooth unit version “ ”
(For only the transceiver with built-in Bluetooth unit)
Displays your transceiver’s built-in Bluetooth unit
version.
Set mode items (Continued)

16
10 SPECIFICATIONS AND OPTIONS
Specications (Measurements made without an antenna.)
LAll stated specications are subject to change without notice or obligation.
DGeneral
• Frequency range: IC-A16
IC-A16E
TX
RX
WX
TX/RX
118.000 ~ 136.99166 MHz
108.000 ~ 136.99166 MHz
161.650 ~ 163.275 MHz
118.000 ~ 136.99166 MHz
• Channel spacing: 25 kHz/8.33 kHz
• Mode: IC-A16
IC-A16E
6K00A3E/5K60A3E
16K0G3E (WX)
6K80A3E/5K00A3E
• Number of Memory channels: 200 Channels
• Antenna impedance: 50 Ω nominal
• Antenna connector: BNC type
• Power supply requirement: 7.2 V DC standard
• Current drain: Less than 1.8 A
• Operating temperature range: IC-A16
IC-A16E
–10˚C ~ +60˚C, 14˚F ~ 140˚F
–20˚C ~ +55˚C
• Dimensions*1: 52.2 (W) × 111.8 (H) × 34.1 (D) mm,
2.1 (W) × 4.4 (H) × 1.3 (D) inches
• Weight (approximate): 257 g, 9.1 oz with BP-280
DTransmitter
• Output power: 6.0 W (PEP), 1.8 W (CW)
• Modulation limiting (IC-A16):
• Modulation depth (IC-A16E):
70 ~ 100%
85%
• Audio harmonic distortion: IC-A16
IC-A16E
Less than 10% (at 60% modulation)
Less than 10% (at 85% + 3dB modulation)
• Ham and Noise ratio: More than 35 dB
• Spurious emissions: IC-A16
IC-A16E
More than 46 dB*2*3
Less than –36 dBm*4
• Frequency stability: IC-A16
IC-A16E
±0.4 kHz
±1 ppm
DReceiver
• Receive system: Double conversion superheterodyne
• Intermediate frequencies: 1st 46.35 MHz, 2nd 450 kHz
• Sensitivity: IC-A16
IC-A16E
COM
NAV
WX
Less than 0 dBμ (at 6 dB S/N)
Less than 3 dBμ (at 6 dB S/N)
Less than –8 dBμ (at 12 dB SINAD)
Less than 0 dBμ (at 12 dB SINAD with CCITT)
• Squelch sensitivity (Threshold): COM/NAV
WX
Less than 0 dBμ
Less than –5 dBμ
• Spurious response rejection ratio: IC-A16
IC-A16E
COM/NAV
WX
More than 60 dB
More than 30 dB
More than 70 dB
Audio output power (At 10% distortion): Int. SP
Ext. SP
1500 mW (Typical) into an 8 Ω load
More than 350 mW into an 8 Ω load
*1Projections not included.
*2Except for the operating frequency ±62.5 kHz in 25 kHz channel spacing.
*3Except for the operating frequency ±20.825 kHz in 8.33 kHz channel spacing.
*4Except for the operating frequency ±1 MHz.

SPECIFICATIONS AND OPTIONS
17
10
DBattery packs
•BP-278/BP-279/BP-280 BATTERY PACKS
Battery pack Voltage Capacity
BP-278 7.2 V 1130 mAh (minimum) 1190 mAh (typical)
BP-279 7.2 V 1485 mAh (minimum) 1570 mAh (typical)
BP-280 7.2 V 2200 mAh (minimum) 2400 mAh (typical)
DChargers/Adapters/DC cables
•BC-213 DESKTOP CHARGER + BC-123S AC ADAPTER
To rapidly charge a single battery pack.
•BC-214 MULTI CHARGER + BC-157S AC ADAPTER+ AD-130 CHARGER ADAPTER
To rapidly charge up to 6 battery packs.
•CP-23L CIGARETTE LIGHTER CABLE
Used when charging the battery pack from a 12 V cigarette lighter socket. (Use with the BC-213)
•OPC-515L DC POWER CABLE
Used when charging battery packs using a 13.8 V DC power source instead of the power adapter.
(Use with the BC-213)
•OPC-656 DC POWER CABLE
Used with a 13.8 V power source instead of the power adapter. (Use with the BC-214)
DOthers
•FA-B02AR ANTENNA
•OPC-2401 HEADSET ADAPTER
To connect a wired headset to the transceiver.
•HM-240 SPEAKER MICROPHONE
•MB-130 CHARGER BRACKET
Mounts the BC-213 desktop charger on a variety of places in a vehicle.
•MB-133 BELT CLIP
•MB-96F/MB-96FL/MB-96N BELT HANGERS
•VS-3 Bluetooth®HEADSET
The Bluetooth headset with a [PTT] switch.
About the third party Bluetooth headsets:
Icom has checked the PTT operation with some 3M Peltor headsets, such as the WS Headset XP, WS ProTac XP
and WS Alert XP. (Compatibility not guaranteed.)
Some options may not be available in some countries. Ask your dealer for details.
All options and those specications are subject to change without notice or obligation.
See the FULL MANUAL for the latest informations, if necessary. You can download the FULL MANUAL from the
Icom website.
http://www.icom.co.jp/world/support/download/manual
Options

18
11 TROUBLESHOOTING
PROBLEM POSSIBLE CAUSE SOLUTION REF.
The transceiver does
not turn ON.
• The battery is exhausted.
• The battery pack is not correctly attached.
• The CP-23L’s fuse is blown.
• Recharge the battery pack.
• Correctly reattach the battery pack.
• Repair the problem, and then replace
the fuse.
p. 6
p. 2
p. 18
Little or no sound
comes from the
speaker.
• Squelch level is set too high.
• Volume level is set too low.
• Adjust the squelch level.
• Adjust the volume level.
p. 4
p. 4
You cannot transmit. • NAV band frequency is set.
• Weather channel or other non-
transmittable channel is selected.
• No frequency is entered into the
selected channel.
• The battery is exhausted.
• Set a COM band frequency.
• Select a transmittable channel.
• Enter a frequency into the Memory
channel.
• Recharge the battery pack.
p. 7
p. 7
p. 9
p. 6
You cannot use the
keypad to enter the
frequency or select
the memory channel.
• The keypad is locked. • Hold down [ ] for 2 seconds to
unlock the keypad.
p. 4
Scan does not start. • No Memory channels in the selected
group are tagged.
• The squelch is open.
• Nothing is entered in the Memory
channels.
• Tag memory channels.
• Adjust the squelch level.
• Enter frequencies into the Memory
channels.
p. 8
p. 4
p. 9
No beep sounds. • The Key beep is set to OFF.
• The audio output level is low.
• Push [FUNC], and then push
[8]/[BEEP] to turn ON the beep.
• Rotate [VOL] to adjust the audio
output level.
p. 4
p. 4
DFuse replacement
If the fuse blows or the transceiver stop working when using
the optional CP-23L CIGARETTE LIGHTER CABLE, correct
the source of the problem. Then replace the damaged fuse
with a new rated one (FGB 4 A), as shown to the right.
Fuse 4 A
Troubleshooting
Other manuals for IC-A16
1
This manual suits for next models
1
Table of contents
Other Icom Transceiver manuals

Icom
Icom D-STAR ID-31A; D-STAR ID-31E User manual

Icom
Icom iF110 User manual

Icom
Icom IC-A14 User manual

Icom
Icom IC-M803 User manual

Icom
Icom IC-V200 User manual

Icom
Icom F6220D 16 USA User manual

Icom
Icom IC-7851 User manual

Icom
Icom UHF IC-F60 User manual

Icom
Icom IC-M505 User manual

Icom
Icom IC-F610 User manual
Popular Transceiver manuals by other brands

Yaesu
Yaesu FT DX 9000MP CONTEST - DATA MANAGEMENT... Operation manual

Yaesu
Yaesu FTM-100DE operating manual

Uniden
Uniden UH950S owner's manual

Delta Electronics
Delta Electronics SFBD-1250B4Q1R Specifications

Uniden
Uniden Sundowner UH-077 owner's manual

Technisonic Industries Limited
Technisonic Industries Limited T3018 user guide