LRA-900-E (Ethernet to LoRa Radio Modem) Firmware Update via Ethernet Version 1.0.0 Page:5
Copyright © 2018 ICP DAS Co., Ltd. All Rights Reserved E-mail: service@icpdas.com
2. Firmware Update Procedure
The firmware update can fail when the computer has multiple network interfaces (e.g., LAN and
Wi-Fi). Therefore, enable only one network interface for updating the firmware, and temporarily
turn off other network interfaces, firewalls, and anti-virus software first.
2.1. Firmware Update
Two methods can be used to update the firmware: “Local FirmwareUpdate”(traditional) and
“Remote Firmware Update”(TeamViewer). The Local Firmware Update method requires the
user to manually adjust the position of the Init/Run Switch and reboot the module in order to
initialize the firmware update. Refer to Section 2.1.1“Local Firmware Update” for more details.
The Remote Firmware Update method allows the user toinitialize the module via a web interface
without needing to adjust the hardware switch. Initialization via the web interface is useful when
the module is installed at a remote site and can be a ccessed via the TeamViewer application
installed on a remote PC. Refer to Section 2.1.2 “Remote Firmware Update” for more details.
2.1.1. Local Firmware Update
Step 1:
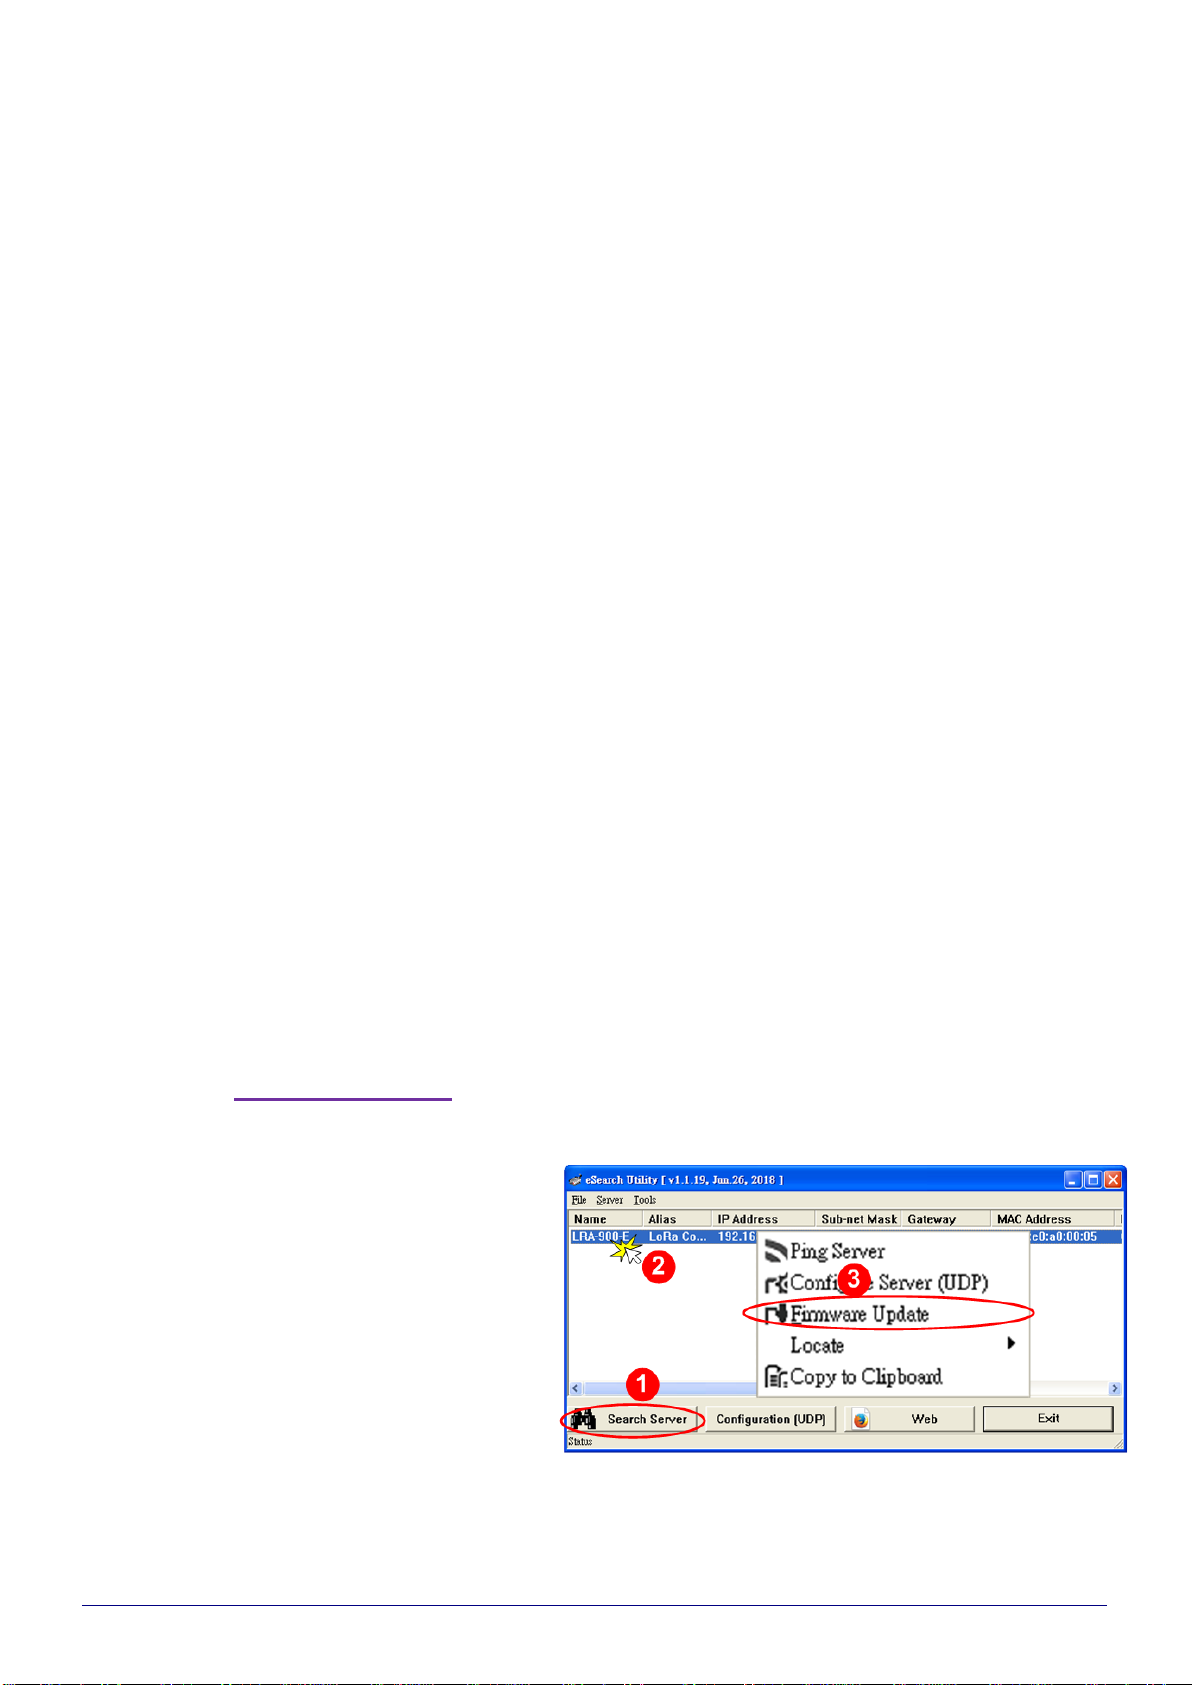
In the eSearch Utility, click the “Search Server” button to search for any LRA-900-E
modules connected to the network. (The network settings of the LRA-900-E module as
described in Step 3 on Chapter1)
Step 2:
Right click on the name of the
LRA-900-E module to be updated.
Step 3:
Select the “Firmware Update” item from
the popup menu and the “Open” dialog
box will be displayed.