manuals.online logo
Brands
  1. Home
  2. •
  3. Brands
  4. •
  5. Icy Box
  6. •
  7. Enclosure
  8. •
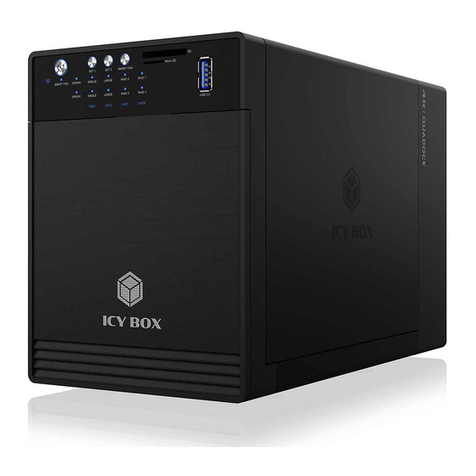
  9. Icy Box IB-3680SU3 User manual

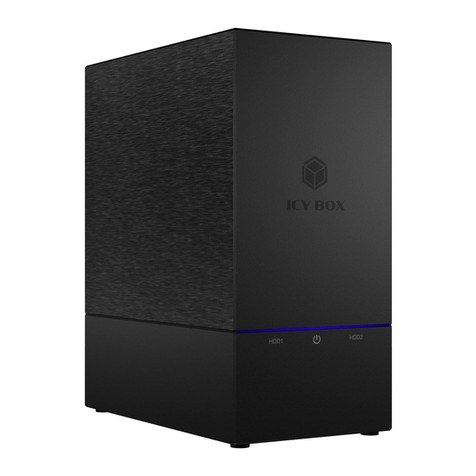
Icy Box IB-3680SU3 User manual

Brief Notes
Operation Environment
Temperature 0 ~ 50 °C Humidity 90 %RH
Reminders
Front Panel Overview
LED Indication / Button
Descriptions
2.
eSATA Link interface use
3.
USB Link interface use
Blue
Orange Power on
Sleep mode
4.
Link interface optioneSATA
5.
Link interface option
USB
6.
Smart Fan automatic mode
7.
Smart Fan manual mode
8.
Fan speed level 1
9.
Fan speed level 2
10.
13.
Interface button
14.
Synchronization mode button
15.
Smart fan button : auto, manual and fan speed from level 1
to level 3
16.
Blue
Purple active
access
HDD1 / HDD2 / HDD3 / HDD4 / HDD5 / HDD6 / HDD7 / HDD8
17.
Key slot
Fan speed level 3
11.
12.
Synchronization comes in 3 modes:
When the PC is off, the device goes off In 15 seconds.
When the PC is off, the device goes to sleep mode.
Synchronization is off.
Blue
Orange
Off
657 8 9 10 11 12 13 14 15
17
16
http://www.raidsonic.de
Please visit our website for latest manual
STEP
1
1
STEP
2
2
STEP
3
3
Trouble Shooting
STEP
7
7
Support USB transfer speeds up to Super Speed (5 Gbit/s),
eSATA transfer speed (1.5~3.0 Gbit/s)
2.
Interface of USB / eSATA can not be used at the same time.
3.
References
Smart fan controlled by the built-in thermal sensor
and it comes with 2 modes (auto / manual) and 3 levels of speed:
1.
Level 1: higher than 55 °C
Level 2: 45 °C ~ 54 °C
Level 3: below 45 °C
2,500rpm
1,800rpm
1,200rpm
~
~
~
3,500rpm
2,500rpm
1,800rpm
Under Windows Vista / 7, users can enable GPT when initializing
HDD with a total capacity of more than 2 TB.
4.
1 2 34
1.
It needs to be pressed and held for 3 seconds
to power off.
This design prevents accidental power off.
Power button
• Follow all instructions.
• Do not place this device near water.
• Clean only with dry cloth.
• Do not block any ventilation openings.
• Install in accordance with the manufacturer’s instructions.
• Do not place near any heat sources such as radiators, heat registers,
stoves, or the devices (including amplifiers) that produce heat.
• Protect the power cord from being walked on or pinched particularly at
plugs, convenience receptacles, and the point where they exit from
the devices.
• Power supply cords should be routed so that they are not likely to be
walked on or pinched by items placed upon them or against them.
• Only use attachments/accessories specified by the manufacturer.
• Unplug this during lightning storms or when unused for long
periods of time.
• Refer all servicing to qualified service personnel. Servicing is required
when the devices has been damaged in any way, such as power-supply
cord or plug is damaged, liquid has been spilled or objects have fallen
into the devices, the devices has been exposed to rain or moisture,
does not operate normally, or has been dropped.
• Carefully read and follow the Quick Install Guide and User Manual.
• Do not drop or shake the device.
• Do not move the device when it is powered on.
• Do not overload wall outlets.
1.
If the device (8 HDDs installed) is connected to the PC with eSATA cable and the SATA HDD icon does not come out in 8, please check if the eSATA
interface card supports Port Multiplier or update the eSATA driver version.
2.
If the transfer rate is not normal, please check if the SATA HDD jumper is set up in 1.5 or 3.0 Gbit/s.
3.
7.
If the fan stops working, do not dismantle it. Please send back to the retail store immediately.
6.
If the noise is still present, change the device with another fan of size 80x80x20mm 2 pins. Otherwise send the device back to the retail store.
Black cableRed cable
Positive
(electrode) Negative
(electrode)
8.
To take the HDD out from the device, slightly press down the handle and pull it out.
It needs to be pressed and held for 3 seconds
to power off.
This design prevents accidental power off.
For Macintosh users, under MAC 10.6.X or later, it's strongly recommended not to have the same name for all the HDDs.
For Windows users, if the device could not recognize more than 5 HDDs when using eSATA interface,
please check if the eSATA port of the motherboard and PCI-e host card can recognize more than 5 hard drives.
4.
If there is noise with the fan, unscrew and take out the fan cover, pull out the power cord, clean the fan and assemble it back.
5.
Operation System
Windows Vista (32bit/64bit) / Windows 7 (32bit/64bit)
Windows 8 (for PC version only)
(under MBR partition, supports total capacity up to 2 TB only)
Windows Vista (32bit/64bit) / Windows 7 (32bit/64bit)
Windows 8 (for PC version only)
(with GPT partition enabled, supports total capacity of more than 2 TB)
Mac OS X 10.8 or later
3.5’’ SATA I/II/III HDD
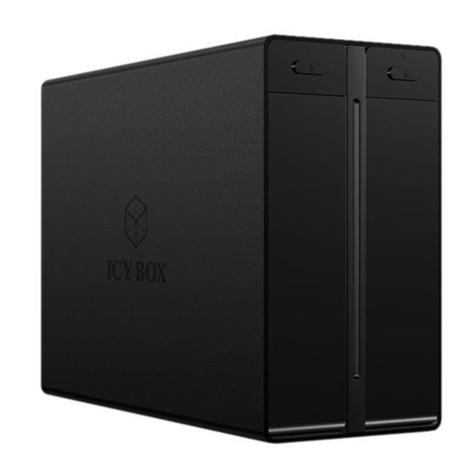
8-bay external JBOD enclosure
Quick Installation Guide
IB-3680SU3
C
M
Y
CM
MY
CY
CMY
K
Initialization
Quick Installation Guide
1.
Please use the provided screws to secure
the handles to the HDDs.
2.
Unlock the cover with the key supplied and press the curricular
depression to open the cover.
3.
Release the inner covers anti-clockwise.
1
1
4
3
2
Descriptions
Fan
eSATA port
USB 3.0 port
220 V AC Input port
1.
2.
1.
3.
4.
Rear Panel Overview
Rear Panel
HDD Handle
Keys
4.
Install the HDDs from up to down.
HDD 1
H
DD
2
H
DD
3
HDD
HDD
DD
DD
DD
D
D
4
5.
Close and secure the covers.
6.
Plug in USB or eSATA cable
USB interface is the default setting and if users wish to change to
eSATA, press and hold
hold
"Interface" for 3 seconds.
1.
Start disk initialization.
3.
HDD format completed
2.
Create new partition and format disk.
If the HDD is uninitialized, you may have to initialize it by doing steps as followed:At first click “Start”
“Execute” at your PC and key in “diskmgmt. msc”. After that please press “OK” key.
Note: Please enable GPT if the total capacity is more than 2TB and enable MBR if the total capacity is less than 2TB.
Start disk initialization.
Activate MBR if total volume is less than 2TB
MBR (Master Boot Record)
Activate GPT if total volume is more than 2TB
GPT (GUID Partition Table)
2.
HDD initialize...
1.
Click Disk Utility icon.
Macintosh O.S. 10.8 or later
3.
Click Erase
4.
Click Erase
5.
HDD format in process
6.
Format completed
STEP
4
4
STEP
5
5
STEP
6
6
Windows Vista (32bit/64bit) / Windows 7 (32bit/64bit) / Windows 8 (for PC version only)
Move the cursor of your mouse to the bottom
left corner and right click “Run”.
C
M
Y
CM
MY
CY
CMY
K

Other Icy Box Enclosure manuals

Icy Box IB-277-C3 User manual

Icy Box

Icy Box IB-277-C3 User manual

Icy Box IB-525-U3 User manual

Icy Box

Icy Box IB-525-U3 User manual

Icy Box IB-289-C3 User manual

Icy Box

Icy Box IB-289-C3 User manual

Icy Box IB-WF200HD User manual

Icy Box

Icy Box IB-WF200HD User manual

Icy Box IB-247-C31 User manual

Icy Box

Icy Box IB-247-C31 User manual

Icy Box IB-AC620-CR User manual

Icy Box

Icy Box IB-AC620-CR User manual

Icy Box IB-351StU3-B User manual

Icy Box

Icy Box IB-351StU3-B User manual

Icy Box IB-382H-C31 User manual

Icy Box

Icy Box IB-382H-C31 User manual

Icy Box IB-1922MF-C32 User manual

Icy Box

Icy Box IB-1922MF-C32 User manual

Icy Box IB-1820M-C31 User manual

Icy Box

Icy Box IB-1820M-C31 User manual

Icy Box IB-AC705-6G User manual

Icy Box

Icy Box IB-AC705-6G User manual

Icy Box IB-2535 User manual

Icy Box

Icy Box IB-2535 User manual

Icy Box IB-RD3662-C31 User manual

Icy Box

Icy Box IB-RD3662-C31 User manual

Icy Box IB-1817MC-C31 User manual

Icy Box

Icy Box IB-1817MC-C31 User manual

Icy Box IB-223 Series User manual

Icy Box

Icy Box IB-223 Series User manual

Icy Box IB-RD3252 User manual

Icy Box

Icy Box IB-RD3252 User manual

Icy Box IB-RP102 User manual

Icy Box

Icy Box IB-RP102 User manual

Icy Box IB-2811M-TB3 User manual

Icy Box

Icy Box IB-2811M-TB3 User manual

Icy Box IB-1819M-C31 User manual

Icy Box

Icy Box IB-1819M-C31 User manual

Icy Box IB-182aMU3 User manual

Icy Box

Icy Box IB-182aMU3 User manual

Icy Box IB-382H-C31 User manual

Icy Box

Icy Box IB-382H-C31 User manual

Icy Box IB-RD3741-C31 User manual

Icy Box

Icy Box IB-RD3741-C31 User manual

Icy Box IB-367-CPD+ User manual

Icy Box

Icy Box IB-367-CPD+ User manual

Icy Box IB-373U3 User manual

Icy Box

Icy Box IB-373U3 User manual

Popular Enclosure manuals by other brands

MTX X3-17-SW-D owner's manual

MTX

MTX X3-17-SW-D owner's manual

Code Blue CB 4 Series Administrator's guide

Code Blue

Code Blue CB 4 Series Administrator's guide

Advantech MIC-3000 Series user manual

Advantech

Advantech MIC-3000 Series user manual

Coolmax HD-250CFBK-U2 user guide

Coolmax

Coolmax HD-250CFBK-U2 user guide

ABB ACS150 series installation instructions

ABB

ABB ACS150 series installation instructions

hager Vega VB318MM Series Mounting instructions

hager

hager Vega VB318MM Series Mounting instructions

Thermaltake Spedo Series user manual

Thermaltake

Thermaltake Spedo Series user manual

Antec NINE HUNDRED TWO V3 User's manual

Antec

Antec NINE HUNDRED TWO V3 User's manual

Pulsar 7/TRP20/SATEL Assembly instructions

Pulsar

Pulsar 7/TRP20/SATEL Assembly instructions

Gembird EE3-U3S-1 user manual

Gembird

Gembird EE3-U3S-1 user manual

iBUYPOWER HYTE Revolt 3 manual

iBUYPOWER

iBUYPOWER HYTE Revolt 3 manual

Outland Technology OTPS1KW-ASM-ROV-R1 user manual

Outland Technology

Outland Technology OTPS1KW-ASM-ROV-R1 user manual

Ultra Products Mid-Tower ATX Case m923 Specifications

Ultra Products

Ultra Products Mid-Tower ATX Case m923 Specifications

SCC TS-3B Series Technical instructions

SCC

SCC TS-3B Series Technical instructions

Lightolier Motion or Light Sensor Enclosure OA20-10 Specification sheet

Lightolier

Lightolier Motion or Light Sensor Enclosure OA20-10 Specification sheet

Lindy Mini NAS Enclosure SATA & IDE 42808 user manual

Lindy

Lindy Mini NAS Enclosure SATA & IDE 42808 user manual

Premier Mounts GearBox Equipment Enclosure GB-PLEN1 installation instructions

Premier Mounts

Premier Mounts GearBox Equipment Enclosure GB-PLEN1 installation instructions

Pulsar AWO 360 Assembly instructions

Pulsar

Pulsar AWO 360 Assembly instructions

manuals.online logo
manuals.online logoBrands
  • About & Mission
  • Contact us
  • Privacy Policy
  • Terms and Conditions

Copyright 2025 Manuals.Online. All Rights Reserved.