Ignite COMMUTER User manual

USER MANUAL E-BIKE (PEDELEC)
COMMUTER eBIKE


Contents
1. Introduction 4
2. General Information 5
3. Legal Details 6
4. Local Regulations 6
5. Intended Use 7
6. Before the First Ride 8
7. Before Every Ride 13
8. Safe Riding 16
Tips for Riding a Pedelec 21
Service 23
Torque Settings 27
Product Specications
(TFT LCD Display) 30
1. Product Name 30
2. Suppliers 30
3. Electrical Parameters 30
4. Dimensions & Material 30
5. Features 31
6. TFT screen instructions 33
7. Functional description 37
8. Parameter setting 52
9. Error Code dene 53
10. Assembly instructions 54
11. Connector descriptions 55
12. Assist level instructions 55

4
EN
Thank you for choosing an Ignite e-Bike. This manual has been designed to help get a better understanding of you Commuter eBike designed in
Australian and compliant to Australian standards (EN15194).
Safety instructions.
Please familiarize yourself withthis manual.
Preparations before riding:
Wear your helmet, and other protective gears before riding to protect yourself from damage in case of an accident.
Max load:
The maximum weight including the rider, all luggage, and child/child seat if fitted is 120kg.
5
Notes
EN
•Your Commuter eBike is fine to be ridden in the rain, after all we are in Australia. Please ensure however that if going
through puddles or other bodies of water that the depth stays below the battery and other electronics to ensure they
remain protected from submersion.
•Please use the dedicated charger which has been specifically designed for this bike.
•Please ensure adequate ventilation when charging.
•Please don’t modify the luggage carrier as it’s been engineered to suit the Commuter bike.
•It’s a good idea to utilise the rear brake predominately, particularly when going down-hill so that the centre of gravity
doesn’t fall too far ahead of the bike.
•When cleaning the bike, please avoid water being directed onto the electric components. It’s recommended to turn
the bike off before cleaning.
4
Notes
1. Introduction

5
6
EN
Meaning of Icons
Indicates how to use the
product or items that
require special attention.
Incorrect action could
result in damage to the
equipment.
Life-threatening danger if
instructions are not
followed or preventive
measures are not taken.
You must have the proper tool, such as atorque wrench
for items that require a specific torque. Atorque that is too
high or too low can cause parts to fall off or break and can
lead to serious accidents and injuries.
2. General Information
1. Wheel
2. Cassette
3. Rear Derailleur
4. Chain
5. Chain
Protector
6. Motor
7. Crank set
8. Pedal
9. Brakes
10. Fork
11. Light/Front
12. Headset
13. Handlepost
14. Handlebar
15. Shifter
16. Grip
17. Controller/
Display
18. Seat Post
19. Saddle
20. Integrated Lock
21. Carrier/Rack
22. Frame
23. Rear Light
3
Thank you for choosing an Ignite e-Bike. This manual has been designed to help get a better understanding of you Commuter eBike.
The Commuter eBike is compliant to Australian standards (EN15194).
Items in carton:
When you open the carton, please check if the following items are inside. If not, please contact with your agent.
1. Introduction
EN
Charger -1pcs Pedal -1pair Manual -1pcs
USER MANUAL

EN
7
Declaration of Conformity
This user manual complies with the requirements of EN 15194 and Machinery Directive
EC/2006/42. See the separate Declaration of Conformity insert.
Edition 2 Rev 2, October 2018
Pedelec stands for pedal electrical cycles. They are also known as EPACs which stands for Electrically Power Assisted Cycles. Pedelecs are
bicycles with a motor that provides assistance when a rider starts to pedal. The A-weighted emission sound pressure level at the driver’s
ears is less than 70 dB(A). When a rider stops pedaling, the assistance stops. Some bikes will also have a push assistance mode with a max
speed of 6 km/hr.
In general, electric bikes are viewed by law as more similar to a conventional bicycle than a motorized scooter or motorcycle. In most
cases, an electric bike can be ridden in bike lanes, on bike paths, and can be locked to bike racks like a regular bicycle. Riders are not
required to have a driver’s license to operate an electric bike and are not required to obtain any special licensing or registration for their
pedelecs.
It’s important to note that the specific laws, rules, and guidelines governing electric bike use may vary from country to
country. It’s important to familiarize yourself with the laws in your specific location before
you begin riding your pedelec. Take time to learn local bike laws before hitting the road.
3. Legal Details
4. Local Regulations
6
EN
32 Relationship : 1 Nm =8.9 lbf.in =10.2 kgf.cm
Brakes
Component
lbf.in
Newton
Meters (Nm)
kgf.cm
Brake
Lever (Flat Bar)
53
-60
6
-6.8
61
-69
Brake
Lever (Drop Bar)
55
-80
6.2
-9
63
-92
Disc
Rotor to Hub (M5 bolts)
18
-35
2
-4
21
-40
Caliper
Mount
55
-70
6.2
-7.9
63
-81
Wheels
Component
lbf.in
Newton
Meters (Nm)
kgf.cm
Free
Hub Body
305
-434
34.5
-49
352
-499
Cassette
Sprocket Lockring
260
-434
29.4
-49
299
-499
Front
Axel Nuts
180
20.3
207
Rear
Axel Nuts
260
-390
29.4
-44.1
299
-449
Drivetrain
Component
lbf.in
Newton
Meters (Nm)
kgf.cm
Pedal
into Crank
307
34.7
353
Crank
Bolt (Spline and Square Spindles)
300
-395
33.9
-44.6
345
-454
Bottom
Bracket (External Shell)
610
-700
40
-50
702
-805
Bottom
Bracket (Cartridge and Cup-and-Cone)
435
-610
49.1
-68.9
500
-702
Others
Component
lbf.in
Newton
Meters (Nm)
kgf.cm
Steerer
Clamp Bolt (Stem)
70
-89
8
-10
80
-102
Top
Cap Bolt
35
-53 4-6 41-62
Handlebar
Clamp Bolts (4 Clamp Bolts)
36
-53
4
-6
41
-62
Saddle
Rail Clamp
70
-89
8
-10
80
-102

EN
9
Built for Commuters, not Stuntmen
Watch the Weight
This bicycle is only designed for one person riding with both wheels in contact with the ground. They are not intended for
racing, jumps, hops, wheelies or anything of the kind. The manufacturer and dealer are not liable for any direct or
consequential damages. The warranty will be void if your pedelec is not used in accordance with the intended usage.
Using the bike for off-road riding, jumps or stunts may cause damage to the frame and risk injury or death to the rider.
Maximum carrying capacity =Rider weight +Cargo weight
If carrying cargo or extra weight, make sure the bike is stable and is within the
maximum load capacity.
Practice handling the bike in a safe area before riding on public roads.
If not properly handled, sudden shifts in load while riding can affect your balance and lead to serious injury or death.
5. Intended Use
CE Frame Sticker example
EPAC according to EN 15194
Max .250W,25km/h
Bike/Max weight: 22.8 kg/120 kg
Model: CC01
Model Year: 2023
7

EN
10
Hit the Books before You Ride
Spend some time to understand how to operate and use your new bike before hitting the road by reading through this manual
thoroughly.
Please Check
Electrical system
Make sure you are familiar with the function of all the controller buttons and meaning of the displays.
Please consult the information in the relevant section from the manual.
Wheels
Check the tire pressure and make sure it is within the minimum and maximum values indicated on the sidewalls of the tires.
Spin both Wheels to make sure they rotate smoothly, are true (not wobbling) and do not rub against the Brakes. If the Wheel wobbles side
to side or rubs against the Brake Pads, take the bike to a qualified bike shop to have the Wheel trued or replaced.
Wheels that do not run true may indicate problems with the Spokes or Tires.
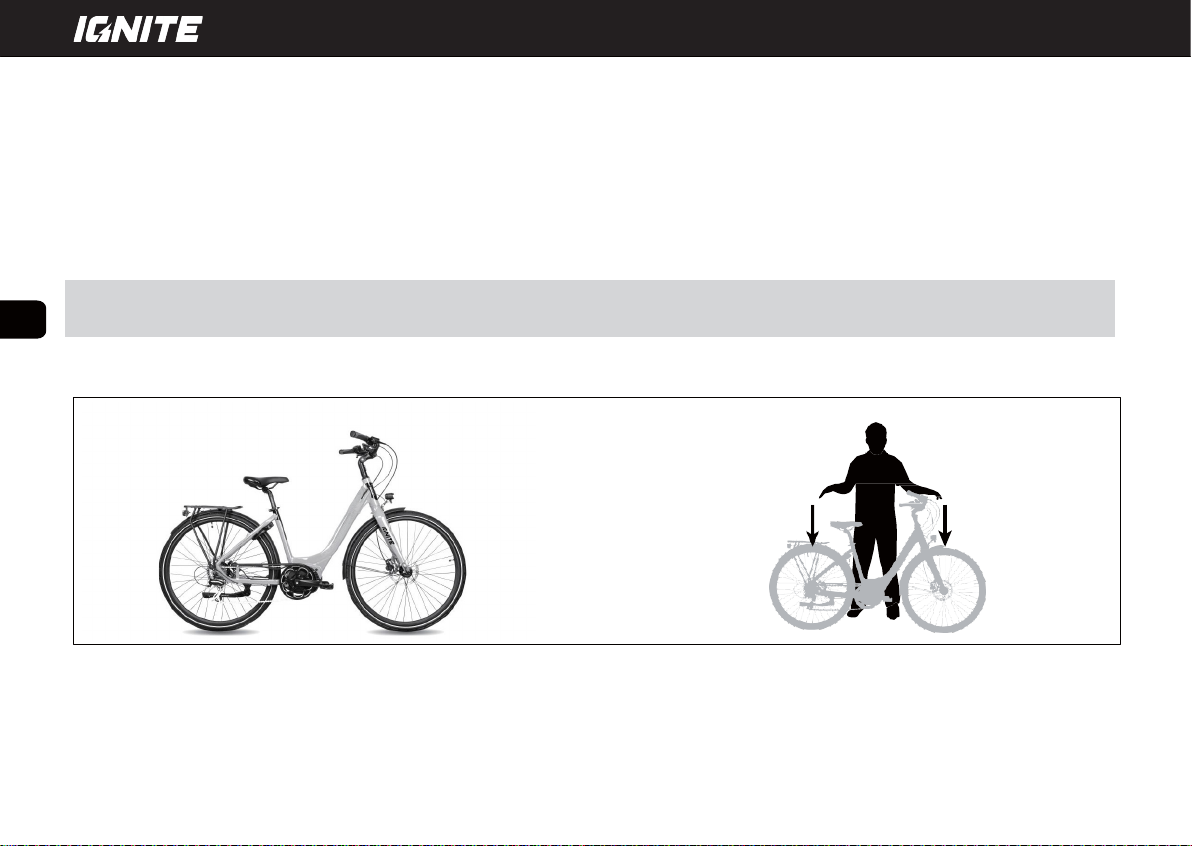
Headset
Stand with the Front Wheel pressed firmly between your legs and try to twist the
Handlebar. If movement occurs, realign your Handlebar and tighten the Headset
and handpost base.
Lift the Front Wheel off the ground and swing it from side to side. Does it feel
smooth? If you feel any binding or roughness in the steering, you may have an
overly tight Headset.
6. Before the First Ride
Do the twist
8

11
Brakes
A
1
2
B
EN
Test your Brakes by standing next to your bike, pull both Brakes, and rock the Bike back and forth. (A) The Bike should not roll and the
Brake Pads should remain firmly in place.
Does your bike feel solid? If you feel a clunk with each forward or backward movement of the bike, you probably have a loose
Headset so please tighten it. Note that for certain Disc Brakes you may feel a bit of play when attempting to rock the bike back and
forth. These are caused by the built-in clearances between the Brake Pads and the Brake Caliper to allow for thermal expansion and is
considered normal. In these cases, it’s not a loose Headset.
Disc Brakes (B) have a Disc Rotor (1) and a Disc Caliper (2). Pads inside the Disc Caliper squeeze the Disc Rotor to slow the Wheel but
can get very hot under use. Do not touch them immediately after riding.
In Australia, the left lever operates the rear brake and the right lever operates the front brake.
Be careful not to damage the Disc Rotor or Disc Caliper when changing wheels or by pulling the Brake Levers when the
Disc Rotor is not aligned.
Make sure to test the braking power before heading into traffic.It can be much more powerful than what you are used to.
Squeezing the Lever too fast can lead to unintended sudden stopping and cause you to crash or get rear ended.
9
EN
13
How the bike fits
The best riding position is the one that you are most comfortable in, but a
badly adjusted bicycle may lead to back or joint pain and reduce your
control. Check that your Saddle and Handlebar are at the correct height
and that you can reach Brake and Gear Levers comfortably.
For most people, the ball of the foot (1) should be placed on the Pedal (2)
directly above the Pedal Spindle (3).
Saddle
The saddle height is an important component of the overall riding position. While seated, you should have aslight bend in your knee
when the Pedal is pushed down all the way. The leg should not be fully extended so make sure the Saddle is not too high. If the seat
is too low, repetitive strain on the knee may lead to pain.
The Saddle can be moved up and down, forward and back and angled up and down. Play around with it to get the best fit. A badly
fitted Saddle can injure nerves, joints, and blood vessels.
Refer to for appropriate saddle rail torque values
1
2
3
EN
12
Gears
Test ride in a safe area away from traffic to familiarize yourself with the function of the Gear Shifters and how to upshift and
downshift. Check that indexing (shifting from gear to gear) is crisp and that you are able to shift into the lowest and highest
gears without the Chain skipping.
Check for tight links in the Chain and that the Chain turns freely through the Gears.
With a pedelec, drive assistance begins immediately when you step on the pedal. Squeeze the brakes before mounting your
bike to avoid any unintentional movement.
For any noise
Lift the bike up about 10 cm and drop it to the ground. If you hear any unusual noise or notice issues with Frame stability (especially Frame
and Handlepost Joints), book it for a service with your local bike shop.
10
EN
32 Relationship : 1 Nm =8.9 lbf.in =10.2 kgf.cm
Brakes
Component
lbf.in
Newton
Meters (Nm)
kgf.cm
Brake
Lever (Flat Bar)
53
-60
6
-6.8
61
-69
Brake
Lever (Drop Bar)
55
-80
6.2
-9
63
-92
Disc
Rotor to Hub (M5 bolts)
18
-35
2
-4
21
-40
Caliper
Mount
55
-70
6.2
-7.9
63
-81
Wheels
Component
lbf.in
Newton
Meters (Nm)
kgf.cm
Free
Hub Body
305
-434
34.5
-49
352
-499
Cassette
Sprocket Lockring
260
-434
29.4
-49
299
-499
Front
Axel Nuts
180
20.3
207
Rear
Axel Nuts
260
-390
29.4
-44.1
299
-449
Drivetrain
Component
lbf.in
Newton
Meters (Nm)
kgf.cm
Pedal
into Crank
307
34.7
353
Crank
Bolt (Spline and Square Spindles)
300
-395
33.9
-44.6
345
-454
Bottom
Bracket (External Shell)
610
-700
40
-50
702
-805
Bottom
Bracket (Cartridge and Cup-and-Cone)
435
-610
49.1
-68.9
500
-702
Others
Component
lbf.in
Newton
Meters (Nm)
kgf.cm
Steerer
Clamp Bolt (Stem)
70
-89
8
-10
80
-102
Top
Cap Bolt
35
-53 4-6 41-62
Handlebar
Clamp Bolts (4 Clamp Bolts)
36
-53
4
-6
41
-62
Saddle
Rail Clamp
70
-89
8
-10
80
-102

EN
13
How the bike fits
The best riding position is the one that you are most comfortable in, but a
badly adjusted bicycle may lead to back or joint pain and reduce your
control. Check that your Saddle and Handlebar are at the correct height
and that you can reach Brake and Gear Levers comfortably.
For most people, the ball of the foot (1) should be placed on the Pedal (2)
directly above the Pedal Spindle (3).
Saddle
The saddle height is an important component of the overall riding position. While seated, you should have aslight bend in your knee
when the Pedal is pushed down all the way. The leg should not be fully extended so make sure the Saddle is not too high. If the seat
is too low, repetitive strain on the knee may lead to pain.
The Saddle can be moved up and down, forward and back and angled up and down. Play around with it to get the best fit. A badly
fitted Saddle can injure nerves, joints, and blood vessels.
Refer to for appropriate saddle rail torque values
1
2
3
11
3
Thank you for choosing an Ignite e-Bike. This manual has been designed to help get a better understanding of you Commuter eBike.
The Commuter eBike is compliant to Australian standards (EN15194).
Items in carton:
When you open the carton, please check if the following items are inside. If not, please contact with your agent.
1. Introduction
EN
Charger -1pcs Pedal -1pair Manual -1pcs
USER MANUAL

EN
14
When riding, your hips should remain stationary and your knee should only bend about 20-25°when the pedal is all the way down.
The Saddle should be roughly parallel to the ground, but if it’s not comfortable, tip the Nose down to relieve pressure on the crotch or
up to distribute your weight over agreater area of the Saddle. The seat should be tilted no more than 5°up or down.
Moving the Saddle backward works your glutes harder and forward works your quads harder. Generally, the front of the knee should
not pass the Pedal Spindle. Once comfortable, check your saddle height again and adjust as necessary.
Do not raise the Seatpost above the minimum insertion line etched on the post. Doing so may result in post/frame
failure and serious injury. If proper saddle height cannot be achieved without raising the post above this line, you need
a longer Seatpost. Similarly, do not lower the Seatpost below the maximum insert mark when riding. The lower exposed
portion may hit objects on the pavement and cause a riding hazard.
Stem
Models fitted with Stems are adjustable in angle and height without tools. Please refer to the included manual for information on
how to adjust the Stem positions.
Handlebar orientation
Rotate your Handlebar so that your palms are supported and that your fingers can easily reach the Brake and Gear Levers. For Handlebar
adjustment procedures,refer to the corresponding information in the manual.
12

EN
15
Be sure to check the following before every ride:
Electrical System
Check that the battery is seated properly in the carrier on the frame and fully plugged in.
Check the controller display for any warnings or error messages. Resolve the error before riding.
Check that the battery is adequately charged for the length of ride you are planning to do.
Make sure the front and rear lights are illuminated when they are actuated and remain on when the bike is at astandstill.
Mechanical
As with all mechanical components, the bicycle is subjected to wear and high stresses. Different materials and components
might react to wear or stress fatigue in different ways. If the design life of a component has been exceeded, it may suddenly
fail, possibly causing injuries to the rider.Any form of crack, scratches, or change of coloring in highly stressed areas
indicate that the life of the component has been reached and it should be replaced.
7. Before Every Ride
EN
14
When riding, your hips should remain stationary and your knee should only bend about 20-25°when the pedal is all the way down.
The Saddle should be roughly parallel to the ground, but if it’s not comfortable, tip the Nose down to relieve pressure on the crotch or
up to distribute your weight over agreater area of the Saddle. The seat should be tilted no more than 5°up or down.
Moving the Saddle backward works your glutes harder and forward works your quads harder. Generally, the front of the knee should
not pass the Pedal Spindle. Once comfortable, check your saddle height again and adjust as necessary.
Do not raise the Seatpost above the minimum insertion line etched on the post. Doing so may result in post/frame
failure and serious injury. If proper saddle height cannot be achieved without raising the post above this line, you need
a longer Seatpost. Similarly, do not lower the Seatpost below the maximum insert mark when riding. The lower exposed
portion may hit objects on the pavement and cause a riding hazard.
Stem
Models fitted with Stems are adjustable in angle and height without tools. Please refer to the included manual for information on
how to adjust the Stem positions.
Handlebar orientation
Rotate your Handlebar so that your palms are supported and that your fingers can easily reach the Brake and Gear Levers. For Handlebar
adjustment procedures,refer to the corresponding information in the manual.
13
3
Thank you for choosing an Ignite e-Bike. This manual has been designed to help get a better understanding of you Commuter eBike.
The Commuter eBike is compliant to Australian standards (EN15194).
Items in carton:
When you open the carton, please check if the following items are inside. If not, please contact with your agent.
1. Introduction
EN
Charger -1pcs Pedal -1pair Manual -1pcs
USER MANUAL

EN
17
Rim
The Rim should be clean and undamaged. Look out for discolorations, scratches or wear. If you have Rim Brakes, the contact surface should
be checked for pits or grooves. Some Rims have awear indicator on the brake contact surface; once the Rim wears down to the wear
indicator it should be replaced.
A worn or damaged Rim may fail without warning and cause the rider to crash.
Wheels
Check that the Wheels arefixed inside the Fork by pushing from each side. They shouldn’t slide along the Hub Axle.
Use your hands to squeeze the neighboring pair of Spokes. If Spoke tension difference is pronounced, have your Wheel trued.
Make sure your Wheels are securely seated by lifting each end of the bike and knocking the Wheel toward the opening of the Dropout;
the Hub Axle should stay in position.
Saddle
Try to turn the Saddle by hand to make sure the Seatpost and Saddle are securely clamped; there should be no movement in either the
Seatpost or Saddle.
EN
16
A
AIR
Check the air pressure on
your Tires. Use your thumb to
press the Tires. They should
feel nice and firm but avoid
over-inflating.
B
BRAKES AND BARS
Check the Brakes by squeezing
the Levers and making sure the
bike stops. Check that the Brake
Cables are undamaged and
untangled.
Check that Bars (Handlebar,
Handlepost, Handlebar
Extensions) are tightly in place
and undamaged by turning the
Handlebar left and right with the
Front Wheel in
between your legs.
C
CHAIN AND CABLES
Check that Chain turns freely
through Gears by rotating the
Crank backwards, and make
sure Cables are undamaged.
QUICK
QUICK RELEASES
Check that Quick Releases
(Wheels, Seat Tube,
Handlepost) and Joints
(Frame, Handlepost) are
closed securely.
DROP
DROP THE BIKE
Lift the bicycle a few
inches and drop it to the
ground. If anything shakes
or rattles, make
adjustments before riding.
ABC Quick Drop Test
We design our bikes so that they can be everyday companions. For safety, however, we recommend this test before each
ride:
Do the twist
14
EN
32 Relationship : 1 Nm =8.9 lbf.in =10.2 kgf.cm
Brakes
Component
lbf.in
Newton
Meters (Nm)
kgf.cm
Brake
Lever (Flat Bar)
53
-60
6
-6.8
61
-69
Brake
Lever (Drop Bar)
55
-80
6.2
-9
63
-92
Disc
Rotor to Hub (M5 bolts)
18
-35
2
-4
21
-40
Caliper
Mount
55
-70
6.2
-7.9
63
-81
Wheels
Component
lbf.in
Newton
Meters (Nm)
kgf.cm
Free
Hub Body
305
-434
34.5
-49
352
-499
Cassette
Sprocket Lockring
260
-434
29.4
-49
299
-499
Front
Axel Nuts
180
20.3
207
Rear
Axel Nuts
260
-390
29.4
-44.1
299
-449
Drivetrain
Component
lbf.in
Newton
Meters (Nm)
kgf.cm
Pedal
into Crank
307
34.7
353
Crank
Bolt (Spline and Square Spindles)
300
-395
33.9
-44.6
345
-454
Bottom
Bracket (External Shell)
610
-700
40
-50
702
-805
Bottom
Bracket (Cartridge and Cup-and-Cone)
435
-610
49.1
-68.9
500
-702
Others
Component
lbf.in
Newton
Meters (Nm)
kgf.cm
Steerer
Clamp Bolt (Stem)
70
-89
8
-10
80
-102
Top
Cap Bolt
35
-53 4-6 41-62
Handlebar
Clamp Bolts (4 Clamp Bolts)
36
-53
4
-6
41
-62
Saddle
Rail Clamp
70
-89
8
-10
80
-102

EN
17
Rim
The Rim should be clean and undamaged. Look out for discolorations, scratches or wear. If you have Rim Brakes, the contact surface should
be checked for pits or grooves. Some Rims have awear indicator on the brake contact surface; once the Rim wears down to the wear
indicator it should be replaced.
A worn or damaged Rim may fail without warning and cause the rider to crash.
Wheels
Check that the Wheels arefixed inside the Fork by pushing from each side. They shouldn’t slide along the Hub Axle.
Use your hands to squeeze the neighboring pair of Spokes. If Spoke tension difference is pronounced, have your Wheel trued.
Make sure your Wheels are securely seated by lifting each end of the bike and knocking the Wheel toward the opening of the Dropout;
the Hub Axle should stay in position.
Saddle
Try to turn the Saddle by hand to make sure the Seatpost and Saddle are securely clamped; there should be no movement in either the
Seatpost or Saddle.
15
3
Thank you for choosing an Ignite e-Bike. This manual has been designed to help get a better understanding of you Commuter eBike.
The Commuter eBike is compliant to Australian standards (EN15194).
Items in carton:
When you open the carton, please check if the following items are inside. If not, please contact with your agent.
1. Introduction
EN
Charger -1pcs Pedal -1pair Manual -1pcs
USER MANUAL

EN
Stay Alert
You need to stay alert when riding. Don’t wear earphones or
headphones that affect your hearing or sunglasses if they hinder your
vision. Don’t ride if you have consumed alcohol or are on medication
that affects your motor skills.
Stand Out
Riding in low light or poor visibility, such as at night, dawn, dusk, in rain or
in fog is much more dangerous than in daytime lighting conditions. Wear
bright colors and reflective gear.
Stay Clean
Reflectors should be clean, unbroken and mounted correctly. Don’t cover
reflectors with loose clothing or bags. Also, they only reflect light in some
directions, so you need lights to make sure you are seen with all around
visibility. Make sure your lights are working properly.
18
Keep Your Eyes on the Road
Check for potholes and other dangers, like car doors opening and
kids playing. Also, think about your own visibility and avoid entering
vehicle blind spots.
8. Safe Riding
16
EN
32 Relationship : 1 Nm =8.9 lbf.in =10.2 kgf.cm
Brakes
Component
lbf.in
Newton
Meters (Nm)
kgf.cm
Brake
Lever (Flat Bar)
53
-60
6
-6.8
61
-69
Brake
Lever (Drop Bar)
55
-80
6.2
-9
63
-92
Disc
Rotor to Hub (M5 bolts)
18
-35
2
-4
21
-40
Caliper
Mount
55
-70
6.2
-7.9
63
-81
Wheels
Component
lbf.in
Newton
Meters (Nm)
kgf.cm
Free
Hub Body
305
-434
34.5
-49
352
-499
Cassette
Sprocket Lockring
260
-434
29.4
-49
299
-499
Front
Axel Nuts
180
20.3
207
Rear
Axel Nuts
260
-390
29.4
-44.1
299
-449
Drivetrain
Component
lbf.in
Newton
Meters (Nm)
kgf.cm
Pedal
into Crank
307
34.7
353
Crank
Bolt (Spline and Square Spindles)
300
-395
33.9
-44.6
345
-454
Bottom
Bracket (External Shell)
610
-700
40
-50
702
-805
Bottom
Bracket (Cartridge and Cup-and-Cone)
435
-610
49.1
-68.9
500
-702
Others
Component
lbf.in
Newton
Meters (Nm)
kgf.cm
Steerer
Clamp Bolt (Stem)
70
-89
8
-10
80
-102
Top
Cap Bolt
35
-53 4-6 41-62
Handlebar
Clamp Bolts (4 Clamp Bolts)
36
-53
4
-6
41
-62
Saddle
Rail Clamp
70
-89
8
-10
80
-102

Using Brakes
Go with the flow
Braking distances increase in wet weather or under heavy load, so brake more gently and
earlier under those circumstances.
Gradual Braking
To prevent skidding when slowing or stopping your bike, pull Brakes gradually. Skidding does
not slow you down faster and means you can’t steer well so it should be avoided.
Lean back
If you slam on your Front Brake, you may fly over the Handlebar or your Rear Wheel may
slide out behind you. If the Rear Wheel rises, lean back and ease off your Front Brake.
Use a bell, horn or your voice to indicate your intention to pass and do so in advance so as not to startle the rider you are passing.
Travel in a straight line unless you are avoiding hazards or passing and always indicate your intention to turn or pass.
EN
19
EN
Stay Alert
You need to stay alert when riding. Don’t wear earphones or
headphones that affect your hearing or sunglasses if they hinder your
vision. Don’t ride if you have consumed alcohol or are on medication
that affects your motor skills.
Stand Out
Riding in low light or poor visibility, such as at night, dawn, dusk, in rain or
in fog is much more dangerous than in daytime lighting conditions. Wear
bright colors and reflective gear.
Stay Clean
Reflectors should be clean, unbroken and mounted correctly. Don’t cover
reflectors with loose clothing or bags. Also, they only reflect light in some
directions, so you need lights to make sure you are seen with all around
visibility. Make sure your lights are working properly.
18
Keep Your Eyes on the Road
Check for potholes and other dangers, like car doors opening and
kids playing. Also, think about your own visibility and avoid entering
vehicle blind spots.
8. Safe Riding
17

EN
21
Charging
Your Commuter comes with battery charger specific to your bike Specific
charging methods refer to:
Off-Bike Charging
•Insert the charging plug of recharger into the battery charge hole; pay attention to the plug direction, please do not insert or dismantle
by force.
•Insert the power plug of recharger into a standard power point .
•Please check the recharger indicator.
When the indicator on the recharger is
red, it indicates the battery is charging,
when the indicator is green, it indicates
charging completed.
On-Bike Charging
Charging without removing the battery from the
bike: Turn off the power to the monitor and stop
using the bike.
Battery indicator button
Waterproof bolts
Power AC plug
Battery charging plug
Charging indicator
AC - Power
Power AC plug
Charging indicator
Battery charging plug
1818
EN
32 Relationship : 1 Nm =8.9 lbf.in =10.2 kgf.cm
Brakes
Component
lbf.in
Newton
Meters (Nm)
kgf.cm
Brake
Lever (Flat Bar)
53
-60
6
-6.8
61
-69
Brake
Lever (Drop Bar)
55
-80
6.2
-9
63
-92
Disc
Rotor to Hub (M5 bolts)
18
-35
2
-4
21
-40
Caliper
Mount
55
-70
6.2
-7.9
63
-81
Wheels
Component
lbf.in
Newton
Meters (Nm)
kgf.cm
Free
Hub Body
305
-434
34.5
-49
352
-499
Cassette
Sprocket Lockring
260
-434
29.4
-49
299
-499
Front
Axel Nuts
180
20.3
207
Rear
Axel Nuts
260
-390
29.4
-44.1
299
-449
Drivetrain
Component
lbf.in
Newton
Meters (Nm)
kgf.cm
Pedal
into Crank
307
34.7
353
Crank
Bolt (Spline and Square Spindles)
300
-395
33.9
-44.6
345
-454
Bottom
Bracket (External Shell)
610
-700
40
-50
702
-805
Bottom
Bracket (Cartridge and Cup-and-Cone)
435
-610
49.1
-68.9
500
-702
Others
Component
lbf.in
Newton
Meters (Nm)
kgf.cm
Steerer
Clamp Bolt (Stem)
70
-89
8
-10
80
-102
Top
Cap Bolt
35
-53 4-6 41-62
Handlebar
Clamp Bolts (4 Clamp Bolts)
36
-53
4
-6
41
-62
Saddle
Rail Clamp
70
-89
8
-10
80
-102

EN
22
Battery
Your Commuter is equipped with a lithium-ion battery. Modern lithium-ion batteries have more than 500 full discharge cycles before
the capacity decreases. The battery does not have amemory effect so you may charge the battery at any time and do not have to wait
until the battery is completely depleted before charging again. If you’re going to stop using the bike for more than amonth, charge the
battery to about 80% full before storage. Never fully drain the battery and leave it uncharged for a prolonged period of time as this may
damage the battery permanently.
Only use the original charger from the battery manufacturer. Do not use another charger, even if the plug fits.
When your Commuter’s battery has reached the end of its service life, it should be treated as hazardous waste material and should
not be disposed of in normal household trash.
Tampering with the motor system
It is forbidden to tamper with the motor system, in any way. Aftermarket devices or software that alters the speed limit and/or
an addition of throttle and/or other devices will void the warranty of your bike. It will potentially create a severe safety hazard
and might be considered unlawful.
Batteries must not be disposed of in landfills or by incineration
19
3
Thank you for choosing an Ignite e-Bike. This manual has been designed to help get a better understanding of you Commuter eBike.
The Commuter eBike is compliant to Australian standards (EN15194).
Items in carton:
When you open the carton, please check if the following items are inside. If not, please contact with your agent.
1. Introduction
EN
Charger -1pcs Pedal -1pair Manual -1pcs
USER MANUAL

EN
22
Battery
Your Commuter is equipped with a lithium-ion battery. Modern lithium-ion batteries have more than 500 full discharge cycles before
the capacity decreases. The battery does not have amemory effect so you may charge the battery at any time and do not have to wait
until the battery is completely depleted before charging again. If you’re going to stop using the bike for more than amonth, charge the
battery to about 80% full before storage. Never fully drain the battery and leave it uncharged for a prolonged period of time as this may
damage the battery permanently.
Only use the original charger from the battery manufacturer. Do not use another charger, even if the plug fits.
When your Commuter’s battery has reached the end of its service life, it should be treated as hazardous waste material and should
not be disposed of in normal household trash.
Tampering with the motor system
It is forbidden to tamper with the motor system, in any way. Aftermarket devices or software that alters the speed limit and/or
an addition of throttle and/or other devices will void the warranty of your bike. It will potentially create a severe safety hazard
and might be considered unlawful.
Batteries must not be disposed of in landfills or by incineration
EN
23
Removing / Installing the Battery
To remove the battery, insert the key into the key hole and turn
counterclockwise. Keep thand on the battery to help guide it out. To re-
install simply realign the battery and push it back into the cavity with a solid
push until it clicks into place.
Removing / Installing the Battery
To remove the battery, insert the key into the key hole and turn counterclockwise.
Keep the hand on the battery and push it back into the cavity with a solid push
until it clicks into place.
20
EN
32 Relationship : 1 Nm =8.9 lbf.in =10.2 kgf.cm
Brakes
Component
lbf.in
Newton
Meters (Nm)
kgf.cm
Brake
Lever (Flat Bar)
53
-60
6
-6.8
61
-69
Brake
Lever (Drop Bar)
55
-80
6.2
-9
63
-92
Disc
Rotor to Hub (M5 bolts)
18
-35
2
-4
21
-40
Caliper
Mount
55
-70
6.2
-7.9
63
-81
Wheels
Component
lbf.in
Newton
Meters (Nm)
kgf.cm
Free
Hub Body
305
-434
34.5
-49
352
-499
Cassette
Sprocket Lockring
260
-434
29.4
-49
299
-499
Front
Axel Nuts
180
20.3
207
Rear
Axel Nuts
260
-390
29.4
-44.1
299
-449
Drivetrain
Component
lbf.in
Newton
Meters (Nm)
kgf.cm
Pedal
into Crank
307
34.7
353
Crank
Bolt (Spline and Square Spindles)
300
-395
33.9
-44.6
345
-454
Bottom
Bracket (External Shell)
610
-700
40
-50
702
-805
Bottom
Bracket (Cartridge and Cup-and-Cone)
435
-610
49.1
-68.9
500
-702
Others
Component
lbf.in
Newton
Meters (Nm)
kgf.cm
Steerer
Clamp Bolt (Stem)
70
-89
8
-10
80
-102
Top
Cap Bolt
35
-53 4-6 41-62
Handlebar
Clamp Bolts (4 Clamp Bolts)
36
-53
4
-6
41
-62
Saddle
Rail Clamp
70
-89
8
-10
80
-102
Other manuals for COMMUTER
1
Table of contents
Other Ignite Bicycle manuals

Popular Bicycle manuals by other brands


GOGOBEST
GOGOBEST GF300 user manual

Optibike
Optibike Pioneer Allroad Unpacking guide

SmarTrike
SmarTrike 650 manual

Hase Spezialräder
Hase Spezialräder Pino user manual

Worksman
Worksman WTX Assembly instructions, parts list, and owners manual

HNF-NICOLAI
HNF-NICOLAI XD2 Urban Rohloff Pedelec operating instructions