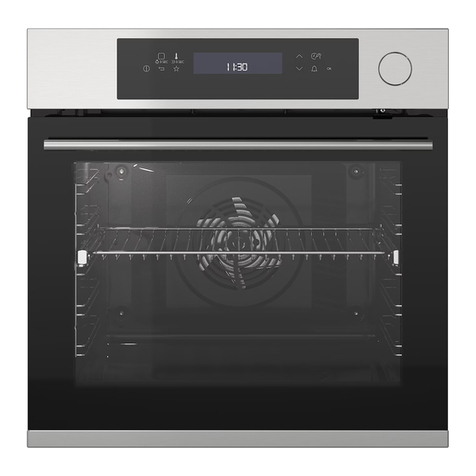
IKEA MATÄLSKARE User manual


5
ENGLISH 15
宜家售后客户服务中心将在您拨打服
务电话时,通过电话为您提供基本
的家电故障排除服务。请参考 www.
IKEA.com
并选择当地店铺,确定电话号码和营
业时间。
The IKEA after sales customer service center
will assist you on the phone with basic
Troubleshooting for your appliances at the
time of service call request. Please refer to
www.IKEA.com
and select your local store for local store
phone numbers and opening times.

Min 560 mm
600 mm
Min 560 mm
583 + 2 mm
560 mm
560 mm

使用本设备之前,请先阅读本安全说明。将其
保存在本设备附近以备将来参考。
这些说明和设备本身提供了应始终遵守的重要
安全警告信息。对于不遵守本安全说明、不当
使用本设备或错误设置控制按键的行为,制造
商拒绝承担任何责任。
不要让幼儿(0-3岁)靠近设备。无人监护
时,不要让儿童(3-8岁)靠近设备。8岁及
以上的儿童和有身心障碍或缺乏经验和知识的
人,只能在有人监督或给予安全设备使用方面
的指导并了解所涉及的危害的情况下方可使用
本设备。儿童不得将此设备当玩具。无人监护
时,不得由儿童进行清洁和用户维护工作。
设备及其附件在使用中会发热。注意
不要接触加热元件。除非一直有人照看,否则
应让八周岁以下儿童保持远离设备。
在烤干食物的过程中,请勿使设备处
于无人看管的状态。如果电器适合用于探测器
用途,仅使用为本烤箱推荐的温度探测器——
失火危险。
在所有部件充分冷却前,保持布料或其它
可燃材料远离设备——失火风险。烹饪富含油
脂的食物或添加含酒精的饮料时,总是应该保
持警惕——失火危险。使用烤箱手套来移除
烤盘和配件。烹饪结束时,小心地打开烤箱
门:手伸入烤箱前,请让热空气或蒸汽逐渐散
逸——烫伤风险。不要阻塞烤箱前面的热风通
风孔——失火风险。
烤箱门打开或拉下时,请小心操作,避免撞
击烤箱门。
设备不适合使用外部开关设备(例
如,定时器或独立的遥控系统)进行操作。
该设备适用于家电及类似应用,如:商店、
办公室及其他工作环境中的员工厨房区域;农
舍;酒店、汽车旅馆、家庭旅馆及其他居住环
境中的顾客。
本设备不可用于专业用途。不要在户外使用
本设备。
不允许用于其它用途 (例如房间取暖)。
不要在电器中或电器附近存放易爆或易燃物
质(例如,汽油罐或喷雾罐)——失火风险。
本设备的装卸和安装必须至少由两个人完
成——伤害风险。打开包装和安装时,请戴上
防护手套——割伤风险。
包括供水(如果有)和电气连接在内的安
装以及维修工作必须由具备资格的技术人员执
行。除非用户手册中特别说明,否则不要维修
或更换本电器的任何部件。使儿童远离安装位
置。打开电器包装后,确认其在运输中未被损
坏。如有问题,请联系经销商或附近的售后服
务中心。安装后,必须将包装废物(塑料、聚
苯乙烯泡沫塑料件等)存放到儿童接触不到
的地方——窒息风险。执行任何安装操作之
前,必须先断开本电器与电源的连接——触
电风险。安装期间,确保电器不会损坏电源
线——火灾或触电风险。仅在完成安装后才启
用电器。
在装入设备之前,进行橱柜的切割工作,取
出所有的木屑和锯末。
为确保正确操作电器,不要阻塞操作台与烤箱
上边缘之间的最小空隙——烫伤风险。
未到安装时,请不要将烤箱从塑料泡沫底座上
取出。
安装完成之后,应该无法接触电器的底
部——烫伤风险。
请勿将电器安装在装饰门后面——失火危
险。
铭牌位于烤箱的上缘(箱门打开时可见)。
必须按照国家电气安全标准,通过拔下可接
近的插头,或通过安装在插座上游的多极开关
断开电器电源,且电器必须接地。
不得使用接线板、复式插座或适配器。安装
完成后,电气组件不可被用户接触。
请勿在湿身或赤脚时使用本设备。
如果电源线或插头损坏或掉落、设备无法正常
工作或已损坏,请勿操作本设备。
如果电源线损坏,必须由制造商、其维护机
构或类似有资质的人员使用相同的电源线予以
更换,以避免危险——电击风险。
在更换电源线时,请联系经授权的服务中
心。
CN

控制面板
冷却风扇(不可见)
3 烤架元件
4 烤箱灯
烤箱风扇
下层加热元件(隐蔽)
烤箱门
1
2
3
4
5
7
6
将烤架略微向上倾斜,将凸起的后沿先放下(朝上),插入所需要的
烤层。接着,将烤架沿着搁架导轨尽量往里滑入。
将烤盘等其它附件沿着烤盘滑道滑动,将其水平插入。
如果您想要购买附件,请致电授权维修中心。
烤盘
1件
烤架
1件
A 旋转开关旋钮
B 定时开关旋钮
C 温控器旋钮
D LED温控器/预热
从烤箱中取出的配件,将烤箱在200℃的温度下加热大约一个小时,以消
除从绝缘材料和保护油脂的气味和烟雾。
要选择功能,将
旋转开关旋钮
旋转到您需要的功能符号处。
要启动烤箱,将
A
旋钮旋转到想要的功能处,要关闭烤箱,将
A
旋
钮旋转到“0”的位置。
一旦激活该功能后,LED温控器将开启,指示预热过程已开始。
当该过程结束时,LED温控器将关闭,指示烤箱已达到设定温
度:此时将食物放入,继续烹饪。
预热未完成就将食物放入烤箱,可能导致不同的烹饪结果。
这个位置不会打断或激活烹饪,但是允许您在烤箱活动或关闭时
均可以使用定时开关。
要激活定时器,将
定时开关
顺时针向右旋转到底,然后逆时针旋
转到想要的时长:当倒计时完成时,将发出信号音提醒您。
•
•
•
•
•
•
•
•
•
•
•
•
•
•
•
•
•
•
A B C D

用于关闭烤箱。
用于在几个搁层(最大三个)上同时烹饪需要相同烹饪温度的不同食物。该功能可以用
来烹饪异味不会从一种食物传送到其他食物的不同食物。
只在一个搁层上烘烤各类盘装食品。
最好使用第2层。
用于烧烤肉排、烤肉串和香肠,烹饪蔬菜脆皮或烤面包。烤肉时,我们建议使用托盘收
集汁液:将平底盘放在烤架下面的任何搁层上,加入200 ml的饮用水。
用于烤大块肉(烤肉腿、烤牛肉、烤鸡)。我们建议使用托盘收集汁液:将平底盘放在
烤架下面的任何搁层上,加入500 ml的饮用水。
用于在一个搁层上烹饪带多汁馅料的蛋糕。也可使用此功能在两个搁层上进行烘烤。交
换食物位置可使烘烤更加均匀。
用于更快地解冻食物。
将食物放置在烤箱腔体的中央的第3层
用于开启烹饪箱中的照明灯。
甜点、糕点等
X2 150-170 30-90
X4-1 160-180 30-90
(干酪蛋糕、果馅卷、
水果派)
X2 160–200 35-90
X4-2 160–200 40-90
X2/3 160-180 15-40
X4-2/5-3-1 150-170 20-45
X2 180-200 40-60
X4-2 170-190 35-50
X2 90 150-200
X4-2/5-3-1 90 140-200
X1/2 220-250 10-40
X4-2 200-240 20-30
X2 250 10-30
X4-2 230-250 10-30
(蔬菜饼、法式蛋
糕)
X2 180-200 30-50
X4-2/5-3-1 180-200 30-60
X2 190-200 20-30
X4-2/5-3-1 180-190 20-40

焗
X2 190-200 45-65
X4-2 200 50-100***
X4-1 190-200 45-100***
X4-1 180 30-50***
水果蛋糕(第5
层)/
意大利千层面(第3层)/ 肉
类(第1层)
X5-3-1 180-190 40-120***
MEAT
2 kg X2 180-190 110-150
1Kg X2 190-200 80-120
1Kg X2 200-230 50-100
3Kg X2 180-200 150-200
FISH
0.5Kg(鱼
排、整鱼) X2 170-190 30-50
蔬菜
(西红柿、西葫
芦、茄子) X2 180-200 50-70
5’ 5 250 2-6
5’ 4/3 250 15-30*
5’ 5/4 250 15-30*
- 3 200-220 60-90**
脆皮蔬菜 - 3 200-220 30-60**
烤土豆 - 3 200-220 30-60**
1-1.3 Kg - 3 200-220 60-90**
1Kg - 3 200-220 30-60**
烹饪温度和时间仅供参考。
* 在烹饪中途翻转食物。
** 在烹饪进行到三分之二时转动食物(如有必要)。
*** 估计的时间长度:可以根据个人偏好,在不同的时间将菜式取出。

- 请勿使用蒸汽清洁设备。
- 在烤箱完全冷却并可触摸的情况下,方可进行清洁。
- 将电器与电源断开。
i
请勿使用烈性或具有腐蚀性的清洁剂。如果此类清洁
剂与烤箱接触,立即用潮湿的抹布擦拭。
• 用潮湿的抹布擦拭烤箱表面。如果烤箱非常脏,可在水中
添加几滴清洁剂。用干布将其擦干。
i
请勿使用磨砂海绵或金属刮刀或硬毛刷清洁。随着时
间的推移,这些用具会损害搪瓷表面和烤箱门的玻璃。
• 在每次使用后,使烤箱冷却,然后在其仍然温热的情况下
清洗,除去由食物残渣(比如有高糖含量的食品)造成的污垢和
污渍。
• 使用专用的烤箱清洁剂,并按照制造商的说明进行操作。
• 使用合适的液体清洁剂清洁门。可以拆下烤箱门,以便于清洁(
参阅“保养”章节)。内玻璃是光滑的,以便进行清洁。
具有高水含量的食品(例如比萨饼、蔬菜等)进行延长烹饪期
间,可在门的内部及周围的形成冷凝。待烤箱冷却之后,用布或海绵
擦干门的内部。
• 在使用后,立即将配件浸泡在有洗涤剂的水中,如果依然过热,
操作时请使用烤箱手套。
• 可以用刷子或海绵轻松去除食物残渣。
- 使用安全手套。
- 在进行任何操作之前,请让烤箱冷却。
- 断开烤箱电源。
紧紧握住滑道的外部,将其朝您拉动,以便抽出支架和两个内部插
销。
将它们靠近烤箱腔体,并将两个插销插入它们各自的锁止位置。然
后,将外部部分放置到锁定位置,插入支架,并朝腔体内壁用力按
下,确保烤盘滑道正确紧固。
1. 将烤箱门完全打开。
2. 抬起卡夹,并将其前推,拆下去除(图1)。
图1
3. 关上烤箱门(A),将其抬起(B),旋转(C),直到其松动(D) (图2、3
、4)。
A
图2
B
B
C
图3
D
图4
1. 将铰链装置重新安装在原来的位置上。
2. 将烤箱门完全打开。
3. 降低两个卡夹。
4. 关上烤箱门

1. 在将门拆下并手柄朝下放置在一个柔软表面上后,同时按住两个
固定夹,朝自己的方向拉动门的上沿,将其拆下。
2. 用双手牢牢抓住内侧玻璃并抬起,将其拆下放在柔软的表面上,
然后进行清洁。对中间层玻璃进行同样的操作。
3. 为了正确装回中间层和内侧玻璃,请确保左角的“R”可见。
首先将玻璃标有“R”且较长的一侧插入支架,然后将其放低,装入
正确的位置。
4. 重装上沿:发出咔嗒声表示装入正确的位置。重新安装门之前,
先确保密封条安装牢固。
1. 断开烤箱电源。
图5
2. 松开灯泡外罩(图5),更换灯泡(注意灯泡类型),然后重新装上灯
泡外罩。
3. 重新连接烤箱电源。
- 仅使用25 W/230 V类型G9,T300 °C卤素灯。
- 设备使用的灯泡专门在电器上使用,不适用居家居照明(EC规
定,编号244/2009)。
- 灯泡可以在宜家家居授权维修中心获得。
烤箱不工作。 主电源没有电。 查看并确认主电源通电。
烤箱并未连接到电源。 将烤箱连接到电源。
烤箱开关旋转到“ ”位置。 将烤箱开关旋转到某一烹饪功能处。
1. 看看是否能借助《发生了这些情况后,应该怎么办》中的建议自
行解决问题。
2. 关闭设备,然后重新开启,检查问题是否依然存在。
如果在以上查看后仍然发生错误,联系宜家家居授权维修中心。
同时提供:
• 故障简要描述;
• 烤箱的确切型号;
• 服务编号(铭牌上“服务”后显示的编号),位于烤箱内腔右侧边缘
(烤箱门打开的时候可见);
• 您的详细地址;
• 您的电话号码。
如果需要进行维修,请联系宜家家居授权维修中心(以确保使用原装
零件和正确执行维修)。

产品类型:内置式电烤箱
型号辨识信息:
MATÄLSKARE 805.082.50
腔体数量
1
热源
电力
功能数量
6
可使用容积。移除任何烤架和催化面板后测量(升)
71
最大烘焙纸区(平方厘米)
1191
顶部加热元件(瓦)
2500
底部加热元件(瓦)
1150
烧烤加热元件(瓦)
2500
风扇加热元件(瓦)
1800
冷却风扇(瓦)
15
烤箱灯(瓦)
25
烤箱风扇功率(瓦)
22
总功率(瓦)
2750
尺寸
宽(毫米)
595
高(毫米)
595
深(毫米)
550
设备毛重
MATÄLSKARE 不锈钢(Kg) 27
技术信息位于设备内部的铭牌上。

要打开带有锁定装置的烤箱门,请参见图1.
图1
烤箱门安全装置可以移除
请按照下图中的顺序进行操作(参见图2)。
图2
确保电器使用的电源电压与铭牌规定的相符。铭牌位于烤箱的
上缘(箱门打开时可见)。
电源线的连接(类型H05 V2V2 x 1,5 mm2)必须由专业电工操
作。请联系宜家家居授权维修中心。
执行任何维护操作之前,请确保本电
器已关闭并与电源断开连接——触电风险。切
勿使用蒸汽清洁设备。
请勿使用烈性且具有腐蚀性的清洁剂或金属刮
刀清洁玻璃门,因为可能会划伤其表面,导致玻
璃粉碎。
开始任何清洁或维护操作之前,确保电器已
经冷却。——烫伤风险。
更换灯泡之前要关闭电器——触电风
险。
包装材料100%可回收,并标有可回收符号。 包装的各个部分必须
负责任地遵循当地政府的废物处置法规来进行处理。
本电器采用可回收或可重复利用的材料制成。应按照当地废物处置条
例对其进行弃置。如需家用电器的处理、回收和循环再用的更多信
息,请与当地主管部门、生活垃圾收集服务机构或您购买本电器的商
店联系。本电器标明符合欧洲指令2012/19/EU,即报废电子电气设备
指令(Waste Electrical and Electronic Equipment)(WEEE)。确
保本产品以正确的方式进行废弃有助于避免对环境和人体健康产生负
面影响。
电器或随附文件上的符号 表明本产品不应按生活垃圾进行处理,
而必须送往电气与电子设备的相应回收中心。
只有在烹饪表或您的食谱中明确要求的情况下,方使用预热烤箱。请使用
深色漆或覆漆烘焙烤盘,因为它们吸收的热量的能力较好。即使烤箱关
闭,
需要延长烹饪的食物仍会继续。


从您在宜家购买电器的日期开始,质保有效期为五 (5) 年。原始的销
售凭据将作为购买凭证。如果维修工作在质保下进行,该工作不会延
长电器的质保期限。
宜家的维修供应商将通过其自有的维修操作或授权的维修合作伙伴网
络提供维修服务。
质保涵盖了从宜家购买之日起由于生产瑕疵或材料瑕疵而造成的电器
故障。该质保仅适用于家用。质保免责在《哪些问题质保不涵盖?》
一节中详述。在质保期限内,只要不需要额外开支就能修复的电器,
修复故障的费用,比如维修、备用件、人工、人工差旅均被涵盖。在
这些条件下,适用相应的当地法规。更换下来的部件归宜家所有。
宜家指定的维修供应商将自主检查产品并确定产品是否受质保保护。
如果确认能获得质保,宜家维修供应商或其自有维修业务中授权维修
合作伙伴将自主维修发生故障的产品,或以相同或相似的产品来替
换。
• 正常磨损和撕裂。
• 故意或疏忽导致的损坏,未遵守操作说明、错误安装或使用错误电
压而造成的损坏,化学或电化学反应、锈蚀、水造成的损坏,包括
但不限于自来水中过量的石灰、异常环境条件造成的损坏。
• 消耗品,包括电池和灯泡。
• 非功能性和装饰性的部件,不影响电器正常使用的,包括任何划痕
和可能的色差。
• 外来物品或物质、清洁或清理滤网、下水道系统或肥皂抽屉造成的
事故性损坏。
• 下列部件的损坏:瓷杯、配件、陶器、餐具篮、进水和出水管道、
封装、灯泡和灯罩、屏幕、旋转开关、机壳和机壳部件。除非可以
证明这些损坏由产品故障引起。
• 技师上门服务时未发现任何故障的。
• 并非由我们制定的维修供应商和/或授权维修承包合作伙伴进行维
修,或使用非原厂替换件的。
• 错误安装或未按照规格安装所造成的维修。
• 在非家用环境使用电器,也即将电器用于专业用途的。
• 运输损坏。如果客户将产品运输到家中或另一地址,宜家对运输途
中发生的任何损坏都不负责任。但是,如果宜家将产品递送到客户
的投递地址,那么在投递过程中发生的产品损坏将由宜家负责。
• 初次安装宜家电器的费用。
• 但是,如果一个宜家指定的维修供应商或其授权维修合作伙伴在本
质保条款下维修或更换电器指定的维修供应商或其授权维修合作伙
伴将在必要时重新安装维修后的电器或替换电器。
• 所有管道和电气安装,均不属于宜家的责任,客户必须在执行工作
之前完成这些工作。
宜家质保保障了您具体的法律权利,可能涵盖或超出了当地的法律要
求。但是,这些条件无论如何不会限制当地法律规定的消费者权益。
本质保仅在购买产品的国家/地区有效;维修服务会根据质保条件进
行。
仅当电器合规且根据下列规定安装时,质保条款中的维修义务才存
在:
- 提出质保索赔所在国家/地区的技术规格;
- 安装说明和用户手册安全信息。
请联系宜家指定的授权维修中心来:
• 提出本质保内的维修请求;
• 索取在专用的宜家厨房家具中安装宜家电器的相关信息;
• 询问宜家电器功能的信息。
为了确保我们能够为您提供最好的帮助,请在联系我们之前仔细阅读
安装说明和/或用户手册。
宜家售后客户服务中心将在您拨打服务电话时,通
过电话为您提供基本的家电故障排除服务。请参考
并选择当地店铺,确定电话号码和营业时间。
这是您的购买凭证,在使用质保时需要出示。销售凭单也写明了
您购买的每一款电器的宜家名称和商品代码(八位数)。
对于任何和您的电器售后服务无关的问题,请联系离您最近的宜家商
场呼叫中心。我们建议您在联系我们之前仔细阅读电器文档。

Table of contents
Before using the appliance, read these
safety instructions. Keep them nearby for
future reference.
These instructions and the appliance itself
provide important safety warnings, to be
observed at all times. The manufacturer
declines any liability for failure to observe
these safety instructions, for inappropriate
use of the appliance or incorrect setting of
controls.
SAFETY WARNINGS
Very young children (0-3 years) should
be kept away from the appliance. Young
children (3-8 years) should be kept away
from the appliance unless continuously
supervised. Children from 8 years old and
above and persons with reduced physical,
sensory or mental capabilities or lack of
experience and knowledge can use this
appliance only if they are supervised or
have been given instructions on safe use
and understand the hazards involved.
Children must not play with the appliance.
Cleaning and user maintenance must
not be carried out by children without
supervision.
WARNING! The appliance and its
accessible parts become hot during use.
Care should be taken to avoid touching
heating elements. Children less than
8 years old must be kept away unless
continuously supervised.
WARNING! Never leave the appliance
unattended during food drying. If the
appliance is suitable for probe usage, only
use a temperature probe recommended
for this oven - risk of re.
Keep clothes or other ammable
materials away from the appliance, until
all the components have cooled down
completely - risk of re. Always be vigilant
when cooking foods rich in fat, oil or
when adding alcoholic beverages - risk of
re. Use oven gloves to remove pans and
accessories. At the end of cooking, open
Safety Information
the door with caution: allowing hot air or
steam to exit gradually before accessing
the cavity - risk of burns. Do not obstruct
hot air vents at the front of the oven - risk
of re.
Exercise caution when the oven door
is in the open or down position, to avoid
hitting the door.
PERMITTED USE
CAUTION: the appliance is not intended
to be operated by means of an external
switching device, such as a timer, or
separate remote controlled system.
This appliance is intended to be used
in household and similar applications
such as: sta kitchen areas in shops,
oces and other working environments;
farm houses; by clients in hotels, motels,
bed & breakfast and other residential
environments.
This appliance is not for professional
use. Do not use the appliance outdoors.
No other use is permitted (e.g. heating
rooms).
Do not store explosive or ammable
substances (e.g. gasoline or aerosol cans)
inside or near the appliance - risk of re.
INSTALLATION
The appliance must be handled and
installed by two or more persons - risk of
injury. Use protective gloves to unpack and
install - risk of cuts.
Installation, including water supply
(if any) and electrical connections, and
repairs must be carried out by a qualied
technician. Do not repair or replace any
part of the appliance unless specically
stated in the user manual. Keep children
away from the installation site. After
unpacking the appliance, make sure that it
has not been damaged during transport.
In the event of problems, contact the
dealer or your nearest After-sales Service.
Safety Information 15
Product description 17
Control panel 17
First use 17
Daily use 18
Cooking tables 18
Cleaning and maintenance 20
What to do if ... 21
Technical data 22
Installation 23
Electrical connection 23
Environmental concerns 23
IKEA GUARANTEE 24
GB
ENGLISH 15

ENGLISH 16
Once installed, packaging waste (plastic,
styrofoam parts etc.) must be stored out
of reach of children - risk of suocation.
The appliance must be disconnected from
the power supply before any installation
operation - risk of electrical shock. During
installation, make sure the appliance
does not damage the power cable - risk of
re or electrical shock. Only activate the
appliance when the installation has been
completed.
Carry out all cabinet cutting works
before tting the appliance in the furniture
and remove all wood chips and sawdust.
Do not obstruct the minimum gap
between the worktop and the upper edge
of the oven - risk of burn.
Do not remove the oven from its
polystyrene foam base until the time of
installation.
After installation, the bottom of the
appliance must no longer be accessible -
risk of burn.
Do not install the appliance behind a
decorative door - risk of re.
ELECTRICAL WARNINGS
The rating plate is on the front edge of
the oven (visible when the door is open).
It must be possible to disconnect
the appliance from the power supply by
unplugging it if plug is accessible, or by a
multi-pole switch installed upstream of the
socket and the appliance must be earthed,
in conformity with national electrical safety
standards.
Do not use extension leads, multiple
sockets or adapters. The electrical
components must not be accessible to the
user after installation.
Do not use the appliance when you are wet
or barefoot.
Do not operate this appliance if it has
a damaged power cable or plug, if it is
not working properly, or if it has been
damaged or dropped.
If the supply cord is damaged, it must
be replaced with an identical one by the
manufacturer, its service agent or similarly
qualied persons in order to avoid a
hazard - risk of electrical shock.
In case of replacement of power cable,
contact an authorized service center.

ENGLISH 17
Product description
1Control panel
2Cooling fan (not visible)
3Grill element
4Oven lamp
5Oven fan
6Lower heating element (hidden)
7Oven door
1
2
3
4
5
7
6
Inserting the wire shelf and other accessories
Insert the wire shelf onto the level you require by holding it
tilted slightly upwards and resting the raised rear side (pointing
upwards) down rst. Next, slide it horizontally along the shelf
guide as far as possible.
The other accessories, such as the baking tray, are inserted
horizontally by sliding them along the shelf guides.
If you want to buy an accessory, call the Authorized Service
Centre.
Accessories
Baking tray
1x
Wire Shelf
1x
Control panel
ASelection knob
BTime knob
CThermostat knob
DLed thermostat/preheating
Remove the accessories from the oven and heat it at 200° for about
an hour to eliminate the smell and fumes from the insulating
materials and protective grease.
First use
•
•
•
•
•
•
•
•
•
A B C D

ENGLISH 18
1. Select a function
To select a function, turn the
selection knob
to the symbol
for the function you require.
2. Turnon/otheoven
To switch on the oven turn the
A
Knob to the desired function,
to switch o turn the
A
knob to position “0”.
3. Preheating
Once the function has been activated, the LED thermostat
will switch on signalling that the preheating process has
begun.
At the end of this process, the LED thermostat switches o
indicating that the oven has reached the set temperature: At
this point, place the food inside and proceed with cooking.
Please note: Placing the food in the oven before preheating has
nished may have an adverse eect on the nal cooking result.
4. Setting the timer
This option does not interrupt or activate cooking but allows
you to use the minute minder both while a function is active
and when the oven is o.
To activate the timer, turn the
timer knob
right round in an
clockwise direction and then turn it back in the opposite
direction to the desired duration: an acoustic signal will warn
you when the count-down is nished.
•
•
•
•
•
•
•
•
•
Daily use
Oven functions table
The oven has 5 cooking levels. Count up from the lower level.
Function Description of function
0OVEN OFF For switching o the oven.
FORCED AIR For cooking dierent foods that require the same cooking temperature on several
shelves (maximum three) at the same time. This function can be used to cook
dierent foods without odours being transferred from one food to another.
CONVENTIONAL
(Top and Bottom Heat)
For cooking any kind of dish on one shelf only.
It is best to use the 2nd shelf.
GRILL For grilling steaks, kebabs and sausages, cooking vegetables au gratin or toasting
bread. When grilling meat, we recommend using a drip tray to collect the cooking
juices: position the pan on any of the levels below the wire shelf and add 200 ml of
drinking water.
GRILLING
WITH FAN
For roasting large joints of meat (legs, roast beef, chicken). We recommend using a
drip tray to collect the cooking juices: position the pan on any of the levels below the
wire shelf and add 500 ml of drinking water.
CONVECTION BAKE For baking cakes with juicy llings on a single shelf. This function can also be used
for cooking on two shelves. Switch the position of the dishes to cook food more
evenly.
DEFROST For defrosting food more quickly.
Place the food in the center of the cavity, level 3
LIGHT For switching on the light in the compartment.
Cooking tables
Type of food Function Preheating Level
(from the bottom)
Temperature (°C) Cooking time
(min)
SWEETS, PASTRY, ETC
Leavened cakes X 2 150–170 30-90
X 4-1 160-180 30-90
Filled pies (cheesecake, strudel,
fruit pie)
X 2 160-200 35-90
X 4-2 160-200 40-90
Biscuits/tartlets X 2/3 160-180 15-40
X 4-2/5-3-1 150-170 20-45
Choux buns X 2 180-200 40-60
X 4-2 170-190 35-50

ENGLISH 19
Type of food Function Preheating Level
(from the bottom)
Temperature (°C) Cooking time
(min)
Meringues X 2 90 150-200
X 4-2/5-3-1 90 140-200
Bread/pizza/focaccia X 1/2 220-250 10-40
X 4-2 200-240 20-30
Frozen pizza X 2 250 10-30
X 4-2 230-250 10-30
Savoury pies (vegetable pie,
quiche)
X 2 180-200 30-50
X 4-2/5-3-1 180-200 30-60
Vols-au-vent/Pupastry
crackers
X 2 190-200 20-30
X 4-2/5-3-1 180-190 20-40
Lasagne, baked pasta,
cannelloni,ans X 2 190-200 45-65
Lasagna & Meat X 4-2 200 50-100***
Meat & Potatoes X 4-1 190-200 45-100***
Fish & Vegetables X 4-1 180 30-50***
Complete meal Fruit tart (Level
5) /
Lasagna (Level 3) / Meat (Level 1)
X 5-3-1 180-190 40-120***
MEAT
Roast Meat 2 kg X 2 180-190 110-150
Lamb/Veal/Beef 1Kg X 2 190-200 80-120
Chicken/Rabbit/Duck 1Kg X 2 200-230 50-100
Turkey/Goose 3Kg X 2 180-200 150-200
FISH
Bakedsh/enpapillote0.5Kg
(llet, whole) X 2 170-190 30-50
VEGETABLES
Stuedvegetables (tomatoes,
courgettes, aubergines) X 2 180-200 50-70
Cooking table with GRILL function
Toast 5’ 5 250 2-6
Fishllets/slices 5’ 4/3 250 15-30*
Sausages/kebabs/spare ribs/
hamburgers 5’ 5/4 250 15-30*
Leg of lamb/knuckle – 3 200-220 60-90**
Vegetable gratin – 3 200-220 30-60**
Roast potatoes – 3 200-220 30-60**
Roast chicken
1-1.3 Kg – 3 200-220 60-90**
Roast beef rare 1Kg – 3 200-220 30-60**
Note: cooking temperatures and times are for guidance only.
* Turn food halfway through cooking
** Turn food two-thirds of the way through cooking (if
necessary).
***Estimated length of time: dishes can be removed from the
oven at dierent times depending on personal preference.

ENGLISH 20
Cleaning and maintenance
CLEANING
WARNING!
- Never use steam cleaning equipment.
- Only clean the oven when it is cool to the touch.
- Disconnect the appliance from the power supply.
Oven exterior
i
IMPORTANT: do not use corrosive or abrasive detergents.
If any of these products accidentally comes into contact
with the appliance, clean immediately with a damp cloth.
• Clean the surfaces with a damp cloth. If it is very dirty, add
a few drops of washing up detergent to the water. Finish o
with a dry cloth.
Oven interior
i
IMPORTANT: do not use abrasive sponges or metallic
scrapers or scourers. Over time, these can ruin enamelled
surfaces and the oven door glass.
• After every use, allow the oven to cool then clean it
preferably while it is still warm in order to remove built-up
dirt and stains caused by food residues (e.g. food with a high
sugar content).
• Use proper oven detergents and follow the manufacturer’s
instructions to the letter.
• Clean the door glass with a suitable liquid detergent.
The oven door can be removed to facilitate cleaning (see
MAINTENANCE). Inner glass is smooth to facilitate cleaning.
NOTE: during prolonged cooking of foods with a high water
content (e.g. pizza, vegetables, etc.) condensation may form on
the inside of the door and around the seal. When the oven is
cold, dry the inside of the door with a cloth or sponge.
Accessories
• Soak the accessories in water with washing up detergent
immediately after use, handling them with oven gloves if still
hot.
• Food residues can be easily removed using a brush or
sponge.
MAINTENANCE
WARNING!
- Use safety gloves.
- Ensure the oven is cold before carrying out the following
operations.
- Disconnect the oven from the power supply.
To remove the shelf guides
rmly grip the external part of the guide, and pull it towards
you to extract the support and the two internal pins from the
lodging.
To reposition the shelf guides
position them near the cavity and initially insert the two pins into
their lodgings. Next, position the external part near
its lodging, insert the support, and rmly press towards the wall
of the cavity to make sure the shelf guide is properly secured.
To remove the door
1. Open the door fully.
2. Lift the catches and push them forwards as far as they will go
(Fig. 1).
Fig. 1
3. Close the door as far as it will go (A), lift it up (B) and turn it
(C) until it is released (D) (Fig. 2, 3, 4).
A
Fig. 2
B
B
C
Fig. 3
D
Fig. 4
Toretthedoor
1. Insert the hinges in their seats.
2. Open the door fully.
3. Lower the two catches.
4. Close the door
Other manuals for MATÄLSKARE
17
This manual suits for next models
1
Table of contents
Other IKEA Oven manuals

IKEA
IKEA BEJUBLAD 603.009.01 User manual

IKEA
IKEA EFTERSMAK User manual

IKEA
IKEA GORLIG 204.117.03 User manual

IKEA
IKEA KULINARISK User manual
IKEA
IKEA FINSMAKARE User manual

IKEA
IKEA IBS550PVW00 User manual

IKEA
IKEA 24 inch User manual

IKEA
IKEA GÖRLIG User manual

IKEA
IKEA KULINARISK User manual

IKEA
IKEA NUTID OV 9 User manual

