L
LC
CD
DM
MO
ON
NI
IT
TO
OR
R_
__
__
__
__
__
__
__
__
__
__
__
__
__
__
__
__
__
__
__
__
__
__
__
__
__
__
__
__
__
__
__
__
__
__
__
__
__
__
__
__
__
__
__
__
__
__
__
__
__
__
__
__
__
__
__
__
_
The LCD monitor on the camera can be viewed while underwater. Simply open the
LCD before the camera is secured to the housing. Note that using the LCD screen will
automatically turn off the camera's electronic viewfinder.
B
BA
AT
TT
TE
ER
RY
YA
AN
ND
DT
TA
AP
PE
E_
__
__
__
__
__
__
__
__
__
__
__
__
__
__
__
__
__
__
__
__
__
__
__
__
__
__
__
__
__
__
__
__
__
__
__
__
__
__
__
__
__
__
__
__
__
__
__
__
__
__
__
_
Install a fully charged SCanon battery on the camera:
BP-310 BP315
Make sure you have loaded an appropriate digital cassette tape in the camera.
F
FI
IN
NA
AL
LP
PR
RE
EP
PA
AR
RA
AT
TI
IO
ON
N_
__
__
__
__
__
__
__
__
__
__
__
__
__
__
__
__
__
__
__
__
__
__
__
__
__
__
__
__
__
__
__
__
__
__
__
__
__
__
__
__
__
__
__
__
__
__
__
__
__
_
The camera's auto focus feature is utilized underwater. For best results, move in
close to your subject and use the wide angle range to shoot thru as little water as
possible. The entire zoom range is accessible underwater while using the flat lens port
on the housing. Chart shows recommended initial settings underwater.
I
IN
NS
ST
TA
AL
LL
LA
AT
TI
IO
ON
N
I
IN
NS
SE
ER
RT
TI
IN
NG
GT
TH
HE
EC
CA
AM
ME
ER
RA
A_
__
__
__
__
__
__
__
__
__
__
__
__
__
__
__
__
__
__
__
__
__
__
__
__
__
__
__
__
__
__
__
__
__
__
__
__
__
__
__
__
__
__
__
__
__
__
__
_
The camera mounts directly to the bottom surface inside the housing using the
watertight camera mounting bolt provided. This mounting bolt will penetrate through the
small circular opening in the bottom of the housing and threads into the tripod mount on
the underside of the camera.
To insert the camera mounting bolt through the housing, it is first necessary to
temporarily remove the quick-release base from the underneath the housing. Refer
to the main housing instruction manual for the proper procedure to remove the
quick-release base.
Before installing the camera, pull the housing controls out to provide clearance for
the camera. Note the placement of white-color lock on the inside bottom of the housing.
Install the camera by slowly sliding the camera along the right side of this white lock.
D
DO
ON
NO
OT
Tforce this installation; if the controls are out of the way and everything
is lined up properly, the camera will fit easily inside. Make certain that the camera is
completely in the housing, and make sure that the white tray lock has secured the
camera in place.
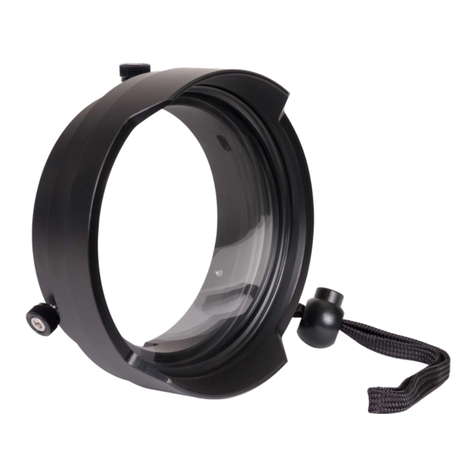
The lens shade will fit into the port when the camera is in place.
C
CA
AM
ME
ER
RA
AS
SE
ET
TT
TI
IN
NG
G
Power On/Off – Camera (On)
Zoom Lever – Wide Angle Setting
Focus – Auto Mode
Exposure – Auto Mode
Flach – Off
Mode Switch – P Mode
I
IN
NS
ST
TA
AL
LL
LA
AT
TI
IO
ON
Nc
co
on
nt
ti
in
nu
ue
ed
d
I
IN
NS
SE
ER
RT
TI
IN
NG
GT
TH
HE
EC
CA
AM
ME
ER
RA
A(
(c
co
on
nt
ti
in
nu
ue
ed
d)
)_
__
__
__
__
__
__
__
__
__
__
__
__
__
__
__
__
__
__
__
__
__
__
__
__
__
__
__
__
__
__
__
__
__
__
_
Clean and lightly lubricate both o-rings featured on the camera mounting bolt, and
make sure the underside of the housing around the small circular opening is clean. Use
only enough lubricant to lightly cover the o-rings on the mounting bolt; wipe off any
excess with a clean cloth. Lubricant only reduces friction; it is NOT a sealant. Never use
spray lubricant as it may crack the plastic.
Once the camera is installed in the housing, insert the camera mounting bolt from
the underside of the housing through the small circular opening in the bottom of the
housing. Thread the mounting bolt into the tripod mount underneath the camera.
FIRMLY HAND-TIGHTEN to assure the proper o-ring seal against the underside of the
housing; D
DO
ON
NO
OT
Tuse a tool when tightening the mounting bolt. It is normal to see a
slight squishing of the larger o-ring on the mounting bolt when tightened against the
housing.
To remove the camera, unthread the camera mounting bolt from the camera, gently
slide the camera out of the housing.
H
HO
OU
US
SI
IN
NG
GC
CO
ON
NT
TR
RO
OL
LS
S_
__
__
__
__
__
__
__
__
__
__
__
__
__
__
__
__
__
__
__
__
__
__
__
__
__
__
__
__
__
__
__
__
__
__
__
__
__
__
__
__
__
__
__
__
__
__
__
__
__
_
Slide the housing controls back in place making sure they properly align with the
camera functions.
Operate each control to see how it works with the camera. Some controls such as
start/stop will be used frequently. Other controls may seldom be utilized. Refer to your
camera owner's manual for the proper function of each camera control. Look thru the
back to be sure that you can see into the viewfinder.
When using the housing controls, especially the start/stop, D
DO
ON
NO
OT
Tuse excessive
force because you could damage the camera.
C
CA
AU
UT
TI
IO
ON
N
If the housing controls are not properly positioned, they could interfere with the housing seal.
I
IK
KE
EL
LI
IT
TE
EU
UN
ND
DE
ER
RW
WA
AT
TE
ER
RS
SY
YS
ST
TE
EM
MS
S
50 West 33rd Street • Indianapolis, IN 46208 USA • 317.923.4523
6070-02-1206


