iLive ITB490B User manual

40" HD Soundbar with Bluetooth Wireless
User’s Guide for Model ITB490B v2503-01
For the most up-to-date version of this User’s Guide, go to www.iLiveElectronics.com

2
Important Safety Instructions
• ReadtheseInstructions.
• KeeptheseInstructions.
• HeedallWarnings.
• Followallinstructions.
• Donotusethisapparatusnearwater.
• Cleanonlywithadrycloth.
• Donotblockanyventilationopenings.Installinaccordance
withthemanufacturer’sinstructions.
• Donotinstallnearanyheatsourcessuchasradiators,heat
registers,stoves,orotherapparatus(includingampliers)
thatproduceheat.
• Donotdefeatthesafetypurposeofthepolarizedor
grounding-typeplug.Apolarizedplughastwobladeswith
onewiderthantheother.Agroundingtypeplughastwo
bladesandathirdgroundingprong.Thewidebladeorthe
thirdprongareprovidedforyoursafety.Whentheprovided
plugdoesnottintoyouroutlet,consultanelectricianfor
replacementoftheobsoleteoutlet.
• Protectthepowercordfrombeingwalkedonorpinched
particularlyatplugs,conveniencereceptacles,andthepoint
wheretheyexitfromtheapparatus.
• Onlyuseattachments/accessoriesspeciedbythe
manufacturer.
• Unplugthisapparatusduringlightningstormsorwhen
unusedforlongperiodsoftime.
• Referallservicingtoqualiedservicepersonnel.Servicing
isrequiredwhentheapparatushasbeendamagedinany
way,suchaspower-supplycordorplugisdamaged,liquid
hasbeenspilledorobjectshavefallenintotheapparatus,
theapparatushasbeenexposedtorainormoisture,doesnot
operatenormally,orhasbeendropped.
• Useonlywithacart,stand,tripod,bracket,
ortablespeciedbythemanufacturer,or
soldwiththeapparatus.Whenacartis
used,usecautionwhenmovingthecart/
apparatuscombinationtoavoidinjury
fromtip-over.
Safety Instructions & Warnings
FCC Warnings
Warning:Changesormodicationstothisunitnotexpressly
approvedbythepartyresponsibleforcompliancecouldvoidthe
user’sauthoritytooperatetheequipment.
NOTE:Thisequipmenthasbeentestedandfoundtocomply
withthelimitsforaClassBdigitaldevice,pursuanttoPart
15oftheFCCRules.Theselimitsaredesignedtoprovide
reasonableprotectionagainstharmfulinterferenceina
residentialinstallation.Thisequipmentgenerates,uses,andcan
radiateradiofrequencyenergyand,ifnotinstalledandusedin
accordancewiththeinstructions,maycauseharmfulinterference
toradiocommunications.However,thereisnoguaranteethat
interferencewillnotoccurinaparticularinstallation.Ifthis
equipmentdoescauseharmfulinterferencetoradioortelevision
reception,whichcanbedeterminedbyturningtheequipmentoff
andon,theuserisencouragedtotrytocorrecttheinterference
byoneormoreofthefollowingmeasures:
• Reorientorrelocatethereceivingantenna.
• Increasetheseparationbetweentheequipmentandreceiver.
• Connecttheequipmentintoanoutletonacircuitdifferent
fromthattowhichthereceiverisconnected.
• Consultthedealeroranexperiencedradio/TVtechnician
forhelp.

3
Battery Warnings
• WARNING:Donotingestthebattery,ChemicalBurn
Hazard.
• Iftheremotecontrolsuppliedwiththisproductcontainsa
coin/buttoncellbatteryandthecoin/buttoncellbatteryis
swallowed,itcancausesevereinternalburnsinjust2hours
andcanleadtodeath.
• Keepnewandusedbatteriesawayfromchildren.Iffthe
batterycompartmentdoesnotclosesecurely,stopusingthe
productandkeepitawayfromchildren.
• Ifyouthinkbatteriesmighthavebeenswallowedor
placedinsideandpartofthebody,seekimmediatemedical
attention.
• CAUTION:Dangerofexplosionifbatteryisincorrectly
replaced.Replaceonlywiththesameorequivalenttype.
• WARNING:Thereisadangerofexplosionifyouattempt
tochargestandardAlkalinebatteriesintheunit.Onlyuse
rechargeableNiMHbatteries.
• Batteryshallnotbeexposedtoexcessiveheatsuchas
sunshine,reorthelike.
• Donotmixoldandnewbatteries.
• Completelyreplacealloldbatterieswithnewones.
• Donotmixalkaline,standard(carbon-zinc),orrechargeable
(ni-cad,ni-mh,etc)batteries.
• Batteriesshouldberecycledordisposedofasperstateand
localguidelines.
Additional Warnings and Precautions
• CAUTION:TOPREVENTELECTRICSHOCK,MATCH
WIDEBLADEOFPLUGTOWIDESLOT,FULLY
INSERT.
• Mainsplugisusedasdisconnectdeviceanditshouldremain
readilyoperableduringintendeduse.Inordertodisconnect
theapparatusfromthemainscompletely,themainsplug
shouldbedisconnectedfromthemainssocketoutlet
completely.
• CAUTION:Useofcontrolsoradjustmentsorperformance
ofproceduresotherthanthosespeciedmayresultin
hazardousradiationexposure.
• WARNING:Changesormodicationstothisunitnot
expresslyapprovedbythepartyresponsibleforcompliance
couldvoidtheuser’sauthoritytooperatetheequipment.
• WARNING:Useofthisunitnearuorescentlightingmay
causeinterferenceregardinguseoftheremote.Iftheunitis
displayingerraticbehaviormoveawayfromanyuorescent
lighting,asitmaybethecause.
• WARNING:Shockhazard-DoNotOpen.
• Cautionandmarkinginformationislocatedattherearor
bottomoftheapparatus.
• WARNING:Toreducetheriskofreorelectricshock,
donotexposethisapparatustorain,moisture,dripping,or
splashing.
• Objectslledwithliquids,suchasvases,shallnotbeplaced
ontheapparatus.
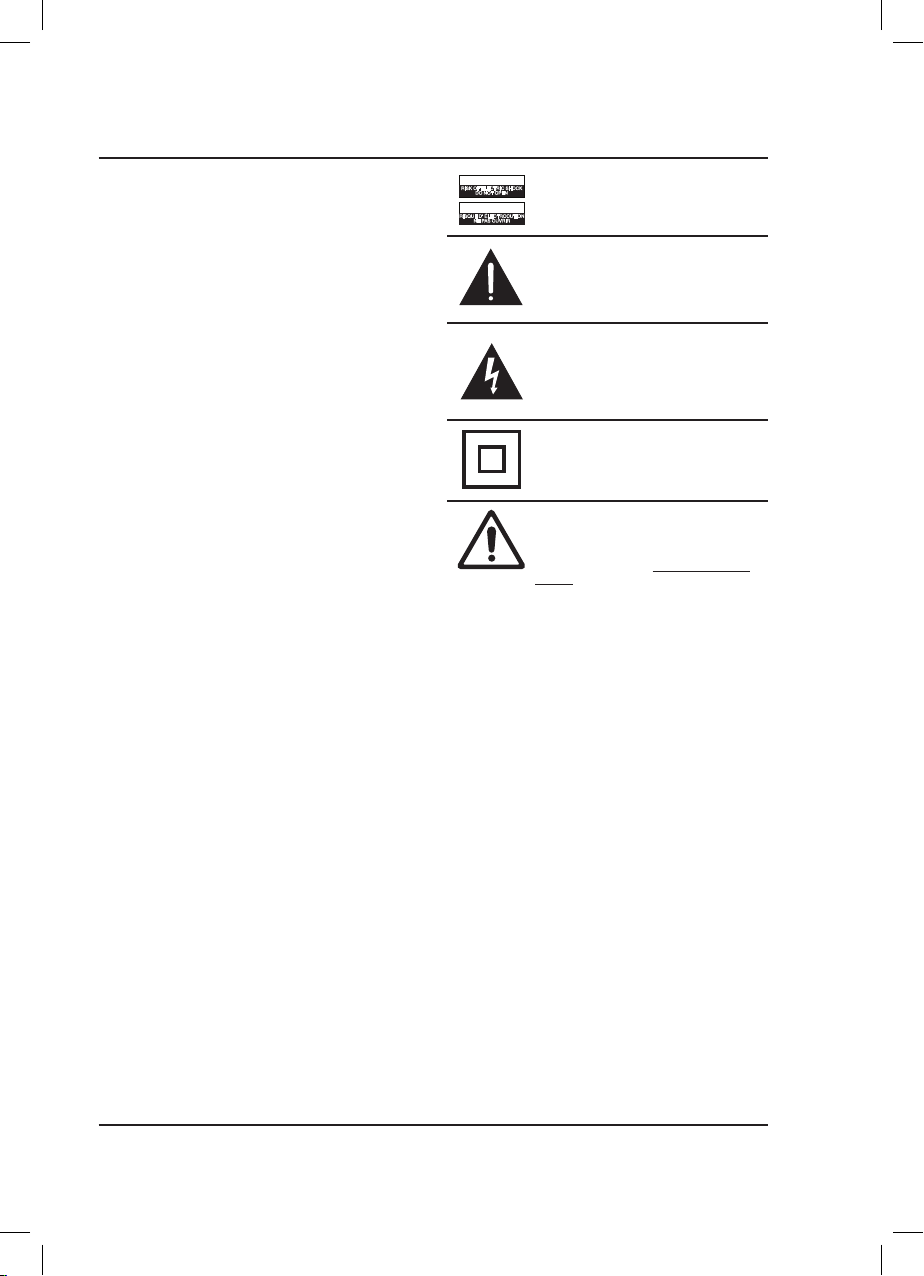
WARNING:Toreducetheriskofelectric
shock,donotremovecover(orback).No
user-serviceablepartsinside.Referservicing
toqualiedservicepersonnel.
ATTENTION
RISQUE D' ÉLECTROCUTION
NE PAS OUVRIR
CAUTION
RISK OF ELECTRIC SHOCK
DO NOT OPEN
Theexclamationpointwithinanequilateral
triangleisintendedtoalerttheuserto
thepresenceofimportantoperatingand
maintenance(servicing)instructionsinthe
literatureaccompanyingtheappliance.
Thissymbolindicatesthatthisproduct
incorporatesdoubleinsulationbetween
hazardousmainsvoltageanduseraccessible
parts.
Thelightningashwitharrowheadsymbol,
withinanequilateraltriangle,isintendedto
alerttheusertothepresenceofun-insulated
“dangerousvoltage”withintheproduct’s
enclosurethatmaybeofsufcientmagnitude
toconstituteariskofelectricshocktopersons.
WARNING : Thisproductcanexposeyou
tochemicalsincludinglead,whichisknown
totheStateofCaliforniatocausecancerand
birthdefectsorotherreproductiveharm.For
moreinformationgotowww.P65Warnings.
ca.gov.This product meets and complies
with all Federal regulations.

4
Table of Contents
Setup � � � � � � � � � � � � � � � � � � � � � � � � � � � � � � � � � � � � � � � � � � � � � � � � � � � � � � � � � � � � � � � � � � � � � � � � � � � � � � � � � � � � � � � � � � � � � � � � � � 5
Features & Specications
Includes
Power
Remote Battery
Orientation � � � � � � � � � � � � � � � � � � � � � � � � � � � � � � � � � � � � � � � � � � � � � � � � � � � � � � � � � � � � � � � � � � � � � � � � � � � � � � � � � � � � � � � � � � � � 6
Front View
Rear View
Speaker Inputs Detail
Speaker Controls (Right Side)
Remote � � � � � � � � � � � � � � � � � � � � � � � � � � � � � � � � � � � � � � � � � � � � � � � � � � � � � � � � � � � � � � � � � � � � � � � � � � � � � � � � � � � � � � � � � � � � � � � � � 8
Bluetooth Wireless � � � � � � � � � � � � � � � � � � � � � � � � � � � � � � � � � � � � � � � � � � � � � � � � � � � � � � � � � � � � � � � � � � � � � � � � � � � � � � � � � � � � � 9
Pairing a Bluetooth Device for the First Time
Playing Audio Wirelessly
Audio Inputs � � � � � � � � � � � � � � � � � � � � � � � � � � � � � � � � � � � � � � � � � � � � � � � � � � � � � � � � � � � � � � � � � � � � � � � � � � � � � � � � � � � � � � � � � � 10
Stereo RCA Inputs (Aux In)
Optical Input
Line In
Company Information � � � � � � � � � � � � � � � � � � � � � � � � � � � � � � � � � � � � � � � � � � � � � � � � � � � � � � � � � � � � � � � � � � � � � � � � � � � � � � � � � 12
Contact Information
Warranty
International Support

5
Features & Specications
• 40" length
• Supports Bluetooth
• Wireless range: 60 ft.
• 2.2 channel stereo sound
• 2 stereo speakers
• 2 woofer speakers
• Digital volume control
• Full-function remote
• Optical digital audio input
• Aux In (3.5mm audio input)
• RCA stereo audio inputs
Plug the small end of the power cord into the DC Input on the back of the speaker, and the large plug into a
standard wall outlet.
Setup
Includes
• Remote control with 1 CR2025 battery
• Optical cable
• AC/DC power adapter
• Wall-mount hardware and instructions
Power
OPTICAL IN
DC IN
AUX IN RL
OPEN
Remote Batteries
Requires 1 CR2025 battery (pre-installed).
OPEN

6
OPTICAL IN
DCIN
AUXIN RL
Rear View
Front View
Orientation
Speaker Inputs
Wall Mount Pegs
Remote Receiver
Function/Source Indicators: Power | Line In | Optical | RCA/Aux In | Bluetooth
STATUS INDICATOR
Power Off Red Light
Line In Mode Green Light
Optical Mode Amber Light
RCA/Aux In Mode White Light
Bluetooth Pairing Flashing Blue Light
Bluetooth Connected Blue Light

7
OPTICAL IN
DC IN
AUX IN RL
Speaker Controls (Right Side)
Speaker Inputs Detail
Stereo RCA Audio Inputs (AUX IN)
Optical Input
DC Power Input
Source/Power
Press to power the unit ON.
Press and hold to power
the unit OFF.
Press to switch between
Optical, RCA/Aux In, Line In,
and Bluetooth modes.
Volume +/-
Press to adjust volume
up or down.
Pair
Press to begin pairing to a
Bluetooth device.
Line In
Connect the soundbar to an
audio device using a 3.5mm
audio cable.
PAIR LINE IN
SOURCE/
VOL +
VOL –

8
Remote
Power
Press to turn
the unit on or off.
Mute
Press to mute
the volume.
Press to switch
to Bluetooth Mode.
Line In
Press to switch
to Line In mode.
Optical
Press to switch
to Optical mode.
AUX
Press to switch
to RCA/Aux mode.
Music
Press to switch to
the EQ optimized
for music.
Movie
Press to switch to
the EQ optimized
for movie sound.
Dialog
Press to switch to
the EQ optimized
for dialog.
Treble
Press to adjust the
treble up or down.
Bass
Press to adjust the
bass up or down
Volume
Press to adjust
the volume.
Skip Back/Fwd
In Bluetooth mode,
press to skip the
selected track.
Play/Pause
In Bluetooth mode,
press to play or
pause the selected
track.
Press and Hold to
pair.
BASSTREBLE VOLUME
OPTICAL
LINE IN AUX
MOVIEMUSIC
DIALOG
SOURCEPOWER MUTE

9
Initial Bluetooth Connection and Playing Audio
1. Power on the sound bar by pressing the Power button. A voice will say, "Bluetooth", and the LED indicator will
slowly flash blue. When pairing, remain within 3 feet of the Bluetooth device.
2. Using the controls on your Bluetooth device, select ITB490 in the Bluetooth Settings to pair. If need be, refer to
the user's manual for your specific device for more information.
3. When successfully paired, a voice will annouce, "Bluetooth is connected", and the LED indicator will turn solid
blue. Audio from the connected Bluetooth device will now be heard through the speaker.
4. Use the controls on the connected Bluetooth device to select and play audio. Use the speaker controls or the
connected Bluetooth device to play, pause, and adjust the volume level.
5. After initial pairing, press the Power button until the voice prompt say, "Power on". The speaker will power ON
and automatically connect to the last Bluetooth device used. Note: If your device should become unpaired or
you find it is unable to connect, press & hold the Play button to enter to Pairing Mode. A voice will announce, "
"Bluetooth is connecting", and you can connect to the speaker manually.
Note: This sound bar has last function memory. After powering OFF, it will resume the last play
mode when powering ON agin. Remember to press the button to switch it ot Bluetooth Mode
before connecting`.
Previously Connected Devices
• The sound bar can remember multiple Bluetooth devices and will always try to re-connect to the last device used.
• To reconnect to a different device, turn off Bluetooth on unwanted devices, then access the Bluetooth settings
menu on teh device you wish to use and select ITB490.
Bluetooth Wireless

10
Audio Inputs
Optical Input
You will need: An audio source with an Optical Audio Output and a Digital Optical Audio Cable (included).
1. Connect the Digital Optical Audio Cable to the optical output on the audio source and to the Optical Input
on the speaker bar.
2. Press the Power button to power the unit on.
3. Press the Source button repeatedly to switch to SPDIF Mode, indicated by a amber light.
4. Using the native controls on your connected device, make sure the audio settings are set to PCM or Optical
Audio and are turned On.
5. Audio from the connected audio source will now be played through the speakers.
Important tips for optical audio:
Use the correct toslink cable and make sure that it is firmly seated in both source and sound bar sockets.
Optical output is activated on the source (they should see a red light emitting from the toslink socket).
It may be labeled SPDIF in the setting menu of the source.
The optical output is set to output PCM and not Dolby Digital.
Stereo RCA Inputs (Aux In)
When connecting two products using an RCA cable (not included), match the colored ports to their corresponding plugs.
1. Connect the RCA cables (not included) to the RCA Stereo Inputs located on the back of the unit, and to the audio
outputs on a television or other audio source.
2. Press the Power button to power on the unit.
3. Press the Source button to select Aux In, indicated by a white light.
4. Audio played through the television will now be heard through the speakers.
Line In
3.5 mm audio input cable not included.
1. Plug one end of a 3.5 mm audio input cable into the Line In on the unit and plug the other end of the cable into
the audio output/headphone output on an MP3 Player or other audio source.
2. Press the Power button to power the unit on.
3. Press the Source button to select Line In, indicated by a green light.
4. Audio played through the connected device will now be heard through the speakers. Use the controls on the
connected device to play, pause, or skip selected tracks.

11
PAIR LINE IN
SOURCE/
VOL +
VOL –
Stereo RCA Inputs (Aux In) - Detail
Optical Input - Detail
Line In Line In - Detail
PAIR LINE IN
SOURCE/
VOL +
VOL –
OPTICAL IN
DC IN
AUX IN RL
OPTICAL IN
DC IN
AUX IN RL

12
Contact Information
Website: www.iLiveElectronics.com
Phone Support: 1-888-999-4215
Warranty
For Warranty Information and the most up-to-date version of this User’s
Guide, go to: www.iLiveElectronics.com
International Support
To download this User’s Guide in English, Spanish, and French, or to get answers
to frequently asked questions, visit the support section at:
www.iLiveElectronics.com
Para descargar este Manual del Usuario en inglés, español y francés, o para obtener respuestas a preguntas frecuentes,
visite la sección de apoyo en: www.iLiveElectronics.com
Pour télécharger ce guide de l’utilisateur en anglais, espagnol ou français, ou pour obtenir des réponses à des
questions fréquemment posées, consultez la rubrique d’assistance sur: www.iLiveElectronics.com
Copyright © 2020 Digital Products International (DPI, Inc.) All other trademarks appearing herein are the property of
their respective owners. Specifications are subject to change without notice.
Customer Support
Protect for Today
Sustain for Tomorrow
Made
Green

Warning:
changes or modifications not expressly approved by the party responsible for compliance could void the user’s
authority to operate the equipment.
This device complies with Part 15 of the FCC Rules. Operation is subject to the following two conditions: (1) this
device may not cause harmful interference, and (2) this device must accept any interference received, including
interference that may cause undesired operation.
NOTE: This equipment has been tested and found to comply with the limits for a Class B digital device, pursuant
to Part 15 of the FCC Rules. These limits are designed to provide reasonable protection against harmful
interference in a residential installation. This equipment generates, uses and can radiate radio frequency energy
and, if not installed and used in accordance with the instructions, may cause harmful interference to radio
communications. However, there is no guarantee that interference will not occur in a particular installation.
If this equipment does cause harmful interference to radio or television reception, which can be determined by
turning the equipment off and on, the user is encouraged to try to correct the interference by one or more of the
following measures:
-- Reorient or relocate the receiving antenna.
-- Increase the separation between the equipment and receiver.
-- Connect the equipment into an outlet on a circuit different from that to which the receiver is connected.
-- Consult the dealer or an experienced radio/TV technician for help.
RF Exposure Statement
This equipment complies with FCC radiation exposure limits set forth for an uncontrolled
environment. This equipment should be installed and operated with a minimum distance of 20cm
between the radiator & your body.
Table of contents
Other iLive Speakers System manuals

iLive
iLive ITBSW222 User manual

iLive
iLive SR215W User manual

iLive
iLive ITB474 User manual

iLive
iLive PLATINUM ISWF776B-1519-01 User manual

iLive
iLive ITB400 User manual

iLive
iLive DS-843 User manual

iLive
iLive ITB474B User manual

iLive
iLive ITB037SO User manual

iLive
iLive TB037BO v2268-01 User manual

iLive
iLive ITB190B User manual
Popular Speakers System manuals by other brands

Vizio
Vizio VSB207BT quick start guide

Marshall Electronics
Marshall Electronics AR-DM1 operating instructions

Electro-Voice
Electro-Voice Ceiling Speaker Systems Installation and operation manual

AudioBahn
AudioBahn ABC600T operating instructions

LG
LG SPN5B-W owner's manual

Panasonic
Panasonic SC-SB1 operating instructions