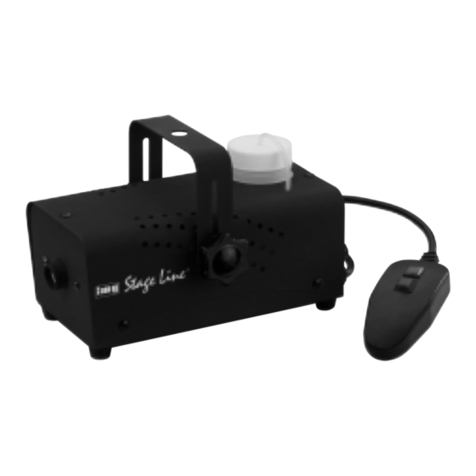
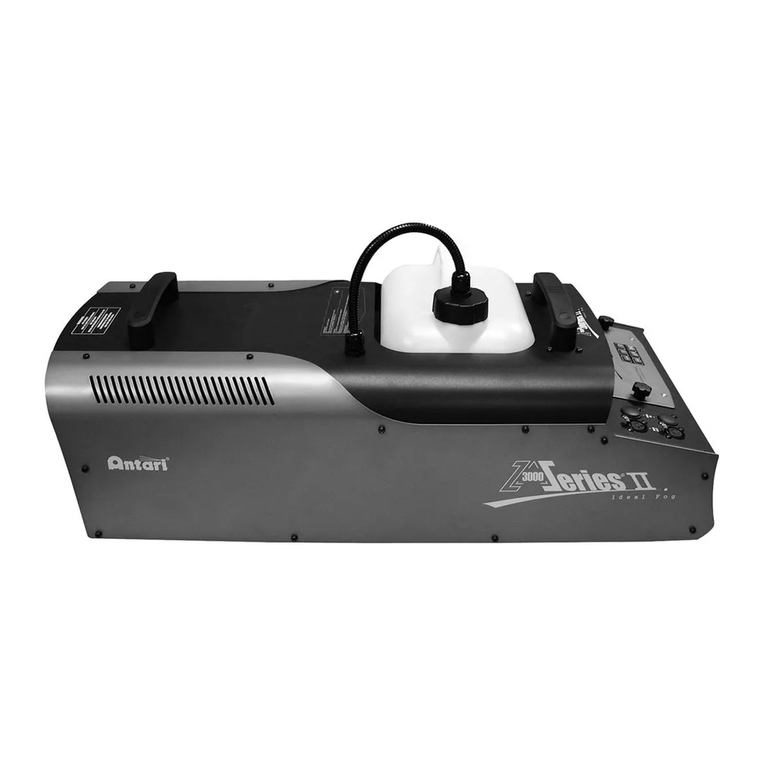
IMG STAGE LINE FM-200H User manual

DUNSTGERÄT
HAZER
MACHINE À FUMÉE
MACCHINA DEL FUMO HAZER
FM-200H Bestellnummer 38.6450
BEDIENUNGSANLEITUNG • INSTRUCTION MANUAL
MODE D’EMPLOI • ISTRUZIONI PER L’USO • MANUAL DE INSTRUCCIONES

2
wwwwww..iimmggssttaaggeelliinnee..ccoomm
Bevor Sie einschalten …
Wir wünschen Ihnen viel Spaß mit Ihrem
neuen Gerät von „img Stage Line“. Bitte lesen
Sie diese Bedienungsanleitung vor dem
Betrieb gründlich durch. Nur so lernen Sie alle
Funktionsmöglichkeiten kennen, vermeiden
Fehlbedienungen und schützen sich und Ihr
Gerät vor eventuellen Schäden durch unsach-
gemäßen Gebrauch. Heben Sie die Anleitung
für ein späteres Nachlesen auf.
Der deutsche Text beginnt auf der Seite 4.
Before switching on …
We wish you much pleasure with your new
“img Stage Line” unit. Please read these oper-
ating instructions carefully prior to operating
the unit. Thus, you will get to know all func-
tions of the unit, operating errors will be pre-
vented, and yourself and the unit will be pro-
tected against any damage caused by
improper use. Please keep the operating
instructions for later use.
The English text starts on page 8.
Avant toute installation …
Nous vous souhaitons beaucoup de plaisir à
utiliser cet appareil “img Stage Line”. Lisez
ce mode dʼemploi entièrement avant toute
utilisation. Uniquement ainsi, vous pourrez
apprendre lʼensemble des possibilités de
fonctionnement de lʼappareil, éviter toute
manipulation erronée et vous protéger, ainsi
que lʼappareil, de dommages éventuels
engendrés par une utilisation inadaptée.
Conservez la notice pour pouvoir vous y
reporter ultérieurement.
La version française se trouve page 12.
Prima di accendere …
Vi auguriamo buon divertimento con il vostro
nuovo apparecchio di “img Stage Line”. Leg-
gete attentamente le istruzioni prima di met-
tere in funzione lʼapparecchio. Solo così
potete conoscere tutte le funzionalità, evitare
comandi sbagliati e proteggere voi stessi e
lʼapparecchio da eventuali danni in seguito ad
un uso improprio. Conservate le istruzioni per
poterle consultare anche in futuro.
Il testo italiano inizia a pagina 16.
D
A
CH
GB
®
F
B
CH
I
Antes de la utilización …
Le deseamos una buena utilización para su
nuevo aparato “img Stage Line”. Por favor, lea
estas instrucciones de uso atentamente antes
de hacer funcionar el aparato. De esta
manera conocerá todas las funciones de la
unidad, se prevendrán errores de operación,
usted y el aparato estarán protegidos en con-
tra de todo daño causado por un uso inade-
cuado. Por favor, guarde las instrucciones
para una futura utilización.
La versión española comienza en la página 20.
E

3

Auf der ausklappbaren Seite 3 finden Sie alle be-
schriebenen Bedienelemente und Anschlüsse.
1 Übersicht der Bedienelemente
und Anschlüsse
1.1 Dunstgerät
1Betriebsanzeige (grüne LED)
Die LED blinkt,
wenn das FM-200H über die Fernbedienung
oder über ein DMX-Steuergerät betrieben wird.
Die LED leuchtet konstant,
wenn keine Fernbedienung und kein DMX-Steu-
ergerät angeschlossen ist.
2Heizanzeige (rote LED), leuchtet während des Auf-
heizens
3DIP-Schalter zum Einstellen der DMX-Startadres-
se (Kap. 8.2)
oder, wenn keine Fernbedienung und kein DMX-
Steuergerät angeschlossen ist, zum Einstellen des
Dunstausstoßes (Kap. 6)
Wichtig: Beim Betrieb über die Fernbedienung
oder über ein DMX-Steuergerät muss der Schalter
Nr. 10 in der linken Position (OFF) stehen.
4Feststellschraube für die verstellbare Dunst-Aus-
trittsöffnung
5Feststellschrauben für den Montagebügel (12)
6DMX-Eingang (XLR, 3-polig) zur Bedienung über
ein DMX-Steuergerät
7DMX-Ausgang (XLR, 3-polig) zum Anschluss an
den DMX-Eingang eines weiteren DMX-gesteuer-
ten Gerätes
8Anschluss REMOTE CONTROL ONLY für die bei-
liegende Fernbedienung
9Netzbuchse zum Anschluss an eine Steckdose
(230 V~/50 Hz) über das beiliegende Netzkabel
10 Sicherungshalter; eine durchgebrannte Sicherung
nur durch eine gleichen Typs ersetzen
11 Ein-/Ausschalter
12 Montagebügel
13 Tankverschluss
14 Sichtfenster zur Kontrolle des Flüssigkeitsstands
im beleuchteten Tank
1.2 Fernbedienung
15 Regler INTERVAL zum Einstellen der Dunstaus-
stoßabstände (5 – 140 Sek.) im Timer-Betrieb
16 gelbe Timer-Anzeige, leuchtet im Timer-Betrieb
17 rote Anzeige CONT, leuchtet im Dauerbetrieb
18 gelbe Taste TIMER zum Ein-/Ausschalten des
Timer-Betriebs
19 Regler FAN für das Gebläse
20 Regler OUTPUT zum Einstellen der Dunstausstoß-
menge im Timer- und im Dauerbetrieb
21 Bereitschaftsanzeige (grüne LED): Leuchtet, wenn
der Aufheizvorgang beendet ist und Dunst ausge-
stoßen werden kann
22 rote Taste CONT zum Ein-/Ausschalten des Dau-
erbetriebs
23 grüne Taste MANUAL zum Ausstoßen der maxima-
len Dunstmenge, solange die Taste gedrückt wird
2 Hinweise für den sicheren Gebrauch
Das Gerät entspricht allen relevanten Richtlinien der
EU und ist deshalb mit gekennzeichnet.
Beachten Sie auch unbedingt folgende Punkte:
GDas Gerät ist nur zur Verwendung im Innenbereich
geeignet. Schützen Sie es vor Tropf- und Spritzwas-
ser, hoher Luftfeuchtigkeit und Hitze (zulässiger Ein-
satztemperaturbereich 0 – 40 °C).
GStellen Sie keine mit Flüssigkeit gefüllten Gefäße,
z. B. Trinkgläser, auf das Gerät.
GNehmen Sie das Gerät nicht in Betrieb und ziehen
Sie sofort den Netzstecker aus der Steckdose,
1. wenn sichtbare Schäden am Gerät oder am Netz-
kabel vorhanden sind,
2. wenn nach einem Sturz oder Ähnlichem der Ver-
dacht auf einen Defekt besteht,
3. wenn Funktionsstörungen auftreten.
Geben Sie das Gerät in jedem Fall zur Reparatur in
eine Fachwerkstatt.
GZiehen Sie den Netzstecker nie am Kabel aus der
Steckdose, fassen Sie immer am Stecker an.
GZum Reinigen des Gehäuses nur ein weiches, sau-
beres Tuch benutzen. Auf keinen Fall eine Flüssig-
keit verwenden, die könnte in das Gerät laufen und
Beschädigungen verursachen.
GWird das Gerät zweckentfremdet, nicht richtig instal-
liert, falsch bedient oder nicht fachgerecht repariert,
kann keine Haftung für daraus resultierende Sach-
oder Personenschäden und keine Garantie für das
Gerät übernommen werden.
Soll das Gerät endgültig aus dem Betrieb
genommen werden, übergeben Sie es zur
umweltgerechten Entsorgung einem örtlichen
Recyclingbetrieb.
WARNUNG Das Gerät wird mit lebensgefährlicher
Netzspannung (230 V~) versorgt. Neh-
men Sie deshalb nie selbst Eingriffe am
Gerät vor. Es besteht die Gefahr eines
elektrischen Schlages.
4
D
A
CH

3 Einsatzmöglichkeiten
Das Dunstgerät FM-200H erzeugt durch Verdampfen
einer Nebelflüssigkeit einen künstlichen Nebel, der zur
optimalen Inszenierung von Lichteffekten genutzt wer-
den kann (z. B. in Diskotheken, auf der Bühne, in
Party-Räumen). Der Nebel wird über ein Gebläse im
Raum verteilt, sodass ein sehr feiner, transparenter
Dunst entsteht.
Das Gerät kann mit und ohne die beiliegende
Kabelfernbedienung betrieben werden. Alternativ zur
Fernbedienung lässt sich das FM-200H auch über ein
Steuergerät mit DMX512-Protokoll bedienen und so
problemlos in eine professionelle Lichtanlage integrie-
ren.
4 Nebelflüssigkeit einfüllen
1) Den Tankverschluss (13) abschrauben.
2) Die Nebelflüssigkeit (Kapitel 4.1) in den Tank
füllen. Eventuell daneben gelaufene Flüssigkeit
sofort mit einem Tuch abwischen, damit sie nicht
ins Geräteinnere gelangt.
3) Den Tank wieder fest verschließen.
4.1 Geeignete Nebelflüssigkeit
Von „img Stage Line“ sind folgende, für das Dunstge-
rät geeignete Nebelflüssigkeiten im 5-Liter-Kanister
erhältlich:
Bei Verwendung anderer Nebelflüssigkeiten kann kei-
ne Garantie für einen ordnungsgemäßen Betrieb über-
nommen werden.
5 Inbetriebnahme
5.1 Gerät aufstellen oder aufhängen
Sämtliches Verpackungsmaterial entfernen. Es dürfen
sich keine Verpackungsreste an der Nebelaustritts-
düse oder am Gehäuse befinden.
Das Gerät auf eine waagerechte Fläche stellen (nicht
direkt auf einen Teppich- oder Holzfußboden!) oder
über den Bügel (12) montieren (z. B. mit einer Befesti-
gungsschelle an einer Traverse). Um es genau waage-
recht auszurichten, die Schrauben (5) an beiden Seiten
des Bügels etwas lösen, die Position des Geräts korri-
gieren und die Schrauben wieder festziehen.
5.2 Ein- und Ausschalten
1) Vor dem Anschluss an eine Steckdose:
1. Den Schwamm, der unterhalb der Nebelaus-
trittsdüse zum Auffangen von Tropfen dient, ggf.
auswringen.
2. Den Füllstand des Tanks kontrollieren und ggf.
Nebelflüssigkeit auffüllen (Kapitel 4).
2) Das beiliegende Netzkabel zuerst in die Netz-
buchse (9) und dann in eine Steckdose (230 V~/
50 Hz) stecken.
WARNUNG 1. Die Nebelaustrittsdüse wird sehr
heiß. Berühren Sie sie nie während
des Betriebs oder kurz danach. Ver-
brennungsgefahr!
2. Das Gerät darf nur von erwachsenen
Personen betrieben werden und nie
unbeaufsichtigt laufen.
3. Betreiben Sie das Gerät nie ohne
Nebelflüssigkeit. Es besteht Brand-
gefahr durch Überhitzung. Außerdem
kann das Gerät beschädigt werden.
WARNUNG Das Gerät muss fachgerecht und sicher
montiert werden. Wird es an einer Stelle
installiert, unter der sich Personen auf-
halten können, muss es zusätzlich gesi-
chert werden (z. B. durch ein Fangseil
am Bügel; das Fangseil so befestigen,
dass der Fallweg des Geräts nicht mehr
als 20 cm betragen kann).
GDie im Gerät entstehende Wärme muss durch Luft-
zirkulation abgegeben werden. Achten Sie darauf,
dass neben und über dem Gerät ein Freiraum von
mindestens 50 cm verbleibt und die Öffnungen des
Gebläses nicht abgedeckt werden.
GIm Betrieb wird die Nebelaustrittsdüse sehr heiß.
Berühren Sie sie nicht. Halten Sie leicht entflamm-
bare oder explosive Stoffe in einem Umkreis von
3 m fern.
GRichten Sie das Gerät so aus, dass der heiße
Dunst nicht direkt auf Personen trifft – Verbren-
nungsgefahr!
Artikel Eigenschaft Bestell-Nr.
NF-502L lang anhaltender Dunsteffekt 38.1820
NF-502SL besonders lang anhaltender
Dunsteffekt
38.1830
WARNUNG 1. Beim Auffüllen mit Nebelflüssigkeit
darf das Gerät nicht mit der Strom-
versorgung verbunden sein. Ziehen
Sie erst den Netzstecker aus der
Steckdose!
2. Fügen Sie der Nebelflüssigkeit nie-
mals entzündliche Flüssigkeiten jegli-
cher Art bei. Explosionsgefahr!
3. Das Gerät ist nicht spritzwasserge-
schützt. Gelangt Flüssigkeit in das
Geräteinnere, lassen Sie es vor der
Inbetriebnahme erst in einer Fach-
werkstatt überprüfen und säubern.
5
D
A
CH

6
D
A
CH
3) Das Dunstgerät mit dem Schalter (11) einschalten.
Das Gerät heizt ca. zwei Minuten lang auf. Während
der Aufheizphase leuchtet die rote LED (2) und es
kann noch kein Dunst ausgestoßen werden.
4) Ist die Aufheizphase beendet, erlischt die rote LED
und es kann Dunst ausgestoßen werden. Nach
einiger Zeit heizt das Gerät immer wieder kurz
nach; die rote LED leuchtet dann. Während des
Nachheizens kann jedoch Dunst ausgestoßen wer-
den.
5) Die Dunstaustrittsöffnung an der Vorderseite kann
verstellt werden. Dazu die Feststellschraube (4)
lösen, den Öffnungswinkel einstellen und die
Schraube wieder festdrehen.
6) Nach dem Betrieb das Dunstgerät mit dem Schalter
(11) ausschalten.
Für einen Transport das Gerät erst abkühlen
lassen und den Tank vollständig entleeren!
Hinweis: Durch Nachtropfen von Flüssigkeit stößt das Gerät
auch nach einem Dunstausstoß bzw. nach dem Ausschalten
weiterhin etwas Dunst aus.
6 Betrieb ohne Fernbedienung
Für einen Betrieb ohne die Fernbedienung lassen sich
die Dunstausstoßmenge und die Gebläseleistung
jeweils in vier Stufen mit den DIP-Schaltern (3) ein-
stellen.
1) Für den Betrieb ohne Fernbedienung den DIP-
Schalter Nr. 10 in die Position „ON“ stellen. Die
grüne LED (1) leuchtet konstant.
2) Die Dunstausstoßmenge mit den Schaltern Nr.
1 – 4 einstellen und die Gebläseleistung mit den
Schaltern Nr. 6 – 9:
Beispiel: Dunstausstoßmenge = 50 %
Gebläseleistung = 75 %
7 Betrieb mit der Fernbedienung
1) Die beiliegende Fernbedienung an die Buchse RE-
MOTE CONTROL ONLY (8) anschließen.
2) Den DIP-Schalter Nr. 10 (3) in die linke Position
(OFF) stellen. Die grüne LED (1) blinkt.
3) Der Magnet auf der Rückseite der Fernbedienung
kann zum Anhaften auf einer magnetischen Fläche
verwendet werden.
Hinweis: Sobald die grüne LED (21) der Fernbedienung
leuchtet, ist die Aufheizphase beendet und es kann Dunst
ausgestoßen werden.
7.1 Manueller Betrieb
1) Um Dunst manuell auszustoßen, die grüne Taste
MANUAL (23) gedrückt halten: Das Gerät stößt
Dunst in der maximalen Menge aus. (Der Dunst tritt
nicht sofort aus, sondern erst wenn ausreichend
Nebelflüssigkeit zur Austrittsdüse gepumpt ist.)
2) Mit dem Regler FAN (19) die Gebläseleistung ein-
stellen.
Der manuelle Betrieb hat Priorität vor dem Dauer-
betrieb und dem Timer-Betrieb, d. h. beim Drücken der
grünen Taste stößt das Gerät immer Dunst in maxima-
ler Menge aus, selbst wenn eine der anderen beiden
Betriebsarten eingeschaltet ist.
7.2 Dauerbetrieb
Im Dauerbetrieb stößt das Gerät ständig Dunst aus.
1) Zum Einschalten des Dauerbetriebs die rote Taste
CONT (22) drücken, so dass sie einrastet und die
rote LED (17) über der Taste leuchtet.
2) Mit dem Regler OUTPUT (20) die Dunstmenge ein-
stellen und mit dem Regler FAN (19) die Gebläse-
leistung.
3) Zum Ausschalten des Dauerbetriebs die rote Taste
wieder lösen.
Der Dauerbetrieb hat Priorität vor dem Timer-Betrieb,
d. h. bei gedrückter roter Taste ist das Gerät auf Dauer-
betrieb eingestellt, selbst wenn der Timer-Betrieb mit
der Taste TIMER (18) eingeschaltet ist.
7.3 Timer-Betrieb
Im Timer-Betrieb stößt das Gerät automatisch Dunst in
einstellbaren Zeitabständen von 5 bis 140 Sekunden
aus.
1) Zum Einschalten des Timer-Betriebs die gelbe
Taste TIMER (18) drücken, so dass sie einrastet
und die gelbe LED (16) über der Taste leuchtet.
2) Mit dem Regler OUTPUT (20) die Dunstmenge ein-
stellen und mit dem Regler FAN (19) die Gebläse-
leistung.
3) Mit dem Regler INTERVAL (15) die Zeitabstände
einstellen.
4) Zum Ausschalten des Timer-Betriebs die gelbe
Taste wieder lösen, die LED darüber erlischt.
12345678910
ON
25%
50%
75%
100% haze
output
25%
50%
75%
100%
fan
Schalter Nr. Funktion, wenn Schalter auf „ON“
10 Betrieb ohne Fernbedienung
9 100 %
Gebläseleistung
8 75 %
7 50 %
6 25 %
5 —
4 100 %
Dunstausstoß-
menge
3 75 %
2 50 %
1 25 %

8 DMX-Betrieb
Zur Bedienung über ein DMX-Steuergerät (z. B. DMX-
1440 oder DMX-510USB von „img Stage Line“) verfügt
das FM-200H über zwei DMX-Steuerkanäle. DMX ist
die Abkürzung für Digital Multiplexund bedeutet digi-
tale Steuerung von mehreren DMX-Geräten über eine
gemeinsame Steuerleitung.
8.1 Anschluss
Für die DMX-Verbindung sind 3-polige XLR-Anschlüsse
mit folgender Kontaktbelegung vorhanden:
Pin 1 = Masse, 2 = DMX
-
, 3 = DMX+
Zum Anschluss sollten spezielle Kabel für die DMX-
Signalübertragung verwendet werden (z. B. Kabel der
CDMXN-Serie von „img Stage Line“). Bei Leitungslän-
gen ab 150 m wird grundsätzlich das Zwischen-
schalten eines DMX-Aufholverstärkers empfohlen
(z. B. SR-103DMX von „img Stage Line“). Die DMX-
Verbindungen folgendermaßen herstellen:
1) Den DMX-Eingang (6) mit dem DMX-Ausgang des
DMX-Steuergeräts verbinden oder mit dem DMX-
Ausgang eines DMX-gesteuerten Geräts.
2) Den DMX-Ausgang (7) mit dem DMX-Eingang des
nächsten DMX-gesteuerten Geräts verbinden. Des-
sen Ausgang wieder mit dem Eingang des nachfol-
genden Gerätes verbinden usw., bis alle DMX-ge-
steuerten Geräte in einer Kette angeschlossen sind.
Die Buchse DMX OUT (7) besitzt eine Verriege-
lung. Zum Herausziehen des Steckers den PUSH-
Hebel hineindrücken.
3) Um Störungen bei der Signalübertragung auszu-
schließen, sollte bei langen Leitungen bzw. bei
einer Vielzahl von hintereinandergeschalteten Ge-
räten der DMX-Ausgang des letzten DMX-Gerätes
der Kette mit einem 120-Ω-Widerstand (> 0,3 W)
abgeschlossen werden: In die DMX-Ausgangs-
buchse einen entsprechenden Abschlussstecker
(z. B. DLT-123 von „img Stage Line“) stecken.
8.2 Einstellung der DMX-Adresse
Um alle am DMX-Steuergerät angeschlossenen DMX-
Geräte separat bedienen zu können, muss jedes
Gerät eine eigene Startadresse erhalten. Soll der erste
DMX-Kanal des FM-200H vom DMX-Steuergerät z. B.
über die DMX-Adresse 5 gesteuert werden, am
FM-200H die Startadresse 5 einstellen. Der zweite
DMX-Kanal des FM-200H ist dann automatisch der
darauffolgenden Adresse zugeordnet (bei diesem Bei-
spiel der Adresse 6). Das nächste DMX-Gerät könnte
dann ab der Adresse 7 gesteuert werden.
Die Adresse wird über die DIP-Schalter (3) als
Binärzahl eingestellt. Sie ergibt sich durch die Addition
der Stellenwerte (Beschriftung „1 ... 256“) derjenigen
DIP-Schalter, die auf „ON“ gestellt sind, z. B.:
Adresse 1 Adresse 5 (= 4 + 1) Adresse 88 (= 64 + 16 + 8)
Schalter Nr. 1 Schalter Nr. 3 und Schalter Nr. 7, Nr. 5 und
auf „ON” Nr. 1 auf „ON” Nr. 4 auf „ON”
Am einfachsten ist es, vom größtmöglichen Stellen-
wert auszugehen und die kleineren Werte dazuzuad-
dieren, bis sich als Summe die Adresse ergibt.
Wichtig: Für die DMX-Steuerung muss der DIP-Schal-
ter Nr. 10 immer in der linken Position (OFF) stehen.
8.3 Bedienung über ein DMX-Steuergerät
Nach Beendigung der Aufheizphase [ca. zwei Minuten
nach dem Einschalten, wenn die rote LED (2) zum ers-
ten Mal erlischt] ist das Gerät zum Dunstausstoß
bereit.
1) Das DMX-Steuergerät einschalten.
2) Am DMX-Steuergerät die zwei Kanäle, die zur An-
steuerung des FM-200H verwendet werden, auf die
gewünschten DMX-Werte einstellen.
Hinweise
1. Der Dunst tritt nicht sofort aus, sondern erst wenn ausrei-
chend Nebelflüssigkeit zur Austrittsdüse gepumpt ist.
2. Das Dunstgerät lässt sich beim DMX-Betrieb nicht über
die Fernbedienung steuern.
9 Technische Daten
Heizleistung: . . . . . . . . . . . . 600 W
Aufheizzeit: . . . . . . . . . . . . . ca. 2 Minuten
Tankinhalt: . . . . . . . . . . . . . . 1,2 Liter
Dunstausstoß: . . . . . . . . . . . ca. 34 m3pro Minute
Stromversorgung: . . . . . . . . 230 V~/50 Hz
Leistungsaufnahme: . . . . . . 600 VA
Abmessungen über alles
(B × H × T): . . . . . . . . . . . . . 242 × 400 × 290 mm
Gewicht: . . . . . . . . . . . . . . . . 7,3 kg
Änderungen vorbehalten.
DMX-
Kanal
DMX-
Wert Funktion
10–6 kein Dunstausstoß
7 – 255 Dunstmenge min. ©max.
20 – 255 Gebläseleistung min. ©max.
12345678910
ON
1
2
4
8
16
32
64
128
256
12345678910
ON
1
2
4
8
16
32
64
128
256
12345678910
ON
1
2
4
8
16
32
64
128
256
7
D
A
CH
Diese Bedienungsanleitung ist urheberrechtlich für MONACOR ®INTERNATIONAL GmbH & Co. KG geschützt.
Eine Reproduktion für eigene kommerzielle Zwecke – auch auszugsweise – ist untersagt.

All operating elements and connections described
can be found on the fold-out page 3.
1 Operating Elements and Connections
1.1 Hazer
1Power LED (green)
LED keeps flashing
when the FM-200H is operated via remote con-
trol or via DMX controller
LED lights continuously
when neither remote control nor DMX controller
is connected
2Heat-up LED (red), lights up while the hazer is
heating up
3DIP switches to set the DMX start address
(chapter 8.2)
or, if neither remote control nor DMX controller is
connected, to adjust the haze output (chapter 6)
Important: When operating the hazer via remote
control or via DMX controller, set switch 10 to the
left position (OFF).
4Locking screw for the adjustable haze outlet
5Locking screws for the mounting bracket (12)
6DMX input (XLR, 3 poles) for operation via DMX
controller
7DMX output (XLR, 3 poles) for connection to the
DMX input of another DMX-controlled unit
8Jack REMOTE CONTROL ONLY for the supplied
remote control
9Mains jack for connection to a socket (230 V~/
50 Hz) via the supplied mains cable
10 Fuse holder; always replace a blown fuse by one of
the same type
11 Power switch
12 Mounting bracket
13 Tank cap
14 Window to check the fluid level in the illuminated
tank
1.2 Remote control
15 Control INTERVAL to adjust the haze output inter-
vals (5 – 140 seconds) in the timer mode
16 Yellow timer LED, lights up in the timer mode
17 Red LED CONT, lights up in the continuous mode
18 Yellow button TIMER to activate/deactivate the
timer mode
19 Control FAN to adjust the fan power
20 Control OUTPUT to adjust the haze output in the
timer mode and in the continuous mode
21 Standby LED (green LED); lights up when the
hazer has been heated up and is ready for use
22 Red Button CONT to activate/deactivate the con-
tinuous mode
23 Green button MANUAL for maximum haze output
while the button is kept pressed
2 Safety Notes
This unit corresponds to all relevant directives of the
EU and is therefore marked with .
Please observe the following items in any case:
GThe unit is suitable for indoor use only. Protect it
against dripping water and splash water, high air
humidity and heat (admissible ambient temperature
range: 0 – 40 °C.
GDo not place any vessel filled with liquid on the unit,
e. g. a drinking glass.
GDo not operate the unit and immediately disconnect
the mains plug from the socket
1. if the unit or the mains cable is visibly damaged,
2. if a defect might have occurred after the unit was
dropped or suffered a similar accident,
3. if malfunctions occur.
In any case the unit must be repaired by skilled per-
sonnel.
GNever pull the mains cable to disconnect the mains
plug from the socket, always seize the plug.
GFor cleaning the housing, only use a soft clean cloth.
Never use any liquid; it may get inside the unit and
cause damage.
GNo guarantee claims for the unit and no liability for
any resulting personal damage or material damage
will be accepted if the unit is used for other purposes
than originally intended, if it is not correctly installed
or operated, or if it is not repaired in an expert way.
If the unit is to be put out of operation defini-
tively, take it to a local recycling plant for a
disposal which is not harmful to the environ-
ment.
WARNING
The unit uses dangerous mains voltage
(230 V~). Leave servicing to skilled per-
sonnel only. Inexpert handling may
result in electric shock.
8
GB

3 Applications
The hazer FM-200H vaporizes fog fluid to produce arti-
ficial fog which can be used to enhance lighting effects
(e. g. in discotheques, on stage, in party rooms). A fan
inside the hazer distributes the fog in the room so that
a very fine, translucent haze is created.
The unit can be operated with or without the sup-
plied cable remote control. Alternatively, use a con-
troller with DMX512 protocol to operate the FM-200H.
Thus, the hazer can be integrated into a professional
lighting system without any difficulty.
4 Filling up the Tank with Fog Fluid
1) Unscrew the tank cap (13).
2) Fill up the tank with fog fluid (chapter 4.1). Make
sure that no fluid gets inside the unit. If any fluid is
spilt, wipe it off immediately with a cloth.
3) Screw on the cap to close the tank tightly.
4.1 Suitable fog fluid
The following fog fluids from “img Stage Line” suitable
for the hazer are available in 5 litre containers:
Only use the fog fluids listed above. If you use other
fluids, no liability will be accepted for correct operation.
5 Operation
5.1 Setting up or suspending the unit
Remove all packaging material. Make sure that there
are no packaging remnants at the fog output nozzle or
on the housing.
Place the unit on a horizontal surface (not directly on a
carpet or wooden floor!) or install it via its bracket (12)
[e. g. on a crossbar with a mounting clip]. For precise
horizontal adjustment of the unit, slightly release the
screws (5) on both sides of the mounting bracket,
readjust the position of the unit and then fasten the
screws.
5.2 Switching on and off
1) Before connecting the unit to a mains socket:
1. If necessary, wring out the sponge that is used to
soak up drops leaking from the fog output noz-
zle.
2. Check the fluid level of the tank and fill up fog
fluid, If necessary (chapter 4).
2) First connect the supplied mains cable to the mains
jack (9), then connect it to a mains socket (230 V~/
50 Hz).
WARNING 1. The fog output nozzle gets very hot.
Never touch it during operation or
shortly after operation. Risk of burns!
2. The unit is for adult use only. Never
leave it unattended during operation.
3. Never operate the hazer without fog
fluid; otherwise there will be a fire
hazard due to overheating. Besides,
the unit may be damaged.
WARNING Install the unit safely and expertly.
When installing it at a place where
people may walk or sit under it, addi-
tionally secure it (e. g. via a safety rope
on the mounting bracket; fasten the
safety rope in such a way that the max-
imum falling distance of the unit will not
exceed 20 cm).
GThe heat produced inside the unit must be dissi-
pated by air circulation. Make sure that a minimum
space of 50 cm is provided around and above the
unit and that the air vents of the housing are not
covered.
GNever touch the fog output nozzle; it gets very hot
during operation. Always ensure a distance of 3 m
to easily flammable material or explosive material.
GNever direct the haze outlet at persons – risk of
burns!
Item Feature Order No.
NF-502L long haze effect 38.1820
NF-502SL extra-long haze effect 38.1830
WARNING 1. Before filling up the tank with fog
fluid, always disconnect the unit from
the power supply!
2. Never add flammable fluids of any
kind to the fog fluid. Explosion haz-
ard!
3. The unit is not splash-proof. If fluid
gets inside the unit, it must be
cleaned and checked by skilled per-
sonnel before it is operated.
9
GB

3) Switch on the hazer with the power switch (11). It
will heat up for approximately two minutes. While
the hazer is heating up, the red LED (2) lights up
and haze output is not possible yet.
4) When the hazer has been heated up, the red LED
is extinguished and haze output is possible. From
time to time, the hazer briefly reheats. The red LED
lights up. While reheating, the unit is still able to pro-
duce haze.
5) The haze outlet on the front panel is adjustable:
Release the locking screw (4), adjust the opening
angle and then fasten the screw.
6) After operation, switch off the hazer with the power
switch (11).
Before transporting the unit, it must cool down
and the tank must be completely empty!
Note: Due to residual fluid in the unit, the unit may still emit
some haze after a haze output or after switching off.
6 Operation without Remote Control
For operation without remote control, both the haze
output and the fan power can be adjusted in four
levels with the DIP switches (3).
1) For operation without remote control, set DIP switch
10 to “ON”. The green LED (1) lights continuously.
2) Adjust the haze output with the switches 1 to 4 and
the fan power with the switches 6 to 9:
Example: Haze output = 50 %
Fan power = 75 %
7 Operation with Remote Control
1) Connect the supplied remote control to the jack
REMOTE CONTROL ONLY (8).
2) Set DIP switch 10 (3) to the left position (OFF). The
green LED (1) starts flashing.
3) Via the magnet on the back of the remote control,
the remote control can be attached to magnetic sur-
faces.
Note: As soon as the green LED (21) of the remote control
lights up, the hazer has been heated up and is ready for use.
7.1 Manual mode
1) For manual haze output, keep the green button
MANUAL (23) pressed: The maximum quantity of
haze is emitted. (However, there is no immediate
haze output. Before haze is emitted, a sufficient
quantity of fog fluid must be pumped to the output
nozzle.)
2) Adjust the fan power with the control FAN (19).
The manual mode takes priority over the continuous
mode and the timer mode, i. e. when the green button
is pressed, the unit always emits the maximum quan-
tity of haze even if one of the other operating modes is
activated.
7.2 Continuous mode
In the continuous mode, haze is emitted continuously.
1) To activate the continuous mode, press the red but-
ton CONT (22) so that it engages and the red LED
(17) above the button lights up.
2) Adjust the haze output with the control OUTPUT
(20) and the fan power with the control FAN (19).
3) To deactivate the continuous mode, disengage the
red button.
The continuous mode takes priority over the timer
mode, i. e. when the red button is pressed, the unit is
set to continuous mode even if the timer mode is acti-
vated with the button TIMER (18).
7.3 Timer mode
In the timer mode, haze is automatically emitted in
adjustable intervals of 5 to 140 seconds.
1) To activate the timer mode, press the yellow button
TIMER (18) so that it engages and the yellow LED
(16) above the button lights up.
2) Adjust the haze output with the control OUTPUT
(20) and the fan power with the control FAN (19).
3) Adjust the intervals with the control INTERVAL (15).
4) To deactivate the timer mode, disengage the yellow
button. The LED above the button is extinguished.
12345678910
ON
25%
50%
75%
100% haze
output
25%
50%
75%
100%
fan
Switch No. Function if switch set to “ON”
10 Operation without remote control
9 100 %
Fan power
8 75 %
7 50 %
6 25 %
5 —
4 100 %
Haze output
3 75 %
2 50 %
1 25 %
10
GB

8 DMX Operation
For operation via a DMX controller (e. g. DMX-1440 or
DMX-510USB from “img Stage Line”), the FM-200H is
provided with two DMX control channels. DMX is short
for digital multiplexand means digital control of sev-
eral DMX units via a common control cable.
8.1 Connection
For DMX connection, 3-pole XLR connectors with the
following pin configuration are provided:
Pin 1 = ground, Pin 2 = DMX
-
, Pin 3 = DMX+
For connection, special cables for DMX signal trans-
mission are recommended (e. g. cables of the CDMXN
series from “img Stage Line”). For cable lengths ex-
ceeding 150 m, it is generally recommended to insert a
DMX level matching amplifier (e. g. SR-103DMX from
“img Stage Line”). Make the DMX connections as fol-
lows:
1) Connect the DMX input (6) to the DMX output of the
DMX controller or to the DMX output of a DMX-con-
trolled unit.
2) Connect the DMX output (7) to the DMX input of the
following DMX-controlled unit; connect its output
again to the input of the following unit, etc. until all
DMX-controlled units have been connected in a
chain.
The jack DMX OUT (7) has a locking mecha-
nism. To remove the plug, press the PUSH lever.
3) To prevent interference in signal transmission, in
case of long cables or a multitude of units con-
nected in series, terminate the DMX output of the
last DMX unit in the chain with a 120 Ω resistor
(> 0.3 W): Connect a corresponding terminating
plug (e. g. DLT-123 from “img Stage Line”) to the
DMX output jack.
8.2 Setting the DMX address
For separate control of the DMX units connected to
the DMX controller, each unit must have its own
start address. Example: If the first DMX channel of
the FM-200H is to be controlled by the DMX controller
via DMX address 5, set the start address 5 on the
FM-200H. The second DMX channel of the FM-200H
is automatically assigned to the address following it
(i. e. address 6 in this example). Address 7 would be
available for controlling the next DMX unit.
The address is set as a binary number via the DIP
switches (3). It is the sum of the position values (mark-
ing “1 … 256”) of the DIP switches set to “ON”, e. g.:
Address 1 Address 5 (= 4 + 1) Address 88 (= 64 + 16 + 8)
Switch 1 Switches 3 and 1 Switches 7, 5 and 4
set to “ON” set to “ON” set to “ON”
The easiest way to do this is to start with the highest
position value and to add the smaller values until the
address results as a sum.
Important: For DMX control, always set DIP switch 10
to the left position (OFF).
8.3 Operation via DMX controller
After heating up [approximately two minutes after
switching on when the red LED (2) is extinguished for
the first time], the hazer is ready for use.
1) Switch on the DMX controller.
2) Set the two channels of the DMX controller which
are used to control the FM-200H to the desired
DMX values.
Notes
1. There is no immediate haze output. Before haze is emit-
ted, a sufficient quantity of fog fluid must be pumped to the
output nozzle.
2. In the DMX mode, it is not possible to operate the hazer
via remote control.
9 Specifications
Heating power: . . . . . . . . . . . 600 W
Heat-up time: . . . . . . . . . . . . 2 minutes (approx.)
Tank capacity: . . . . . . . . . . . 1.2 litres
Haze output: . . . . . . . . . . . . 34 m3per minute
(approx.)
Power supply: . . . . . . . . . . . 230 V~/50 Hz
Power consumption: . . . . . . 600 VA
Overall dimensions
(W x H x D): . . . . . . . . . . . . . 242 × 400 × 290 mm
Weight: . . . . . . . . . . . . . . . . . 7.3 kg
DMX
channel
DMX
value Function
10–6 no haze output
7 – 255 haze output min. ©max.
20 – 255 fan power min. ©max.
12345678910
ON
1
2
4
8
16
32
64
128
256
12345678910
ON
1
2
4
8
16
32
64
128
256
12345678910
ON
1
2
4
8
16
32
64
128
256
11
GB
All rights reserved by MONACOR ®INTERNATIONAL GmbH & Co. KG. No part of this instruction manual may
be reproduced in any form or by any means for any commercial use.
Subject to technical modification.

Vous trouverez sur la page 3, dépliable, les élé-
ments et branchements décrits.
1 Eléments et branchements
1.1 Machine à fumée
1Témoin de fonctionnement (LED verte)
La LED clignote :
lorsque le FM-200H fonctionne via la télécom-
mande ou via un contrôleur DMX
La LED brille en continu
si aucune télécommande ni contrôleur DMX
nʼest relié
2Témoin de chauffe (LED rouge), brille pendant la
chauffe
3Interrupteurs DIP pour régler lʼadresse de démar-
rage DMX (chapitre 8.2)
ou, si aucune télécommande ni contrôleur DMX
nʼest branché, pour régler le dégagement de fumée
(chapitre 6)
Important : Pendant le fonctionnement via la télé-
commande ou un contrôleur DMX, lʼinterrupteur
N° 10 doit être sur la position gauche (OFF).
4Vis de réglage pour lʼouverture réglable pour la sor-
tie de fumée
5Vis de réglage pour lʼétrier de montage (12)
6Entrée DMX (XLR, 3 pôles) pour une utilisation via
un contrôleur DMX
7Sortie DMX (XLR 3 pôles) pour brancher à lʼentrée
DMX dʼun autre appareil géré par DMX
8Branchement REMOTE CONTROL ONLY pour la
télécommande livrée
9Prise secteur à brancher via le cordon secteur livré
à une prise secteur 230 V~/50 Hz
10 Porte fusible : tout fusible fondu doit être remplacé
par un fusible de même type.
11 Interrupteur marche/arrêt
12 Etrier de montage
13 Bouchon du réservoir
14 Fenêtre de contrôle du niveau du liquide dans le
réservoir éclairé
1.2 Télécommande
15 Réglage INTERVAL pour régler les intervalles
dʼémission (5 – 140 s) en mode Programmateur
(Timer)
16 LED jaune Timer, brille en mode Timer
17 LED rouge CONT, brille en monde continu
18 Touche jaune TIMER pour activer/désactiver le
mode Timer
19 Réglage FAN pour la ventilation
20 Réglage OUTPUT pour régler la quantité de fumée
émise en mode Timer ou continu
21 LED (verte) appareil prêt à fonctionner : brille
lorsque le processus de chauffe est terminé, la
fumée peut être émise
22 Touche rouge CONT pour activer/désactiver le
mode continu
23 Touche verte MANUAL pour dégager la quantité
maximale de fumée tant que la touche est enfon-
cée
2 Conseils dʼutilisation et de sécurité
Cet appareil répond à toutes les directives nécessaires
de lʼUnion européenne et porte donc le symbole .
Respectez scrupuleusement les points suivants :
GCet appareil nʼest conçu que pour une utilisation en
intérieur. Protégez-le de tout type de projections
dʼeau, des éclaboussures, dʼune humidité élevée et
de la chaleur (plage de température de fonctionne-
ment autorisée : 0 – 40 °C).
GEn aucun cas, vous ne devez poser dʼobjet conte-
nant du liquide ou un verre sur lʼappareil.
GNe faites pas fonctionner lʼappareil ou débranchez-
le immédiatement du secteur lorsque :
1. des dommages visibles apparaissent sur lʼappa-
reil ou sur le cordon secteur,
2. après une chute ou un cas similaire, vous avez un
doute sur lʼétat de lʼappareil,
3. des dysfonctionnements apparaissent.
Dans tous les cas, les dommages doivent être répa-
rés par un technicien spécialisé.
GNe débranchez jamais lʼappareil en tirant sur le cor-
don secteur ; retirez toujours le cordon secteur en
tirant la fiche.
GPour nettoyer le boîtier, utilisez un tissu doux et pro-
pre. En aucun cas, vous ne devez utiliser de liquide
car il pourrait couler dans lʼappareil et causer des
dégâts.
GNous déclinons toute responsabilité en cas de dom-
mages matériels ou corporels résultants si lʼappareil
est utilisé dans un but autre que celui pour lequel il a
été conçu, sʼil nʼest pas correctement installé ou uti-
lisé ou nʼest pas réparé par une personne habilitée ;
en outre, la garantie deviendrait caduque.
Lorsque lʼappareil est définitivement retiré du
service, vous devez le déposer dans une
usine de recyclage adaptée pour contribuer à
son élimination non polluante.
AVERTISSEMENT Lʼappareil est alimenté par une ten-
sion dangereuse (230 V~). Ne tou-
chez jamais lʼintérieur de lʼappareil
et ne faites rien tomber dans les
ouïes de ventilation. Vous pourriez
subir une décharge électrique.
12
F
B
CH

3 Possibilités dʼutilisation
La FM-200H, en vaporisant un liquide à fumée, produit
une fumée artificielle pouvant être utilisée pour une
mise en scène optimale dʼeffets de lumière (par exem-
ple dans des discothèques, sur scène ou dans des
salles des fêtes). La fumée est dispersée via un venti-
lateur dans la pièce pour quʼune fumée très fine et
transparente soit créée.
Lʼappareil peut fonctionner avec ou sans la télé-
commande filaire livrée. A la place de la télécom-
mande, la FM-200H peut également être utilisée via un
contrôleur avec protocole DMX512 et donc être très
facilement intégrée dans une installation profession-
nelle de lumière.
4 Remplissage du liquide à fumée
1) Dévissez le bouchon du réservoir (13).
2) Remplissez le réservoir avec du liquide à fumée
(chapitre 4.1). Si du liquide coule, essuyez immé-
diatement avec un chiffon sec, il ne doit pas pénétrer
dans lʼappareil.
3) Refermez le réservoir fermement.
4.1 Liquide à fumée adapté
Les liquides suivants de marque “img Stage Line”
adaptés pour lʼappareil sont disponibles en bidon de
5 litres :
Si vous utilisez dʼautres liquides, tout droit à la garantie
pour un fonctionnement correct deviendrait caduque !
5 Fonctionnement
5.1 Positionnement ou accrochage de lʼappareil
Retirez tous les éléments dʼemballage. Aucun résidu
ne doit rester dans la buse ou sur le boîtier.
Placez lʼappareil sur une surface horizontale (pas
directement sur un tapis ou un sol en bois) ou montez-
le via lʼétrier (12), par exemple avec un crochet de fixa-
tion à une traverse. Pour le mettre précisément à lʼho-
rizontale, desserrez un peu les vis (5) sur les deux
côtés de lʼétrier, orientez lʼappareil et revissez les vis.
5.2 Marche/arrêt
1) Avant le branchement au secteur :
1. Si besoin, essorez lʼéponge qui se trouve sous la
buse et sert à éponger les gouttes.
2. Contrôlez le niveau du réservoir et si besoin
rajoutez du liquide (chapitre 4).
2) Reliez le cordon secteur livré à la prise secteur (9)
puis à une prise secteur 230 V~/50 Hz.
AVERTISSEMENT 1. La buse est très chaude. Ne la
touchez pas pendant le fonction-
nement ou juste après. Risque
de brûlure !
2. La machine à fumée ne doit être
manipulée que par des adultes ;
ne la faites jamais fonctionner
sans surveillance.
3. Assurez-vous quʼil y ait toujours
assez de liquide dans le réser-
voir. Si lʼappareil fonctionne sans
liquide, il y a risque dʼincendie à
cause dʼune surchauffe. De plus,
lʼappareil peut être endommagé.
AVERTISSEMENT Lʼappareil doit être monté de ma-
nière sûre et professionnelle. Sʼil
doit être installé au-dessus de per-
sonnes, il faut en plus lʼassurer (par
exemple via une élingue de sécurité
sur lʼétrier ; fixez lʼélingue de telle
sorte que la chute de lʼappareil ne
puisse pas excéder 20 cm).
GLa chaleur dégagée par lʼappareil doit être évacuée
par une bonne circulation dʼair. Veillez à ce quʼil y
ait assez dʼespace libre autour et au-dessus de
lʼappareil et à ce que les ouïes de ventilation sur le
boîtier ne soient pas obturées.
GPendant le fonctionnement, la buse dʼémission est
très chaude. Veillez à laisser une distance de 3 m
avec des matériaux facilement inflammables ou
explosifs.
GOrientez lʼappareil de sorte que le dégagement de
fumée chaud ne se fasse pas directement vers des
personnes. Risque de brûlure !
Article Propriété Ref. num.
NF-502L effet long de fumée 38.1820
NF-502SL effet particulièrement long de
fumée
38.1830
AVERTISSEMENT 1. Lors du remplissage du réservoir
avec du liquide, lʼappareil ne doit
en aucun cas être relié au sec-
teur. Débranchez-le impérative-
ment du secteur !
2. Nʼajoutez jamais de liquides
inflammables de nʼimporte quel
type, au liquide à fumée. Risque
dʼexplosion !
3. Lʼappareil nʼest pas protégé
contre les éclaboussures. Si du
liquide venait à couler dans lʼap-
pareil, ne le mettez pas en fonc-
tionnement mais faites-le vérifier
et nettoyer par un technicien spé-
cialisé et habilité.
13
F
B
CH

3) Allumez lʼappareil avec lʼinterrupteur (11). Il chauffe
pendant 2 minutes environ. Pendant le processus
de chauffe la LED rouge (2) brille, aucune fumée ne
peut encore être émise.
4) Lorsque le processus de chauffe est terminé, la
LED rouge sʼéteint, la fumée peut être émise. Après
quelques temps, lʼappareil réchauffe toujours
encore un peu : la LED rouge brille. Pendant ce
temps, la fumée peut être émise.
5) Lʼouverture pour la sortie de fumée sur la face
avant est réglable. Pour ce faire, desserrez la vis
(4), réglez lʼangle dʼouverture et revissez la vis.
6) Après le fonctionnement, éteignez lʼappareil avec
lʼinterrupteur (11).
Pour le transport, laissez tout dʼabord refroidir
lʼappareil et videz entièrement le réservoir.
Conseil : Lʼappareil peut encore dégager un peu de fumée
après un dégagement ou après lʼarrêt à cause des résidus
de liquide dans la machine.
6 Fonctionnement sans télécommande
Pour un fonctionnement sans télécommande, on peut
régler la quantité de fumée dégagée et la puissance du
ventilateur en quatre paliers avec les interrupteurs DIP
(3).
1) Pour le fonctionnement sans télécommande, met-
tez lʼinterrupteur N° 10 sur la position “ON”. La LED
verte (1) brille en continu.
2) Réglez la quantité de fumée dégagée avec les
interrupteurs 1 à 4 et réglez la puissance du venti-
lateur avec les interrupteurs 6 à 9 :
exemple : quantité fumée dégagée : 50 %
puissance du ventilateur : 75 %
7 Fonctionnement avec la télécommande
1) Reliez la télécommande livrée à la prise REMOTE
CONTROL ONLY (8).
2) Mettez lʼinterrupteur DIP N° 10 (3) sur la position
gauche (OFF). La LED verte (1) clignote.
3) Vous pouvez utiliser lʼaimant sur la face arrière de
la télécommande pour la maintenir sur une surface
aimantée.
Conseil : Dès que la LED verte (21) sur la télécommande
brille, la phase de chauffe est terminée, la fumée peut être
émise.
7.1 Mode manuel
1) Pour un dégagement manuel de fumée, maintenez
la touche verte MANUAL (23) enfoncée : lʼappareil
dégage de la fumée en quantité maximale. (La
fumée ne sort pas tout de suite mais uniquement
lorsque suffisamment de liquide est pompé vers la
buse).
2) Avec le réglage FAN (19), réglez la puissance du
ventilateur.
Le mode manuel est prioritaire sur le mode continu et
le mode Timer (programmateur), cʼest-à-dire que
lorsquʼon appuie sur la touche verte, lʼappareil émet
toujours la quantité maximale même si un des deux
autres modes de fonctionnement est activé.
7.2 Fonctionnement continu
En mode continu, lʼappareil émet de la fumée tout le
temps.
1) Pour activer le mode continu, appuyez sur la touche
rouge CONT (22) pour quʼelle sʼenclenche et que la
LED rouge (17) au-dessus de la touche brille.
2) Avec le réglage OUTPUT (20), réglez la quantité de
fumée et avec le réglage FAN (19), la puissance du
ventilateur.
3) Pour désactiver le mode continu, désenclenchez la
touche rouge.
Le mode continu est prioritaire sur le mode Timer (pro-
grammateur), cʼest-à-dire que lorsquʼon appuie sur la
touche rouge, lʼappareil est réglé sur le mode continu
même si le mode Timer est activé avec la touche
TIMER (18).
7.3 Mode Timer (programmateur)
En mode Timer, lʼappareil émet automatiquement de la
fumée dans des intervalles réglables de 5 à 140 se-
condes.
1) Pour activer le mode Timer, appuyez sur la touche
jaune TIMER (18) pour quʼelle sʼenclenche et que la
LED jaune (16) au-dessus de la touche brille.
2) Avec le réglage OUTPUT (20), réglez la quantité de
fumée et avec le réglage FAN (19), la puissance du
ventilateur.
3) Avec le réglage INTERVAL (15), réglez les inter-
valles.
12345678910
ON
25%
50%
75%
100% haze
output
25%
50%
75%
100%
fan
Nointerrupteur Fonction, si interrupteur sur “ON”
10 fonctionnement sans télécommande
9 100 %
puissance
du ventilateur
8 75 %
7 50 %
6 25 %
5 —
4 100 %
quantité
fumée dégagée
3 75 %
2 50 %
1 25 %
14
F
B
CH

4) Pour désactiver le mode Timer, désenclenchez la
touche jaune, la LED au-dessus sʼéteint.
8 Fonctionnement DMX
Pour une gestion via un contrôleur DMX (par exemple
DMX-1440 ou DMX-510USB de “img Stage Line”), la
FM-200H dispose de 2 canaux de commande DMX.
DMX est lʼabréviation de Digital Multiplexet signifie
transmission digitale de plusieurs appareils DMX via
un câble commun de commande.
8.1 Branchement
Pour la connexion DMX, des branchements XLR
3 pôles avec la configuration de contact suivante sont
prévus :
Pin 1 = masse, 2 = DMX
-
, 3 = DMX+
Pour le branchement, il est recommandé dʼutiliser des
câbles spécifiques pour la transmission de signaux
DMX (p. ex. câbles de la série CDMXN de “img Stage
Line”). Pour des longueurs de liaison à partir de 150 m,
il est recommandé dʼinsérer un amplificateur DMX de
signal (par exemple SR-103DMX de “img Stage Line”).
Faites les connexions DMX comme suit :
1) Reliez lʼentrée DMX (6) à la sortie DMX du contrô-
leur DMX ou à la sortie DMX dʼun appareil géré par
DMX.
2) Reliez la sortie DMX (7) à lʼentrée DMX du prochain
appareil DMX. Reliez sa sortie à lʼentrée de lʼappa-
reil DMX suivant et ainsi de suite de manière à ce
que tous les appareils gérés par DMX forment une
chaîne.
La prise DMX OUT (7) a un verrouillage. Pour
retirer la fiche, appuyez sur le levier PUSH.
3) Pour éviter les perturbations lors de la transmission
du signal, il convient, pour de longs câbles ou pour
une multitude dʼappareils branchés les uns derrière
les autres, de terminer la sortie DMX du dernier
appareil DMX de la chaîne avec une résistance
120 Ω (> 0,3 W) : mettez un bouchon correspondant
(par exemple DLT-123 de “img Stage Line”) dans la
prise de sortie DMX.
8.2 Réglage de lʼadresse DMX
Pour pouvoir utiliser séparément tous les appareils
reliés au contrôleur DMX, chaque appareil doit avoir
une adresse de démarrage propre. Si le premier canal
DMX de la FM-200H doit être réglé par le contrôleur
DMX par exemple via lʼadresse DMX 5, réglez sur la
FM-200H lʼadresse de démarrage 5. Le second canal
DMX de la FM-200H est automatiquement attribué à
lʼadresse suivante (dans cet exemple, lʼadresse 6). Le
prochain appareil DMX pourrait alors être géré à partir
de lʼadresse 7.
Lʼadresse se règle sous forme de données binaires
via les interrupteurs DIP (3). Elle sʼobtient en ajoutant
les valeurs de position (repère “1 ... 256”) de chaque
interrupteur DIP réglé sur “ON“, par exemple :
Adresse 1 Adresse 5 (= 4 + 1) Adresse 88 (= 64 + 16 + 8)
Interrupteur N° 1 Interrupteur N° 3 et Interrupteur N° 7, N°. 5 et
sur “ON” N° 1 sur “ON” N° 4 sur “ON”
Le plus simple est de partir de la valeur de position la
plus grande et dʼy ajouter les valeurs plus petites
jusquʼà ce que la somme donne lʼadresse.
Important : Pour la gestion DMX, il faut que lʼinterrup-
teur N° 10 soit toujours sur la position gauche “OFF”.
8.3 Utilisation via un contrôleur DMX
Une fois la phase de chauffe terminée [2 minutes envi-
ron après lʼallumage lorsque la LED rouge (2) sʼéteint
pour la première fois], lʼappareil est prêt à dégager la
fumée.
1) Allumez le contrôleur DMX.
2) Sur le contrôleur, réglez les deux canaux qui doi-
vent être utilisés pour gérer la FM-200H sur les
valeurs DMX voulues.
Conseils
1. La fumée ne sort pas tout de suite mais uniquement
lorsque suffisamment de liquide est pompé vers la buse.
2. En mode DMX, il nʼest pas possible de gérer lʼappareil via
la télécommande.
9 Caractéristiques techniques
Puissance de chauffe : . . . 600 W
Durée de chauffe : . . . . . . 2 minutes environ
Capacité du réservoir : . . . 1,2 litre
Débit : . . . . . . . . . . . . . . . . 34 m3par minute environ
Alimentation : . . . . . . . . . . 230 V~/50 Hz
Consommation : . . . . . . . . 600 VA
Dimensions tout compris
(L × H × P) : . . . . . . . . . . . . 242 × 400 × 290 mm
Poids : . . . . . . . . . . . . . . . . 7,3 kg
Tout droit de modification réservé.
Canal
DMX
Valeur
DMX Fonction
10–6 aucun dégagement
7 – 255 quantité fumée min. ©max.
20 – 255 puissance du ventilateur min. ©max.
12345678910
ON
1
2
4
8
16
32
64
128
256
12345678910
ON
1
2
4
8
16
32
64
128
256
12345678910
ON
1
2
4
8
16
32
64
128
256
15
F
B
CH
Notice dʼutilisation protégée par le copyright de MONACOR ®INTERNATIONAL GmbH & Co. KG. Toute repro-
duction même partielle à des fins commerciales est interdite.

A pagina 3, se aperta completamente, vedrete tutti
gli elementi di comando e i collegamenti descritti.
1 Elementi di comando e collegamenti
1.1 Hazer
1Spia di funzionamento (LED verde)
Il LED lampeggia,
se la FM-200H è comandata tramite il teleco-
mando o unʼunità di comando DMX.
Il LED è acceso costantemente,
se non è collegato nessun telecomando e nes-
sunʼunità di comando DMX.
2Spia di riscaldamento (LED rosso), è acceso
durante il riscaldamento
3DIP-switch per impostare lʼindirizzo di start DMX
(Cap. 8.2)
oppure, se non è collegato né telecomando né
unità di comando DMX, per impostare lʼerogazione
di fumo (Cap. 6)
Importante: Durante il funzionamento tramite il
telecomando o tramite unʼunità di comando DMX,
lo switch n. 10 deve trovarsi in posizione a sinistra
(OFF).
4Vite di bloccaggio per lʼapertura regolabile dʼeroga-
zione di fumo
5Viti di bloccaggio per la staffa di montaggio (12)
6Ingresso DMX (XLR, 3 poli) per il comando tramite
unʼunità di comando DMX
7Uscita DMX (XLR, 3 poli) per il collegamento con
lʼingresso DMX di un ulteriore apparecchio con
comando DMX
8Contatto REMOTE CONTROL ONLY per il teleco-
mando in dotazione
9Presa per il collegamento con una presa di rete
(230 V~/50 Hz) per mezzo del cavo in dotazione
10 Portafusibile; sostituire un fusibile difettoso solo
con uno dello stesso tipo
11 Interruttore on/off
12 Staffa di montaggio
13 Tappo del serbatoio
14 Finestrina per controllare il livello del liquido nel
serbatoio illuminato
1.2 Telecomando
15 Regolatore INTERVAL per impostare gli intervalli
dʼerogazione di fumo (5 – 140 sec.) con funziona-
mento temporizzato
16 Spia giallo per il timer, è accesa durante il funzio-
namento temporizzato
17 Spia rossa CONT, è accesa durante il funziona-
mento continuo
18 Pulsante giallo TIMER per attivare/disattivare il fun-
zionamento temporizzato
19 Regolatore FAN per il ventilatore
20 Regolatore OUTPUT per impostare la quantità di
fumo erogato durante il funzionamento temporiz-
zato e continuo
21 Spia di funzionamento (LED verde): Si accende
quando il riscaldamento è terminato e il fumo può
essere erogato
22 Pulsante rosso CONT per attivare/disattivare il fun-
zionamento continuo
23 Pulsante verde MANUAL per erogare la quantità
massima di fumo mentre si tiene premuto il tasto
2 Avvertenze di sicurezza
Questʼapparecchio è conforme a tutte le direttive rile-
vanti dellʼUE e pertanto porta la sigla .
Si devono osservare assolutamente anche i seguenti
punti:
GLʼapparecchio è adatto solo per lʼuso allʼinterno di
locali. Proteggerlo dallʼacqua gocciolante e dagli
spruzzi dʼacqua, da alta umidità dellʼaria e dal calore
(temperatura dʼimpiego ammessa fra 0 e 40 °C).
GNon depositare sullʼapparecchio dei contenitori
riempiti di liquidi, p. es. bicchieri.
GNon mettere in funzione lʼapparecchio o staccare
subito la spina rete se:
1. lʼapparecchio o il cavo rete presentano dei danni
visibili;
2. dopo una caduta o dopo eventi simili sussiste il
sospetto di un difetto;
3. lʼapparecchio non funziona correttamente.
Per la riparazione rivolgersi sempre ad unʼofficina
competente.
GStaccare il cavo rete afferrando la spina, senza tirare
il cavo.
GPer pulire lʼapparecchio usare solo un panno mor-
bido, pulito. Non usare in nessun caso dei liquidi che
potrebbero penetrare nellʼapparecchio provocando
dei danni.
GNel caso dʼuso improprio, dʼinstallazione non cor-
retta, dʼimpiego scorretto o di riparazione non a
regola dʼarte dellʼapparecchio, non si assume nes-
suna responsabilità per eventuali danni consequen-
ziali a persone o a cose e non si assume nessuna
garanzia per lʼapparecchio.
Se si desidera eliminare lʼapparecchio defini-
tivamente, consegnarlo per lo smaltimento a
unʼistituzione locale per il riciclaggio.
AVVERTIMENTO Lʼapparecchio funziona con perico-
losa tensione di rete (230 V~). Non
intervenire mai personalmente al suo
interno. Esiste il pericolo di una sca-
rica elettrica.
16
I

3 Possibilità dʼimpiego
La macchina del fumo crea un fumo artificiale con
effetto nebbia per mezzo dellʼevaporazione del liquido
fumogeno che può essere sfruttato per la messa in
scena ottimale di effetti di luci (p. es. in discoteche, sul
palcoscemico, durante party). Attraverso un ventila-
tore, il fumo viene distribuito nellʼambiente, creando
una nebbia molto fine, trasparente.
Lʼapparecchio può funzionare con e senza il teleco-
mando via cavo in dotazione. In alternativa al teleco-
mando, la FM-200H può essere comandata anche per
mezzo di unʼunità di comando con protocollo DMX512
integrandosi così senza problemi in un impianto pro-
fessionale di luci.
4 Riempire il liquido fumogeno
1) Svitare il tappo (13) del serbatoio.
2) Versare il liquido nel serbatoio (Capitolo 4.1).
Raccogliere immediatamente il liquido eventual-
mente uscito per evitare che penetri allʼinterno del-
lʼapparecchio.
3) Richiudere bene il serbatoio.
4.1 Liquido fumogeno adatto
Presso “img Stage Line“ sono disponibili i seguenti
liquidi fumogeni in taniche di 5 litri, adatti per lʼappa-
recchio hazer:
Se si usano altri liquidi fumogeni, non si assume nes-
suna garanzia per un funzionamento corretto.
5 Mesa in funzione
5.1 Collocare o appendere lʼapparecchio
Togliere tutto il materiale dellʼimballaggio. Vicino
allʼugello di erogazione del fumo o sul contenitore non
ci devono essere dei resti dellʼimballaggio.
Sistemare lʼapparecchio su una superficie orizzontale
(non direttamente su un tappeto o un pavimento di
legno!) oppure montarlo per mezzo della staffa (12)
(p. es. tramite una fascetta di fissaggio a una traversa).
Per orientarlo esattamente in senso orizzontale, allen-
tare leggermente le viti (5) ai due lati della staffa, orien-
tare lʼapparecchio e stringere nuovamente le viti.
5.2 Accendere e spegnere
1) Prima del collegamento con la presa di rete:
1. Strizzare, e necessario, la spugna salvagocce
sotto lʼugello dʼerogazione del fumo.
2. Controllare il livello del serbatoio e aggiungere
eventualmente del liquido fumogeno (Capi-
tolo 4).
AVVERTIMENTO 1. Lʼugello dʼerogazione del fumo
diventa molto caldo. Non toccarlo
durante il funzionamento o subito
dopo. Pericolo di bruciature!
2. Lʼapparecchio deve essere usato
solo da persone adulte e non deve
mai rimanere incustodito.
3. Non usare mai lʼapparecchio
senza liquido fumogeno. Esiste il
pericolo dʼincendio in seguito al
surriscaldamento. Inoltre, lʼappa-
recchio può essere danneggiato.
AVVERTIMENTO Lʼapparecchio deve essere montato
a regola dʼarte e in modo sicuro. Se
viene installato in un punto sotto il
quale si possono trovare delle per-
sone, occorre provvedere ad una
protezione supplementare (p. es. per
mezzo di una fune di trattenuta sulla
staffa; fissare la fune in modo tale
che la caduta dellʼapparecchio non
possa superare i 20 cm).
GIl calore creatosi allʼinterno dellʼapparecchio deve
essere dissipato per mezzo della circolazione del-
lʼaria. Verificare che vicino e sopra lʼapparecchio
sia dello spazio libero non inferiore a 50 cm e che
le fessure dʼaerazione non siano coperte.
GDurante il funzionamento, lʼugello dʼerogazione del
fumo diventa molto caldo. Non toccatelo. Tenete
materiali facilmente infiammabili o esplosivi a una
distanza di 3 m.
GOrientare lʼapparecchio in modo tale che la cor-
rente di fumo non arrivi direttamente a persone o
oggetti – pericolo di bruciature!
Articolo Caratteristica Codice
NF-502L effetto fumo a lunga durata 38.1820
NF-502SL effetto fumo a durata partico-
larmente lunga
38.1830
AVVERTIMENTO 1. Durante il riempimento del liquido,
lʼapparecchio non deve essere col-
legato con la rete elettrica. Stac-
care prima la spina dalla presa di
rete!
2. Non aggiungere mai liquidi infiam-
mabili al liquido fumogeno. Peri-
colo dʼesplosione!
3. Lʼapparecchio non è protetto con-
tro gli spruzzi dʼacqua. Se allʼin-
terno penetra del liquido, prima
della messa in funzione far con-
trollare e pulire lʼapparecchio da
un laboratorio specializzato.
17
I

2) Inserire il cavo in dotazione prima nella presa (9) e
poi in una presa di rete (230 V~/50 Hz).
3) Accendere la macchina con lʼinterruttore (11). La
macchina si riscalda per circa due minuti. Durante
la fase di riscaldamento, il LED rosso (2) è acceso
e non è ancora possibile erogare del fumo.
4) Al termine della fase di riscaldamento, il LED rosso
si spegne ed è possibile erogare del fumo. Dopo un
certo lasso di tempo, la macchina ricomincia a
riscaldarsi brevemente; in questo caso il LED rosso
si accende. Tuttavia, durante questa fase del riscal-
damento di mantenimento è possibile lʼerogazione
di fumo.
5) Lʼapertura dʼerogazione di fumo sul lato anteriore
può essere regolata. Per fare ciò, allentare la vite
di bloccaggio (4), impostare lʼangolo dʼapertura e
stringere nuovamente la vite.
6) Dopo lʼuso spegnere la macchina fumogena con
lʼinterruttore (11).
Per il trasporto, fare prima raffreddarsi lʼappa-
recchio e vuotare completamente il serbatoio!
Nota: Per il gocciolio finale del liquido, la macchina continua
a erogare un poʼ di fumo anche dopo lʼerogazione del fumo
e dopo lo spegnimento.
6 Funzionamento senza telecomando
Per il funzionamento senza il telecomando, la quantità
di fumo erogato e la portata del ventilatore possono
essere regolate a quattro livelli per mezzo dei dip-
switch (3).
1) Per il funzionamento senza telecomando, portare il
dip-switch n. 10 in posizione “ON”. Il LED (1) verde
rimane acceso costantemente.
2) Impostare la quantità dʼerogazione del fumo con gli
switch n. 1 – 4 e la portata del ventilatore con gli
switch n. 6 – 9:
Esempio: Quantità di fumo erogato = 50 %
Portata del ventilatore = 75 %
7 Funzionamento con il telecomando
1) Collegare il telecomando in dotazione con la presa
REMOTE CONTROL ONLY (8).
2) Portare il dip-switch n. 10 (3) in posizione di sinistra
(OFF). Il LED verde (1) lampeggia.
3) Il magnete sul retro del telecomando può essere
usato per fissare il telecomando su una superficie
magnetica.
Nota: Quando il LED verde (21) del telecomando si spegne,
significa che la fase di riscaldamento è terminata e che è
possibile erogare del fumo.
7.1 Funzionamento manuale
1) Per erogare il fumo manualmente, tener premuto il
tasto verde MANUAL (23): Lʼapparecchio eroga il
fumo con la quantità massima. (Il fumo non esce
subito, ma solo quando allʼugello dʼerogazione è arri-
vata una quantità sufficiente di liquido fumogeno.)
2) Con il regolatore FAN (19) impostare la portata del
ventilatore.
Il funzionamento manuale ha la priorità rispetto al fun-
zionamento continuo e a quello temporizzato; ciò si-
gnifica che premendo il tasto verde, lʼapparecchio
eroga il fumo sempre con la quantità massima, anche
se è attivato un altro dei due modi di funzionamento.
7.2 Funzionamento continuo
Con il funzionamento continuo, lʼapparecchio eroga il
fumo continuamente.
1) Per attivare il funzionamento continuo, premere il
tasto rosso CONT (22) fino allo scatto che lo blocca;
il LED rosso (17) sopra il tasto si accende.
2) Con il regolatore OUTPUT (20) impostare la quan-
tità di fumo e con il regolatore FAN (19) impostare
la portata del ventilatore.
3) Per disattivare il funzionamento continuo, sbloc-
care il tasto rosso.
Il funzionamento continuo ha la priorità rispetto al fun-
zionamento temporizzato; ciò significa che con il tasto
rosso premuto, lʼapparecchio è impostato per il funzio-
namento continuo, anche se con il tasto TIMER (18) è
attivato il funzionamento temporizzato.
7.3 Funzionamento con timer
Con il funzionamento con timer, lʼapparecchio eroga il
fumo a intervalli regolabile fra 5 e 140 secondi.
1) Per attivare il funzionamento con il timer premere il
tasto giallo TIMER (18) fino allo scatto che lo
blocca; il LED giallo (16) sopra il tasto si accende.
2) Con il regolatore OUTPUT (20) impostare la quan-
tità di fumo e con il regolatore FAN (19) impostare
la portata del ventilatore.
3) Con il regolatore INTERVAL (15) impostare gli inter-
valli di tempo.
4) Per disattivare il funzionamento con timer, sbloc-
care il tasto giallo, il LED sovrastante si spegne.
12345678910
ON
25%
50%
75%
100% haze
output
25%
50%
75%
100%
fan
Switch n. Funzione, se lʼinterruttore su “ON”
10 Funzionamento senza telecomando
9 100 %
Portata del
ventilatore
8 75 %
7 50 %
6 25 %
5 —
4 100 %
Quantità di
fumo erogato
3 75 %
2 50 %
1 25 %
18
I

8 Funzionamento DMX
Per il comando tramite unʼunità di comando DMX
(p. es. DMX-1440 o DMX-510USB di “img Stage
Line”), la FM-200H dispone di due canali di comando
DMX. DMX è lʼabbreviazione di Digital Multiplexe
significa il comando digitale di più apparecchi DMX tra-
mite unʼunica linea di comando.
8.1 Collegamento
Per il collegamento DMX, lʼapparecchio dispone di
contatti XLR a 3 poli con la seguente piedinatura:
pin 1 = massa, 2 = DMX
-
, 3 = DMX+
Per il collegamento si dovrebbero usare cavi speciali
per la trasmissione di segnali DMX (p. es. cavi della
serie CDMXN di “img Stage Line”). Nel caso di lun-
ghezze oltre i 150 m si consiglia lʼimpiego di un ampli-
ficatore DMX (p. es. SR-103DMX di “img Stage Line”).
Realizzare i collegamenti DMX come segue:
1) Collegare lʼingresso DMX (6) con lʼuscita dellʼunità
di comando DMX oppure con lʼuscita DMX di un
apparecchio con comando DMX.
2) Collegare lʼuscita DMX (7) con lʼingresso DMX del-
lʼapparecchio successivo con comando DMX e la
sua uscita con lʼingresso dellʼapparecchio DMX
successivo ecc., finché tutti gli apparecchi con
comando DMX sono collegati formando una
catena.
La presa DMX OUT (7) possiede un bloccaggio.
Per staccare il connettore spingere indentro la leva
PUSH.
3) Per escludere interferenze durante la trasmissione
dei segnali, nel caso di linee lunghe o di un gran
numero di apparecchi collegati in serie, lʼuscita
DMX dellʼultimo apparecchio DMX della catena
dovrebbe essere terminata con una resistenza di
120 Ω (> 0,3 W): Inserire nella presa dʼuscita un ter-
minatore (p. es. DLT-123 di “img Stage Line”).
8.2 Impostazione dellʼindirizzo DMX
Per comandare separatamente tutti gli apparecchi
DMX collegati con lʼunità per comando DMX, ogni
apparecchio deve avere il suo indirizzo di start. Se il
primo canale DMX della FM-200H deve essere
comandato dallʼunità per comando DMX p. es. tramite
lʼindirizzo DMX 5, impostare sulla FM-200H lʼindirizzo
di start 5. Al secondo canale DMX della FM-200H è
assegnato automaticamente lʼindirizzo successivo (nel
nostro esempio lʼindirizzo 6). Lʼapparecchio DMX suc-
cessivo potrebbe quindi essere comandato a partire
dallʼindirizzo 7.
Lʼindirizzo di start sʼimposta come numero binario
tramite i dip-switch (3). Lʼindirizzo risulta dallʼaddizione
dei valori (indicazione “1 … 256”) degli switch che si
trovano in posizione “ON”, p. es.
Indirizzo 1 Indirizzo 5 (= 4 + 1) Indirizzo 88 (= 64 + 16 + 8)
Switch n. 1 Switch n. 3 e Switch n. 7, n. 5 e
su “ON” n. 1 su “ON” n. 4 su “ON”
La cosa più semplice è partire dal valore più alto pos-
sibile e aggiungere i valori minori fino a ottenere lʼindi-
rizzo come somma dei valori.
Importante: Per il comando DMX, il dip-switch n. 10
deve trovarsi sempre in posizione sinistra (OFF).
8.3 Comando tramite unʼunità di comando DMX
Al termine della fase di riscaldamento [ca. due minuti
dopo lʼaccensione, quando il LED rosso (2) si spegne
per la prima volta], lʼapparecchio è pronto per lʼeroga-
zione di fumo.
1) Accendere lʼunità di comando DMX.
2) Sullʼunità di comando DMX impostare per i due
canali usati per il comando della FM-200H, i valori
DMX desiderati.
Note
1. Il fumo non esce subito, ma solo quando allʼugello dʼero-
gazione è arrivata una quantità sufficiente di liquido fumo-
geno.
2. Durante il funzionamento DMX, lʼapparecchio del fumo
non può essere comandato tramite il telecomando.
9 Dati tecnici
Potenza di riscaldamento: . . 600 W
Durata del riscaldamento: . . ca. 2 minuti
Serbatoio: . . . . . . . . . . . . . . 1,2 litri
Erogazione di fumo: . . . . . . . ca. 34 m3al minuto
Alimentazione: . . . . . . . . . . . 230 V~/50 Hz
Potenza assorbita: . . . . . . . . 600 VA
Dimensione totale
(l × h × p): . . . . . . . . . . . . . . 242 × 400 × 290 mm
Peso: . . . . . . . . . . . . . . . . . . 7,3 kg
Con riserva di modifiche tecniche.
Canale
DMX
Valore
DMX Funzione
10–6 nessunʼerogazione di fumo
7 – 255 Quantità di fumo min. ©max.
20 – 255 Portata del ventilatore min. ©max.
12345678910
ON
1
2
4
8
16
32
64
128
256
12345678910
ON
1
2
4
8
16
32
64
128
256
12345678910
ON
1
2
4
8
16
32
64
128
256
19
I
La MONACOR ®INTERNATIONAL GmbH & Co. KG si riserva ogni diritto di elaborazione in qualsiasi forma delle
presenti istruzioni per lʼuso. La riproduzione – anche parziale – per propri scopi commerciali è vietata.

Puede encontrar todos los elementos de funciona-
miento y las conexiones que se describen en la
página 3 desplegable.
1 Elementos de Funcionamiento
y Conexiones
1.1 Hazer
1LED Power (verde)
El LED se mantiene parpadeando
Cuando la FM-200H funciona mediante control
remoto o mediante controlador DMX
El LED se ilumina continuamente
Cuando no se ha conectado un control remoto o
un controlador DMX
2LED de calentamiento (rojo), se ilumina mientras la
hazer se calienta
3Interruptores DIP para configurar la dirección de
inicio DMX (apartado 8.2)
O, si no hay ningún control remoto o controlador
DMX conectado, para ajustar la salida de niebla
(apartado 6)
Importante: Al utilizar la hazer mediante control
remoto o mediante controlador DMX, ajuste el inter-
ruptor
10 en la posición izquierda (OFF).
4Tornillo de cierre para la salida de niebla regulable
5Tornillos de cierre para el soporte de montaje (12)
6Entrada DMX (XLR, 3 polos) para funcionar me-
diante un controlador DMX
7Salida DMX (XLR, 3 polos) para conectar a la
entrada DMX de otro aparato controlado por DMX
8Toma REMOTE CONTROL ONLY para el control
remoto entregado
9Toma de corriente para la conexión a un enchufe
(230 V~/50 Hz) mediante el cable de corriente
entregado
10 Soporte de fusible: cambie siempre un fusible fun-
dido por otro del mismo tipo
11 Interruptor Power
12 Soporte de montaje
13 Tapón del depósito
14 Ventana para comprobar el nivel del líquido en el
depósito iluminado
1.2 Control remoto
15 Control INTERVAL para regular los intervalos de
salida de la niebla (5 – 140 segundos) en el modo
temporizador
16 LED temporizador amarillo, se ilumina en el modo
temporizador
17 LED rojo CONT, se ilumina en el modo continuo
18 Botón amarillo TIMER para activar/desactivar el
modo temporizador
19 Control FAN para ajustar la potencia del ventilador
20 Control OUTPUT para ajustar la salida de niebla en
el modo temporizador y en el modo continuo
21 LED Standby (verde); se ilumina cuando la hazer
se ha calentado y está lista para utilizarse
22 Botón rojo CONT para activar/desactivar el modo
continuo
23 Botón verde MANUAL para la salida máxima de
niebla mientras el botón esté pulsado
2 Notas de Seguridad
Este aparato cumple con todas las directivas rele-
vantes de la UE y por lo tanto está marcado con el sím-
bolo .
Preste atención a los siguientes puntos bajo cualquier
circunstancia:
GEl aparato está adecuado sólo para utilizarlo en inte-
riores. Protéjalo de goteos y salpicaduras, elevada
humedad del aire y calor (temperatura ambiente
admisible: 0 – 40 ºC).
GNo coloque ningún recipiente con líquido encima del
aparato, p. ej. un vaso.
GNo utilice el aparato y desconecte inmediatamente
la toma de corriente del enchufe si:
1. El aparato o el cable de corriente están visible-
mente dañados.
2. El aparato ha sufrido daños después de una
caída o accidente similar.
3. No funciona correctamente.
Sólo el personal cualificado puede reparar el apa-
rato bajo cualquier circunstancia.
GNo tire nunca del cable de corriente para desconec-
tarlo de la toma, tire siempre del enchufe.
GPara la limpieza de la carcasa, utilice sólo un paño
suave y limpio. No utilice ningún líquido; podría
penetrar en el aparato y provocar daños.
GNo podrá reclamarse garantía o responsabilidad
alguna por cualquier daño personal o material resul-
tante si el aparato se utiliza para otros fines diferen-
tes a los originalmente concebidos, si no se instala
o se utiliza adecuadamente o no se repara por
expertos.
Si va a poner el aparato definitivamente fuera
de servicio, llévelo a la planta de reciclaje
más cercana para que su eliminación no sea
perjudicial para el medioambiente.
ADVERTENCIA El aparato utiliza un voltaje peligroso
(230 V~). Deje el mantenimiento en
manos del personal cualificado. El
manejo inexperto puede provocar una
descarga.
20
E
Table of contents
Languages:
Other IMG STAGE LINE Fog Machine manuals

