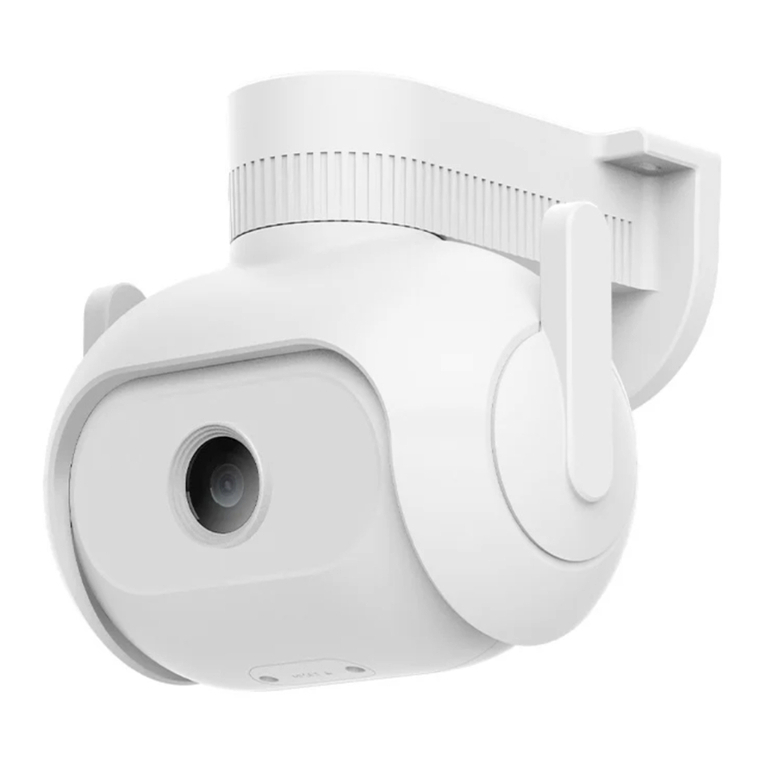
imilab EC5 User manual

Please read this manual carefully before using the device
and retain it for future reference.
IMILAB EC5
Floodlight Camera
UserManual
EN ESDE FRIT RU PL TR CZ

CONTENTS
English 01-11
12-23Deutsche
24-35Español
36-47Italiano
48-59Français
60-71Pусский
72-83Polski
84-95Türkçe
96-107čeština

Product Introduction
Wall mounting pack Wall/ceiling mounting
positioning stickers
User manual
IMILAB EC5 Floodlight Camera Power adapter
Package list
Product Appearance
Lens
Mic
Reset button
Flood light
Speaker
Wall bracket
Micro SD card slot
EN-01

Installing the Device
Wall mounting
The device can be wall mounted, ceiling mounted or tied around a
support.
1. Attach the wall mounting positioning sticker on the desired installation
location on a wall. Drill two holes at the positions indicated on the
sticker. Drilling diameter of around 6.0 mm; drilling depth of around
30mm.
2. Insert two plastic expansion nuts into the wall. Put the base plate on the
wall. Secure the base plate by inserting the screws into the expansion
nuts.
EN-02

Ceiling mounting
1. Attach the ceiling mounting positioning sticker on the desired installation
location on the ceiling. Drill two holes at the positions indicated on the
sticker. Drilling diameter of around 6.0 mm; drilling depth of around
30mm.
2. Insert two plastic expansion nuts into the wall. Put the base plate on the
ceiling. Secure the base plate by inserting the screws into the expansion
nuts.
EN-03

Connecting the Device
Turn on the camera
Insert the power supply cable into the camera's power supply port.
Connect the other end of the power supply cable to a power source.
Insert a micro SD card.
Ensure that the camera is disconnected from the power supply. Use a
screwdriver to remove the protective case and expose the micro SD card
slot.
The contact points of the micro SD card should be facing down. Insert the
micro SD card into the slot.
Pole mounting
EN-04

Note: Actual operation may differ due to Mi Home app update. Please follow
the on-screen instructions of the Mi Home app.
64295C5D
Restoring factory settings
Press and hold the reset button to restore the factory settings. The content
inside the micro SD card will not be deleted.
Note:
When inserting or removing the micro SD card, please disconnect the
camera from the power supply. Please use a micro SD card from a reputable
manufacturer (up to 256GB). The recommended read and write speed of the
micro SD card is at least U1/Class 10.
This product works with Mi Home and can be controlled using the Mi Home
app.
Scan the QR code to download and install the Mi Home app. If you already
have Mi Home app installed, you will be directed to the device connection
page. You can also search for "Mi Home" in an app store to download and
install the Mi Home app. Open the Mi Home app. Tap “+” at the top right
corner and following the on-screen instructions to add the device.
Connecting to Mi Home App
EN-05

“works with mijia” signifies that the product herein is designed to connect
and interact with Mi Home app or Mi AI. Please be noted that the product
herein is certified by the app interaction only. Xiaomi and Mijia are not
responsible for anyof the product manufacturing, safety and regulatory
standards, or quality supervision.
Specifications
About works with mijia
Name:IMILAB EC5 Floodlight Camera
Model:CMSXJ55A
Input:12V 1A
Resolution:2304 x 1296
Operating Temperature:-30℃ ~ 60℃
Wireless Connectivity:Wi-Fi IEEE 802.11 b/g/n 2.4GHz
Dimensions:139 x 128 x 135 mm
Net Weight:630 g
Viewing Angle:95°
Aperture:F2.1
IP rating:IP66
FCC ID: 2APA9-CMSXJ55A
EN-06

2021 3 2 20:51:05
Full Color Night Vision
The light sensor can automatically switch the device to night vision mode
through IR-CUT based on changes in the lighting of the environment.
Built-in high power exposure light can present colorful images even in the
darkness.
Video Playback
Past videos can only be viewed when a compatible micro SD card is inserted
in IMILAB EC5 Floodlight Camera. After inserting a micro SD card and turning
on the device, the camera will automatically start
recording.
In the control interface for IMILAB EC5 Floodlight
Camera in the Mi Home app, tap the playback
button to enter the video playback page. You can
also view a recording by selected a time period.
Night vision effect illustration
12MB / s
06:20
IMILAB EC5 Floodlight Camera
EN-07

Sharing a Video
In the control interface for IMILAB EC5 Floodlight Camera in the Mi Home
app, you can set the device as a shared device in the settings menu and
invite others to watch the recordings. Users must download the Mi Home
app and login to their Xiaomi account in order to view the recordings of the
shared device.
Note:
The illustrations are for reference only. The pages may differ based on actual
Mi Home app version and mobile phone operating system.
Share group
Check for firmware updates
Rename IMILAB EC5 Floodlight...
Security settings
Share device
Remove device
Add Home screen shortcut
Feedback
Network info
Share with Mi Account
Share manage
Share...General settings
EN-08

Home Security
The Home Security function can be turned on/off in the control interface for
IMILAB EC5 Floodlight Camera in the Mi Home app.
The device can detect and record movements within the viewing angle and
push the recording to the client. Users can set the surveillance time, alert
sensitivity, alert interval, etc.
Note:
The illustrations are for reference only. The pages may differ based on actual
Mi Home app version and mobile phone operating system.
EN-09

Precautions
The working temperature of the device is -30℃ to 60℃. Do not use the
device when the temperature is too high or too low.
For better results, avoid placing the camera in front of or next to a glass
surface, a white-colored wall or other reflective surfaces as this may
cause the recording to have un-even lighting between the foreground
and background or be over-exposed.
Please ensure that the device is within Wi-Fi signal coverage.
Place it at a location with good Wi-Fi signal strength.
Try to avoid placing the device near a metallic object, a microwave oven
or other objects that may cause signal interference.
FCC Statement
Changes or modifications not expressly approved by the party responsible for
compliance could void the user's authority to operate the equipment. This
device complies with Part 15 of the FCC Rules.
Operation is subject to the following two conditions:
(1) This device may not cause harmful interference, and
(2) This device must accept any interference received, including interference
that may cause undesired operation.
Note: This equipment has been tested and found to comply with the limits for
a Class B digital device, pursuant to Part 15 of the FCC Rules. These limits are
designed to provide reasonable protection against harmful interference in a
residential installation. This equipment generates, uses, and canradiate radio
frequency energy, and if not installed and used in accordance with the
instructions, may cause harmful interference to radio communications.
However, there is no guarantee that interference will not occur in a particular
installation. If this equipment does cause harmful interference to radio or
television reception, which can be determined by turning the equipment off
and on, the user is encouraged to try to correct the interference by one or
more of the following measures:
-Reorient or relocate the receiving antenna.
EN-10

-Increase the separation between the equipment and receiver.
-Connect the equipment into an outlet on a circuit different from that to
which the receiver is connected.
-Consult the dealer or an experienced radio/TV technician for help.
FCC 20cm Statement: This equipment complies with FCC radiation exposure
limits set forth for an uncontrolled environment. This equipment should be
installed and operated with a minimum distance of 20cm between the
radiator & your body. This transmi er must not be co-located or operating in
conjunction with any other antenna or transmier.
WEEE Disposal and Recycling Information
Adaptor Statements
All products bearing this symbol are waste electrical and electronic
equipment (WEEE as in directive 2012/19/EU) which should not be
mixed with unsorted household waste. Instead, you should protect
human health and the environment by handing over your waste
equipment to a designated collection point for the recycling of waste
electrical and electronic equipment, appointed by the government or local
authorities. Correct disposal and recycling will help prevent potential
negative consequences to the environment and human health. Please
contact the installer or local authorities for more information about the
location as well as terms and conditions of such collection points.
Hereby, Shanghai Imilab Technology Co., Ltd. declares that the radio
equipment type IMILAB EC5 Floodlight Camera is in compliance with
Directive 2014/53/EU.
The full text of the EU declaration of conformity is available at the following
internet address: https://www.imilabglobal.com/pages/eu-declara-
tion-of-conformity
EN-11

Einführung zum Produkt
Wandbefestigungspaket Wand-
/Deckenbefestigung-
spositionsaufkleber
Benutzerhandbuch
IMILAB EC5 Floodlight Camera Netzteil
Verpackungsliste
Produkterscheinung
Objektiv
Mic
Rücksetzungstaste
Flutlicht
Lautsprecher
Wandhalterung
Micro-SD-Kartenschlitz
DE-12

Installation des Geräts
Wandbefestigung
Das Gerät kann an der Wand, an der Deck befestigt oder um eine
Stütze gebunden werden.
1. Bringen Sie die Aufkleber für die Wandbefestigung am gewünschten
Installationsort an einer Wand an. Bohren sie zwei Löcher an den auf den
Aufklebern angegebenen Positionen. Bohrlochdurchmesser von ca. 6,0
mm; Bohrlochtiefe von ca. 30 mm.
2. Führen Sie zwei Kunststoffspreizmuttern in die Wand ein. Bringen Sie die
Basisplatte an der Wand an. Sichern Sie die Basisplatte, indem Sie die
Schrauben in die Spreizmuttern einführen.
DE-13

Deckenbefestigung
1. Bringen Sie die Aufkleber für die Deckenbefestigung am gewünschten
Installationsort an der Decke an. Bohren sie zwei Löcher an den auf den
Aufklebern angegebenen Positionen. Bohrlochdurchmesser von ca. 6,0
mm; Bohrlochtiefe von ca. 30 mm.
2. Führen Sie zwei Kunststoffspreizmuttern in die Wand ein. Bringen Sie die
Basisplatte an der Decke an. Sichern Sie die Basisplatte, indem Sie die
Schrauben in die Spreizmuttern einführen.
DE-14

Anschluss des Geräts
Schalten Sie das Gerät ein
Stecken Sie das Stromversorgungskabel in die Stromversorgungsbuchse
der Kamera. Verbinden Sie das andere Ende des Stromversorgungska-
bels mit einer Stromquelle.
Führen Sie eine Micro SD-Karte ein.
Vergewissern Sie sich, dass die Kamera von der Stromversorgung
getrennt ist. Verwenden Sie einen Schraubenzieher, um die Schutzhülle
zu entfernen und den Schlitz für die SD-Karte offenzulegen.
Die Kontaktpunkte der Micro SD-Karte sollten nach unten weisen. Stecken
Sie die Micro SD-Karte in den Schlitz.
Befestigung an einem Pfosten
DE-15

Hinweis: Der tatsächliche Betrieb kann aufgrund der Aktualisierung der Mi
Home-App verschieden sein. Bitte folgen Sie den Anweisungen auf dem
Bildschirm der Mi Home-App.
64295C5D
Wiederherstellung der Werkseinstellungen
Drücken und halten Sie die Rückstelltaste, um die Werskeinstellungen
wiederherzustellen. Der Inhalt im Innern der Micro SD-Karte wird nicht
gelöscht.
Hinweis:
Trennen Sie beim Einführen oder Entfernen der Micro SD-Kate die Kamera
bitte von der Stromversorgung. Bitte verwenden Sie eine Micro SD-Karte von
einem angesehenen Hersteller ( bis zu 256GB ). Die empfohlene Lese- und
Schreibgeschwindigkeit der Micro SD-Karte beträgt mindestens U1/Klasse
10.
Dieses Produkt funktioniert mit Mi Home und kann durch Verwendung der
Mi Home-App gesteuert werden.
Scannen Sie den QR-Code, um die Mi Home-App herunterzuladen und zu
installieren. Wenn Sie die Mi Home-App bereits installiert haben, werden Sie
auf die Seite Gerät-Verbindung weitergeleitet. Sie können auch in einem
App-Store nach "Mi Home" suchen, um die Mi Home-App herunterzuladen
und zu installieren. Öffnen Sie die Mi Home-App Tippen Sie auf der rechten
oberen Ecke auf "+" und befolgen Sie die Anweisungen auf dem Bildschirm,
um das Gerät hinzuzufügen.
Verbindung mit der Mi Home-App
DE-16

"funktioniert mit mijia" bedeutet, dass das vorliegende Produkt für die
Verbindung und Interaktion mit der Mi Home-App oder Mi-KI konzipiert ist.
Bitte beachten Sie, dass das vorliegende Produkt nur durch die Interaktion mit
der App zertifiziert ist. Xiaomi und Mijia übernehmen keine Verantwortung für
die Herstellung des Produkts, die Sicherheits- und Regulierungsstandards
oder die Qualitätskontrolle.
Spezifikationen
Über „funktioniert mit mija“
Name: IMILAB EC5 Floodlight Camera
Modell: CMSXJ55A
Eingang: 12V 1A
Auflösung: 2304 x 1296
Betriebstemperatur: -30℃ ~ 60℃
Kabellose Konnektivität: Wi-Fi IEEE 802.11 b/g/n 2,4GHz
Ausmaße: 139 x 128 x 135 mm
Nettogewicht: 630 g
Blickwinkel: 95°
Blende: F2.1
IP-Rating: IP66
FCC ID: 2APA9-CMSXJ55A
DE-17

2021 3 2 20:51:05
Vollfarb-Nachtsicht
Der Lichtsensor kann das Gerät durch IR-CUT automatisch in den Nachtsicht-
modus schalten, je nach Veränderung der Lichtverhältnisse in der
Umgebung. Eingebaute Hochleistungsbelichtungs kann auch bei Dunkelheit
Farbbilder liefern.
Video-Playback
Frühere Videos können nur angesehen werden, wenn eine kompatible Micro
SD-Karte in die IMILAB EC6 Floodlight Camera eingeführt wird. Nach dem
Einführen einer Micro SD-Karte und dem Einschalten
des Geräts, wird die Kamera automatisch mit der
Aufnahme beginnen.
Tippen Sie auf der Steueroberfläche für die IMILAB
EC6 Floodlight Camera in der Mi Home-App auf die
Playback-Taste, um auf die Video-Playback-Seite
zu gelangen. Sie können eine Aufzeichnung durch
Auswahl eines Zeitraums auswählen.
Darstellung der Wirkung der Nachtsicht
12MB / s
06:20
IMILAB EC5 Floodlight Camera
DE-18
Other manuals for EC5
1
This manual suits for next models
1
Table of contents
Languages:
Other imilab Floodlight manuals
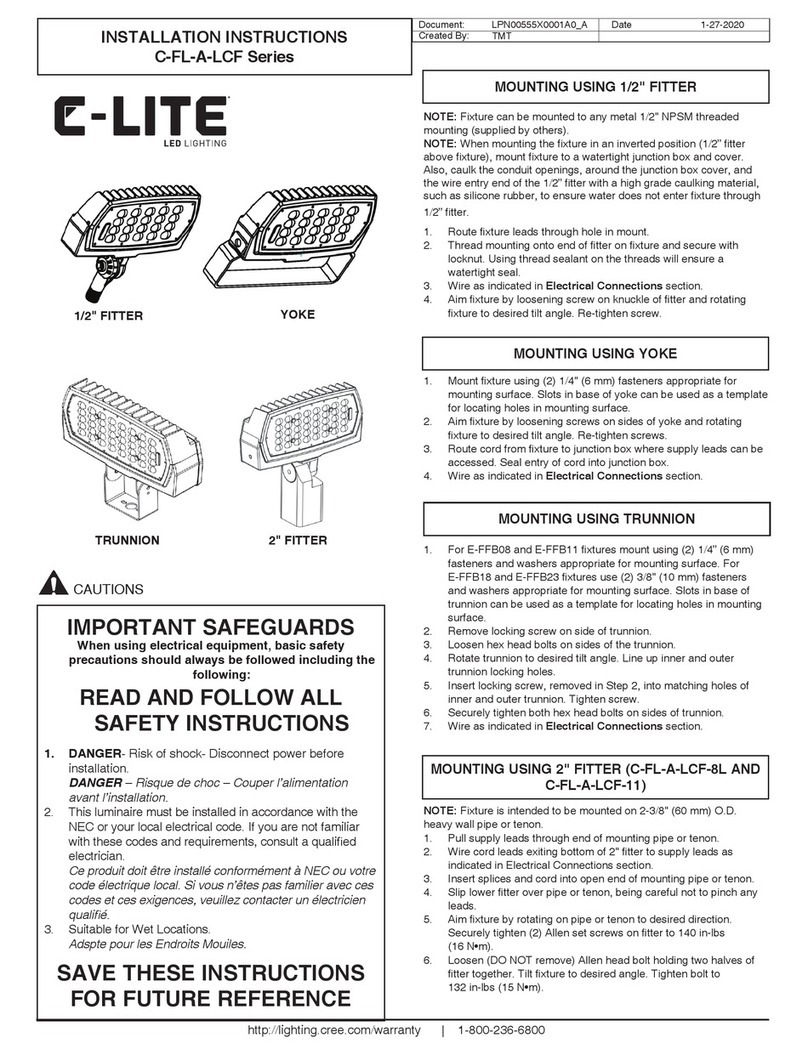
Popular Floodlight manuals by other brands

Chauvet
Chauvet EZpar 64 RGBA user manual
Elation
Elation Active Scan 250 User instructions

Fumagalli
Fumagalli TOMMY Series manual

Knightsbridge
Knightsbridge FLS15BK Installation & maintenance manual

Larson Electronics
Larson Electronics EPLC2-LED-150W-RT-DIMM manual
Aurora
Aurora Megacube X15 Owner's handbook
