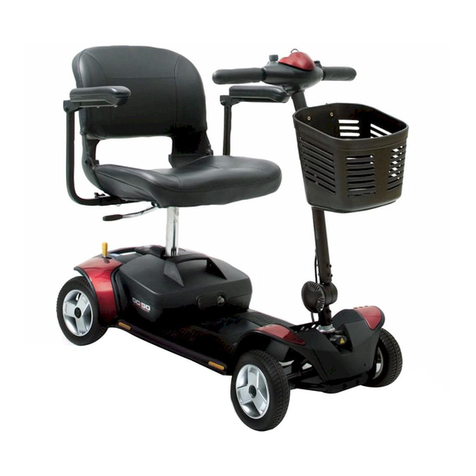
iMoving MAMBO User manual


Catalog
Assemble
Chair
1
1
Operation guide
Charge
Disassemble
Transport
5
6
8
9
10
11
Troubleshooting
7
Hand push mode
Parameter
Warranty card
Component composition
This product consists of the following five components:
Packing list: 1-4; 5 chargers; 6 keys; 7 seat belts; 8 wrenchesX3.
Front Driving Chassis
Rear Driving Chassis
Lithium
ion battery
1
2
3
4

Assemble I Assemble II
3
2
Connect the front base with the rear
base
Grasp handle A and align it with the
hook on the back base.
Make sure your hands are relaxed.
Alignment of circular
holes
Seat fitting
Installation of cushion
Slowly tilt the rear pedestal forward
to connect with the front pedestal.
When the two parts are connected
correctly, a click is heard.
Hold up the seat
1
2
3
4
5
6
7
Handle B
Handle A

Assembly III
Operation guide
5
4
Put down the seat retaining rod
Install batteries
Normal driving condition
Handles for
fixing front
and rear frame
Anti overturn wheel
Abnormal driving condition
※Make sure the battery is fully
charged before initial use.
※Before and after using the machine, please note that it is powered off.
Display
Battery power is shown here, from
0% to 100%.
Speed increase and decrease keys
Horn
Power switch
1Get on Make sure the power of the machine is off before
boarding.
Boot up When the power button is pressed, the display
screen lights up.
move Turn the direction rocker and move as you wish.
Stop it To stop operation, remove your hand from the
directional rocker.
Shutdown Press the power button for 3 seconds to check
whether the display is turned off.
Get off Turn off the power before leaving the car.
2
3
4
5
6
Directional
rocker
03
8
Fixed finish
9
10

Charge
Hand push mode
7
6
Insert the charger into the standard socket and check to ensure that
the charger light turns red.
Battery charging port
Remove the battery from the car.
Open the cover of the battery charging port and insert the charger
plug into the battery port. The red light flashes when charging.
At this point, the lamp on the side of the battery
will also flicker to indicate the charging status.
When the green light of the charger stops flashing and the battery is
charged, the battery power will be turned off.To check the remaining
battery power, press the [battery power check] button.
Remove the charger plug, close the cover of the charging port on
the battery, and put the battery back on the device.
Stop and turn off the power.
Find the lower part of the rear base, two
red levers near the inside of the wheel
(this is the brake), and press the two red
levers down.
After that, you can use the push mode.
1 Separate Charging of Charging Battery and Body Put the car body close to the wall socket and turn off the power supply.
Insert the charger into the standard socket and check to ensure
that the charger light turns red.
Open the cover of the battery charging port and insert the charger
plug into the battery port. The charging red light flashes.
When the green light of the charger stops flashing, the battery is charged.
Unplug the charger and close the cover of the charging port on the battery.
2 Installed on the body for charging
※Don't release the brakes on the slope. Make sure the vehicle is on a
horizontal plane before releasing them.

Disassemble
98
Remove battery
Hold the handle and remove the battery.
Hold the armrests on both
sides of the seat and lift it
upward, leaving the seat a
way from the base.
Release the seat retaining
wrench.
Front base handle position Rear base handle position
Grasp handle A and separate the
front and rear pedestals.
Dismantle the base
Pull the fixed rod at the back of the
base outward. When disassembling,
support the rear base with your
hands to ensure that it does not fall.
※Check if the battery is locked.
Demolition of seats

Troubleshooting Parameter
1110
error message
If a fault or failure occurs, an error message will be displayed on the control panel screen.
Following is a list of icons and voice messages, as well as possible reasons and Solutions
Display icon
Abnormal Rocker Position Release rocker
Brake warning Pull up left and right motor brake
Charging Disconnect charger
Low power, please charge Connect Charger Charging
Note: Battery temperature is
too low and speed is limited.
Please move the battery
to a temperature higher
than 0 degrees.
Battery temperature is
normal, speed limit is lifted -
Be careful:
The inclination angle is
more than 10 degrees.
Move to a slope or plane
not exceeding 10 degrees.
Voice information Terms of settlement
Motor power 250W*2
Controller R & D Delta
Torque 21N.m
Climbing performance 12 degrees
Brake mode electromagnetic brake
Braking distance is 0.6 m in dry condition and 0.7 m in wet condition.
Body size 900X860X560mm
Seat 1 Adult
Rated maximum load mass 165 kg
The front shock absorber yes
aftershock absorption no
Safe wading height 30 mm
Choose Gears Five
(1) The longest distance that can be reached when driving at a uniform speed on a slope-free road.
(2) Including the weight of the body and passengers.
Core Type 18650 Lithium Battery
Core Specification Automotive Power Core
Charging time 2.5 hours
Charging Battery Single Charging/Direct Charging in Vehicle
Capacity 10Ah
Voltage 24V
Battery Pack Weight 3KG
Duration*1 20km
Charger size 146x70x39mm
Battery size 115x150x250mm
Battery
Dynamic system
Body
Other

Product warranty insurance card
User information
Model
Date of purchase
Remarks
Full name:
Address:
Contact information:
Rules of Warranty Insurance
1. Guarantee Statement:
The supplier and distributor should first confirm and determine the problem of the electric wheelchair. In normal
use, if there is a manufacturing or quality problem, the distributor needs to repair or replace the parts.
2. Except for warranty:
1) Failure to follow proper operation and maintenance
2) Due to the absence of conventional spare parts and damage caused
3) Accidents or misuses caused by mechanical damage
4) Consumables are not covered by this warranty, such as tyres, bearings, light bulbs, etc.
5) Any unauthorized modification
6) Problems caused by any natural disaster or accident, such as typhoons, floods and earthquakes
7) This warranty does not include routine maintenance services or periodic monitoring adjustments in normal
use.
8) This warranty applies only to the original purchaser's electric wheelchair and is not transferable.
Note: To enjoy the after-sales service of hummingbird, you must provide the product warranty card of the product
you purchased. In order to retrospect after-sales and sales time, to provide you with appropriate services. If you
can't provide the product warranty card of the product you buy, you can only enjoy the paid service of humming-
bird. Thank you for your cooperation.
Table of contents
Other iMoving Scooter manuals

