Impecca IDM-95TEP-95 User manual

Dehumidier - User’s Manual
Model: IDM-95TEP—95 Pint Dehumidier
v. 1.0
www.impecca.com

ENGLISH ESPAÑOL FRANÇAIS
Table of Contents:
– Introduction .......................................................................................p.3
– Safety Precautions .................................................................................p.3
– What’s In The Box ..................................................................................p.3
– Specications & Warnings ..........................................................................p.5
– Unit Diagram ......................................................................................p.5
– Getting Started ....................................................................................p.6
– Placing the Dehumidier ...........................................................................p.6
– Operating Modes ..................................................................................p.7
– Front Panel Overview ..............................................................................p.7
– Removing Collected Water/Drainage ................................................................p.8
– Additional Features Explained .....................................................................p.10
– Energy Saving Tips ................................................................................p.10
– Care & Maintenance...............................................................................p.11
– Troubleshooting Tips/Error Codes .................................................................p.12
– Contact Customer Support ........................................................................p.12
Regulatory Warnings:
DISPOSAL:
Do not dispose this product as unsorted municipal waste. Collection of such waste separately for special treat-
ment is necessary.
It is prohibited to dispose of this appliance in domestic household waste.
For disposal, there are several possibilities:
A) The municipality has established collection systems, where electronic waste can be disposed of
at least free of charge to the user.
B) When buying a new product, the retailer will take back the old product at least free of charge.
C) The manufacturer will take back the old appliance for disposal at least free of charge to the user.
D) As old products contain valuable resources, they can be sold to scrap metal dealers.
Wild disposal of waste in forests and landscapes endangers your health when hazardous substances leak into
ground-water and nd their way into the food chain.
CAUTION:
• This appliance is not intended for use by persons (including children) with reduced physical, sensory or
mental capabilities, or lack of experience and knowledge, unless they have been given supervision or in-
struction concerning use of the appliance by a person responsible for their safety.
• Children should be supervised to ensure that they do not play with the appliance.
SAFETY PRECAUTIONS:
To prevent injury and/or property damage, please familiarize yourself with the following instructions and
safety precautions. Failure to comply with the instructions and cautions mentioned in this manual may cause
harm or damage. The seriousness is classied by the following indications:
iWARNING This symbol indicates the possibility of serious injury or death.
iCAUTION This symbol indicates the possibility of injury and/or damage to property.
Never do this.
⍟Always do this.

3
ENGLISHESPAÑOLFRANÇAIS
WELCOME:
Congratulations on your purchase of an IMPECCA™ Electronic Dehumidier. Before using this product, you
should familiarize yourself with the features, functions, and operating procedures described in this manual. In-
side you will nd many helpful hints on how to use and maintain your dehumidier properly. Just a little preven-
tive care on your part can save you a great deal of time and money over the lifespan of your dehumidier. You
will nd many answers to common problems in the chart of troubleshooting tips.
FEATURES AT A GLANCE:
• Automatic Pump • Ion air purier
• Continuous Operation • Comfort Mode
• Auto-restart function • Auto-defrost function
• Water-level window • Delay start and stop
NOTE: Due to slight modications in production, the instructions, features, and/or descriptions found in this
manual might vary slightly from your product.
SAVE TIME AND MONEY!
If you review our chart of Troubleshooting Tips rst, you may not need to call for service at all.
DRAINAGE ACCESSORIES:
PART (for illustration only, may not be identical) PART DESCRIPTION: QUANTITY INCLUDED:
Pump Drain Hose (~16' length) 1 piece (found in bucket)
Adapter 1 piece
Screw 2 pieces
Avoid damaging your new appliance! If required accessories are missing, please contact Customer Support.
WHAT’S IN THE BOX:
Please verify your box for the following items. Note that some models may not include all items.
1. Dehumidier
2. User’s Guide
3. Warranty Card
4. Drainage Accessories (see details
below)
i
Impecca Dehumidier
User’s Manual
IDM-30SE—30 Pint Dehumidier
IDM-45SE—45 Pint Dehumidier
IDM-70SE—70 Pint Dehumidier
❶❷ ❸

4
ENGLISH ESPAÑOL FRANÇAIS
SPECIFICATIONS & WARNINGS:
Carefully review all of these specications and warnings BEFORE operating your dehumidier unit. Failure to do
so may cause damage, injury, or bodily harm including permanent disability and/or death.
WARNING FOR YOUR SAFETY
• Do not store or use gasoline or other ammable vapors/liquids in the vicinity of this or any other appliance.
• Avoid re hazard or electric shock. Do not use an extension cord or an adapter plug. Do not remove the
ground prong from the power cord.
WARNING ELECTRICAL INFORMATION
• Be sure your electrical wiring is adequate for the model you have chosen. This information can be found
on the rating label, a silver sticker located on the back of the unit.
• Be sure the dehumidier is properly grounded. To minimize shock and re hazards, proper grounding is
important. The power cord is equipped with a three-prong grounding plug for protection against shock
hazards.
• Your dehumidier must be connected to a properly grounded wall receptacle. If the wall receptacle you
intend to use is not adequately grounded or protected by a time delay fuse or circuit breaker, have a quali-
ed electrician install the proper receptacle.
• Ensure the receptacle is accessible aer the unit installation.
⍟ Do not exceed the rating of the power out-
let or connection device.
⍟ Do not operate or stop the unit
by switching on or o the power.
⍟ Do not damage or use
an unspecied power cord.
• Otherwise, it may cause
electric shock or re due to excess heat
generation.
• It may cause electric shock or re due to
heat generation. • It may cause electric shock or re.
⍟ Do not modify power cord length or share
the outlet with other appliances.
⍟ Do not insert or pull out plug with wet
hands.
⍟ Do not place the unit near a heat
source.
• It may cause electric shock or re due to
heat generation. • It may cause electric shock. • Plastic parts may melt and cause a re.
⍟ ⍟ Disconnect the power if strange sounds,
smell, or smoke emits from the unit.
⍟ You should never try to take apart or
repair the unit by yourself.
⍟ Before cleaning, turn o the power
and unplug the unit.
• It may cause re and electric shock. • It may cause failure of machine or electric
shock/ • It may cause electrical shock or injury.
⍟ Do not use the machine near ammable
gas or combustibles, such as gasoline,
benzene, thinner, etc.
⍟ Do not drink or use the water drained
from the unit.
⍟ Do not take the water
reservoir out during operation.
• It may cause an explosion or re. • It contains contaminants and could make
you sick.
• It may ruin the reservoir full protection
on the unit and cause electric shock.
WARNING

5
ENGLISHESPAÑOLFRANÇAIS
⍟ Do not use the unit in small spaces. ⍟ Do not put in places where water may
splash onto the unit.
⍟ Place the unit on a level, sturdy sec-
tion of the oor.
• Lack of ventilation can cause overheating
and re.
• Water may enter the unit and degrade the
insulation. It may cause an electric shock
or re.
• If the unit falls over, it may cause water
to spill and damage belongings, or
cause electrical shock or re.
⍟ Do not cover the intake or exhaust open-
ings with cloths or towels.
⍟ Care should be taken when using the
unit in a room with the following per-
sons:
⍟ Do not use in areas where chemicals
are handled.
• A lack of air ow can lead to overheating
and re.
• Infants, children, elderly people, and peo-
ple sensitive to dry environments.
• This will cause the unit deterioration due
to chemicals and solvents
dissolved in the air.
⍟ Never insert your nger or other foreign
objects into grills or openings. Take
special care to warn children of these
dangers.
⍟ Do not place heavy object on the power
cord and take care so that the cord is
not compressed.
⍟ Do not climb up on or sit on the unit.
• It may cause electric shock or failure of
appliance. • There is danger of re or electric shock. • You may be injured if you fall or
if the unit falls over.
⍟ Always insert the lters securely.
Clean lter once every two weeks.
⍟ If water enters the unit, turn the unit o
and disconnect the power , contact a
qualied service technician.
⍟ Do not place ower vases or other
water container on top of the unit.
• Operation without lters may cause failure.• It may cause failure of appliance or acci-
dent.
• Water may spill inside the unit, causing
insulation failure and electrical shock
or re.
CAUTION
UNIT DIAGRAM:
FRONT VIEW REAR VIEW
1. Control panel
2. Air outlet grille
3. Water reservoir
4. Water level window
5. Handle (both sides)
6. Drain hose outlet
7. Rolling casters
8. Power cord and plug
9. Pump drain hose connector
10. Power cord storage wrap
11. Air intake grille (concealing lter)
1
2
3
4
5
89
6
7
10
11
NOTE: All drawings in this manual are
for illustrative purposes only. The actual
shape of the unit you purchased may be
slightly dierent, but the operations and
functions are the same.
Fig. 1
Fig. 2

6
ENGLISH ESPAÑOL FRANÇAIS
OPERATING INSTRUCTIONS
GETTING STARTED
Carefully review all of these instructions BEFORE proceeding to install and operate your dehumidier.
Failure to do so may cause damage, injury, or bodily harm including permanent disability and/or death.
PLACING THE DEHUMIDIFIER
A dehumidier operating in a basement will have little or no eect in
drying an adjacent enclosed storage area, such as a closet, unless there is
adequate circulation of air in and out of the area.
• Do not use outdoors.
• This dehumidier is intended for indoor residential applications
only. This dehumidier should not be used for commercial or indus-
trial applications.
• Place the dehumidier on a smooth, level oor strong enough to
support the unit with a full reservoir of water.
• If you’ll be using continuous drainage (see section later) you’ll want
to be sure that the unit is located near a drain, and that the drain is
located lower than the unit so water can ow using gravity.
• Allow at least eight inches of air space on all sides of the unit for
good air circulation.
• Place the unit in an area where the temperature will not fall below
41°F (5°C). The coils can become covered with frost at temperatures below 41°F (5°C), which may reduce
performance.
• Place the unit away from clothes dryers, heaters or radiators.
• Use the unit to prevent moisture damage anywhere books or valuables are stored.
• The dehumidier should be operated in an enclosed area to be most eective.
• Close all doors, windows and other outside openings to the room.
BEFORE FIRST USE
• When rst using the dehumidier, operate the unit in continuous mode for at least 24 hours.
• This unit is designed to operate with a working environment between 41°F–95°F (5°C–35°C).
• It’s important to know that when starting the unit for the rst time (and any subsequent power-up) the fans
and compressor will generally not run for the rst three minutes. This is to reduce stress on the compres-
sor.
• Do not connect the dehumidier to a multiple socket outlet, which is also being used for other electrical
appliances.
• Select a suitable location, making sure you have easy access to an electrical outlet.
• Plug the unit into a electrical socket-outlet with a ground connection.
• Make sure the water reservoir is correctly tted. Otherwise the unit will not operate properly.
NOTE: When the water in the reservoir reaches a certain level, please be careful when moving the machine
to avoid it tipping over.
Casters (4 on the bottom of unit)
Casters can move freely.
Do not force casters to move over carpet,
nor move the unit with water in the res-
ervoir. (The unit may tip over, spill water
and cause shock)
Air intake grille
8” (20cm)
or more
8” (20cm) or more 8” (20cm) or more
8” (20cm) or more
16” (40cm)
or more
Air outlet grille
Fig. 3

7
ENGLISHESPAÑOLFRANÇAIS
OPERATING INSTRUCTIONS (CONTINUED):
MODES OF OPERATION
There are three modes of operation: Comfort*, Standard and Continuous modes.
1. COMFORT MODE
Comfort mode is a setting whereby an ideal humidity setting (between 45-55% relative humidity) is auto-
matically chosen based on uctuating environmental temperature. This is a great choice for a living space.
2. STANDARD MODE
In Standard mode, you can choose your desired humidity level from 35% to 85%. What level you choose
can depend on a number of factors including personal comfort, surrounding temperature and outside tem-
perature. Use the and buttons to select the desired level. Aer about four seconds, the display resume
showing the current humidity level. If at any time during operation you press the or key once, the display
will show the set level. It can be re-adjusted at any time.
NOTE: When operating in Comfort or Standard modes, the compressor and fan will cycle on and o as
needed to maintain the optimum or desired humidity level. At some point the unit may be completely
silent.
3. CONTINUOUS MODE
In continuous mode, the unit’s compressor will run continuously until the unit is powered o or another
mode is selected. This will remove all the moisture from the air that it’s capable of. This mode should be
used for the rst three or four days aer setting up your dehumidier to get room and unit ready for proper
operation in Comfort mode or Standard mode at a set humidity level.
CONTROL PANEL OVERVIEW:
The following diagram and legend shows the functions of the front operating panel. Some functions are
only available on select models.
When you push the button to change operation modes, the unit will make a beep sound to indicate that it
is changing modes.
*Comfort mode not available on all models
Fig. 4
TIMER
On
Off
Defrost
Full
CONT.
POWER
ION
PUMP
COMFORT
FILTER
TURBO
LED lit:
Continuous
mode on
Button:
Toggle mode
LED lit:
Comfort
mode on
Button:
Toggle mode
LED lit:
Filter needs
replacement
Button:
Reset
filter indicator
LED lit:
Pump mode
on
Button:
Toggle mode
LED lit:
Turbo mode
(high fan) on
Button:
Toggle mode
LED lit:
Ion mode
on
Button:
Toggle mode
On LED lit:
Unit set to go on
Off LED lit:
Unit set to go off
Button:
Program timer
LED lit:
machine is in
auto-defrost
mode
LED lit:
Tank is full
Button:
Toggle Power
Humidity or
Time Delay
Display

8
ENGLISH ESPAÑOL FRANÇAIS
OPERATING INSTRUCTIONS (CONTINUED):
REMOVING THE COLLECTED WATER:
The dehumidication of the air should result water being collected by the machine. Your model allows for
the water to be collected in a bucket (Reservoir Collection), or be hooked up via standard garden hose to a
drain located lower than the unit (Continuous Drainage).
RESERVOIR COLLECTION
• When the reservoir is full, the unit will beep eight times, the full in-
dicator will light and the digital display will show P2. If the unit is on
when this happens, the fan will continue spinning for 30 seconds
aer the unit is full.
1. Slowly pull out the reservoir. Grip the le and right handles se-
curely, and carefully pull out straight so water does not spill. Do
not put the tank on the oor because the bottom of the reservoir
is uneven and water may spill. (Fig. 5)
2. Pour out the water and return the reservoir. (Fig. 6)
3. The error should clear aer the reservoir is correctly positioned
and the dehumidier should resume operation three minutes
hence.
NOTES: In order to avoid damage to the dehumidier, do not touch
any parts inside aer removing the reservoir. Be sure to push the reservoir gently all the way into the unit, as
putting it in roughly can cause problems with the operation of the unit. If water spills or is found within the
dehumidier itself upon removing the reservoir, you should wipe it dry.
CONTINUOUS DRAINAGE
Water can be automatically emptied into a oor drain or any drain
located lower than the dehumidier itself by attaching a standard
garden hose (5/16” - 3/4” diameter) with a 3/4” NPT female threaded
end to the drain hose adapter on the rear of the dehumidier.
1. Remove the plastic cover from the back drain outlet of the unit and
set aside.
2. Install the female threaded end of a water hose (not included) into
adapter A.
3. Make sure the hose is secure so there are no leaks. Direct the hose
toward a oor drain, making sure that there are no kinks that will
stop the water ow. Place the end of the hose into the drain and
make sure it is level or down to let the water ow smoothly.
4. Place the reservoir back in the unit and make sure that it is seated
correctly.
5. Select the desired humidity setting and fan speed on the unit to
commence continuous draining.
Fig. 5
Fig. 6
Fig. 7
Fig. 8

9
ENGLISHESPAÑOLFRANÇAIS
PUMP DRAINAGE
Water can be automatically emptied into a oor drain by connecting the unit pump
to a 1/4” hose (included). Follow these instructions carefully:
• Ensure the plastic drain cap is placed on the back of the unit and screwed in
tightly.
• Insert the pump drain hose (shipped inside the bucket)into the pump drain
hose outlet. Push the hose onto the outlet a minimum of 3/4” for a secure
t.
• Press the pump button on the unit to activate the pumping function. When
the reservoir is full, the pump will operate for 3-5 minutes and remove
water from the top of the reservoir. Note that the pump may produce a loud
noise—this is normal. Also note that it does not empty the reservoir com-
pletely each time.
• Make sure the hose is secure so there are no leaks. Direct the hose toward
the drain,making sure that there are no kinks that will stop the water ow.
Place the end of the hose into the drain and make sure the end of the hose is
level or down to let the water ow smoothly. The pump is powerful enough
to allow an upward travel of a few feet before reaching the drain, if neces-
sary.
• Select the desired humidity setting and fan speed on the unit to commence
pump draining.
IMPORTANT: To clean the pump lter, remove the reservoir from the unit
and manually pull the pump lter down and carefully remove it.. Clean the
lter (as shown in Figure I) using warm water. When re-inserting the pump
lter, ensure that the pump drain hose does not kink or block. Re-insert the
reservoir and resume operation.
IMPORTANT: Do not operate the pump in near-freezing environments as
this can cause permanent damage to your unit!
IMPORTANT: The reservoir must always be in place for the unit to operate
-- even when using the Pump Drainage mode.
Plastic drain cap
Pump Hose
in down position
Pump Hose
returned to its place
Fig. 10

10
ENGLISH ESPAÑOL FRANÇAIS
ADDITIONAL FEATURES EXPLAINED:
TIMER FUNCTION (Delay Start and/or Stop)
The timer can be used for two separate functions:
• To set a time delay before the unit will power on.
• To set a time delay before the unit will power o.
NOTE: Both can be set together.
Setting the unit to automatically turn o:
• With the dehumidier running, push the timer
button once (twice if dehumidier is not run-
ning), until the ‘OFF’ indicator illuminates.
• Use the and buttons to select the number of
hours until the unit will power o.
• The time will be programmed aer 5 seconds of
inactivity and the display will return to show the
humidity level.
Setting the unit to automatically turn on:
• With the dehumidier not running, push the
timer button once (twice if dehumidier is not
running), until the ‘ON’ indicator illuminates.
• Use the and buttons to select the number of
hours until the unit will power o.
• The time will be programmed aer 5 seconds of
inactivity and the display will return to show the
humidity level.
NOTES:
• If both an “ON” and “OFF” program were set,
both respective indicators will be illuminated.
• The amount of hours chosen is from the time the
program was set.
• To check the program, simply press the TIMER
button again to cycle through ON and OFF times
accordingly.
TURBO MODE (If equipped)
• If pressed, the indicator will illuminate. This will
provide a quicker dehumidication. Ideal for
situations where speedy removal of moisture is
more important than quiet operation.
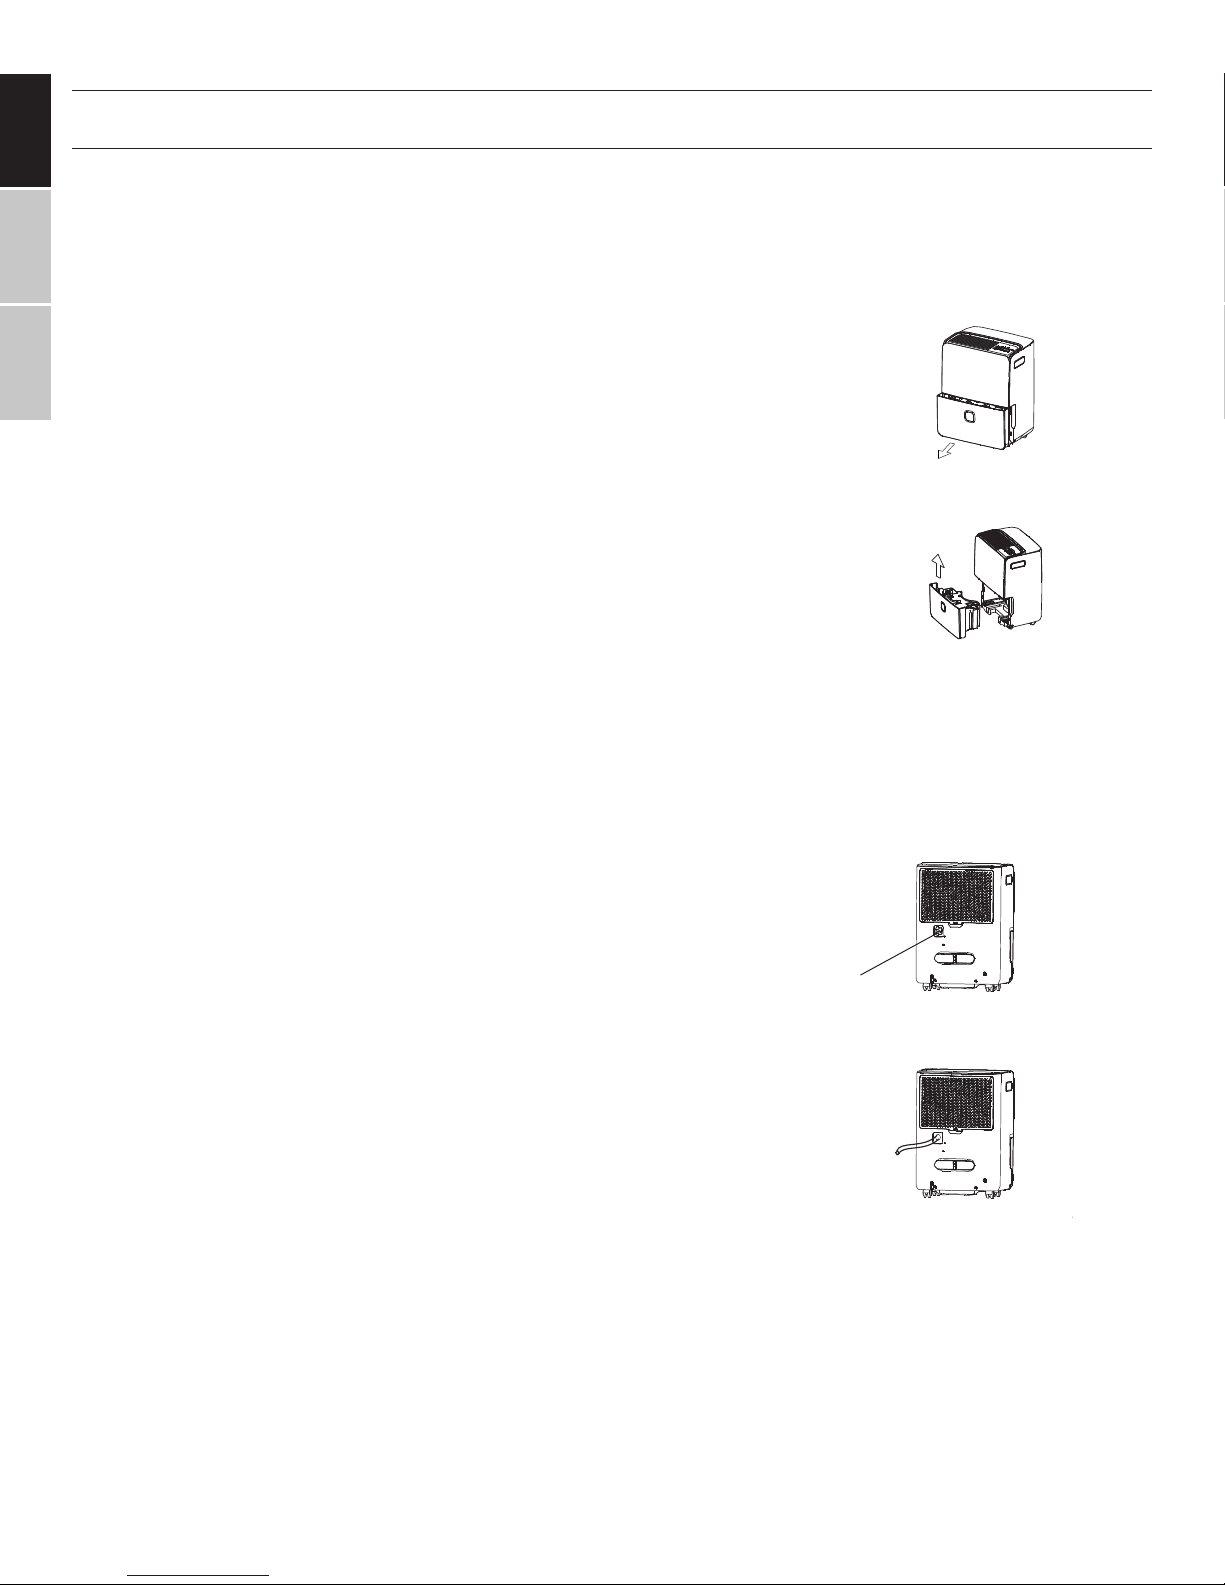
RESERVOIR FULL LIGHT
• Illuminates when the reservoir is full and ready
to be emptied, or when the reservoir is removed
and not seated in the proper position.
AUTO SHUT OFF
The dehumidier shuts o aer 30 seconds when:
• The reservoir is full.
• The reservoir is removed or not seated in the
proper position.
• When the desired humidity level is reached.
NOTE: On some models, the fan motor will con-
tinue operating.
CHECK FILTER
• The system keeps count when the fan motor op-
erates and illuminates the clean lter light aer
250 hours of operation (about every 10 days if in
continuous use). The indicator light ashes once
per second.
• Aer cleaning the air lter, press the FILTER but-
ton on the control panel and the indicator turns
o.
AUTO DEFROST
• When frost builds up on the evaporator coils, the
compressor will cycle o and the fan will contin-
ue to run until the frost disappears.
AUTO PROTECT
• Once the unit is turned o, it can not restart oper-
ation for the rst 3 minutes. This is to protect the
unit. Operation will automatically resume aer 3
minutes.
AUTO RESTART
• If the household power goes out, the unit will
automatically resume the previous mode and
settings when power returns.
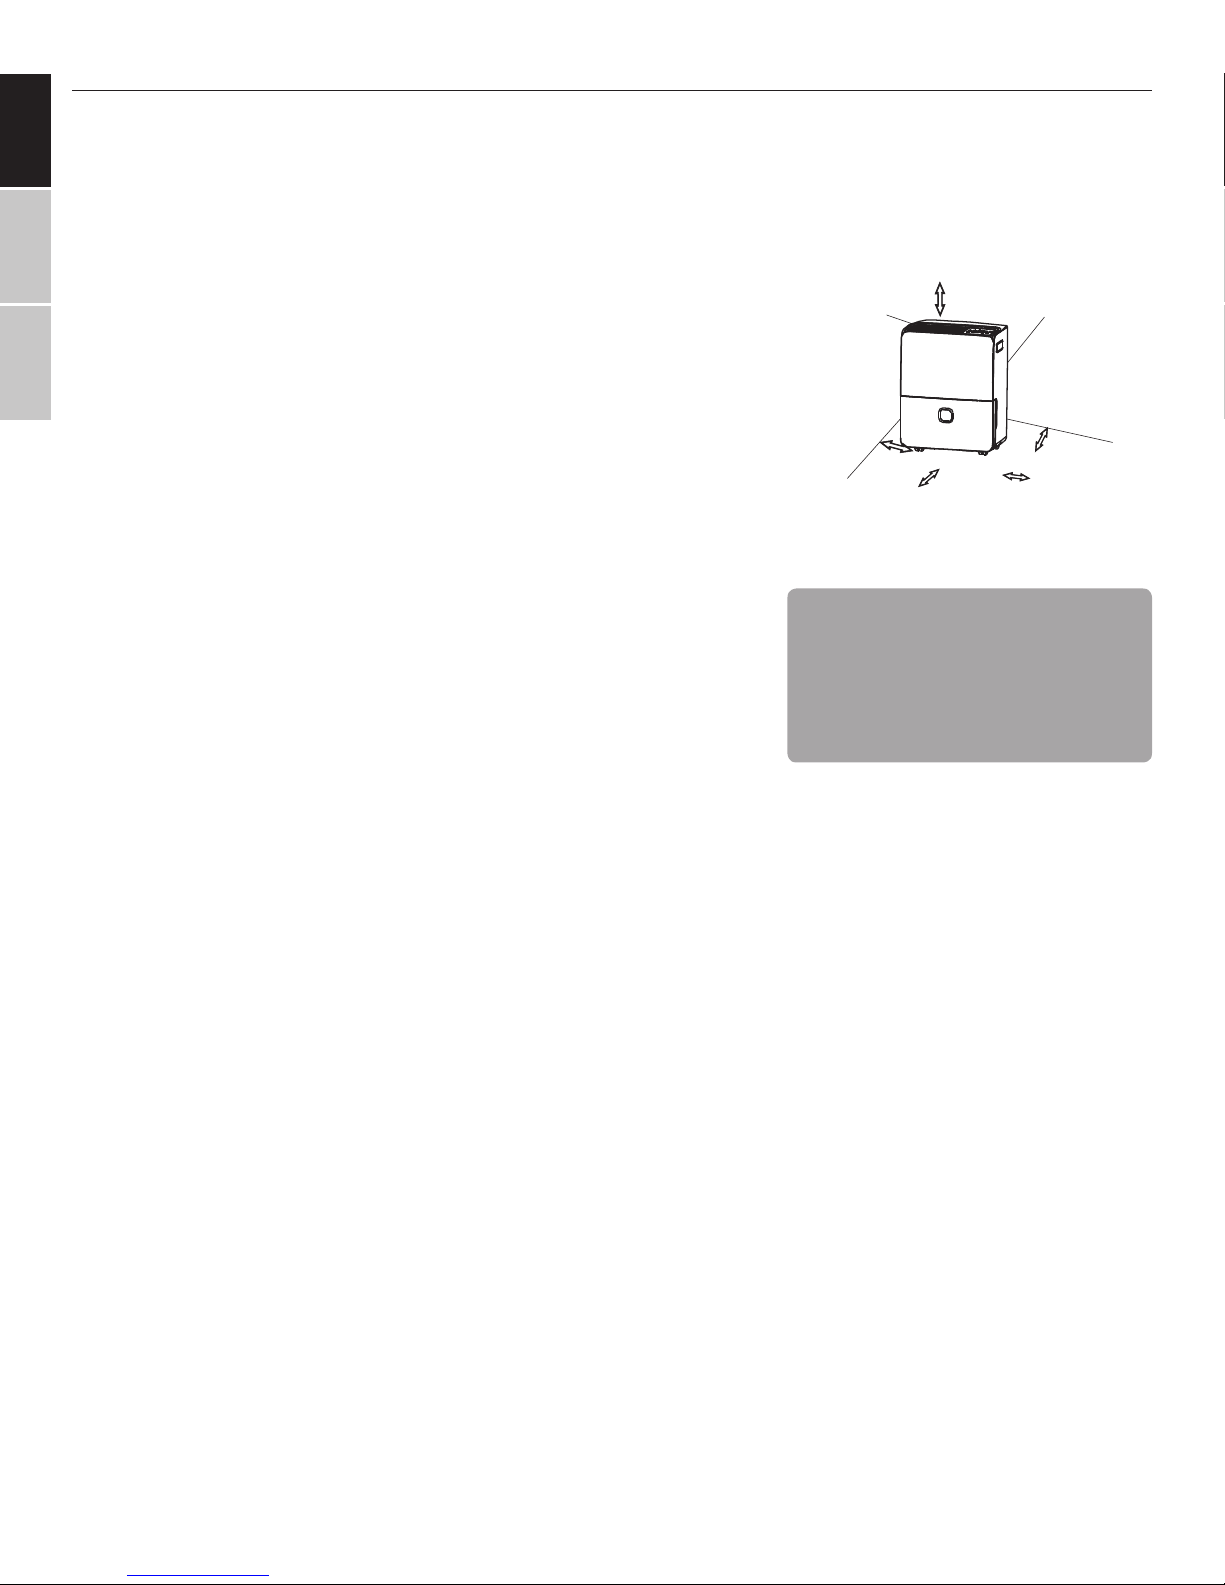
$$$ SAVE & CONSERVE ENERGY
• Use the unit in the recommended room size.
• Locate the unit where furniture cannot obstruct the air ow.
• Keep the lters clean.
• Keep doors and windows closed.

11
ENGLISHESPAÑOLFRANÇAIS
CARE & MAINTENANCE:
IMPORTANT: Turn the dehumidier o and remove the plug from
the wall outlet before cleaning.
CLEANING THE GRILLE AND CASE:
• Use water and a mild detergent. Do not use bleach
or abrasives.
• Do not splash water directly onto the main unit. Doing so may
cause an electrical shock, cause the insulation to deteriorate, or
cause the unit to rust.
• The air intake and outlet grilles get soiled easily, so use a vacuum
attachment or brush to clean.
CLEANING THE RESERVOIR:
Every few weeks, clean the reservoir to prevent growth of mold,
mildew and bacteria. Partially ll the reservoir with clean water
and add a little mild detergent. Swish it around in the reservoir,
empty and rinse.
NOTE: Do not use a dishwasher to clean the reservoir. Aer clean-
ing, the reservoir must be in place and securely seated for the
dehumidier to operate.
CLEANING THE AIR FILTER
Clean the lter every two weeks based on normal operating con-
ditions.
1. Unlatch the air intake grille on the back of the unit
2. Pull lter downwards (Figure 11).
3. Wash the lter with clean water then dry.
4. Re-install the lter.
CAUTION: DO NOT operate the dehumidier without a lter be-
cause dirt and lint will clog it and reduce performance.
BEFORE STORING OR NOT USING A UNIT
FOR LONG PERIODS OF TIME:
• Aer turning o the unit, wait one day before emptying the res-
ervoir, as some excess water that has accumulated on the coils
may need time to condense and drain into the reservoir.
• Clean the main unit, water reservoir and air lter.
• Wrap the cord and bundle it with the band. Cover the unit with a
plastic bag.
• Store the unit upright in a dry, well-ventilated place.
CAUTION: NEVER STORE UNIT LYING DOWN OR UPSIDE-DOWN.
Fig. 11

12
ENGLISH ESPAÑOL FRANÇAIS
TROUBLESHOOTING TIPS:
Problem What to Check
Unit does not start
• Make sure the dehumidier plug is pushed completely into the outlet.
• Check the house fuse/circuit breaker box.
• Dehumidier has reached its preset level or bucket is full.
• Reservoir is not in the proper position.
• Make sure three minutes have elapsed from time unit has been powered
on.
Dehumidier does not dry
the air as it should
• Did not allow enough time to remove the moisture.
• Make sure there are no curtains, blinds or furniture blocking the front or
back of the dehumidier.
• The humidity control may not be set low enough.
• Check that all doors, windows and other openings are securely closed.
• Room temperature is too low, below 41°F (5°C).
• There is a kerosene heater or something giving o water vapor in the
room.
The unit makes a loud noise
when operating
• The air lter is clogged.
• The unit is tilted instead of upright as it should be.
• The oor surface is not level.
Frost appears on the coils • This is normal. The dehumidier has an auto–defrost feature.
Water on oor • Hose to connector or hose connection may be loose.
• Even though you’re using the reservoir, the back drain plug is open.
DISPLAY:
Shows the set % RH (Relative Humidity level) from 35% to 85% or auto start/stop time (0-24) while setting,
then returns to show the actual (+/-5% accuracy) room humidity level in a range of 30% RH to 90%RH.
DISPLAY ERROR CODES AND PROTECTION CODES:
AS) Humidity sensor error—Unplug the unit and plug it back in. If error repeats, call for service.
ES) Temperature sensor error—Unplug the unit and plug it back in. If error repeats, call for service.
P2- Reservoir is full or reservoir is not seated correctly—Empty the reservoir and replace it in the right posi-
tion.
EC) Unit malfunction—Please make sure whether the environment temperature is suitable for the stated tem-
perature in the manual or not. If not, please operate the unit under the stated temperature. If the environ-
ment temperature is suitable for the stated temperature, please call for service.
CONTACT CUSTOMER SUPPORT
Internet: www.impecca.com
Phone: +1 866-954-4444
© 2016 Impecca, a division of LT Inc., Wilkes Barre, PA.
Table of contents
Other Impecca Dehumidifier manuals