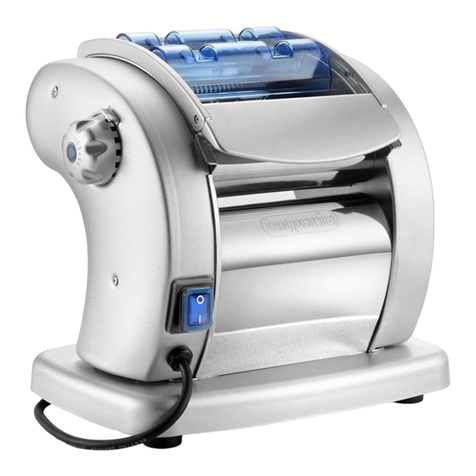
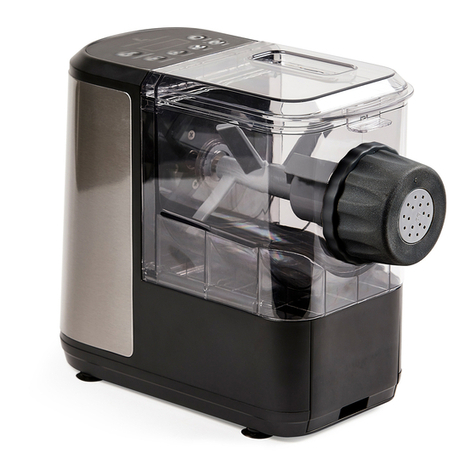
Imperia Chef-in-Casa 750 User manual

ELECTRIC MACHINE
Instructions Manual
MACHINE ELECTRIQUE
Manuel d’instructions
ELEKTRISCHE MASCHINE
Gebrauchsanleitung
MAQUINA ELÉCTRICA
Manual de instrucciones
MACCHINA ELETTRICA
Libretto istruzioni

DISEGNI ILLUSTRATIVI - ILLUSTRATED EXAMPLES
DESSINS - EXEMPLES - ABBILDUNGEN
Fig./Abb. 1
2
Fig./Abb. 2
1
2
3
4
8
12 13
10
7
9
6
5
14
16
19
15
17
18
20
21
11

DISEGNI ILLUSTRATIVI - ILLUSTRATED EXAMPLES
DESSINS - EXEMPLES - ABBILDUNGEN
Fig./Abb. 3
3
Fig./Abb. 4
22
24 25
26
27
28
9- Spaghetti
mm 1,9
24 - Tagliatelle
mm 2,5
39 - Reginette
mm 9
21 - Linguine
mm 3,3 x 1,6
383 - Tortiglioni
mm 10
531 - Pipe 433 - Radiatori
418 - Conchiglie
464 - Caserecci 570 - Gigli
9913 - Paccheri
mm 25
370 - Fusilli
SFOGLIA mm 100
dimensione di utilizzo della Raviolatrice Monferrina
pag. 30/31
23
26m

Ci congratuliamo con Voi per l’ottima scelta.
DESCRIZIONE DELLA MACCHINA (Fig.1-2)
Imperia Chef-in-Casa destinata ad un utilizzo casalingo e prodotta sulla base di standard quali-
tativi molto elevati, Vi garantirà affidabilità e sicurezza nel tempo, permettendovi di preparare in
casa vostra, in modo veloce e sicuro, la migliore pasta fresca con gli ingredienti naturali scelti da
Voi.
Il presente manuale è parte integrante della macchina. Prima di compiere qualsiasi operazione,
leggere attentamente tutte le norme di sicurezza, le istruzioni e le condizioni di garanzia.
Conservate con cura ed a portata di mano questo manuale e consultatelo a ogni eventuale
necessità. Per qualsiasi dubbio o impiego non previsto, interpellate il rivenditore prima dell’in-
stallazione, citando il MODELLO e il NUMERO DI MATRICOLA.
ATTENZIONE !
Qualsiasi utilizzo della macchina non previsto dal presente manuale di istruzioni deve conside-
rarsi scorretto o improprio e comportare condizioni di pericolo. La macchina è stata progettata,
costruita ed allestita esclusivamente per la produzione di pasta trafilata ottenuta da materie
prime quali farina di grano duro o tenero con l’aggiunta di acqua e/o uova e quindi è destinata
solo ed esclusivamente a impasto e trafila della pasta e non può essere utilizzata per scopi diversi.
Il Fabbricante si ritiene sollevato da eventuali responsabilità in caso di:
• uso improprio;
• modifiche o interventi non autorizzati dal Fabbricante;
• non corretta installazione;
• utilizzo di ricambi non originali o non specifici per il modello;
• alimentazione elettrica non idonea;
ATTENZIONE !
Se il cavo di alimentazione è danneggiato, esso deve essere sostituito dal costruttore o dal suo
servizio assistenza tecnica o comunque da una persona con qualifica similare, in modo da pre-
venire ogni rischio.
ITALIANO
4
DESCRIZIONE PANNELLO COMANDI (Fig.2)
ACCESSORI IN DOTAZIONE
(Fig.3)
22 - Chiave per ghiera porta trafile
23 - Estrattore per canotto
24 - Trafila sfoglia 170mm
25 - Tagliapasta manuale
ACCESSORI OPZIONALI
(Fig.4)
26 - Tagliapasta motorizzato
27 - Coltelli per tagliapasta
28 - Altre trafile
1 - Pannello di comando
2 - Coperchio di sicurezza in Acciaio Inox
3 - Leva sblocco/blocco albero impastatore
4 - Perno
5 - Trafila
6 - Ghiera porta trafile
7 - Gancio di sicurezza
8 - Tagliapasta Manuale
9 - Pomello di blocco/sblocco tagliapasta
10 - Cavo di alimentazione
11 - Connettore di alimentazione con fusibile
12 - Coclea
13 - Albero impastatore
14 - Pulsante “MIXER”
15 - Led marcia impastatore
16 - Pulsante “STOP”
17 - Led marcia trafila
18 - Led macchina in tensione
19 - Pulsante “PASTA”
20 - Led segnalazione arresto
21 - Connettore tagliapasta a motore

PULIZIA
La pulizia è la sola manutenzione normalmente richiesta.
Prima e dopo ogni utilizzo assicurarsi che la spina sia disinserita dalla presa di corrente.
Non usare oggetti contundenti per rimuovere eventuali residui. Evitare assolutamente l’uso di coltelli o
altri utensili per iniziare la presa dell’impasto.
Prima di riporre la macchina e gli accessori assicurarsi che ogni elemento sia perfettamente asciutto.
Per facilitare la pulizia all’interno della vasca impastatrice occorre smontare l’albero nel seguente modo:
- ruotare in senso antiorario la leva di bloccaggio ed estrarre il perno di fissaggio;
- sfilare e togliere dall’alto l’albero impastatore.
Pulire poi l’interno della vasca e l’albero con una spugnetta umida.
Smontare, quindi, la trafila dalla ghiera porta trafile e immergerla in un contenitore pieno d’acqua.
La pasta residua all’interno dei fori della trafila non deve mai seccare.
Togliere la coclea e pulirla, anch’essa, con una spugnetta umida.
AVVERTENZA! Non usare mai
getti d’acqua per pulire la macchi-
na. Prima di montare la trafila
assicurarsi sempre che abbia i
fori liberi da rimasugli di pasta.
5
Quindi passare all’estrazione del canotto con l’apposito estrattore in dotazione.
Sfilare prima la rondella grande (C) dall’asta (A), poi inserire l’asta, solo con la rondella piccola (B), dal-
l’interno della vasca verso l’esterno. Fuoriuscita l’asta reinfilare la rondella grande.
INTERNO
ESTERNO
ESTRATTORE
A
B
C
A questo punto non rimane che svitare,
in senso antiorario, la ghiera porta tra-
file, con la chiave in dotazione, fino a
completa estrazione del canotto.
Dopo la pulizia rimontare canotto,
coclea e ghiera porta trafile.

6
COLLEGAMENTO ELETTRICO
Prima di far funzionare la macchina, controllare che la tensione della Vostra abitazione sia quella indi-
cata nella scheda tecnica del presente libretto, e che l’impianto sia dotato di messa a terra.
Non utilizzate nessun altro tipo di alimentazione. Il fabbricante declina ogni responsabilità per danni a
persone o cose derivanti dalla mancata osservazione di questa norma. Ove necessario montare un
adattatore per la spina, assicurarsi della sua conformità al cavo di alimentazione.
AVVERTENZE
In caso di emergenza, per arrestare il funzionamento della macchina, basta sollevare il coperchio di
sicurezza (2), oppure premere il pulsante “STOP”.
Non manomettere o neutralizzare nessuna delle protezioni di cui la vostra macchina è dotata.
Qualora si riscontrasse che la macchina entri in funzione anche nelle condizioni in cui non dovrebbe
funzionare (coperchio di sicurezza alzato), spegnerla immediatamente premendo il pulsante “STOP”.
Estrarre la spina del cavo di alimentazione (10) dalla presa di corrente e rivolgersi al Rivenditore
Autorizzato di fiducia (vedi tagliando di garanzia allegato alla macchina).
Questo apparecchio non è inteso per uso di persone (inclusi bambini) con ridotte capacità fisiche, sen-
soriali o mentali, o senza esperienza e conoscenza, a meno che abbiano ricevuto istruzioni relativa-
mente all'uso dell'apparecchio e siano assistiti da una persona responsabile per la loro sicurezza.
I bambini dovrebbero essere controllati in modo da assicurare che non giochino con l'apparecchio.
Non utilizzare la macchina con indumenti o grembiuli i cui lembi possano impigliarsi tra gli organi in
movimento della macchina.
Porre particolare attenzione, per questo motivo oltre che per ragioni igieniche, anche ai capelli (si
consiglia di tenerli raccolti sul capo all’interno di una cuffia protettiva) e ad ogni altro oggetto con simi-
li caratteristiche (catenine, braccialetti, ecc.).
Sistemare la macchina su di una superficie piana e stabile, in grado di sopportarne il peso.
Prima di iniziare l’utilizzo assicurarsi di saper arrestare la macchina in caso di emergenza.
Non utilizzare l’apparecchio se:
- non funziona correttamente;
- è stato danneggiato o è caduto;
- il cavo di alimentazione o la spina sono danneggiati.
Non immergere il cavo di alimentazione o la spina in acqua. Tenerli lontano da superfici calde.
Non lasciare pendere il cavo di alimentazione da bordi di tavoli o mobili.
Non usare questa macchina vicino a lavandini o su basamenti bagnati.
Se il cavo di alimentazione risultasse danneggiato, va sostituito dal Costruttore o dal suo Servizio
Assistenza Tecnica o, comunque, da persona con qualifica similare. In modo da prevenire ogni possi-
bile rischio.
CONSIGLI SULLA PRODUZIONE DELLA PASTA
Per l’impasto può essere usato qualsiasi tipo di farina, di semola, o misto di semola con farina.
L’impasto può essere lavorato utilizzando solo uova o un misto di uova e acqua.
L’acqua può essere sostituita, in parte, da spinaci o verdure ben tritate per ottenere paste verdi, o con-
centrati di pomodoro per ottenere paste rosse. In questi casi è consigliabile usare semola di grano duro.
Per un buon impasto necessitano circa 300 ÷ 350 gr di liquido per ogni Kg di farina.
Questo liquido può essere composto di sole uova, di sola acqua oppure un misto di acqua e uova.
Poiché l’umidità della farina varia a seconda del tipo, del clima e del luogo in cui è conservata, le dosi
indicate devono essere adattate al tipo di farina che viene lavorata diminuendo o aggiungendo un po’
di liquido.
L’impasto, al termine della lavorazione, si dovrà presentare in grani grandi come un chicco di caffè. Se
la farina si amalgama formando un impasto omogeneo è segno che è stato versato troppo liquido; in
questo caso prima di trafilare la pasta occorre aggiungere un po’ di farina e continuare l’impasto.
Se invece la farina non forma i granuli ma rimane molto farinosa aggiungere un po’ di liquido.

7
Vi forniamo alcune ricette per produrre diversi tipi di pasta.
Si tenga comunque presente che si possono sempre modificare ingredienti e quantità secondo la pro-
pria esperienza e gusto.
Preparazione sfoglia per ravioli:
70% farina tipo “00”
30% semola di grano duro
N° 5 uova per 1 Kg d’impasto + acqua
Impastare per circa 10 minuti.
Preparazione pasta per tagliatelle:
70% farina tipo “00”
30% semola di grano duro
N° 5 uova per 1 Kg d’impasto + acqua
Oppure
100% semola di grano duro
N° 5 uova per 1 Kg di semola + acqua
Impastare per circa 15 minuti con umidità di circa il 33%.
Preparazione pasta di semola:
(tipo: rigatoni, fusilli, conchiglie, spaghetti, ecc.).
Per questo tipo di pasta si impiegano solo semola di grano duro e acqua in percentuale del 30 ÷ 33%.
Quando s’impiegano tipi diversi di farina è preferibile miscelarli bene prima di aggiungere il liquido.
A discrezione del gusto del consumatore si può aggiungere all’impasto del sale nella quantità indicati-
va di 2 gr. per 1 Kg di farina avendo cura di diluirlo bene nel liquido.
IMPIEGO DELLA MACCHINA
Prima di ogni utilizzo: seguire le istruzioni descritte al paragrafo “PULIZIA”.
1 - Sistemare la macchina su di un piano idoneo.
2 - Inserire la trafila nella ghiera desiderata e riavvitare il tutto sulla macchina.
3 - Se si vuole produrre la pasta corta, scegliere il coltello per tagliapasta opportuno tra i due tipi in
dotazione.
Attenzione! Maneggiare con cura i coltelli tagliapasta.
4 - Montare il tagliapasta manuale o a motore (opzionale) sulla macchina, fissandolo con il pomello di
blocco (9).

8
5 – Nel caso del tagliapasta a motore inserire lo spinotto d’alimentazione del motore tagliapasta nel
connettore (11) posto sulla macchina.
6 - Aprire il coperchio e riempire la vasca impastatrice con gli ingredienti di base, farina e/o semola di
grano duro, acqua e/o uova.
Si consiglia di pesare sempre la farina e/o semola di grano duro che si introduce nella vasca per poter
stabilire il quantitativo esatto del liquido da aggiungere (acqua e/o uova).
Rompere le uova in un recipiente a parte evitando così che eventuali frammenti del guscio, cadendo
nella vasca, intasino la trafila.
Si consiglia, inoltre, di sbattere le uova amalgamando bene tuorlo e albume.
7 - Richiudere il coperchio bloccandolo con l’apposito gancio di sicurezza.
8 - Tenere premuto il pulsante “MIXER” fino a quando il led marcia impastatore smetterà di lampeggia-
re e diventerà fisso (circa 5 secondi).
Avvertenza! Non azionare mai la macchina con il pulsante “PASTA” prima di aver impastato la
farina in quanto si potrebbero verificare gravi danni meccanici.
9 - Dopo circa 15 minuti l’impasto, friabile e suddiviso in granuli, sarà pronto per essere trafilato.
10 - Fermare la macchina premendo il tasto “STOP”.
Attenzione! Non indossare indumenti ampi o elementi sporgenti che possano impigliarsi nella
macchina.
Per produrre pasta lunga (tagliatelle, spaghetti, ecc.):
Tenere premuto il pulsante “PASTA” fino a quando il led marcia trafila smetterà di lampeggiare e diven-
terà fisso (circa 5 secondi)
Procedere al taglio della pasta in uscita dalla trafila, utilizzando una spatola o un coltello.
Per produrre pasta corta:
Montare sulla trafila il tagliapasta manuale o a motore (opzionale) con il coltello scelto per la lunghezza
di taglio, assicurandolo con il pomello di sicurezza.
Premere il pulsante “PASTA”.
Nel caso sia montato il tagliapasta motorizzato (26) regolare la velocità di rotazione del coltello median-
te la manopola (26m).
Sostituzione delle trafile:
Per cambiare il formato della pasta occorre sostituire la tra-
fila nel seguente modo:
Premere il pulsante “STOP”.
Se presente svitare il pomello ed estrarre il tagliapasta.
Premere il pulsante “MIXER” e far funzionare la macchina per
circa 10 secondi diminuendo la pressione all’interno della
trafila.
Arrestare la macchina premendo il pulsante “STOP”.
Allentare la ghiera con l’apposita chiave in dotazione.
Svitare ed estrarre la ghiera.
Togliere la trafila e sostituirla con quella desiderata.
Avvertenza! Dopo l’uso le trafile devono essere immerse in un contenitore pieno d’ac-
qua per evitare che la pasta si secchi intasando i fori.

ENGLISH
We would like to congratulate you on your excellent choice.
DESCRIPTION OF THE MACHINE (Figs.1-2)
We would like to congratulate you on your excellent choice.
Imperia Chef-in-Casa is intended for domestic use and manufactured to very high quality stan-
dards. It is guaranteed to serve you reliably and safely for a long time, enabling you to prepare
the best fresh pasta at home, quickly and safely, and using whatever natural ingredients you
choose.
This instruction booklet is an integral part of the machine. Before taking any action, be sure to
read all the safety recommendations, instructions and warranty terms carefully.
Take care of this booklet, keeping it readily available to consult whenever you might need to do
so. In case of doubt or other uses, contact the retailer before taking any installation steps, quo-
ting the MODEL and the SERIAL NUMBER.
IMPORTANT!
Any use of the machine other than as foreseen in the present instruction booklet shall be consi-
dered as improper or inappropriate and may be hazardous. The machine has been designed,
manufactured and equipped exclusively for the production of drawn pasta using such raw mate-
rials as durum wheat or soft wheat flours with the addition of water and/or eggs. It is intended
exclusively for the purpose of mixing and drawing pasta and may not be used for any other pur-
poses.
The manufacturer accepts no liability for:
- improper use;
- modifications to the machine or any other action not authorized by the manufacturer;
- improper installation;
- use of spare parts that are not original or not specific to the model;
- connection to an inappropriate electric power supply.
IMPORTANT! If the power supply cord is damaged, it must be replaced by the manufacturer or
the manufacturer's after-sales technical support service, or by a person with similar qualifica-
tions, to prevent any risks.
9
DESCRIPTION OF THE CONTROL PANEL (Fig. 2)
STANDARD ACCESSORIES
(Fig. 3)
22 - wrench for die-holder ring
23 - sleeve extractor
24 - 170mm sheet pasta die
25 - manual pasta cutter
OPTIONAL ACCESSORIES
(Fig. 4)
26 - motorized pasta cutter
27 - blades for pasta cutter
28 - other dies
1 - control panel
2 - stainless steel safety cover
3 - mixer shaft release/locking switch
4-pin
5-die
6 - die-holder ring
7 - safety latch
8 - manual pasta cutter
9 - pasta cutter lock/release knob
10 - power cord
11 - fuse-protected power supply connector
12 - worm screw
13 - mixer shaft
14 - ‘MIXER’ button
15 - mixer ‘ON’ led
16 - ‘STOP’ button
17 - die ‘ON’ led
18 - machine power ‘ON’ led
19 - ‘PASTA’ button
20 - machine ‘STOP’ led
21 - motorized pasta cutter connector

CLEANING
Cleaning is the only type of maintenance normally required.
Before and after use, make sure the plug has been removed from the power socket.
Never use sharp objects to remove any scraps of pasta. Absolutely avoid any use of knives or other
tools to feed the pasta to the dies.
Before storing the machine and accessories, make sure that all the parts are perfectly dry.
To make it easier to clean the inside of the mixer bowl, it is best to remove the shaft as follows:
- turn the shaft locking lever anticlockwise and remove the fixing pin;
- slide the mixer shaft out and remove it from above.
Then clean the inside of the bowl and the shaft with a damp cloth.
Then remove the die from the die-holder ring and place it in a bowl of water.
Any scraps of pasta remaining inside the holes in the die must never be allowed to dry out.
Remove the worm screw and clean it with a damp cloth.
IMPORTANT! Never use a jet of water
to clean the machine. Before fitting
the die, always make sure the holes in
the die are completely free of any
scraps of pasta.
10
Then proceed to remove the sleeve with the aid of the extractor provided.
First slide the larger disk (C) off the rod (A), then insert the rod, with the smaller disk (B) alone, working
from inside the bowl outwards. When the rod extends outside the sleeve, reattach the larger disk.
INSIDE
OUTSIDE
EXTRACTOR
A
B
C
All there remains to do is to unscrew
the die-holder ring (turning anticlockwi-
se) with the aid of the wrench provided
until the sleeve has been completely
extracted. After cleaning the sleeve, re-
install the sleeve, the worm screw and
the die-holder ring.

11
ELECTRIC CONNECTION
Before using the machine, make sure the voltage in your home is as stated in the technical datasheet
in the instruction booklet, and that your system is complete with an earthing connection.
Never use any other type of power supply. The manufacturer accepts no liability for any personal injury
or damage to property deriving from failure to comply with this recommendation. Where it is necessary
to fit an adapter to the plug, make sure that it is appropriate for the power cord.
IMPORTANT
In the event of an emergency, simply raise the safety lid (2) or press the “STOP” button to stop the
machine.
Never manhandle or neutralize any of the safety devices installed in the machine.
If the machine starts to operate even in conditions in which it should not (i.e. with the safety cover rai-
sed), press the “STOP” button to switch it off immediately.
Remove the plug on the power cord (10) from the socket and contact the authorized retailer (see the
warranty label attached to the machine).
This machine is not intended for use by people (including children) with limited physical, sensory or
mental faculties, or lacking appropriate experience and knowledge, unless they have received instruc-
tions on the use of the machine and are assisted by a person who takes responsibility for their safety.
Children should be monitored to ensure that they do not play with the machine.
Never use the machine while wearing clothing or aprons with flapping or loose parts that could be
entrained between moving parts of the machine. For this reason, as well as for reasons of hygiene, also
pay particular attention to your hair (it is best kept tied up and inside a protective cap), and any objects
with similar features (necklaces, bracelets, etc.).
Stand the machine on a flat, stable surface capable of supporting its weight.
Before starting the machine, make sure that you know how to stop it in the event of an emergency.
Do not use the machine if:
– it is not functioning properly;
– it has been damaged or dropped;
– the power supply cord or plug show signs of damage.
Do not immerse the power cord or plug in water; keep them well away from hot surfaces. Do not allow
the power cord to hang over the edge of tables or other items of furniture.
Do not use the machine close to sinks or wet floors.
If the power supply cord is damaged, it must be replaced by the manufacturer or the manufacturer's
after-sales technical support service, or by a person with similar qualifications, to prevent any risks.
PASTA MAKING TIPS
To make your pasta you can use any type of soft flour, durum wheat flour, or combinations of the two,
mixed with eggs alone or a combination of eggs and water.
A part of the water can be replaced with finely minced spinach or other leafy greens to obtain a green
pasta, or with tomato concentrate to obtain a red pasta, in which case it is advisable to use durum
wheat flour.
To obtain the right consistency of your pasta dough, you will need approximately 300-350 g of liquid
per kilo of flour.
This liquid may consist of eggs alone, water alone, or a combination of water and eggs. Since the humi-
dity of the flour varies according to the type, the climate and the place where the flour is stored, these
recommended quantities need to be adjusted to the type of flour used, slightly increasing or decrea-
sing the amount of liquid.
After mixing thoroughly, the dough should form clumps about the size of a coffee bean. If it has formed
a smooth ball, this means that too much liquid has been added, so you will need to add a little more
flour and carry on mixing the dough before drawing the pasta.
If the dough fails to form clumps and remains very powdery, add a little more liquid.

12
Here are a few recipes for making different types of pasta.
Bear in mind, however, that the ingredients and quantities can always be adjusted to suit your own
experience and personal tastes.
Preparing sheet pasta for ravioli:
70% soft wheat flour
30% durum wheat flour
5 eggs per kilo of flour plus water. Mix for approximately 10 minutes.
Preparing pasta for noodles:
70% soft wheat flour
30% durum wheat flour
5 eggs per kilo of flour plus water
or 100% durum wheat flour
5 eggs per kilo of flour plus water. Mix for approximately 15 minutes, with a humidity of around 33%.
Preparing durum wheat pasta:
(e.g. rigatoni, fusilli, shells, spaghetti, etc.).
This type of pasta is made using only durum wheat flour and water in proportions of 30-33%.
When other types of flour are used, it is preferable to mix the flours well before adding the liquid.
Depending on your personal tastes, you may or may not add salt in quantities of roughly 2 g per kilo of
flour, taking care to dissolve it thoroughly in the liquid.
USING THE MACHINE
Before using the machine, always complete the steps explained in the section on ‘Cleaning’.
1 - Stand the machine on a suitable surface.
2 - Place the die of your choice in the die-holder ring and screw them onto the machine.
3 - If you are making short pasta shapes, choose the appropriate blade for cutting the pasta from the
two types provided. IMPORTANT! Take care when handling the pasta cutter blade.
4 – Fit the manual or motorized (optional) pasta cutter on the machine, fixing it in place with the locking
knob (9).
5 - When using the motorized pasta cutter, insert the plug on the power cord for the motorized pasta
cutter in the socket (11) located on the machine.
6 - Open the cover and fill the mixer bowl with the basic ingredients - soft flour and/or durum wheat
flour, water and/or eggs.
It is always advisable to weigh the soft and/or durum wheat flour that you add to the bowl in order to
establish the exact quantity of liquid (water and/or eggs) required.

13
It is always advisable to weigh the soft and/or durum wheat flour that you add to the bowl in order to
establish the exact quantity of liquid (water and/or eggs) required.
Break the eggs into a separate container to avoid any risk of fragments of egg shell dropping into the
bowl and clogging the holes in the dies. It is also best to beat the eggs to combine the yolks and whi-
tes thoroughly before adding them to the bowl.
7 - Close the cover again and lock it in place with the safety latch.
8 - Press and hold the ‘MIXER’ button until the ‘ON’ led on the mixer stops flashing and remains on (this
takes approximately 5 seconds).
Warning! Never operate the machine with the ‘PASTA’ button before you have mixed the flour and
other ingredients, otherwise you could cause severe mechanical damage.
9 - After mixing the ingredients for approximately 15 minutes, the pasta will have become crumbly and
separate into clumps; it is now ready to be drawn through the dies.
10 - Stop the machine by pressing the ‘STOP’ button.
Important! Never wear loose clothing, pendants, or anything that might become trapped in the
moving parts of the machine.
To produce long pasta (noodles, spaghetti, etc.):
Press and hold the ‘PASTA’ button until the die ‘ON’ led stops flashing and remains on (this takes about
5 seconds). Then proceed to cut the pasta as it emerges from the die, using a spatula or knife.
To make pasta shapes:
Fit the manual or motorized (optional) pasta cutter on the die with the blade chosen to suit the cutting
length required, making sure that the safety knob is in place.
Press the ‘PASTA’ button.
If the motorized pasta cutter (26) is used, adjust the turning
speed of the blade with the aid of the knob (26m).
Changing the dies:
To change the pasta shape you need to replace the die as follows:
Press the ‘STOP’ button.
Unscrew the knob, if any, and remove the pasta cutter.
Press the ‘MIXER’ button and run the machine for approxima-
tely 10 seconds to reduce the pressure inside the die.
Stop the machine by pressing the ‘STOP’ button.
Loosen the die-holder ring with the wrench provided.
Unscrew and remove the die-holder ring.
Remove the die and replace it with the one you wish to use.
Important! After use, the dies must be immersed in a container of water to avoid the pasta drying
inside the holes and clogging the die.
TROUBLESHOOTING
PROBLEM LIKELY CAUSE SOLUTION
The motor fails to start or
suddenly stops.
A - Plug not inserted in the
socket, or not inserted properly
A – Insert the plug properly
B – Safety cover raised B – Lower the safety cover
C – Motor overheated C – Remove the plug from the
socket and wait for the motor
to cool down
D – ‘MIXER’ or ‘PASTA’
buttons not pressed properly
D – Press and hold the button
required for at least 5 seconds.
If none of the above-listed anomalies are identified, contact the customer support service (see back of
warranty card for details).
TROUBLESHOOTING PROBLEM

FRANÇAIS
Nous nous félicitons de votre choix.
DESCRIPTION DE LA MACHINE (Fig.1-2)
Imperia Chef-in-Casa est destinée à un usage domestique et elle est fabriquée selon des stan-
dards de qualité très élevés, Elle vous garantira fiabilité et sécurité au fil du temps, en vous per-
mettant de préparer chez vous, de manière rapide et sûre, les meilleures pâtes fraîches avec les
ingrédients naturels que vous avez choisis.
Ce manuel fait partie intégrante de la machine. Avant d’accomplir n’importe quelle opération,
lisez avec attention toutes les normes de sécurité, les instructions et les conditions de garantie.
Gardez avec soin et à portée de main ce manuel et lisez-le en cas de besoin. Pour tout doute ou
toute utilisation non prévue, contactez votre revendeur avant l’installation, en mentionnant le
MODELE et le NUMERO DE MATRICULE.
ATTENTION !
Toute utilisation de la machine non prévue par ce manuel d’instructions doit être considérée
comme incorrecte ou impropre et elle peut entraîner des situations de danger. La machine a été
conçue, fabriquée et aménagée exclusivement pour la production de pâtes tréfilées obtenues de
matières premières telles que farine de blé dur ou tendre avec l’ajout d’eau et/ou d’oeufs; elle est
exclusivement destinée au pétrissage et au tréfilage de la pâte et elle ne peut pas être utilisée
pour d’autres finalités.
Le Fabricant est soulevé de toutes responsabilités éventuelles dans les cas suivants:
• utilisation abusive;
• modifications ou interventions non autorisées par le Fabricant;
• installation incorrecte;
• utilisation de pièces de rechange non originales ou non spécifiques pour le modèle;
• alimentation électrique non appropriée;
ATTENTION!
Si le câble d’alimentation est endommagé, il doit être remplacé par le fabricant ou par son ser-
vice d’assistance technique ou, en tout cas, par une personne ayant une qualification similaire,
de manière à éviter tout risque.
14
DESCRIPTION DU PANNEAU DES COMMANDES (Fig.2)
ACCESSOIRES FOURNIS
(Fig.3)
22 - Clé pour embout porte-filières
23 - Extracteur pour manchon
24 - Filière abaisse 170mm
25 - Coupe-pâtes manuel
ACCESSOIRES
OPTIONNELS (Fig.4)
26 - Coupe-pâtes motorisé
27 - Couteaux pour coupe-pâtes
28 - Autres filières
1 - Panneau de commande
2 - Couvercle de sécurité en acier inoxydable
3 - Levier de déblocage/blocage
de l’arbre mélangeur
4 - Pivot
5 - Filière
6 - Embout porte-filières
7 - Crochet de sécurité
8 - Coupe-pâtes manuel
9 - Pommeau de blocage/déblocage coupe-pâtes
10 - Câble d’alimentation
11 - Connecteur d’alimentation avec fusible
12 - Vis d’Archimède
13 - Arbre mélangeur
14 - Bouton “MIXER”
15 - Led marche mélangeur
16 - Bouton “STOP”
17 - Led marche filière
18 - Led machine sous tension
19 - Bouton “PASTA”
20 - Led signalisation arrêt
21 - Connecteur coupe-pâtes à moteur

NETTOYAGE
D’habitude, le nettoyage est le seul entretien demandé.
Avant et après chaque utilisation s’assurer que la fiche est débranchée de la prise de courant.
Ne pas utiliser d’objets contondants pour enlever tous résidus éventuels. Eviter absolument l’utilisation
de couteaux ou d’autres ustensiles pour commencer la prise de la pâte.
Avant de ranger la machine et ses accessoires s’assurer que chaque élément est parfaitement sec.
Pour faciliter le nettoyage dans la cuve de mélange, il faut démonter l’arbre comme suit:
- tourner dans le sens antihoraire le levier de blocage et extraire le pivot de fixation;
- enlever l’arbre mélangeur.
Nettoyer l’intérieur de la cuve et l’arbre à l’aide d’une éponge humide.
Démonter la filière de l’embout porte-filières et la plonger dans un récipient plein d’eau.
La pâte résiduelle dans les trous de la filière ne doit jamais sécher.
Enlever la vis d’Archimède et la nettoyer toujours à l’aide d’une éponge humide.
AVERTISSEMENT! Ne jamais utiliser
des jets d’eau pour nettoyer la machi-
ne. Avant de monter la filière s’assurer
toujours qu’il n’y a aucun résidu de
pâte dans les trous.
15
INTERIEUR
EXTERIEUR
EXTRACTEUR
A
B
C
A ce point, il faut dévisser dans le sens
antihoraire l’embout porte-filières au
moyen de la clé fournie, jusqu’à l’ex-
traction complète du manchon.
Après le nettoyage monter à nouveau
le manchon, la vis d’Archimède et
l’embout porte-filières.
Extraire ensuite le manchon à l’aide de l’extracteur spécial fourni.
Oter d’abord la rondelle grande (C) de la tige (A), puis introduire la tige, uniquement avec la rondelle
petite (B), de l’intérieur de la cuve vers l’extérieur. Après la sortie de la tige, enfiler à nouveau la rondelle
grande.

16
RACCORDEMENT ELECTRIQUE
Avant de faire fonctionner la machine, contrôler que la tension de votre maison est celle indiquée
dans la fiche technique de cette notice et que l’installation est équipée de mise à la terre.
N’utiliser aucun autre type d’alimentation. Le fabricant décline toute responsabilité pour les dommages
aux personnes ou aux choses découlant du non-respect de cette norme. S’il est nécessaire, monter un
adaptateur pour la fiche de courant, s’assurer de sa conformité au câble d’alimentation.
AVERTISSEMENTS
En cas d’urgence, pour arrêter le fonctionnement de la machine il suffit de soulever le couvercle de
sécurité (2) ou d’appuyer sur le bouton “STOP”.
Ne pas altérer ou neutraliser aucune des protections de la machine.
Si on constate que la machine entre en fonction dans des conditions auxquelles elle ne devrait pas mar-
cher (couvercle de sécurité soulevé), l’éteindre immédiatement en appuyant sur le bouton “STOP”.
Sortir la fiche du câble d’alimentation (10) de la prise de courant et s’adresser au Vendeur Agréé (voir
coupon de garantie annexé à la machine).
Cet appareil n’est pas conçu pour être utilisé par des personnes (y compris les enfants) ayant des capa-
cités physiques, sensorielles ou mentales réduites ou sans expérience et connaissance, à moins qu’el-
les aient reçu des instructions relativement à l’utilisation de l’appareil et qu’elles soient assistées d’une
personne responsable de leur sécurité.
Les enfants devraient être contrôlés afin qu’ils ne jouent pas avec l’appareil.
Ne pas utiliser la machine si on porte des vêtements ou des blouses dont les pans peuvent s’accro-
cher aux organes en mouvement de la machine.
Pour cette raison et pour des raisons d’hygiène, faire particulièrement attention aux cheveux (il est con-
seillé d’attacher les cheveux et de les couvrir avec un bonnet) et à tous autres objets ayant des caracté-
ristiques similaires (chaînettes, bracelets, etc.).
Placer la machine sur une surface plane et stable capable d’en supporter le poids.
Avant d’utiliser la machine, s’assurer de savoir arrêter la machine en cas d’urgence.
Ne pas utiliser l’appareil si:
- il ne fonctionne pas correctement;
- il a été endommagé ou il est tombé;
- le câble d’alimentation ou la fiche sont endommagés.
Ne pas plonger dans l’eau le câble d’alimentation ou la fiche. Tenir la fiche et le câble loin des surfaces
chaudes.
Ne pas laisser pencher le câble d’alimentation des bords de tables ou de meubles.
Ne pas utiliser cette machine près des éviers ou sur des bases mouillées.
Si le câble d’alimentation est endommagé, il doit être remplacé par le Fabricant ou par son Service
d’Assistance Technique ou, en tout cas, par une personne ayant une qualification similaire, pour éviter
tout risque possible.
CONSEILS SUR LA FABRICATION DES PATES
Pour la pâte il est possible d’utiliser tous types de farines, de semoules ou un mélange de farine et de semoule.
La pâte peut être travaillée en utilisant uniquement des œufs ou un mélange d’œufs et d’eau.
L’eau peut être remplacée, en partie, par des épinards ou des légumes bien hachés pour obtenir des
pâtes vertes, ou des concentrés de tomates pour obtenir des pâtes rouges. Dans ces cas, il est con-
seillé d’utiliser de la semoule de blé dur.
Pour obtenir une pâte idéale sont nécessaires environ 300 ÷ 350 gr de liquide pour chaque kilo de farine.
Ce liquide peut être formé d’œufs ou d’eau uniquement, ou bien d’un mélange d’eau et d’œufs. Puisque
l’humidité de la farine varie selon le type, le climat et le lieu de conservation, les doses indiquées doi-
vent être adaptées au type de farine, en diminuant ou en ajoutant un peu de liquide.
Au final, la pâte devra se présenter en grains grands comme ceux du café.
La farine qui s’amalgame et qui forme une pâte homogène indique qu’une quantité excessive de liqui-
de a été versée; dans ce cas, avant de tréfiler, il faut ajouter un peu de farine et continuer de travailler
la pâte. Au contraire, si la farine ne forme pas de granule mais elle est très farineuse, il faut ajouter un
peu de liquide.

17
UTILISATION DE LA MACHINE
Avant chaque utilisation, suivre les instructions décrites au paragraphe “NETTOYAGE”.
1 – Placer la machine sur un plan approprié.
2 – Introduire la filière dans l’embout et revisser le tout sur la machine.
3 – Si on veut produire des pâtes courtes, choisir le couteau pour coupe-pâtes convenable entre les
deux types de couteaux fournis. Attention! Manipuler avec soin les couteaux coupe-pâtes.
4 – Monter sur la machine le coupe-pâtes manuel ou à moteur (optionnel), en le fixant avec le pommeau
de blocage (9).
5 – Dans le cas du coupe-pâtes à moteur introduire la broche d’alimentation du moteur coupe-pâtes
dans le connecteur (11) situé sur la machine.
6 – Ouvrir le couvercle et remplir la cuve mélangeuse avec les ingrédients de base, farine et/ou semou-
le de blé dur, eau et/ou oeufs.
Il est conseillé de peser toujours la farine et/ou la semoule de blé dur qu’on introduit dans la cuve afin
d’établir la quantité précise du liquide à ajouter (eau et/ou oeufs).
Nous vous proposons quelques recettes pour produire plusieurs types de pâtes.
En tout cas, il faut considérer qu’il est toujours possible de modifier les ingrédients et les quantités
selon votre expérience et votre goût.
Préparation de l’abaisse pour raviolis:
70% farine type “00”
30% semoule de blé dur
5 oeufs pour 1 Kg de pâte + eau. Mélanger pendant environ 10 minutes.
Préparation de la pâte pour tagliatelles:
70% farine type “00”
30% semoule de blé dur
5 oeufs pour 1 Kg de pâtes + eau
Ou bien
100 % semoule de blé dur
5 oeufs pour 1 Kg de semoule + eau. Mélanger pendant environ 15 minutes avec environ 33% d’humidité.
Préparation des pâtes de semoule: (types de pâtes: rigatoni, fusilli, conchiglie, spaghettis, etc.).
Pour ce type de pâtes on utilise uniquement de la semoule de blé dur et de l’eau (30 ÷ 33%).
Lorsqu’on utilise des types différents de farines, il est préférable de bien les mélanger avant d’ajouter
le liquide. Selon le goût du consommateur, il est possible d’ajouter du sel à la pâte dans la quantité indi-
cative de 2 g pour 1 kg de farine, en veillant à bien le diluer dans le liquide.

18
Casser les oeufs dans un récipient à part, évitant ainsi que d’éventuels fragments de la coque ne tom-
bent dans la cuve en obstruant la filière.
De plus, il est conseillé de fouetter les oeufs, en mélangeant bien le jaune et le blanc.
7 – Refermer le couvercle en le bloquant à l’aide du crochet de sécurité.
8 – Presser sur le bouton “MIXER” jusqu’à ce que le led de marche du mélangeur cesse de clignoter
et devient fixe (environ 5 secondes).
Avertissement! Ne jamais actionner la machine avec le bouton “PASTA” avant d’avoir mélangé la
farine, car cela pourrait causer des dommages mécaniques graves.
9 – Après 15 minutes environ, la pâte, friable et divisée en granules, sera prête à être filetée.
10 – Arrêter la machine en appuyant sur le bouton “STOP”.
Attention! Ne pas porter de vêtements larges ou d’éléments en saillie qui peuvent s’accrocher à
la machine.
Pour produire des pâtes longues (tagliatelles, spaghettis, etc.):
Presser le bouton “PASTA” jusqu’à ce que le led de marche filière cesse de clignoter et devient fixe
(environ 5 secondes)
Couper la pâte qui sort de la filière, en utilisant une spatule ou un couteau.
Pour produire des pâtes courtes:
Monter sur la filière le coupe-pâtes manuel ou à moteur (optionnel) avec le couteau choisi pour la lon-
gueur de coupe, en l’assurant au moyen du pommeau de sécurité.
Appuyer sur le bouton “PASTA”.
Si le coupe-pâtes motorisé a été monté (26), régler la vitesse de rotation du couteau à l’aide de la poi-
gnée (26m).
Remplacement des filières:
Pour changer le format des pâtes il faut remplacer la filière de la
façon suivante:
Appuyer sur le bouton “STOP”.
S’il est présent, dévisser le pommeau et extraire le coupe-pâtes.
Appuyer sur le bouton “MIXER” et faire fonctionner la machine pen-
dant environ 10 secondes, en diminuant la pression dans la filière.
Arrêter la machine en appuyant sur le bouton “STOP”.
Desserrer l’embout au moyen de la clé spéciale fournie.
Dévisser et extraire l’embout.
Enlever la filière et la remplacer par la filière souhaitée.
Avertissement! Après leur utilisation, les filières doivent être plongées dans un récipient plein
d’eau pour éviter que la pâte ne sèche, en obstruant les trous.
EN CAS DE NON-FONCTIONNEMENT
PROBLEME CAUSE PROBABLE REMEDE
Le moteur ne démarre pas ou il
s’arrête soudainement
A – Fiche débranchée ou intro-
duite erronément
A – Introduire correctement la
fiche
B – Couvercle de protection
soulevé
B – Baisser le couvercle de pro-
tection
C – Moteur surchauffé C – Débrancher la fiche et atten-
dre le refroidissement
D – Bouton “MIXER” ou
“PASTA” non appuyé correcte-
ment
D – Appuyer sur le bouton et le
tenir appuyé pendant au moins
5 secondes
Si aucune des anomalies susvisée n’est constatée, contacter le Revendeur Autorisé.
(Voir le verso du coupon de garantie)

DEUTSCH
Herzlichen Glückwunsch zu Ihrer gelungenen Wahl.
BESCHREIBUNG DER MASCHINE (Abb.1-2)
Imperia Chef-in-Casa wird mit einem sehr hohen Qualitätsstandard hergestellt und ist für den
Gebrauch im Haushalt bestimmt. Wir garantieren Ihnen die dauerhafte Zuverlässigkeit und
Sicherheit, damit Sie zuhause leckere, frische Teigwaren mit den von Ihnen selbst gewählten
natürlichen Zutaten schnell und sicher zubereiten können.
Dieses Handbuch ist ein untrennbarer Bestandteil der Maschine. Lesen Sie deshalb alle darin
enthaltenen Sicherheitsvorschriften, Anleitungen und Garantiebedingungen, bevor Sie das Gerät
verwenden. Bewahren Sie dieses Handbuch sorgfältig an einem leicht zugänglichen Ort auf,
damit Sie bei Bedarf darin nachschlagen können. Bei Fragen oder im Fall einer nicht vorgesehe-
nen Verwendung wenden Sie sich vor der Installation an den Fachhändler und geben Sie dabei
das MODELL und die HERSTELLNUMMER der Maschine an.
ACHTUNG !
Jede in dieser Bedienungsanleitung nicht vorgesehene Verwendung gilt als sachwidrig oder als
Missbrauch und kann Gefahr verursachen. Die Maschine wurde ausschließlich für die
Herstellung von gezogenen Teigwaren geplant, gebaut und ausgerüstet, welche aus Zutaten wie
Hart- oder Weichweizenmehl mit der Zugabe von Wasser und/oder Eiern erhalten werden. Sie ist
daher einzig und allein zum Zubereiten und Ziehen von Teigwaren bestimmt und darf für keinen
anderen Zweck verwendet werden.
Der Hersteller übernimmt keine Verantwortung im Fall von:
• sachwidrigem Gebrauch;
• Änderungen oder Maßnahmen, die vom Hersteller nicht genehmigt sind;
• falscher Installation;
• Verwendung von Ersatzteilen, die keine Originalteile oder keine modellspezifischen Teile sind;
• ungeeigneter Stromversorgung.
ACHTUNG !
Das Anschlusskabel muss bei Beschädigung vom Hersteller oder von dessen Kundendienst bzw.
von einem Fachmann mit geeigneter Qualifikation gewechselt werden, um Gefahren zu vermeiden.
19
BESCHREIBUNG DES BEDIENFELDS (Abb.2)
MITGELIEFERTES
ZUBEHÖR (Abb.3)
22 - Schlüssel für Matrizen-Haltering
23 - Abziehvorrichtung für Spindel
24 - Blätterteigmatrize 170mm
25 - Manuelle Abschneidevorrichtung
ZUBEHÖR NACH WUNSCH
(Abb.4)
26 - Motorisierte Abschneidevorrichtung
27 - Messer für Abschneidevorrichtung
28 - Weitere Matrizen
1 - Bedienfeld
2 - Sicherheitsabdeckung aus Edelstahl
3 - Hebel zum Sperren und Lösen der Knetwelle
4 - Bolzen
5 - Matrize
6 - Matrizen-Haltering
7 - Sicherheitsverschluss
8 - Manuelle Abschneidevorrichtung
9 - Knopf zum Befestigen/Lösen der
Abschneidevorrichtung
10 - Anschlusskabel
11 - Netzstecker mit Sicherung
12 - Schnecke
13 - Knetwelle
14 - Taste “MIXER”
15 - LED Kneten läuft
16 - Taste “STOP”
17 - LED Ziehen läuft
18 - LED Gerät unter Spannung
19 - Taste “PASTA”
20 - LED zur Anzeige von Halt
21 - Anschluss für motorisierte Abschneidevor-
richtung

REINIGUNG
ACHTUNG! Die Maschine niemals
unter einem Wasserstrahl reinigen.
Vor dem Einsetzen der Matrize immer
kontrollieren, ob ihre Löcher frei von
Teigresten sind.
20
INNEN
AUSSEN
ABZIEHER
A
B
C
Nun muss der Matrizen-Haltering mit
dem mitgelieferten Schlüssel gegen
den Urzeigersinn gedreht werden,
damit die Spindel vollständig herau-
sgenommen werden kann.
Nach der Reinigung Spindel, Schnecke
und Haltering wieder montieren.
Die Reinigung ist normalerweise die einzige, zur Pflege des Geräts erforderliche Arbeit.
Vor und nach jeder Verwendung ist zu prüfen, ob der Stecker aus der Steckdose gezogen ist.
Keine spitzen Gegenstände verwenden, um Reste zu entfernen. Messer oder andere Geräte zum
Aufnehmen des Teigs dürfen auf keinen Fall verwendet werden.
Bevor Sie die Maschine und ihr Zubehör wegräumen, stellen Sie sicher, dass alle Teile trocken sind.
Zur leichteren Reinigung des Behälterinnenraums muss die Welle folgendermaßen abmontiert werden:
- Den Sperrhebel gegen den Uhrzeigersinn drehen und den Befestigungsbolzen abnehmen.
- Die Knetwelle nach oben abziehen.
Den Behälter innen und die Welle mit einem feuchten Schwammtuch reinigen.
Die Matrize von ihrem Haltering abnehmen und in einen mit Wasser gefüllten Behälter tauchen.
Die in den Löchern der Matrize verbliebenen Teigreste dürfen nicht austrocknen.
Die Schnecke herausnehmen und ebenfalls mit einem feuchten Schwammtuch reinigen.
Nun die Spindel mit dem spezifischen mitgelieferten Werkzeug abnehmen
Dazu als Erstes die große Scheibe (C) von der Stange (A) abziehen und danach die Stange nur mit der
kleinen Scheibe (B) vom Behälterinnenraum nach außen abnehmen. Sobald die Stange entnommen ist,
die große Scheibe wieder einsetzen.
This manual suits for next models
1
Table of contents
Languages:
Other Imperia Pasta Maker manuals
Popular Pasta Maker manuals by other brands

Menuett
Menuett 810-047 User instructions

Morphy Richards
Morphy Richards InstaCook instructions

Vicko
Vicko 107-48590 instruction manual

Ronco
Ronco Pasta Maker user manual

Lincat
Lincat LPB Installation, operating and servicing instructions

Giorik
Giorik 2CPG Instructions for installation, use and maintenance manual