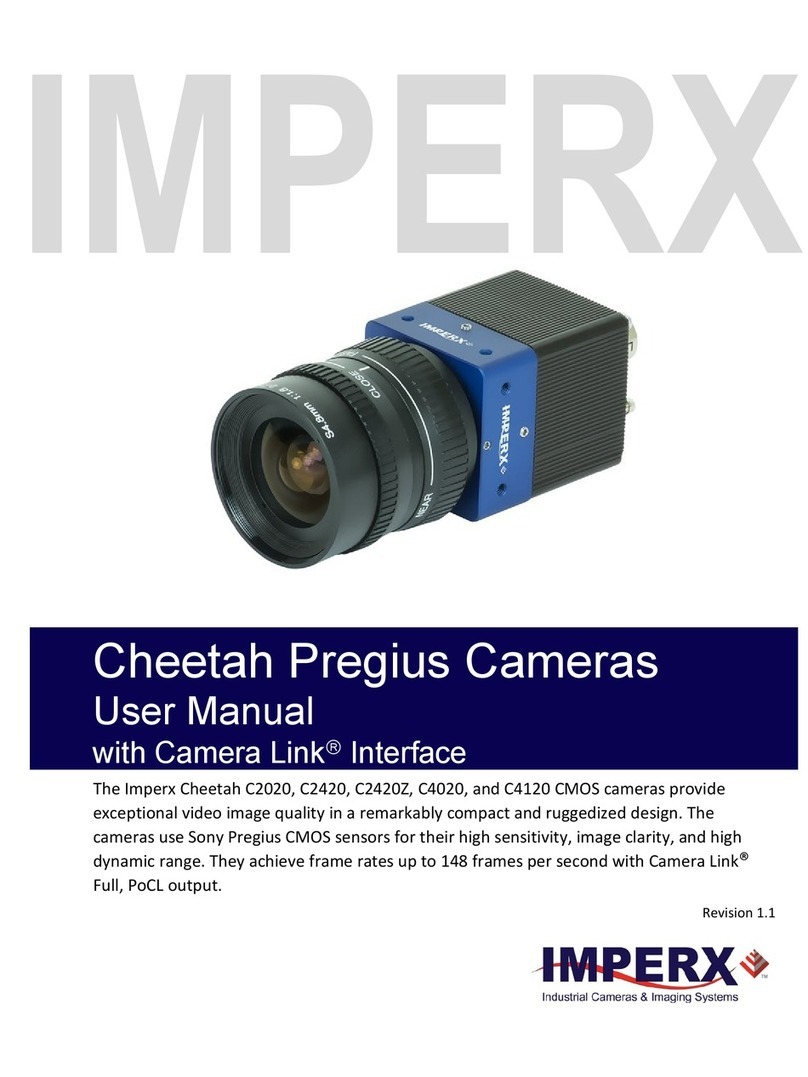
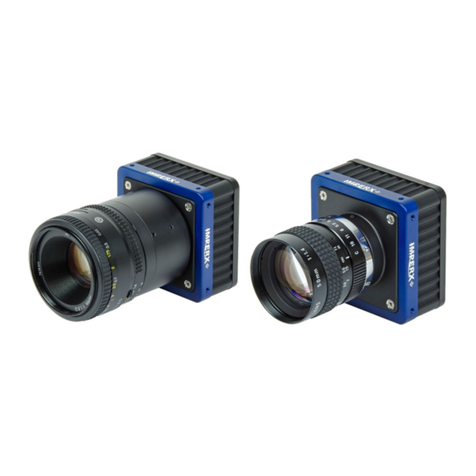
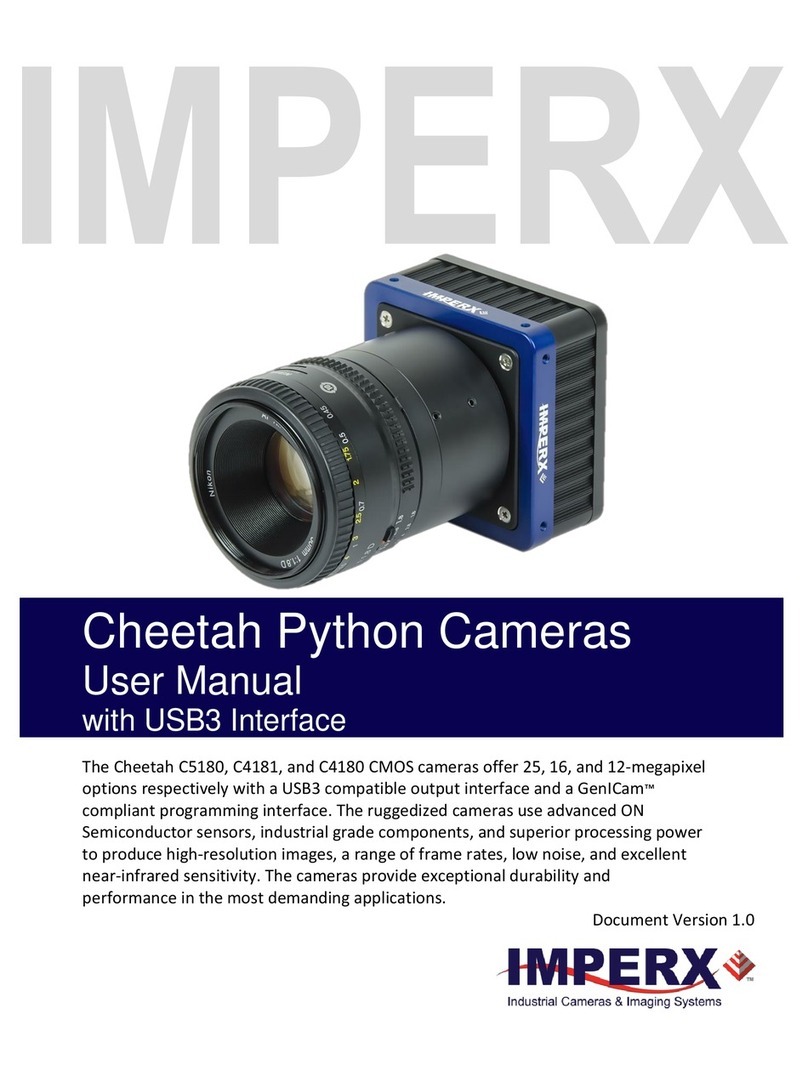
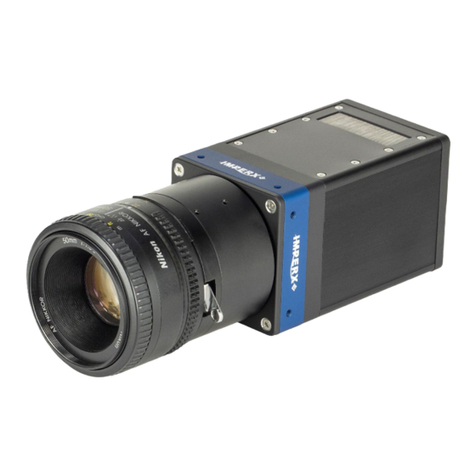
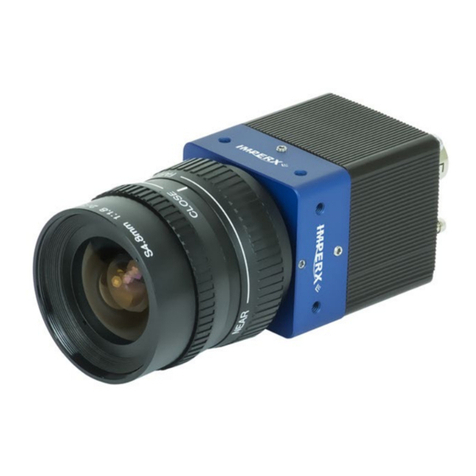
Imperx Cheetah C5180 Instructions for use

IMPERX
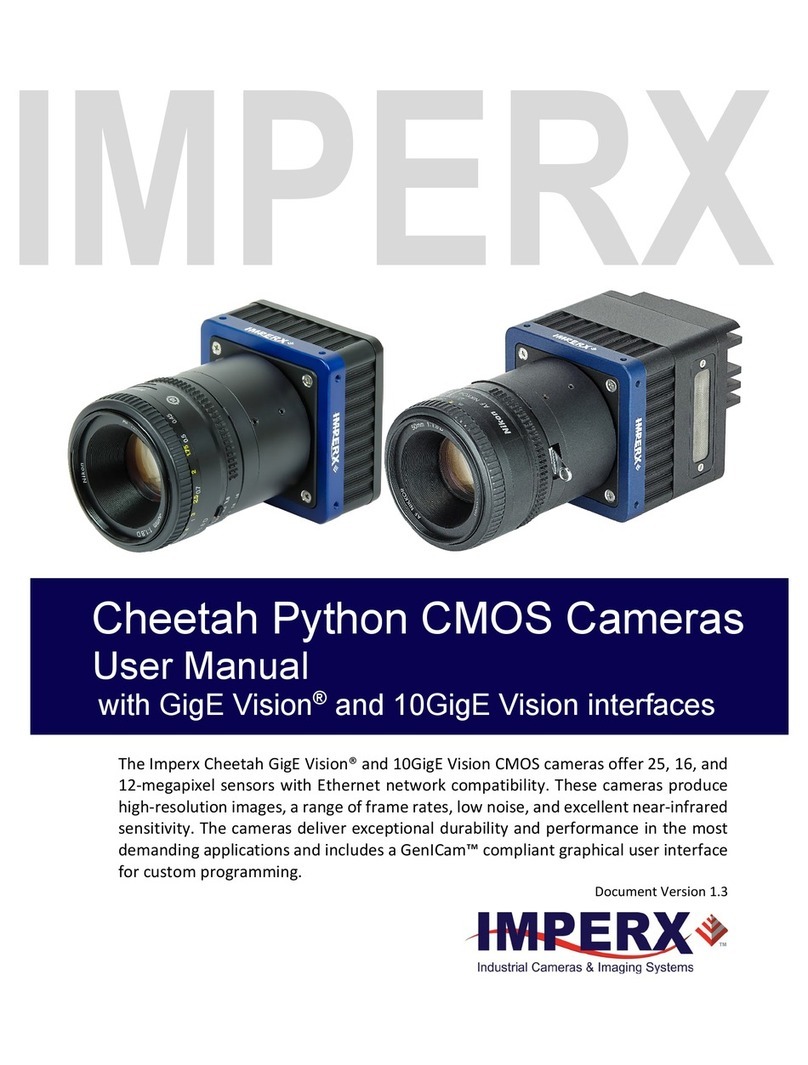
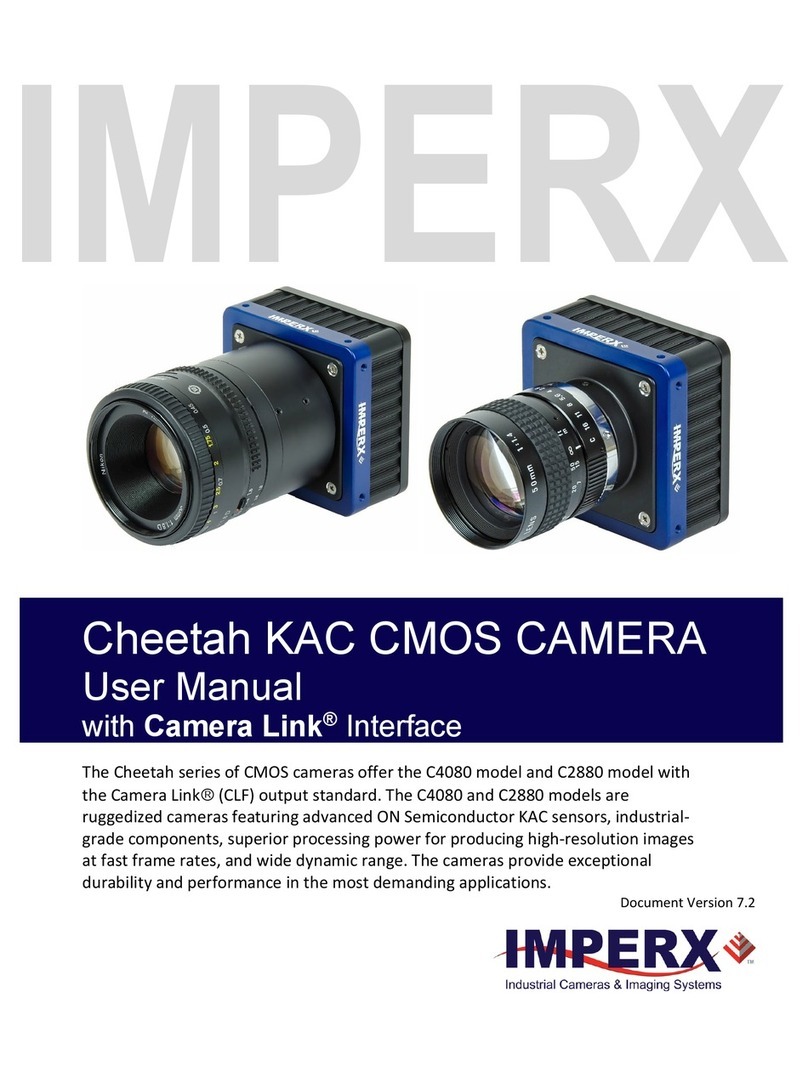
Cheetah Python Cameras
Hardware User Manual
with Camera LinkInterface
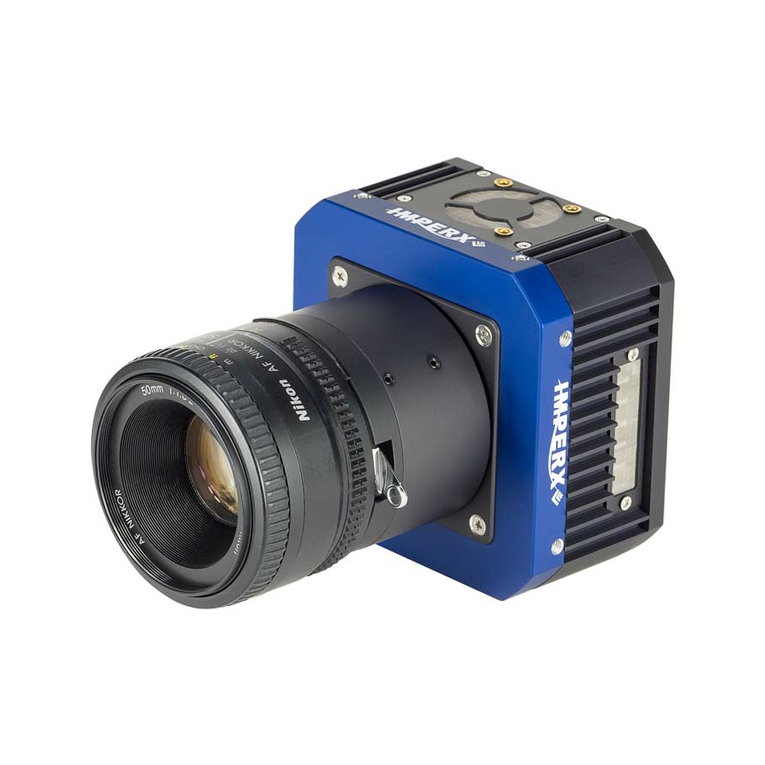
The Imperx Cheetah C5180, C4181, and C4180 CMOS cameras provide exceptional video
image quality in a ruggedized design. The cameras use 25-, 16-, and 12-megapixel ON
Semiconductor Python image sensors to produce exceptional quality image with low noise
and efficient, optimized internal thermal distribution.
Revision 2.1

Cheetah Python Camera with Camera Link –User Manual
March 23, 2018 Page 2 of 96 Rev 2.1
About Imperx, Inc.
IMPERX, Inc. is a leading designer and manufacturer of high performance, high quality
digital cameras, frame grabbers, and accessories for industrial, commercial, military, and
aerospace imaging applications including flat panel inspection, biometrics, aerial mapping,
surveillance, traffic management, semiconductors and electronics, scientific & medical
Imaging, printing, homeland security, space exploration, and other imaging and machine
vision applications.
Fortune 100 companies, federal and state government agencies, domestic and foreign
defense agencies, academic institutions, and other customers worldwide use IMPERX
products.
Imperx, Inc. | 6421 Congress Ave. | Boca Raton, FL, 33487
US Phone: +1 (561) 989-0006

Cheetah Python Camera with Camera Link –User Manual
March 23, 2018 Page 3 of 96 Rev 2.1
Warranty
IMPERX warrants performance of its products and related software to the specifications
applicable at the time of sale in accordance with IMPERX’s standard warranty, which is 2
(two) years parts and labor. FOR GLASSLESS CAMERAS THE CCD OR CMOS IS NOT
COVERED BY THE WARRANTY.
Do not open the housing of the camera. Warranty voids if the housing has been open or
tampered.
IMPORTANT NOTICE
This camera has been tested and complies with the limits of Class A digital device,
pursuant to part 15 of the FCC rules.
Copyright © 2016, 2018 IMPERX Inc. All rights reserved. All information provided in this
manual is believed to be accurate and reliable. No responsibility is assumed by IMPERX for
its use. IMPERX reserves the right to make changes to this information without notice.
Redistribution of this manual in whole or in part, by any means, is prohibited without
obtaining prior permission from IMPERX. IMPERX reserves the right to make changes to
its products or to discontinue any product or service without notice and advises its
customers to obtain the latest version of relevant information to verify, before placing
orders, that the information being relied on is current.
IMPERX PRODUCTS ARE NOT DESIGNED, INTENDED, AUTHORIZED, OR WARRANTED TO BE
SUITABLE FOR USE IN LIFE-SUPPORT APPLICATIONS, DEVICES OR SYSTEMS OR OTHER
CRITICAL APPLICATIONS, WHERE MALFUNCTION OF THESE PRODUCTS CAN REASONABLY
BE EXPECTED TO RESULT IN PERSONAL INJURY. IMPERX CUSTOMERS USING OR SELLING
THESE PRODUCTS FOR USE IN SUCH APPLICATIONS DO SO AT THEIR OWN RISK AND
AGREE TO FULLY INDEMNIFY IMPERX FOR ANY DAMAGES RESULTING FROM SUCH
IMPROPER USE OR SALE.

Cheetah Python Camera with Camera Link –User Manual
March 23, 2018 Page 4 of 96 Rev 2.1
TABLE OF CONTENTS
1 About the Camera................................................................................8
1.1 General ......................................................................................................................8
1.1.1 Main Cheetah Features.....................................................................................9
1.2 Cheetah Specifications...............................................................................................9
1.2.1 General Information .........................................................................................9
1.2.2 Spectral Sensitivity Curves ..............................................................................11
1.2.3 Bayer Pattern Information ..............................................................................12
1.3 Technical Specifications...........................................................................................12
1.3.1 C5180 and C4181 Cameras .............................................................................13
1.3.2 C4180 Camera.................................................................................................14
1.4 Ordering Information...............................................................................................14
1.5 Technical Support ....................................................................................................15
2 Hardware...........................................................................................16
2.1 CLF (Full) - Camera Link (CL) Output ........................................................................16
2.1.1 Power Supply ..................................................................................................16
2.2 Camera Power Connector........................................................................................19
2.2.1 Power Connector Pins.....................................................................................19
2.2.2 Electrical Connectivity.....................................................................................19
2.2.3 Camera Link Full Signal Mapping ....................................................................21
2.2.4 Camera Link Physical Layer to Camera Link Receiver Bits ..............................23
2.2.5 Camera Link Bit to Port Bit assignments .........................................................23
2.2.6 Camera Link Port assignments based on selected output configuration .......26
2.3 Mechanical, Optical, Environmental........................................................................27
2.3.1 Mechanical......................................................................................................27
2.4 Optical......................................................................................................................28
2.5 Environmental .........................................................................................................29
3 Camera Configuration ........................................................................30
3.1 Overview..................................................................................................................30
3.2 Configuration ...........................................................................................................30
3.2.1 Configuration Memory –parameter FLASH....................................................30
3.2.2 Camera Serial Protocol....................................................................................30
3.3 Camera Configuration Register Descriptions...........................................................33
3.3.1 Startup Procedure...........................................................................................33
3.3.2 Saving and Restoring Settings .........................................................................34
3.3.3 Retrieving Manufacturing Data.......................................................................35
3.3.4 Camera Information Registers ........................................................................36
3.3.5 AGC/AEC registers...........................................................................................38
3.3.6 Frame Exposure Control .................................................................................40
3.3.7 Exposure Time (Internal).................................................................................40
3.3.8 Programmable Frame Period Enable ..............................................................40
3.3.9 Output Pixel Clock Rate and Zero ROT............................................................40
3.3.10 Fixed Frame Period .......................................................................................41
3.3.11 Area of Interest .............................................................................................41
3.3.12 Slave AOI Control ..........................................................................................41
3.3.13 Decimation (Averaging or Subsampling).......................................................43
3.3.14 Black Level auto-calibration..........................................................................43
3.3.15 Analog and Digital Gain.................................................................................44

Cheetah Python Camera with Camera Link –User Manual
March 23, 2018 Page 5 of 96 Rev 2.1
3.3.16 Triggering Workspace Registers....................................................................44
3.3.17 Strobe Control Registers ...............................................................................46
3.3.18 Pulse Generator Registers.............................................................................47
3.3.19 Test Pattern Workspace Registers ................................................................48
3.3.20 Input/output Workspace Registers...............................................................49
3.3.21 Data Output Bit Depth/Format Selector.......................................................49
3.3.22 White Balance (WB) Workspace Registers ...................................................50
3.3.23 Data Correction Workspace Registers ..........................................................51
3.3.24 Flat Field Correction and FPN Correction......................................................52
4 Software Configuration GUI ...............................................................54
4.1 Camera Configurator Overview ...............................................................................54
4.2 Installing the GUI .....................................................................................................54
4.3 Camera Discovery Procedure ..................................................................................55
4.4 Graphical User Interface..........................................................................................56
4.5 Main GUI Menu .......................................................................................................57
4.6 View GUI Windows ..................................................................................................60
4.7 Menu Help ...............................................................................................................61
4.8 Parameter Windows................................................................................................62
4.8.1 Acquisition Control Panel................................................................................62
4.8.2 Trigger Panel ...................................................................................................65
4.8.3 Pulse Generator Panel ....................................................................................66
4.8.4 Strobe Control and Output Mapping ..............................................................67
4.8.5 AGC / AEC Control...........................................................................................68
4.8.6 Data Output ....................................................................................................68
4.8.7 Color................................................................................................................70
5 Camera Features................................................................................72
5.1 Exposure Control .....................................................................................................72
5.1.1 Internal Exposure Control - Electronic Shutter ...............................................72
5.1.2 External Exposure Control ..............................................................................72
5.2 Frame Time Control .................................................................................................73
5.2.1 Internal Line and Frame Time Control ............................................................73
5.2.1.1 Zero-Row Overhead (ROT) Control ..............................................................73
5.2.2 Camera Output Control...................................................................................73
5.3 Area of Interest........................................................................................................74
5.3.1 Horizontal and Vertical Window .....................................................................75
5.3.2 Factors Impacting Frame Rate ........................................................................75
5.4 Subsampling.............................................................................................................76
5.4.1 Pixel Averaging................................................................................................76
5.4.2 Sub-sampling Decimation ...............................................................................77
5.5 Camera Triggering....................................................................................................78
5.5.1 Triggering Inputs .............................................................................................78
5.5.2 Acquisition and Exposure Control...................................................................78
5.5.3 Triggering modes ............................................................................................79
5.6 Strobes.....................................................................................................................80
5.7 Video Amplifier Gain and Offset..............................................................................80
5.7.1 Analog Gain.....................................................................................................80
5.7.2 Digital Gain......................................................................................................80
5.7.3 Digital Offset ...................................................................................................80
5.7.4 Black Level Auto-calibration and Black Level Offset .......................................81
Cheetah Python Camera with Camera Link –User Manual
March 23, 2018 Page 6 of 96 Rev 2.1
5.8 Data Output Format ................................................................................................81
5.8.1 Bit Depth .........................................................................................................81
5.8.2 Output Taps ....................................................................................................81
5.9 Pulse Generator .......................................................................................................82
5.10 I/O Control .............................................................................................................82
5.10.1 Input / Output Mapping................................................................................82
5.11 Test Image Patterns...............................................................................................83
5.11.1 Test Image patterns ......................................................................................83
5.12 White Balance and Color Conversion ....................................................................83
5.12.1 White Balance Correction .............................................................................83
5.13 Transfer Function Correction LUT..........................................................................84
5.13.1 Standard Gamma Correction ........................................................................84
5.14 Bad Pixel Correction ..............................................................................................85
5.14.1 Static Pixel Correction...................................................................................85
5.14.2 Dynamic Pixel Correction..............................................................................86
5.15 Flat Field and FPN Correction ................................................................................86
5.16 Camera Interface ...................................................................................................86
5.16.1 Status LED .....................................................................................................86
5.16.2 Temperature Monitor...................................................................................86
5.16.3 Exposure Time Monitor ................................................................................87
5.16.4 Frame Time Monitor .....................................................................................87
5.16.5 Current image size ........................................................................................87
5.16.6 Auto Gain and Auto Exposure Control (AGC/AEC)........................................87
6 Configuration Registers ......................................................................88
6.1 Abbreviations...........................................................................................................88
6.2 Saving and Restoring Registers................................................................................88
6.3 Camera Information Registers.................................................................................88
6.4 AEC/AGC/AWB Registers .........................................................................................89
6.5 Acquisition Registers (stored in Flash).....................................................................89
6.6 Trigger Registers ......................................................................................................90
6.7 Pulse Generator Registers .......................................................................................90
6.8 Test Pattern Registers..............................................................................................91
6.9 Strobe Registers.......................................................................................................91
6.10 Input / Output Registers ........................................................................................91
6.11 Output Data Format Registers...............................................................................92
6.12 WB and Color Correction Registers .......................................................................92
6.13 Data Correction Registers ......................................................................................92
6.14 Manufacturing Data Registers ...............................................................................93
7 Creating Look-up Tables .....................................................................94
7.1 Overview..................................................................................................................94
7.2 Using an ASCII Text Editor........................................................................................94
7.3 Using Microsoft Excel ..............................................................................................94
8 Creating DPC / HPC Tables..................................................................96
8.1 Overview..................................................................................................................96
8.2 Using an ASCII Text Editor........................................................................................96

Cheetah Python Camera with Camera Link –User Manual
March 23, 2018 Page 7 of 96 Rev 2.1
REVISION HISTORY
Revision
Date
Reviser
Comments
Rev 1.0
10/30/15
K. Wetzel
Initial Pre-Release l
Rev 1.1
4/07/16
K. Wetzel
Added Register and GUI info. Input from
Gennady
Rev 1.2
4/20/16
K. Wetzel
Updated CamConfig registers and C3880
frame rates
Rev 1.3
5/04/16
K. Wetzel
Updated minimum ROI width to 320
Rev 1.4
5/25/16
K. Wetzel
Update Figure 51 description, removed single
tap mode from Figures 15, 16 and 17. Zero
ROT not supported in Averaging mode.
Rev 1.5
6/07/16
K. Wetzel
Updated PG period and width in Section 2.9
Rev 1.6
7/22/16
K. Wetzel
Updated Mechanical Drawings in 1.6.4,
Cheetah images and Appendix E Power
Supply Schematic
Rev 1.7
8/19/2016
M.Pangburn
Adjusted Graph/Data and TOC
Rev 1.8
8/19/16
E. Fateyeva
Adjusted Graph/Data, updated logo in
header, replaced pyramid image with
Cheetah sketch image
Rev 1.9
8/23/2016
M. Pangburn
Review and finalize TOC
Rev 2.0
12/12/2016
R. Johnston
Updated Fixed Frame Period to
microseconds, section 3.3.9. Changed 3.17 to
3.17x, section 2.7.1.
Rev 2.1
3/23/2018
R. Johnston
Updated voltage range to 3.3 and 24 volts in
Electrical Connectivity section; added
AGC/AEC functionality; removed C3880
camera; updated mechanical drawings;
reorganized manual formatting; updated
minimum exposure time and shutter speed.

Cheetah Python Camera with Camera Link –User Manual
March 23, 2018 Page 8 of 96 Rev 2.1
1 About the Camera
1.1 General
The Cheetah series of cameras are built around a robust imaging platform utilizing the
latest digital technology and components with CMOS imaging sensors featuring different
resolutions / frame rates and available in both monochrome and color.
This manual describes the C5180, C4181, and C4180 model cameras operating with the
Camera Link Deca/Full, Camera Link Medium, and Camera Link Base output interface.
Model
Resolution
(H x V)
Speed
(fps)
Type
Optics
CMOS
Sensor
Supported
Outputs
C5180M
5120 x 5120
32
Mono
35mm
ONSemi
NOIP1SN025KA
CLF/CXP*
C5180C
5120 x 5120
32
Color
35mm
ONSemi
NOIP1SN025KA
CLF/CXP*
C4181M
4096 x 4096
50
Mono
35mm
ONSemi
NOIP1SN016KA
CLF/CXP*
C4181C
4096 x 4096
50
Color
35mm
ONSemi
NOIP1SN016KA
CLF/CXP*
C4180M
4096 x 3072
67
Mono
4/3”
ONSemi
NOIP1SN012KA
CLF/CXP*
C4180C
4096 x 3072
67
Color
4/3”
ONSemi
NOIP1SN012KA
CLF/CXP*
Table 1: Cheetah C5180, C4181, and C4180 overview.
Cheetah cameras are advanced, intelligent, high-resolution, progressive scan, fully
programmable and field upgradeable CMOS cameras. They are built around ON
Semiconductor area scan Python CMOS imagers and are feature rich with a built-in image
processing engine, low noise, and efficient and optimized internal thermal distribution.
The Cheetah cameras feature a wide range of programmable functions; including
exposure control, frame rate control, area of interest, subsampling, pixel averaging, gain,
offset, several triggering options, strobes, output control, transfer function correction,
temperature monitoring, and user programmable and up-loadable LUT.
All Cheetah cameras offer global shutter for superior motion capture and exceptionally
high frame rates in high throughput applications. Cheetah camera exposure time can be
controlled using an internal control or an external pulse width. Exposure times up to 1
second with 1µs increments are supported. An Area of Interest (AOI) can be programmed
for each acquisition frame, and subsampling or pixel averaging capabilities are also
available. Analog gains up to 10 dB (3.17x) are supported and digital gain controls allow
further expansion of the low-end signal with 24dB (16x) of additional gain available.
A built-in gamma correction and user-defined look-up table (LUT) capability optimizes the
camera’s dynamic range even further. Bad pixel correction (DPC) and hot pixel correction
(HPC) can also be applied to correct for pixels that are over-responding or under-
responding. Auto-White Balance (AWB) is available in color cameras to correct for color
temperature. The cameras have a Camera Link interface that includes 8/10/12 bit data
transmission with two, four, eight, or ten output taps as well as camera control all on one

Cheetah Python Camera with Camera Link –User Manual
March 23, 2018 Page 9 of 96 Rev 2.1
or two cables. The cameras are fully programmable via the Camera Link interface. The
adaptability and flexibility of the camera allow it to be used in a wide and diverse range of
applications including machine vision, metrology high-definition imaging and surveillance,
medical and scientific imaging, intelligent transportation systems, aerial imaging,
character recognition, document processing and many more.
1.1.1 Main Cheetah Features
•Global shutter (GS)
•Monochrome or color
•Large 4.5-micron pixels
•Fixed pattern noise (FPN) correction
•Enhanced near infrared (NIR) sensitivity version available upon request
•Fast frame rates:32 fps (C5180), 50fps (C4181), 67 fps (C4180)
•Configurable Pixel Clock
•Pixel Averaging
•Sub-sampling
•Area of Interest
•Analog and Digital Gain Controls
•Offset Control
•Three selectable trigger sources: external, pulse generator or computer
•Built-in pulse generator
•Two programmable output strobes
•Auto-white balance: once, static or tracking
•Two 12-bit look-up tables (LUT)
•Defective pixel correction (DPC), hot pixel correction (HPC)
•Two programmable external inputs (one opto-isolated) and two external outputs
(one opto-isolated)
•Flat Field Correction (FFC), User and Factory
•Camera Link Base, Medium, Full and Deca support
•Temperature monitor
•Field upgradeable firmware, LUT, DPC, HPC, FFC
1.2 Cheetah Specifications
1.2.1 General Information
A CMOS camera is an electronic device for converting light into an electrical signal. The
camera contains a light sensitive element CMOS (Complementary Metal Oxide
Semiconductor) where an electronic representation of the image is formed. The CMOS
image sensor consists of a two-dimensional array of sensitive elements –silicon
photodiodes, also known as pixels. The photons falling on the CMOS surface create
photoelectrons within the pixels, where the number of photoelectrons is linearly
proportional to the light level. Although the number of electrons collected in each pixel is
linearly proportional to the light level and exposure time, the number of electrons varies
with the wavelength of the incident light.

Cheetah Python Camera with Camera Link –User Manual
March 23, 2018 Page 10 of 96 Rev 2.1
1.3.1.1 Global Shutter Description
All Cheetah cameras support global shutter readout mode. In Global Shutter (GS) mode
every pixel starts and stops integration at the same time. This mode is excellent for clean
capture of moving scenes without the need for a mechanical shutter. When global shutter
mode is used, all pixel data is stored in light shielded regions within each pixel and held
there until readout.
Figure 1: Global Shutter Description
1.3.1.2 A/D architecture and frame rate controls
The image sensors used by the C5180, C4181, and C4180 cameras multiplex 80 (C5180)
and 64 (C4181 and C4180) columns respectively into an array of 64 A/D converters. The
camera takes care of all the details of re-ordering the lines within frame grabber memory.
Unlike a CCD where digitization is performed within one-pixel time, these cameras
perform digitization at 1/64th the pixel rate (64 A/D converters) and the digitization has a
depth of 10 bits.
The image sensor provides up to 32 Low-voltage Differential Signaling (LVDS) outputs, and
the time to readout one line from the image sensor is much less than the time needed to
output the data using Camera Link. The camera compensates for this mismatch in data
output rate versus data capture rate using two methods: a variable pixel clock for line
readout and the ability to add 1 microsecond of delay (row overhead) time at the end of
each line output by the camera. Slowing down the pixel line clock and adding delay (dead
time) at the end of each line allow the Camera Link frame grabber to keep pace with the
camera output.
The following figures show a typical CMOS image sensor architecture and the image
sensor spectral response in monochrome and color.

Cheetah Python Camera with Camera Link –User Manual
March 23, 2018 Page 11 of 96 Rev 2.1
Figure 2: CMOS image sensor architecture
1.2.2 Spectral Sensitivity Curves
Figure 3: Python CMOS mono spectral response (Monochrome with the cover glass)

Cheetah Python Camera with Camera Link –User Manual
March 23, 2018 Page 12 of 96 Rev 2.1
Figure 4: Python CMOS typical color spectral response (Color with micro lens and cover
glass).
1.2.3 Bayer Pattern Information
Cheetah is available with Monochrome or Color CMOS imager. The color image sensor is
equipped with a set red, green, and blue color filters arranged in a Bayer pattern over the
pixels. Red is the starting color.
1.3 Technical Specifications
The following Tables describe features and specifications that relate to all Cheetah CLF
cameras.
Features / Specifications
C5180/C4181/C4180
Shutter Operation
Global only
Exposure time
44 µs minimum
Area of Interest
one
Analog Gain
Up to 10dB
Digital Gain
Up to 24dB
Subsampling
Keep one, skip one
Pixel Averaging (mono)
1x2, 2x1 and 2x2
Auto-White Balance
Yes
Test Image
Static, Dynamic
Defective pixel correction
Static, Dynamic, User DPM
Hot pixel correction
Static, Dynamic, User HPM
Inputs
1-LVTTL / 1-Opto-coupled
Outputs
1-5v TTL / 1-Opto-coupled
Triggers
Programmable Rising/Falling De-bounce
Pulse Generator
Yes

Cheetah Python Camera with Camera Link –User Manual
March 23, 2018 Page 13 of 96 Rev 2.1
In-camera Image Processing
2 LUTs
Camera housing
Aluminum
Supply voltage range
10 V to 33 V DC
Upgradeable firmware
Yes
Upgradeable LUT, DPM, FFC
Yes
Operating
- 40.0 to + 85.0 deg C
Environmental (storage)
- 50.0 to + 90.0 deg C
Vibration, Shock
TBD
Relative humidity
10% to 90% non-condensing
1.3.1 C5180 and C4181 Cameras
Specifications
C5180
C4181
Active image resolution
5120 x 5120
4096 x 4096
Active image area (H, V)
23.0 mm x 23.0 mm
32.5 mm Diagonal
18.4 mm x 18.4 mm
26.1 mm Diagonal
Pixel size
4.5 μm
4.5 μm
Video output
Digital, 8/10-bit
Digital, 8/10-bit
Output structure
10-Tap
10-Tap
Data clock
85 MHz
85 MHz
Camera interface
DECA/Full/Medium or Base CL
Connector
Dual HDR (26-pin mini CL)
Maximum frame rate
26 fps (10-bit), 32 fps (8-bit)
40 fps (10-bit), 50 fps (8-bit)
Dynamic Range
59 dB
59 dB
Shutter speed
44 µs to 1 sec
44 µs to 1 sec
Area of Interest
One
One
Analog gain
0 to 10dB (8 & 10-bit)
Digital gain
0 to 24dB
0 to 24dB
Black level offset
0 to 1024, 1/step
0 to 1024 1/step
User LUT
2 LUTs: Gamma, User LUT
Hardware trigger
Asynchronous
Asynchronous
Strobe modes
Programmable Width, Delay
Trigger sources
External, Pulse Generator,
Computer
External, Pulse Generator,
Computer
Trigger features
Rising/Falling edge, De-glitch,
Delay, Strobe
Rising/Falling edge, De-glitch,
Delay, Strobe
Size (W x H x L) - CLB
(72.0 x 72.0 x 39.8) mm
Weight
385 g
385 g
Lens mount
F-Mount, 35mm format
F-Mount–35mm format
Power:
Typical: 0.52A, Maximum:
0.66A
Typical: 0.52A, Maximum:
0.66A

Cheetah Python Camera with Camera Link –User Manual
March 23, 2018 Page 14 of 96 Rev 2.1
1.3.2 C4180 Camera
Specifications
C4080 –9 MP
Active image resolution
4096 x 3072
Active image area (H, V)
18.4 mm x 13.8mm; 23.0 mm Diagonal
Pixel size
4.5 μm
Video output
Digital, 8/10-bit
Output structure
10-Tap
Data clock
85 MHz
Camera interface
DECA/Full/Medium or Base CL
Connector
Dual HDR (26-pin mini CL)
Maximum frame rate
54 fps (10-bit), 67 fps (8-bit)
Dynamic range
59 dB
Shutter speed
44 µs to 1 sec
Area of Interest
One
Analog gain
0 to 10dB
Digital gain
0 to 24dB
Black level offset
0 to 1024, 1/step
User LUT
2 LUTs: Gamma, User LUT
Hardware trigger
Asynchronous
Strobe modes
Programmable Width, Delay
Trigger sources
External, Pulse Generator, Computer
Trigger features
Rising/Falling edge, De-glitch, Delay, Strobe
Size (W x H x L) - CLB
(72.0 x 72.0 x 39.8) mm
Weight
385 g
Lens mount
F-Mount, 35mm format
Power:
Typical: 0.52A, Maximum: 0.66A
1.4 Ordering Information
Cheetah Camera Ordering Codes
Sample Code: CLF-C5180M-PF000
Interface
Camera
model
Sensor Type
Ruggedized
Lens Mount
Filter/
customization
options
CLF- Camera
Link
C5180
C4181
C4180
M –monochrome
C - color
Ruggedized
F –F Mount
0 –none
Note: PS12V04A Power Supply sold separately.

Cheetah Python Camera with Camera Link –User Manual
March 23, 2018 Page 15 of 96 Rev 2.1
1.5 Technical Support
Each camera is fully tested before shipping. If for some reason the camera is not
operational after power up, check the following:
1. Check the power supply and all I/O cables. Make sure that all the connectors are
firmly attached.
2. Check the status LED and verify that it is steady ON, if not –refer to the LED
section.
3. Enable the test mode and verify that the communication between the frame
grabber and the camera is established. If the test pattern is not present, power
off the camera, check all the cabling, frame grabber settings, and computer
status.
If you still have problems with the camera operation, contact technical support at:
Email: techsupport@imperx.com
Toll Free 1 (866) 849-1662 or (+1) 561-989-0006
Fax: (+1) 561-989-0045
Visit our Web Site: www.imperx.com

Cheetah Python Camera with Camera Link –User Manual
March 23, 2018 Page 16 of 96 Rev 2.1
2 Hardware
2.1 CLF (Full) - Camera Link (CL) Output
The interface between the Cheetah cameras and outside equipment connects via two
connectors and one LED located on the back panel of the camera –Figure 5.
1. Two camera outputs –standard Full Camera Link Mini connectors provides data,
sync, control, and serial interface.
2. Male 12-pin Power Connector –provides power and I/O interface.
3. USB type B programming/SPI connector.
4. Status LED –indicates the status of the camera –refer to Status LED section.
5. Model / Serial Number –shows camera model and serial number.
Figure 5: CLF Camera back panel, Deca, Full, Medium, or Base.
2.1.1 Power Supply
The camera requires a 12-volt power supply. Imperx recommends purchasing the optional
Imperx PS12V04 power supply. The PS12V04A power supply also provides connectors for
trigger input (black) and strobe output (white).

Cheetah Python Camera with Camera Link –User Manual
March 23, 2018 Page 17 of 96 Rev 2.1
Figure 6: PS12V04A standard power supply (ordered separately).
2.1.1.1 Power Supply Specs:
Cable length:
Supplied AC power input cable (IEC): 1.8m (6’) 100 - 240 Vac, 50 - 60Hz 1A
Power supply Output (+12V): 3m (10’) ± 15cm (6”) connector HIROSE #HR10A-10P-12S
Strobe & Trigger: 10cm (4”) ± 1cm (0.5”) connector BNC male
Electrical:
Over-Voltage Protective Installation
Short-circuit Protective Installation
Protection Type: Auto-Recovery
10 -15 VDC 12VDC nominal, 2 A.
Load regulation ± 5%
Ripple & Noise 1% Max.
Regulatory:
Class 1
Safety standards UL60950-1, EN60950-1, IEC60950-1
Safety (1) EMC UL/CUL, CE, TUV, DoIR+C-Tick, Semko, CCC, FCC
Safety (2) BSMI, FCC

Cheetah Python Camera with Camera Link –User Manual
March 23, 2018 Page 18 of 96 Rev 2.1
Figure 7: PS12V04A power supply assembly.

Cheetah Python Camera with Camera Link –User Manual
March 23, 2018 Page 19 of 96 Rev 2.1
2.2 Camera Power Connector
The male 12-pin Hirose connector provides power and all external input/output signals
supplied to the camera. Refer to the following tables for connector pin-outs and pin
mapping. The connector is a male HIROSE type miniature locking receptacle #HR10A-10R-
12PB (71). The optionally purchased power supply is shipped with a power cable that
terminates in a female HIROSE plug #HR10A-10P-12S (73).
Figure 8: Camera Power Connector (Viewed from rear)
2.2.1 Power Connector Pins
Pin
Signal
Type
Description
1
12 VDC Return
Ground Return
12 VDC Main Power Return
2
+ 12 VDC
Power - Input
+ 12 VDC Main Power
3
NC
–NC
Reserved for future RS-232
4
NC
NC
Reserved for future RS-232
5
GP OUT 2
Opto- Switch contact 2
General Purpose Output 2-
6
GP Out 1 RTN
TTL Ground Return
General Purpose Output 1 Return
7
GP OUT 1
TTL OUT 1
General Purpose Output 1
8
GP IN 1
Opto-isolated IN 1
General Purpose Input 1
9
GP IN 2
TTL/LVTTL IN 2
General Purpose Input 2
10
GP IN 1 Return
Ground Return IN1
General Purpose Input 1 Return
11
GP IN 2 Return
LVTTL Ground Return IN2
General Purpose Input 2 Return
12
GP OUT 2
Opto-Switch contact 1
General Purpose Output 2+
Table 2: Camera Power Connector Pin Mapping
2.2.2 Electrical Connectivity
The Cheetah has two external inputs: IN 1 and IN 2. Input “IN 1” is optically isolated, while
input “IN 2” accepts Low Voltage TTL (LVTTL). Cheetah provides two general purpose
outputs. Output “OUT 1” is a 5v TTL (5.0 Volts) compatible signal and output “OUT 2” is
opto-isolated. The following four figures show the external input electrical connections
and the external output electrical connections.

Cheetah Python Camera with Camera Link –User Manual
March 23, 2018 Page 20 of 96 Rev 2.1
A. Input IN 1- Opto-Isolated
The input signal “IN 1” and “IN 1 Rtn” are optically isolated and the voltage difference
between the two must be positive between 3.3 and 24 volts.
Figure 9: IN1 electrical connection.
B. Input IN 2 LVTTL
The input signals “IN 2” and “IN 2 Rtn” are used to interface to a TTL or LVTTL input signal.
The signal level (voltage difference between the inputs “IN 2” and “IN 2 Rtn”) MUST be
LVTTL (3.3 volts) or TTL (5.0 volts). The total maximum input current MUST NOT exceed 2.0
mA.
Figure 10:IN 2 electrical connection.
C. Output OUT 1 LVTTL
Output OUT 1 is a 5v TTL (5.0 Volts) compatible signal and the maximum output current
MUST NOT exceed 8 mA.
Figure 11:OUT 1 LVTTL electrical connection.
D. Output OUT 2 - Opto-isolated
Output OUT 2 is an optically isolated switch. There is no pull-up voltage on either contact.
The voltage across OUT 2 Contact 1 and OUT 2 Contact 2 MUST NOT exceed 25 volts and
the current through the switch MUST NOT exceed 50 mA.
This manual suits for next models
2
Table of contents
Other Imperx Digital Camera manuals

Imperx
Imperx Cheetah Python Series User manual

Imperx
Imperx CXP-C5180M User manual

Imperx
Imperx Cheetah Series User manual

Imperx
Imperx Camera Link PoCL User manual

Imperx
Imperx LYNX Instructions for use

Imperx
Imperx Cheetah Pregius Series User manual

Imperx
Imperx LYNX IPX-VGA120-L User manual

Imperx
Imperx bobcat User manual

Imperx
Imperx Cheetah Pregius SFP-C5440 User manual

Imperx
Imperx Cheetah 3G-SDI User manual