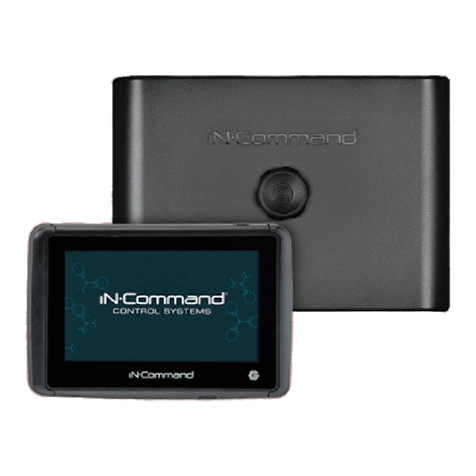
IN-COMMAND NCSP35 User manual

Troubleshooting Guide


BCM Pin Values
Pin
Name BCM Function Note A DMM
Tanks
1
Fresh 1Tank In
Input from Sending Unit
0-.74V = EMPTY (○○○)
.75-1.74V = 1/3 (●○○)
1.75-3.59V = 2/3 (●●○)
3.6V = FULL (
●●●)
MEASUREFROM PIN 11 TO
EACH INPUT
VDC
2
Fresh 2 Tank In
Input from Sending Unit
VDC
3
Black 1 Tank In
Input from Sending Unit
VDC
4
Black 2 Tank In
Input from Sending Unit
VDC
5
Gray 1 Tank In
Input from Sending Unit
VDC
6
Gray 2 Tank In
Input from Sending Unit
VDC
7
Gray 3 Tank In
Input from Sending Unit
VDC
8
Tank Common
7VDC Output to all Tanks
7VDC
Lighting I/O’s
9
Light Group 1 12V Switch Input
Input
From External Momentary Switch
15A
12VDC
10
Light Groups 12V 15A In
Input for All Light Groups
From Main Breaker Box
12VDC
11
Light Group 1 Ground
Common Ground
GND
12
Light Group 1 12V 15A Out
Output
12VDC
13
Light Group 2 12V Switch In
Input
From External Momentary Switch
12VDC
14
Light Group 2 Ground
Common Ground
GND
15
Light Group 2 12V 15A Out
12VDC
16
Awning 12V Switch
Input
Input
From External Momentary Switch
5A
12VDC
17
Ground
Common Ground
GND
18
Awning Light12V 5A Out
Output
12VDC
19
Awning LightGround
Common Ground
GND
Travel
Lockout
20
Travel Lock
out
12V In
12V In from Tow Vehicle Brake Signal
Locks
out all motor functions
12VDC
Water
Heater
21
Water Heater Ground
Common Ground
GND
22
Water Heater Gas 12V 1A Out
12V Out to Gas Ignitor
1A
12VDC
23
Water Heater Electric 12V 1A Out
12V Out to Electric Ignitor
12VDC
24
Water Heater 12V Fault
In
Receive 12V Fault Signal
12VDC
Water
Pump
25
Ground
Common Ground
GND
26
Water Pump 12V 10A Out
Output
10A
12VDC
27
Water Pump Ground
Common Ground
GND
28
Water Pump 12V 10A In
Input
From Main Breaker Box
10A
12VDC

BCM Pin Values (Cont.)
Pin Name BCM Function Note A DMM
Electric Motors
29
Motor 5 Retract Out
Output
Reversing Polarity DC Motor
30A
12V/GND
30
Motor 5 Extend Out
Output
Reversing Polarity DC Motor
12V/GND
31
Motor 4 Retract Out
Output
Reversing Polarity DC Motor
12V/GND
32
Motor 4 Extend Out
Output
Reversing Polarity DC Motor
12V/GND
33
Motor 3 Retract Out
Output
Reversing Polarity DC Motor
12V/GND
34
Motor 3 Extend Out
Output
Reversing Polarity DC Motor
12V/GND
35
Motor 2 Retract Out
Output
Reversing
Polarity DC Motor
12V/GND
36
Motor 2 Extend Out
Output
Reversing Polarity DC Motor
12V/GND
37
Motor 1 Retract Out
Output
Reversing Polarity DC Motor
12V/GND
38
Motor 1 Extend Out
Output
Reversing Polarity DC Motor
12V/GND
Power
39
Ground In
From
Chassis Ground
GND
40
Electric Motor 12V 30A In
Input
From 12V 30A mini reset fuse
30A
12VDC
41
Power Chassis 12V In
Input
From Chassis battery
(motorized)
12VDC
42
Main Power 12V 15A In
Input
From Main Breaker Box
15A
12VDC
RV-C (CAN
Bus)
Connection
43/47
CAN High
Send/Receive RV
-
C signal
VDC
44/48
CAN Low
Send/Receive RV
-
C signal
VDC
45/46/49/50
No Connection
Power to
DC
51
12V Out
Output
Optional 12V out to DC
12VDC
52
Ground Out
Output
Optional GND out to DC
GND
AUX
Motor
Control
53
Ground
GND
54
Aux Motor 1 Retract Out
Output
Reversing Polarity DC Motor
15/30A
12V/GND
55
Aux Motor 1 Extend Out
Output
Reversing Polarity DC Motor
12V/GND
56
Aux Motor 2 Retract Out
Output
Reversing Polarity DC Motor
12V/GND
57
Aux Motor 2 Extend Out
Output
Reversing Polarity DC Motor
12V/GND

NCSP3 Functionality Test
The Body Control Module (BCM) should be wired correctly, without
loose connections, and connected to 12 VDC at pin 42. A RED LED will
indicate that the BCM is receiving 12 VDC.
The BCM has override switches available. There is a knob and switch
that correspond to motor functions 1 – 5. The knob chooses the
motor and the switch actuates the motor to go in or out. There are
also buttons labeled AW1 In & Out and AW2 In & Out that act as
overrides for the optional AUX Motor Relay Control Kit. The switches
and buttons are momentary and will activate the component only
while pressed in either direction.
The BCM and Display Commander (DC) communicate with each other
through an RV-C (CAN BUS) connection. This RV-C communication
also allows the DC to connect to a third party AC translator module
(gateway) so that you can perform the HVAC functions from the DC.
The DC will be mounted in an "all access" area near the entrance. On
the DC, press and release the Power button (the left button) to wake
up the DC. After a moment, the Passcode Screen will appear. Enter
your Passcode. If this is the first time the DC has been powered on, an
End User License Agreement (EULA) screen will appear. Upon
accepting the EULA, the “Enter New Passcode” screen will appear.
Enter your new passcode and confirm.
The DC will now bring up the Home Screen If the Floor Plan has been
loaded, all of the devices should be listed with corresponding
actitation buttons.
Go through all the functions andmake sure they are operating properly. All
the functions should be smooth and instantaneous. Ensure all the Home
Page Hot keys actuate/turnon the corresponding functions.

HVAC Testing
Whentesting the HVAC (Climate Function), make sure each “Zone” is
displaying a room (Zone) temperature. Use the “Mode” buttonto
cycle through Fan, Cool, Heat and Auto modes. (Heat and Auto
modes availability depend on the floor plan.)
Use the “Set”temperature up and down arrows to set the desired
temperature. The “Set” temperature can be adjusted between 55 to 90F.

Please review the NCSP35User Manual for further HVAC operational
instructions. You can scan the QR code shown below or use the
following link: https://in-command.net/wp-
content/uploads/2018/08/owners-manual_ncsp35.pdf
Troubleshooting
HVAC
(Dometic Systems) If the room temp reads 100F,remove the room
sensor cover and pull the room sensor out of the holding clip. The
temp should read normally. Adjust the holding clip down on the
room sensor sothat it is not pinching it.
(RVP Systems) If the room temp reads 111F, the room sensor was
connected to the cool shed connections on the RVP control box.
Swap the wires between the cool shed and room sensor pins. The
room temp should start reading correctly without a reset.
(Both Systems)If no HVAC function, check to see if the room (zone)
temp is blank. If it is, make sure the RV-C cables are connectedto
the gateways andmake sure there is an EOL (End of Line)
terminator resistor at the last gateway in the line. Make sure the
address on the gateway is correct. If that is correct, redo the
power, ground and communication wires between the gateway and
control box. Verify the gateway hasproper +12VDC.
(Dometic)If there are multiple rapid clinking sounds whenoperating
the furnace function, the gateway has old software and needs to be
swapped out.
(Dometic)If a zone will not change functions (i.e. stuck on furnace
mode), try adjusting the fan speed. Most likely it will show Auto, try
and get it to either low or high. This indicates the gateway is in a
locked state. If you can get the fan mode to change, you should
then be able to change the zone function to off. Once it stays in off
mode, try power cycling the system.
If changing an HVAC function in a Zone, and the function changes in
a different zone, the dip switches are not set correctly. The front AC
is Zone 1, middle is Zone 2 and rear is Zone 3.

(RV-C) Communication issues
Make sure the CAN-Low does nothave a short to +12V.
Make sure the CAN-High does not have a short to ground.
Make sure there is not a short between CAN-Low and CAN-High.
Check RV-C plugs and pins to make sure there is not a loose
connection. Try and power cycle all the components.
Make sure the RV-C connector is pinned correctly.
Try a different RV-C cable.
Press the reset button on the BCM.
No BCM Power
Check ifthe Red Power indicator is lit.
Press the Reset button on the BCM.
Verify 12V on Pin 42and Ground on pin39.
Check Fuse in Main Breaker Box.
Cycle RV Power at the Main Breaker Box.
No DC Power
Cycle powerwith the Power Button. (Press and hold the
power button for 5 seconds.)
Verify 12V and Ground at the back of the DC.
Verify no blown fuses in theMain BreakerBox.
Electric Motors do not move
Verify 12V on pin 40.
If the Battery Disconnect switch is off, turn it on. (Some
models pull the slide power through the battery disconnect.)
Aux. Motors do not move
Verify the AUX motor Control Relay Kit’s pigtail harness is
connected and seated properly on the BCM.
Make sure the Motor Ground (black) and Motor+12V (red)
wires are connected and getting power.
Check fuse in Main Breaker Box.
Water Tank
Make sure the commonpin (Pin 8) is outputting +7VDC. If no
voltage, disconnect the tank harness and test the pin on the BCM. If
there is voltage now,thatindicates the common wire has a short to
ground.
If one of the tanks is reading, but another tank does not read,
remove the wires from the bell caps and swap the tank wires. If the
opposite tank now reads, that indicates the BCM is fine and there is
an issue in the tank line.
The tank level voltages are as follows:
o1/3:.75 to1.74
o2/3:1.75 to3.59
o3/3:3.6
For additional troubleshooting, call ASA Electronics Technical Support at 1-
877-845-8750, email info@asaelectronics.com or visit our iN-Command
support page at https://in-command.net/
Table of contents
Other IN-COMMAND Control System manuals
