Inbay 241178-01-2 User manual
Inbay Universal Ladebecher
Inbay Einsatz für alle Fahrzeuge
mit Becherhalter ( Ø 76 - 83 mm )
Geignet für Smartphones mit einer
maximalen Breite von 70 mm (inkl. Hülle)
241178-01-2
1
2
3
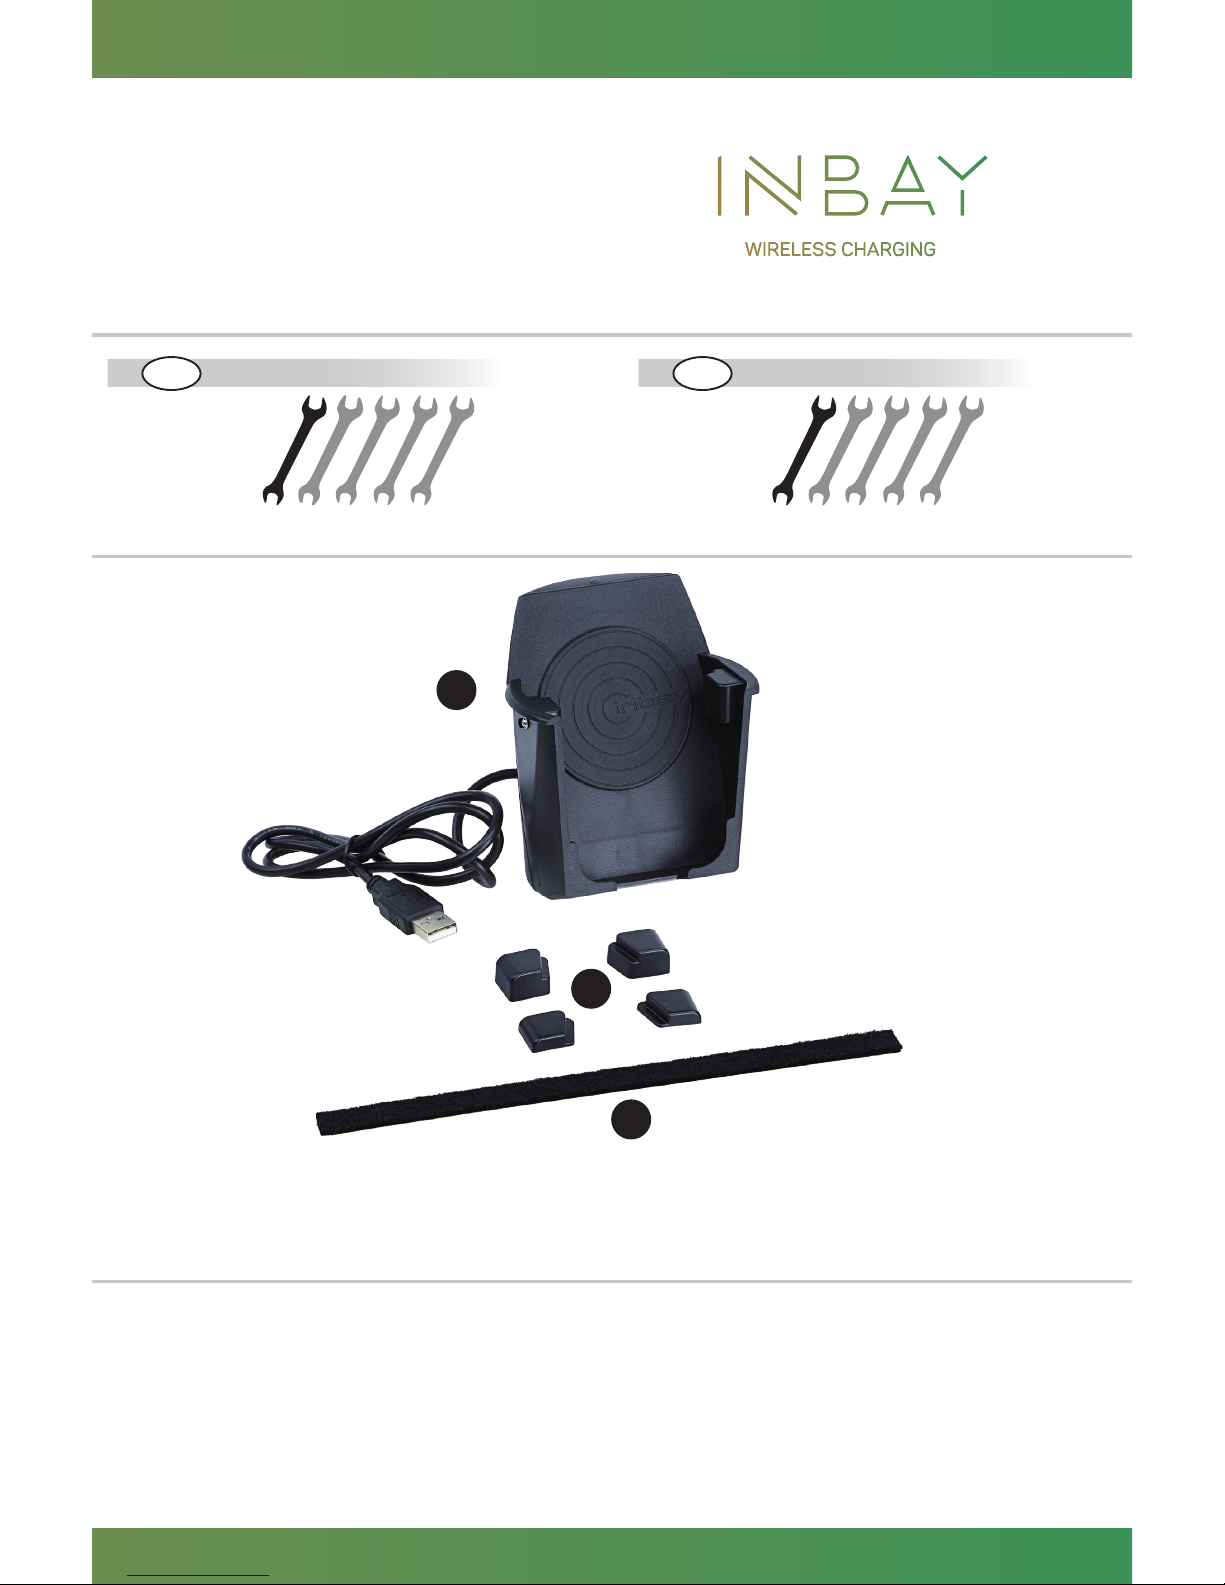
• (1) Inbay Ladebecher - drahtlose Ladestation im Becherformat mit USB-Anschlusskabel
• (2) Klemmbacken zur optimalen Fixierung des Smartphones
• (3) 1 x Filzklebeband
1
© 2018 · acv GmbH · Straßburger Allee 10-12 · 41812 Erkelenz www.inbay.systems
level of difficultySchwierigkeitsgrad
v18052018
Sachgemäße Installation unter Beachtung dieser Einbauanleitung erfor-
derlich. Achten Sie auf korrekte Anschlüsse. Verlegen Sie die Kabel so, dass
Sie weder geknickt, gequetscht oder beschädigt werden können. Sorgen
Sie dafür, dass sich die Kabel nicht in Gegenständen verfangen können.
Wir können keine Haftung für Schäden übernehmen, welche durch un-
sachgemäße Installation oder Nutzung verursacht wurden. Verwenden Sie
darum ausschließlich das mitgelieferte Montagematerial.
Technische Änderungen vorbehalten, alle Angaben ohne Gewähr.
Das „Qi“ Logo ist Warenzeichen des „Wireless Power Consortium“
An appropriate installation in observance of these operating instructions
is necessary. Please make sure the wiring is arranged so it is not bended
or crimped due to the risk of cable break. Make sure that all connections
are correct. Route the cable away from moving parts, do not allow the
cable to be entangled, pinched or damaged in any way.
We will not be liable for damage due to improper installation or utilization.
Use the specified accessory parts to prevent product failure.
Subject to technical modifications; no responsibility is accepted for the
accuracy of this information.
The “Qi” symbol is a trademark of the “Wireless Power Consortium”
EINBAUANLEITUNG
DINSTALLATION GUIDE
GB
gering hoch low high
www.inbay.systems
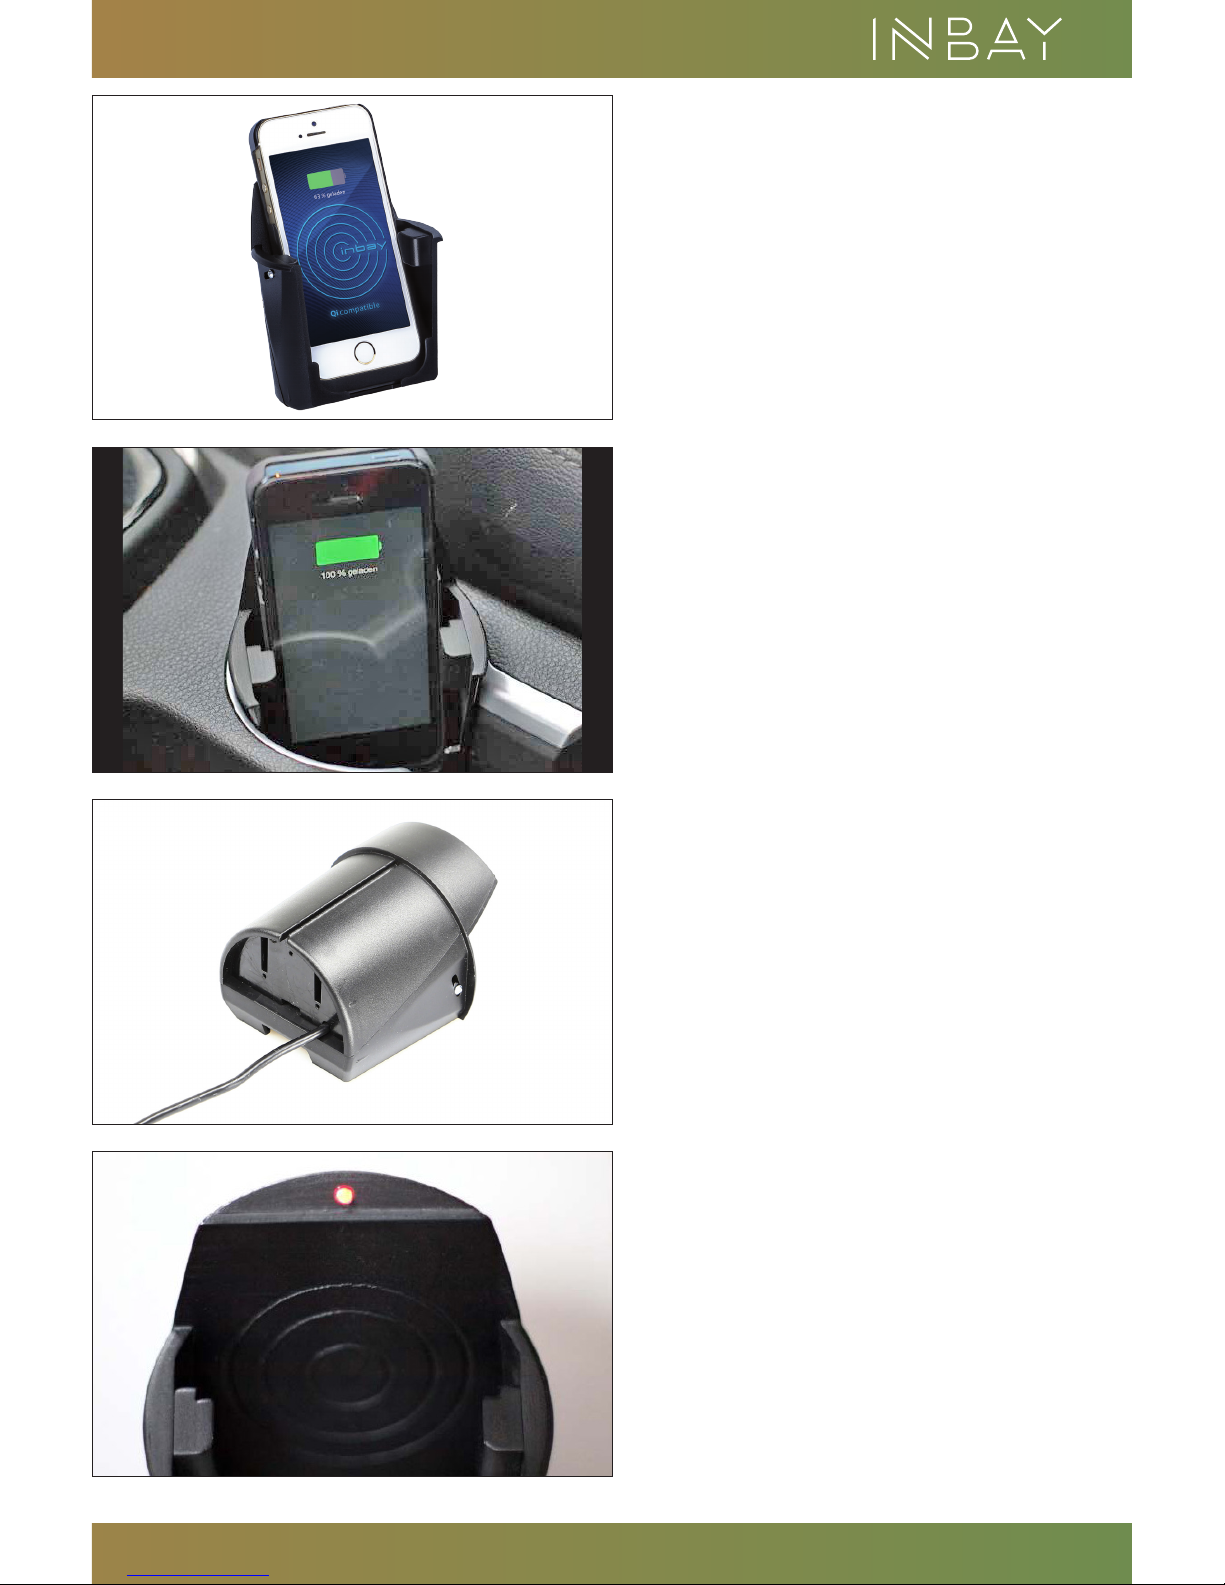
Der Inbay Ladebecher ist eine drahtlose Ladestation
im Becherformat. Die Ladung erfolgt induktiv nach
dem Qi-Standard und ermöglicht allen Smartphones
mit Qi-kompatiblen Receivern ein drahtloses Laden
bei gleichzeitig stabiler Ablage im Fahrzeug-
Getränkehalter.
Für einen sicheren Halt sind alle Fahrzeug
Getränkehalter mit 76 - 83 mm Durchmesser
geeignet
=> Wählen Sie im Fahrzeug einen geeigneten
Getränkehalter für den Ladebecher aus und
wählen Sie die gewünschte Ausrichtung
=> Eine praxisgerechte Ausrichtung wäre z.B., dass
das Display des Smartphones vom Fahrersitz gut
einsehbar ist
=> Der Anschluss erfolgt an einem (vorhandenen)
USB-Anschluss im Fahrzeug
=> Die Kabelführung des Ladebechers verläuft
hierfür nach unten oder seitlich aus dem Gehäuse
=> Mindestens 0.8A Ladestrom erforderlich
=> Überprüfen Sie die Funktion des Ladebechers
Bei Einschalten der Zündung muss die LED des
Ladebechers rot leuchten.
2
Einbauanleitung / Install Manual
2
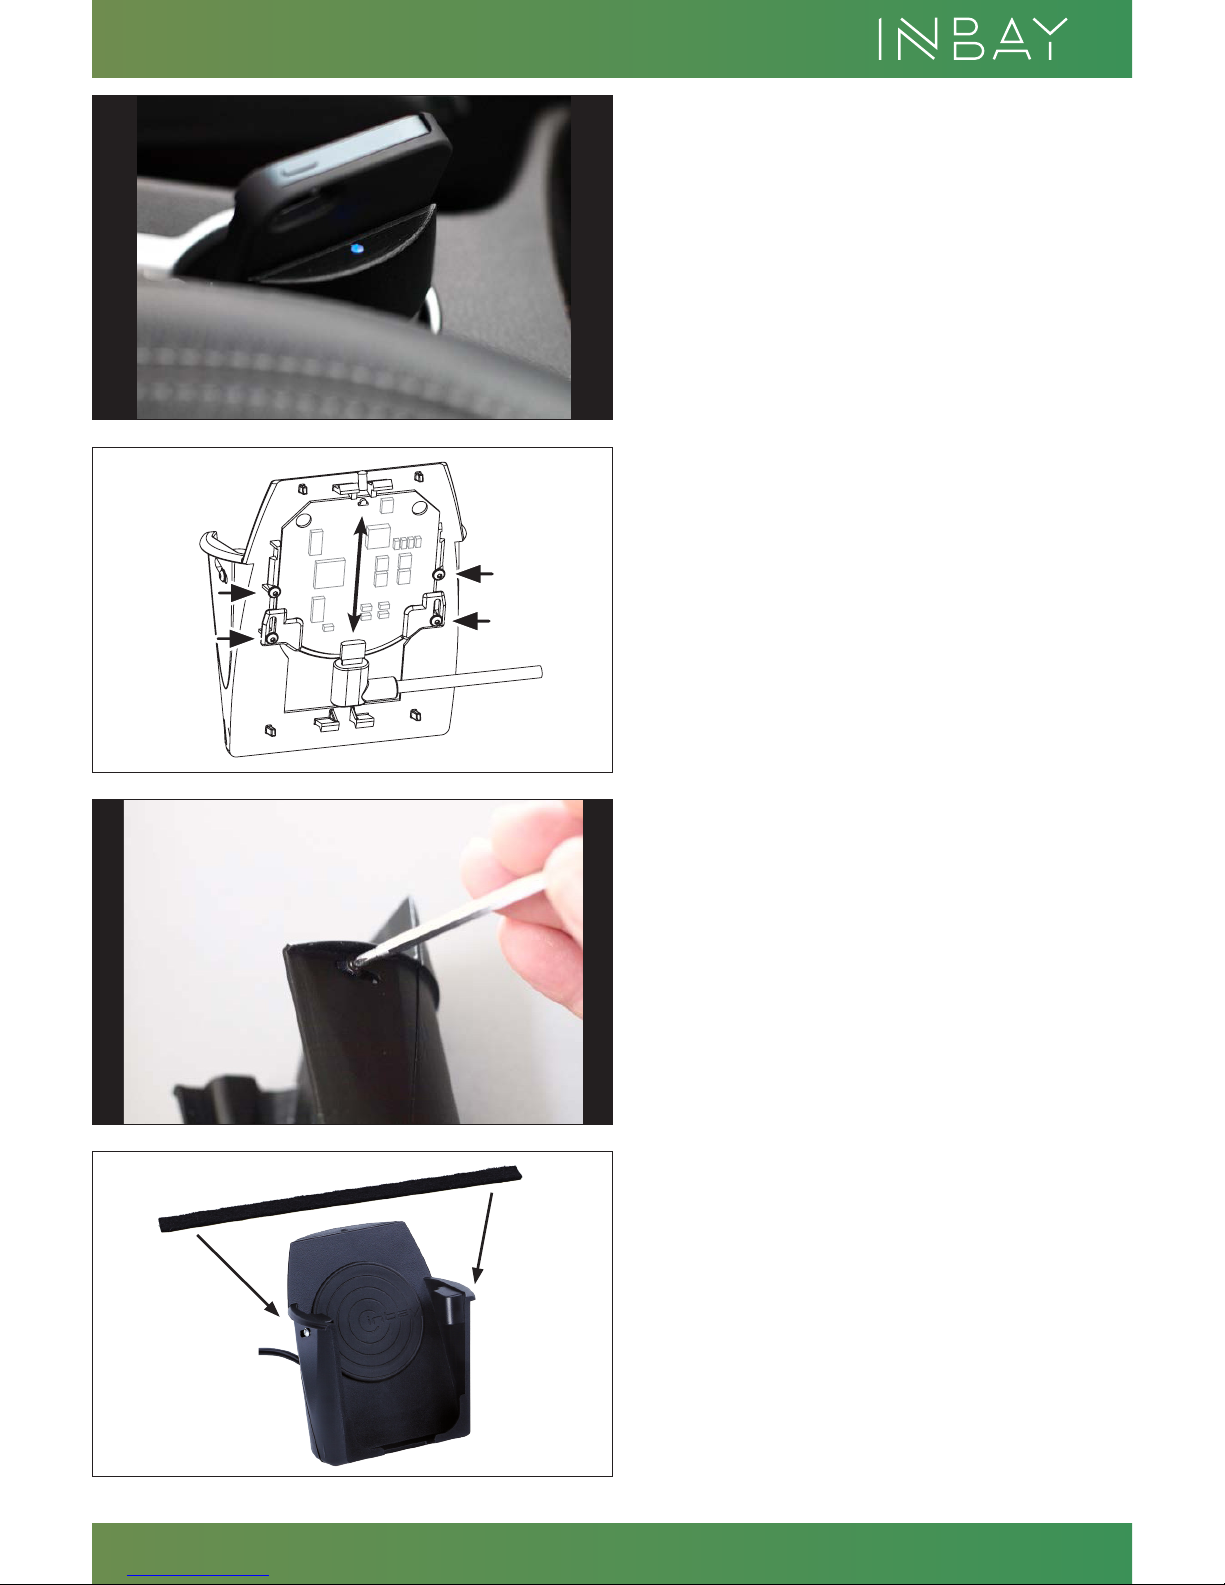
Wenn ein Qi-kompatibles Smartphone eingelegt
wird, beginnt automatisch der Ladevorgang:
die LED leuchtet dann blau.
=> Montieren Sie wieder ordnungsgemäss alle
entfernten Abdeckungen und Blenden
Sollte das Smartphone nicht geladen werden,
kann bei Bedarf die Höhe der Platine des
Inbay-Becherhalters eingestellt werden
Entfernen Sie dazu die Abdeckung
auf der Rückseite
Durch Lösen der Schrauben (Torx TX 6)
lässt sich die Platine verschieben
(siehe Pfeile)
Mit den beiliegenden Klemmbacken kann für jedes
Smartphone eine optimale Fixierung auch bei starken
Querbeschleunigungen sichergestellt werden
=> Ein Paar der Klemmbacken ist vormontiert.
Tauschen Sie, falls für den verwendeten
Smartphone-Typ notwendig, die Klemmbacken
gegen ein gewünschte Paar aus
=> Zur Justierung der Klemmbacken lösen Sie
leicht die Schrauben auf der Aussenseite des
Gehäuses und verschieben die Klemmbacken
in die gewünschte Position
=> Ziehen Sie die Schrauben wieder vorsichtig an
=> Kleben Sie den beiliegenden Filzstreifen um
das Gehäuse des Ladebechers, um eine feste
Passform im Fahrzeug-Getränkehalter zu
gewährleisten und die Schrauben zu verdecken
3
www.inbay.systems
3

44
Einbauanleitung / Install Manual
4

level of difficultySchwierigkeitsgrad
Sachgemäße Installation unter Beachtung dieser Einbauanleitung erfor-
derlich. Achten Sie auf korrekte Anschlüsse. Verlegen Sie die Kabel so, dass
Sie weder geknickt, gequetscht oder beschädigt werden können. Sorgen
Sie dafür, dass sich die Kabel nicht in Gegenständen verfangen können.
Wir können keine Haftung für Schäden übernehmen, welche durch un-
sachgemäße Installation oder Nutzung verursacht wurden. Verwenden Sie
darum ausschließlich das mitgelieferte Montagematerial.
Technische Änderungen vorbehalten, alle Angaben ohne Gewähr.
Das „Qi“ Logo ist Warenzeichen des „Wireless Power Consortium“
An appropriate installation in observance of these operating instructions
is necessary. Please make sure the wiring is arranged so it is not bended
or crimped due to the risk of cable break. Make sure that all connections
are correct. Route the cable away from moving parts, do not allow the
cable to be entangled, pinched or damaged in any way.
We will not be liable for damage due to improper installation or utilization.
Use the specified accessory parts to prevent product failure.
Subject to technical modifications; no responsibility is accepted for the
accuracy of this information.
The “Qi” symbol is a trademark of the “Wireless Power Consortium”
gering hoch low high
EINBAUANLEITUNG: Seite 1-4
DINSTALLATION GUIDE: Page 5 - 8
GB
Inbay Universal Charging Cup
For all vehicles equipped with
a cup holder ( diameter Ø 76 - 83 mm )
Suitable for smartphones with a maximum
width of 70 mm (including cover)
241178-01-2
1
2
3
• (1) Inbay Charging Cup - wireless charging station in cup format with USB plug
• (2) Spacers providing a perfect fit of your smartphone
• (3) 1 x felt adhesive tape
© 2018 · acv GmbH · Straßburger Allee 10-12 · 41812 Erkelenz www.inbay.systems
www.inbay.systems
5
© 2018 · acv GmbH · Straßburger Allee 10-12 · 41812 Erkelenz www.inbay.systems
level of difficultySchwierigkeitsgrad
v18052018
Sachgemäße Installation unter Beachtung dieser Einbauanleitung erfor-
derlich. Achten Sie auf korrekte Anschlüsse. Verlegen Sie die Kabel so, dass
Sie weder geknickt, gequetscht oder beschädigt werden können. Sorgen
Sie dafür, dass sich die Kabel nicht in Gegenständen verfangen können.
Wir können keine Haftung für Schäden übernehmen, welche durch un-
sachgemäße Installation oder Nutzung verursacht wurden. Verwenden Sie
darum ausschließlich das mitgelieferte Montagematerial.
Technische Änderungen vorbehalten, alle Angaben ohne Gewähr.
Das „Qi“ Logo ist Warenzeichen des „Wireless Power Consortium“
An appropriate installation in observance of these operating instructions
is necessary. Please make sure the wiring is arranged so it is not bended
or crimped due to the risk of cable break. Make sure that all connections
are correct. Route the cable away from moving parts, do not allow the
cable to be entangled, pinched or damaged in any way.
We will not be liable for damage due to improper installation or utilization.
Use the specified accessory parts to prevent product failure.
Subject to technical modifications; no responsibility is accepted for the
accuracy of this information.
The “Qi” symbol is a trademark of the “Wireless Power Consortium”
EINBAUANLEITUNG
DINSTALLATION GUIDE
GB
gering hoch low high
www.inbay.systems
5
www.inbay.systems

6
The Inbay Universal Charger Cup is a wireless
charging cradle in cup-size format. Charging is
done inductive according to Qi-standard and
enables charging of all smartphones with
Qi-compatible receiver going hand in hand with
a stable storing in the vehicle‘s cup-holder
=> Find a suitable cup holder in your vehicle
for the Charger Cup and rotate it to the desired
orientation
=> As example for a practice oriented orientation
we recommend a postition from where the display
of the smartphone is fully visible to the driver
=> The connection is made on an (installed)
USB-Connector in the vehicle
=> The cable routing of the Charging Cup
runs at the bottom or the side of the housing
=> At least 0.8A charging curent required
=> Check functionality of Charging Cup:
Turning on ignition the LED has to light up red
Einbauanleitung / Install Manual
6

7
When Inserting a Qi compatible smartphone
charging begins automatically and the LED
turns from red to blue
=> Re-install all removed covers and bezels
properly
In case the smartphone can‘t be charged,
adjust the height of the charging PCB :
Remove the cover on the rear side of the
charger cup
After releasing the screws (see arrows) the
position charging PCB can be adjusted
With the included spacers an optimal fixation
for every smartphone even under strong side
acceleration can be carried out
=> A pair of spacers is already pre-installed.
If neccessary swap these against the
appropriate spacer pair depending on the
size of the smartphone going to be used
=> For adjustment of spacers release screws at
the outer side of the housing and slide spacers
into the desired position
=> Tighten screws carefully
=> Glue the attached felt adhesvie tape around
the housing of the Charging Cup in order provide
a tight fit of the Charging Cup inside the cup holder
of the vehicle and to cover up the screws
www.inbay.systems
7

8
Einbauanleitung / Install Manual
8
Table of contents
Languages:
Other Inbay Batteries Charger manuals


