injen Civic Type R FK8 User manual

Instruction Manual P/N:FM1582i
Vehicle Application:
Make: Honda
Model: Civic Type R FK8
Year: 2017-18
Page 1 FM1582i
TOOL REQUIRED
•Pliers
•Ratchet
•13mm ocket
•10mm ocket
•8mm nut drive
•Allen key
•Flat Blade crewdriver
•Phillips crewdriver
•5.5mm nut driver
•7mm nut driver
244 Pioneer Place Pomona California 91768 U.S.A Office: (909) 839-0706 FAX: (909)839-0427 Email:T[email protected] WWW.INJEN.COM
Report any defective or issing parts to the authorized Injen dealer you purchased this product fro . Before installing any parts of this syste ,
please read the instructions thoroughly. If you have any questions regarding installation, please contact your Injen Technology dealer. Installation
DOES require so e echanical skills. A qualified echanic is always reco ended.
WARNING: FAILURE TO FOLLOW IN TALLATION IN TRUCTION AND NOT
U ING THE PROVIDED HARDWARE MAY DAMAGE THE INTERCOOLER
Y TEM, ENGINE AND COMPONENT !!!
*Do not attempt to install the intercooler system while the engine is hot.
Severe burn could result fro touching hot engine co ponents!
Item ty P/N Discription
A 1 #FM1572i Intercooler
A

1. Remove the plastic rivet clips to
remove the radiator support cover.
4. With flat head screwdriver carefully push clip
back, and remove the side indicator. Pull panel of
bumper back.
3. Remove the screws and plastic rivet
clips on bottom of bumper using flat head
screwdriver, t30 torx, and 10mm socket.
5. With flat head screwdriver, locate the push clip
and pull back the top of the headlight trim. Carefull not
pull to hard.
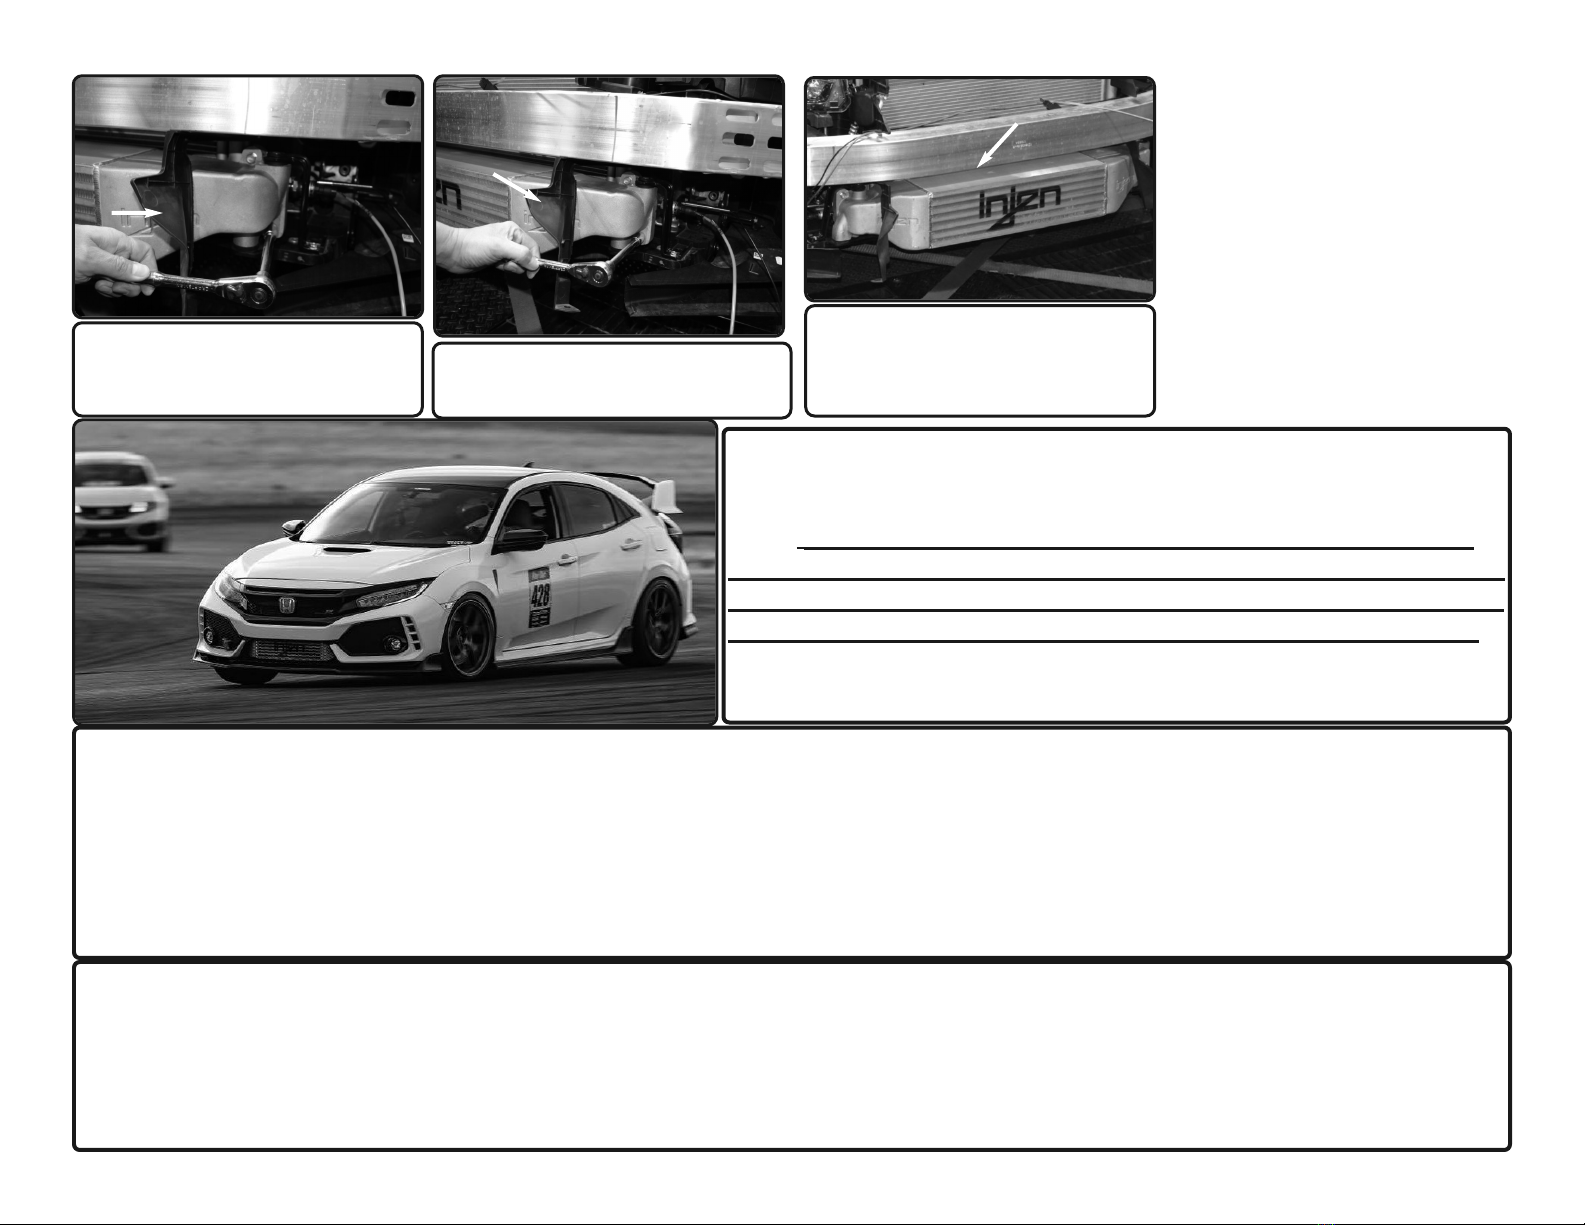
8. Loosen pass side intercooler
bracket using 10mm socket or wrench.
save bracket and screw for later install.
7. Carefully raise the vehicle up and
unscrew the 2 screws on both sides of
bumper.
6. Now pull back the bumper and remove.
10. Now carefully pull out the intercooler
from the vehicle.
9. Loosen the 4 bolts holding in the
Intercooler to the intercooler pipes using
12mm socket or wrench.
Instruction Manual P/N:FM1582i
2. Loosen the screws holidng in the
ram scoop. pull back the Ram scoop from
the intake.
11. Now Remove the OEM gasket
from the stock intercooler on both sides.
Page 3 FM1582i
7. Loosen driver side intercooler
bracket using 10mm socket or wrench.
save bracket and screw for later install.
Plastic Rivet clips
Bracket
Bracket

12. Install the OEM gaskets to the new
injen intercooler.
16. Cut plastic like above image.
15. Remove plastic piece and discard.
17. Remove plastic piece and discard.
20. Install the grommet to the injen
intercooler fitting.
14. Cut plastic like above image.
18. Remove the grommet from the
OEM intercooler.
22. Install the bracket to the passenger
side. ecure and tighten.
21. Now install injen intercooler.
Instruction Manual P/N:FM1582i
13. Mark the passenger side plastic
shroud with a marker like above image.
23. Install the bracket to the driver side.
ecure and tighten.
Page 4 FM1582i
19. Install the grommet to the injen
intercooler fitting.
Bracket
Bracket
Page 5 FM1582i
1. Upon co pletion of the installation, reconnect the negative battery ter inal before you start the engine.
2. Align the entire intercooler syste for the best possible fit. Once the intercooler has been properly fitted continue to tighten all nuts,
bolts and cla ps.
3. Periodically, recheck the align ent of the intercooler syste and ake sure there is proper clearance Failure to follow proper
ainentance procedures ay cause da age to the intercooler and will void the warranty.
4. Start the engine and listen carefully for any odd noises, rattles and/or air leaks prior to taking it for a test drive. If any proble s arise
go back and check the vacuu lines, hoses and cla ps that aybe causing leaks or rattles and correct the proble .
Congratulations! You have just completed the installation of the
Injen intercooler system. Periodically, check the alignment of the
intercooler, normal wear and tear can cause nuts and bolts to come
loose. Note: Check clearance and adjust if needed! Failure to
check the alignment and adjust the intercooler can cause dam-
age that ill void the arranty. Injen Technology is not respon-
sible for any damages caused by/from improper installation.
Instruction Manual P/N:FM1582i
Test Drive:
1. With the trans ission in neutral or park and the parking brake engaged, start the engine. Listen for air leaks or odd noises. If air leaks are
detected, secure hoses and connections. For any odd noises, inspect entire syste for cause and adjust intercooler as needed. The Injen in-
tercooler will function identically to the factory syste but will be ore powerful.
2. Perfor a road test. Listen for odd noises or rattles and fix as necessary.
3. If there are no issues, continue to enjoy your added perfor ance fro the Injen perfor ance intercooler kit.
4. Injen Technology reco ends you periodically check clearance and adjust if needed! Failure to check the align ent and adjust thein-
tercooler can cause da age that will void the warranty. Injen Technology is not responsible for any da ages caused by/fro i proper in-
stallation.
20. Re-install the OEM screws and
secure the injen intercooler. 21. Tighten the Passenger and driver
side intercooler using 12mm socket or
wrench.
22. Your Injen intercooler installation is
now complete. Make your final adjustment
and make sure all your nuts, bolts and clamps
are secure. Reinstall the rest of the bumper
components in reverse order.
A
This manual suits for next models
1
Other injen Automobile Accessories manuals


Popular Automobile Accessories manuals by other brands


ULTIMATE SPEED
ULTIMATE SPEED 279746 Assembly and Safety Advice

SSV Works
SSV Works DF-F65 manual

ULTIMATE SPEED
ULTIMATE SPEED CARBON Assembly and Safety Advice

Witter
Witter F174 Fitting instructions

WeatherTech
WeatherTech No-Drill installation instructions

TAUBENREUTHER
TAUBENREUTHER 1-336050 Installation instruction