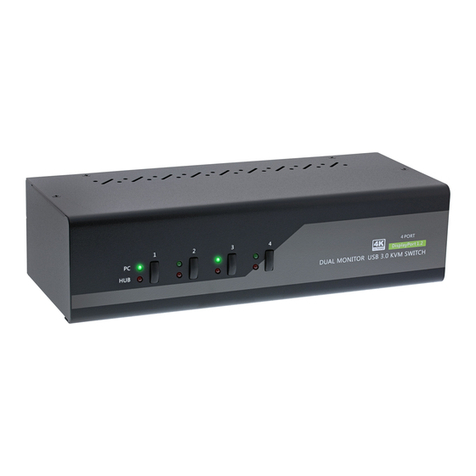
Inline 62642I User manual

INSTALLATIONS-KURZANLEITUNG
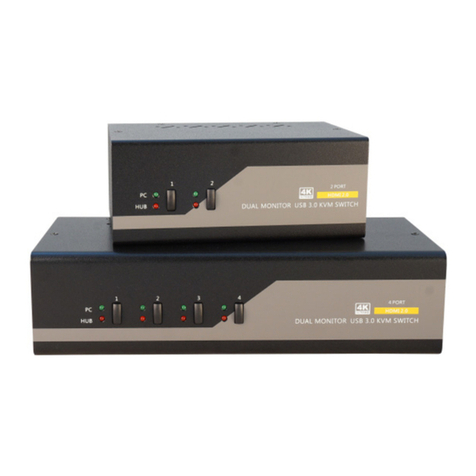
INLINE® KVM DESKTOP SWITCH, 2/4-FACH, DUAL
MONITOR, DISPLAYPORT + HDMI, 4K, USB 3.0, AUDIO
62642I/62644I
Vielen Dank für den Kauf des InLine KVM Desktop Switchs, Dual
Monitor, DisplayPort + HDMI, der Ihnen ermöglicht, zwei bzw. vier
Computer an einer Konsole (bestehend aus 1x DisplayPort-Moni-
tor, 1x HDMI-Monitor, 1x USB-Maus und 1x USB-Tastatur) zu be-
treiben.
EINFÜHRUNG
Der InLine KVM Desktop Switch wurde speziell für die Nutzung von
zwei Monitoren (1x HDMI, 1x DisplayPort) an zwei/vier Multime-
dia-Computern entwickelt. Mit dem InLine KVM Desktop Switch
können Sie zwei/vier PCs mit nur einer USB-Tastatur, Maus sowie
zwei Monitoren vollständig steuern. Dieser Dual-Monitor-HDMI/
DP-KVM-Switch unterstützt Auflösungen von bis zu 3840x2160
(4K) bei 60Hz, für maximalen Komfort bei der Anpassung an Ihre
Bildschirmanforderungen.
Mit der TTU-Emulationstechnologie, in einen neuen ASIC-Chip in-
tegriert, ist der Dual-Monitor HDMI/DP USB KVM-Switch in der
Lage, eine vollständige Vielseitigkeit bei der Bewältigung der funk-
tionalen Anforderungen aller Arten von modernen Tastaturen und
Mäusen zu bieten. Er verfügt über einen 2 Kanal-Stereo-Sound für
volle Soundfunktionen. Seine erweiterten Audio- & Mikrofon-Um-
schaltfunktion bietet Ihnen zusätzlich ein ununterbrochenes Mul-
timedia-Erlebnis während der KVM-Bedienung (z.B. können Sie
von einem PC Musik hören, während Sie einen anderen bedienen).
Eine Multi-Plattform-Unterstützung für PC und Mac ist ebenso
verfügbar.
Lieferumfang:
1x InLine KVM Desktop Switch, Dual Monitor, DisplayPort + HDMI
2x KVM Kabelsatz für 62642I bzw. 4x Kabelsatz für 62644I
1x Stecker-Netzteil DC 9V
1x Bedienungsanleitung
INSTALLATION
1. Verbinden Sie die USB-Tastatur, USB-Maus, die beiden Mo-
nitore (1x HDMI, 1x DisplayPort) und bei Bedarf Lautsprecher/
Kopfhörer und Mikrofon mit den entsprechenden Anschlüs-
sen im Konsolenbereich („CONSOLE“) des KVM-Switch. Die
beiden weißen USB-Anschlüsse (links) sind für Tastatur und
Maus vorgesehen und die beiden blauen USB 3.0-Anschlüsse
für andere Geräte (USB-Sticks, Drucker, etc.).
2. Verbinden Sie jeden KVM-PC-Anschluss („PC 1“, etc.) mit ei-
nem Computer über ein HDMI-Kabel, ein DisplayPort-Kabel,
ein USB-Kabel (USB 3.0 Typ-A zu Typ-B) und bei Bedarf ein
Audio- & Mikrofon-Kombinationskabel.
3. Schließen Sie Ihre optionalen USB-Geräte an die USB-Hub-
Ports (links, blau) an.
4. Schließen Sie das mitgelieferte Netzteil an, nach Anschluss
aller Kabel stecken Sie das Steckernetzteil in die Steckdose.
Ihr KVM-Switch ist nun einsatzbereit.
BEDIENUNG
Eine Tastatur-Hotkey-Sequenz besteht aus mindestens drei spezi-
fischen Tastenanschlägen, diese finden Sie in der Kurzübersicht auf
der Rückseite.
Hotkey-Sequenz = [ScrLk]* + [ScrLk]* + Befehlstaste(n)
* Benutzerdefinierbar = SCROLL LOCK (Rollen-Taste), CAPS LOCK,
ESC, F12 oder NUM LOCK
Ändern der Hotkey-Sequenz: Für Benutzer, die eine andere als zwei
aufeinanderfolgende ScrollLock-Tasten verwenden möchten, gibt
es auch eine bequeme Möglichkeit, diese zu konfigurieren.
(1) Drücken Sie ScrollLock + ScrollLock + H, Sie hören zwei Signal-
töne, die den Konfigurationsprozess einleiten [oder halten Sie die
letzte Taste an der Vorderseite (Taste 2 oder Taste 4) gedrückt, bis
Sie zwei Signaltöne hören, dann lassen Sie die Taste los.].
(2) Wählen und drücken Sie die Taste, die Sie anstelle der Scroll-
Lock Taste bevorzugen (CAPS LOCK, ESC, F12 oder NUM LOCK
stehen zur Auswahl). Sie hören einen Signalton zur Bestätigung der
Auswahl. Nun können Sie die neue vorhergehende Sequenz ver-
wenden, um Ihre Hotkey-Befehle auszuführen.
Hinweis: Jeder Tastendruck innerhalb einer Hotkey-Sequenz sollte
innerhalb von zwei Sekunden gedrückt werden. Andernfalls wird die
Hotkey-Sequenz nicht validiert.
DISCLAIMER
1. Ausgabe Deutsch 08/2019
Dokumentation © 2019 INTOS ELECTRONIC AG
Alle Rechte vorbehalten. Ohne schriftliche Zustimmung des Heraus-
gebers darf dieses Handbuch auch nicht auszugsweise in irgend-
einer Form reproduziert werden oder unter Verwendung elektroni-
scher, mechanischer oder chemischer Verfahren vervielfältigt oder
verarbeitet werden. Es ist möglich, dass das vorliegende Handbuch
noch drucktechnische Mängel oder Druckfehler aufweist. Die Anga-
ben in diesem Handbuch werden jedoch regelmäßig überprüft und
Korrekturen in der nächsten Ausgabe vorgenommen. Für Fehler
technischer oder drucktechnischer Art und ihre Folgen übernehmen
wir keine Haftung. Alle Warenzeichen und Schutzrechte werden an-
erkannt. Änderungen im Sinne des technischen Fortschritts können
ohne Vorankündigung vorgenommen werden. Unsere Produkte,
einschließlich der Verpackung, sind kein Spielzeug, sie könnten klei-
ne Teile und scharfe Objekte enthalten. Bitte von Kindern fernhalten.
INTOS ELECTRONIC AG
Siemensstrasse 11, D-35394 Giessen
www.inline-info.com
www.inline-info.com
Anschlussdiagramm
62644I – Rückansicht
www.inline-info.com
KURZÜBERSICHT
KOMMANDO HOTKEYS1FRONTTASTEN BESCHREIBUNG
Auswahl des PC-Ports²
(PC-Port + Hub-Port + Audio&Mic, wenn Bindung
aktiv ist)
ScrLk + ScrLk + X
X=1-2 / 1-4 (PC-Port Nummer)
Drücken Sie die entsprechende Taste, um den PC-Port aus-
zuwählen.
Auswahl der USB-Hubs²
(PC-Port + Hub-Port, wenn Bindung aktiv ist)
ScrLk + ScrLk + Fx
Fx=F1-F2/F1-F4, x=Hub-Port Nummer
Drücken Sie die Taste, um die jeweilige PC+USB Hub-Ports-
teuerung umzuschalten. (Funktioniert nur, wenn die PC-
Port/Hub-Port-Bindung aktiviert ist.)
Auswahl der Audio- / Mikrofon-Ports³
(PC-Port + Audio&Mic, wenn Bindung aktiv ist)
ScrLk + ScrLk + Fy
Fy=F5-F6/F5-F8, y=Audio/Mic.-Port Nummer
Bindung zwischen PC und USB Hub herstellen² ScrLk + ScrLk + Z
Aktivieren Sie die Verbindung von PC-Port
und Hub-Port-Steuerung (sobald diese Funk-
tion aktiviert ist, werden alle PC- und/oder
Hub-Port-Switching-Schnittstellen miteinander
verbunden) (Werkseinstellung).
Bindung zwischen PC und USB-Hub aufheben² ScrLk + ScrLk + X Deaktivieren der Bindung von PC-Port und
Hub-Port-Steuerung
Bindung zwischen PC und Audio&Mic herstellen³ ScrLk + ScrLk + Q
Aktivieren Sie die Verbindung von PC-Anschluss
und Audio&Mic Umschaltung. (Sobald diese
Funktion aktiviert ist, ist jede PC- und/oder Au-
dio&Mic-Umschaltung miteinander verbunden)
(Werkseinstellung).
Bindung zwischen PC und Audio&Mic aufheben³ ScrLk + ScrLk + W Deaktivieren Sie die Verbindung von PC-An-
schluss und Audio&Mic.
Vorheriger PC-Port ScrLk + ScrLk + ↑ (Pfeil-hoch)
Nächster PC-Port ScrLk + ScrLk + ↓ (Pfeil-runter)
Zuvor genutzter PC-Port ScrLk + ScrLk + ←(Backspace) Wechselt zwischen dem vorherigen Port und
dem aktuellen Port.
Signaltöne Ein / Aus ScrLk + ScrLk + B
Hotkey Sequenz einstellen/ändern ScrLk + ScrLk + H + y
y=Scroll Lock, Caps Lock, ESC, F12, Num Lock
Halten Sie die letzte Taste (Taste 2 / Taste 4) gedrückt, bis zwei
Signaltöne ertönen, lassen Sie die Taste los und drücken Sie
dann (y).
Wählen Sie die Hotkey-Sequenz aus 5 Alter-
nativen aus
Autoscan ScrLk + ScrLk + S
Automatisches Scannen durch jeden ange-
schlossenen Port für schnelles Durchsuchen der
einzelnen Ports (Scan-Verzögerung = 5 Sek.)
Autoscan mit programmierter Verzögerung
ScrLk + ScrLk + H + z
z=1>10s, 2>20s, 3>30s, 4>40S, 5>50s, 6>60s, 7>70s, 8>80s,
9>90s, 0>100s
Automatischer Scan mit einer benutzerdefinier-
ten Verzögerungszeit im Bereich von 10 ~ 100
Sekunden
Autoscan beenden Drücken Sie eine beliebige Taste auf der Tastatur. Beenden der Autoscan-Aktivität
Hinweise: 1. Die Hotkeys der USB-Tastatur ermöglichen eine schnellere und umfassendere Steuerung Ihres KVM-Switch zusätzlich zur Fronttaste. Wenn Sie eine andere Hotkey-Sequenz als zwei aufeinanderfolgende Scroll-Lock konfiguriert haben, sollten Sie hier Ihre Hotkey-Sequenz
entsprechend ändern. (Zur vorherigen Konfiguration der Sequenztasten siehe „Hotkey-Sequenz einstellen/ändern“ in der obigen Tabelle.)
2. Wenn die Bindung von PC & USB-Hub Port Control durch die Hotkey-Sequenz aktiviert wird: ScrLk + ScrLk + Z, jeder PC und die Hub-Port Umschaltung sind miteinander verbunden. Um diese Bindung zu entfernen, verwenden Sie die
Hotkey-Sequenz: ScrLk + ScrLk + X.
3. Wenn die Verbindung von PC und Audio&Mic durch die Hotkey-Sequenz aktiviert wird: ScrLk + ScrLk + Q, jeder PC und die Audio&Mic Umschaltung sind miteinander verbunden.
Um diese Bindung zu entfernen, verwenden Sie die Hotkey-Sequenz: ScrLk + ScrLk + W.
Dual-Monitor KVM Switch mit Audio und USB 3.0 – Kommando-Tabelle für Hotkey und Fronttasten

QUICK INSTALLATION GUIDE
2-PORT/ 4-PORT DUAL MONITORS HDMI2.0 DP1.2 USB
KVM SWITCH W/ AUDIO & MIC
62642I/62644I
Thank you for purchasing the 2-Port Dual Monitors HDMI2.0 DP1.2
USB KVM Switch! With our highly reliable and quality product,
user can enjoy countless benefits from using it.
INTRODUCTION
The Dual Monitors HDMI2.0 DP1.2 KVM Switch is designed spe-
cifically for sharing two monitors/ flat panel displays between two/
four multimedia computers with dual head HDMI/DP display [1x
HDMI , 1x DP]. With KVM-Switch, you can fully control two/ four
dual head PCs using only one keyboard, mouse and dual moni-
tor/ flat panel displays. This dual monitor HDMI / DP KVM switch
supports 3840 x 2160/4K 60Hz for your maximum convenience in
adapting to your display requirements.
With the TTU Emulation Technology, which embodies itself within
a new ASIC chip, the dual monitors HDMI/DP USB KVM switch
is capable of a complete versatility in dealing with the functional
requirements of all types of advanced keyboards and mice. It fea-
tures two channels stereo sound for theater audio experience and
its audio&mic switching function offers you uninterrupted multi-
media experience while performing KVM switching. Multi-platform
support for PC and Mac is available.
Package content:
1x KVM switch unit 2-port / 4-port
2x KVM cable set for 62642I / 4x cable set for 62644I
1x Quick Installation Guide
1x Power Adapter DC9V
INSTALLATION
1. Connect the shared USB keyboard, mouse, two monitors,
speaker/headphone and microphone to corresponding ports
on console section of the KVM Switch. Note that the two left
side white USB ports are for keyboard and mouse and two
blue USB 3.0 ports for other USB devices.
2. Connect each KVM PC port to a computer, using one HDMI2.0
video cable (Male to Male) and one DP1.2 video cable (Male
to Male), one USB cable (type A to type B) and one audio&mic
combo cable (male to male).
3. Connect each of your USB devices to the USB hub ports (on
the left).
4. Power up you KVM Switch by connecting the external power
adapter to it.
You can now begin to use the KVM switch.
EASY OPERATION
A keyboard hotkey sequence consists of at least three specific ke-
ystrokes: See Quick Reference Sheet
Hotkey sequence = [ScrLk]* + [ScrLk] * + Command key(s)
* User-definable = SCROLL LOCK, CAPS, ESC, F12 or NUM LOCK
Hotkey preceding sequence configuration: For users who want to
use a preceding sequence other than two consecutive Scroll Locks,
there is also one convenient way to configure it.
(1) Hit ScrollLock + ScrollLock + H, then two beeps will signal rea-
diness for new preceding sequence selection [or Press and hold
down the last front-panel button (Button 2 or Button 4) until you hear
two beeps, then release the button.]
(2) Select and press the key you would like to use as your preceding
sequence (SCROLL LOCK, CAPS, ESC, F12 or NUM LOCK) keys
are available for selection and you’ll hear a beep for selection con-
firmation. Now you can use the new preceding sequence to execute
your hotkey commands.
Note: Each keystroke within a hotkey sequence should be pres-
sed within two seconds. Otherwise, the hotkey sequence will not
be validated.
DISCLAIMER
1. Edition English 08/2019
Documentation © 2019 INTOS ELECTRONIC AG
All rights reserved. No part of this manual may be reproduced in
any form or duplicated or processed using electronic, mechanical
or chemical processes without the publisher´s written consent. It
is possible that this manual may still contain typographical defects
or printing errors. However, the information in this manual is revie-
wed regularly and corrections will be made in the next edition. We
accept no liability for technical or typographical errors and their
consequences. All trademarks and industrial property rights are
acknowledged. Changes in the sense of technical progress can
be made without prior notice. Our products, including packaging,
are not toys; they may contain small parts and sharp objects. Keep
away from children, please.
INTOS ELECTRONIC AG
Siemensstrasse 11, D-35394 Giessen
www.inline-info.com
www.inline-info.com
Connection Illustration
62644I – Rear View

www.inline-info.com
QUICK REFERENCE SHEET
COMMAND HOTKEYS1FRONT-PANEL BUTTON DESCRIPTION
Select PC Port²
(Jointly select PC port/ hub port control/ audio&mic,
if binding is enabled)
ScrLk + ScrLk + X
X=1-2 / 1-4 (PC port number) Press the corresponding button to select the active PC port.
Select the active PC port (jointly select PC port/
hub port control/ audio&mic, if binding is ena-
bled)
Select Hub Port Control2
(Jointly select PC and hub port control, if binding is
enabled)
ScrLk + ScrLk + Fx
Fx=F1-F2/F1-F4, x=Hub port number
Press the button to toggle the specific PC+USB hub port
control. (It works only if PC port/ hub port control binding
is enabled.)
Select the PC port that control all USB hub ports
(jointly select PC & hub port control, if PC/ hub
port control binding is enabled)
Select Audio&Mic Port3
(Jointly select PC port and audio&mic, if binding is
enabled)
ScrLk + ScrLk + Fy
Fy=F5-F6/F5-F8, y=audio/mic.-port number
Select the active audio&mic port (jointly select
PC & audio&mic port, if binding is enabled)
Bind PC and Hub Port Control Switching2[Default] ScrLk + ScrLk + Z
Enable the binding of PC port and hub port con-
trol (once this feature is enabled, any PC and/
or hub port control switching is bound together)
(factory default)
Unbind PC and Hub Port Control Switching2
[Default] ScrLk + ScrLk + X Disable the binding of PC port and hub port con-
trol
Bind PC and Audio&Mic Switching3[Default] ScrLk + ScrLk + Q
Enable the binding of PC port and audio&mic
switching. (once this feature is enabled, any PC
and/or audio&mic switching is bound together)
(factory default)
Unbind PC and Audio&Mic Switching3[Default] ScrLk + ScrLk + W Disable the binding of PC port and audio&mic
Previous PC port2
(Jointly select PC/ hub port control, if binding is
enabled) ScrLk + ScrLk + ↑ (Arrow Up) Select the previous connected PC port (jointly
select PC/ hub port control, if binding is
Next PC port2
(Jointly select PC/ hub port control, if binding
enabled) ScrLk + ScrLk + ↓ (Arrow Down)
Select the next connected PC port (jointly select
PC/ hub port control, if binding is
Previous PC port ScrLk + ScrLk + ← (Back Space) Toggle between the previous port and current
Beep Sound On/Off ScrLk + ScrLk + B Toggle on/off the beep sound
Define Hotkey Preceding ScrLk + ScrLk + H + y
y=Scroll Lock, Caps Lock, ESC, F12, Num Lock
Press and hold down last button ( Button 2 / Button 4 ) till two
beeps, release the button, then press (y)
Select the hotkey preceding sequence among 5
alternative keys
Auto Scan ScrLk + ScrLk + S
Autoscan through every connected port for
quick screen browsing of each port (scan delay
= 5 sec.)
Autoscan with Programmable Delay
ScrLk + ScrLk + H + z
z=1>10s, 2>20s, 3>30s, 4>40S, 5>50s, 6>60s, 7>70s, 8>80s,
9>90s, 0>100s
Auto scan with a user-defined delay time within a
range of 10 ~ 100 seconds
Stop Auto Scan Press any button Terminate Autoscan activity
Notes: 1. The USB keyboard hotkeys allows you a faster and broader control for your KVM switching operation in addition to the front-panel button. If you have configured a hotkey preceding sequence other than two consecutive scroll locks, here you should change your hotkey se-
quence accordingly. (For preceding sequence key configuration, please refer to “Define Hotkey Preceding Sequence” in above table.)
2. When the binding of PC & USB hub port control switching is enabled by the hotkey sequence: ScrLk + ScrLk + Z, any PC and hub port control switching are bound together. To remove this binding, use the
hotkey sequence: ScrLk + ScrLk + X.
3. When the binding of PC and audio&mic switching is enabled by the hotkey sequence: ScrLk + ScrLk + Q, any PC and audio&mic switching are bound together. To remove this binding, use
the hotkey sequence: ScrLk + ScrLk + W.
Dual Monitors HDMI/DP USB KVM Switch w/ Audio & Mic -- Operation Commands for Hotkeys / Front-Panel Button
This manual suits for next models
1
Table of contents
Languages:
Other Inline Switch manuals

Inline
Inline 32316P User manual

Inline
Inline 33293I User manual

Inline
Inline A3H User manual

Inline
Inline 60603I User manual

Inline
Inline 33293H User manual

Inline
Inline 33271N User manual

Inline
Inline 33271O User manual

Inline
Inline IN3546R User manual

Inline
Inline SWP123 User manual

Inline
Inline IN3554 User manual

Inline
Inline IN3606 User manual

Inline
Inline 33051H User manual

Inline
Inline IN3564HR User manual

Inline
Inline IN3504 User manual

Inline
Inline IN3552R User manual

Inline
Inline 63652I User manual

Inline
Inline IN3526vi User manual

Inline
Inline 32305Q User manual

Inline
Inline 62602I User manual

Inline
Inline IN3526 User manual