Inline IN3526 User manual

Operation Manual
IN3526 - Composite / S-Video Switcher
®

2
IN3526 OPERATION MANUAL - REV. 1 11/11/96 ©1996 - INLINE, INC.
DESCRIPTION
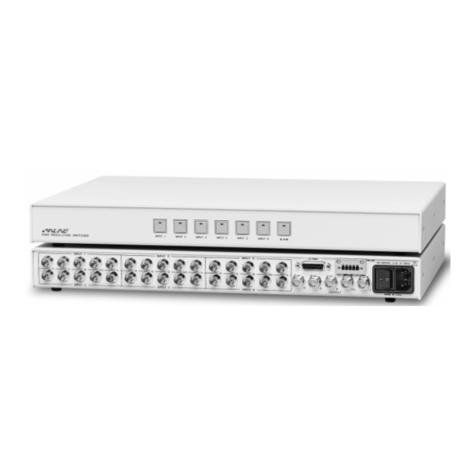
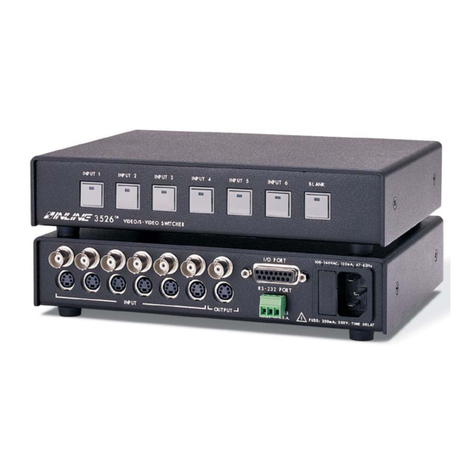
The IN3526 is a six input and one output switcher designed for composite or S-Video signals. The IN3526
switcher is designed to route several video source signals to an attached video recorder, monitor, projector or
other video equipment. Users may select the desired input channel using front panel buttons or via remote
control. The IN3526 switcher offers easy operation and the following features:
♦100 MHz Bandwidth - allows the unit to be used with high resolution computer video signals as well as
NTSC/PAL/SECAM composite and S-Video signals
♦Front Panel Channel Selection Controls and LED Indicators
♦Contact Closure and RS-232 control port for remote selection of input channels
♦Cascading capability to create larger switching configurations.
♦I/O port to power and control an IN3546 6 in, 1 out Stereo Audio Switcher for audio follow video
applications
COMPATIBILITY
The IN3526 switcher will switch a wide variety of signals. While the unit was primarily designed for Composite
Video and S-Video (Y/C) signals, it can also switch high resolution computer video signals. The IN3526 shares
the composite video and Luma (Y) channel, so it is not designed to handle both signal formats at the same time.
However, if your display device can switch between composite and S-Video, you can have some inputs be
composite and others be S-Video (although you will need to switch your display to view the proper signal.)
INSTALLATION
This section offers step-by-step instructions for installing an IN3526 switcher.
1. Connect all sources to the IN3526 input connectors. Unused inputs do not need to be terminated.
2. Connect the IN3526 output to the display device.
3. Connect remote control system if required.
4. Apply AC power to the unit.
5. Configure the unit for special applications (see Power-On Settings for more information.)

3
© 1996 - INLINE, INC. IN3526 OPERATION MANUAL - REV. 1 11/11/96
OPERATION
FRONT PANEL OPERATION
Input Selection
The IN3526 switcher provides seven front panel buttons which may be used to select the desired input channel or
blank the output (no input selected.) Any time the unit is powered up, Input 1 is automatically selected. In order
to select a different input, press the corresponding input button and the appropriate green LED will light to
indicate the current active channel. All non-selected channels are terminated to 75 Ohms. Input channels may
also be selected remotely by using an optional IN3590 wired remote or a control system (see Remote Control
Operation for more details).
Blank
You can blank the output by disconnecting all inputs by pressing the BLANK button. If you press the button
again, the previous input will be selected. For example, let’s say you currently have Input 3 selected. If you
press BLANK, the output will be blanked. If you press BLANK again, Input 3 will be selected. You can also
exit blank by selecting another input.
REMOTE CONTROL OPERATION
The IN3526 switcher has an I/O port and an RS-232 port. The functions of these ports are described in this
section.
I/O Port
Channels can be selected through the remote port by providing contact closures between the appropriate pins.
The port also includes a +5V power supply and tally outputs which can be used to power and control an IN3546
audio switcher to provide audio follow video switching. Several contact closure type control devices are
available including:
IN3590 - An optional hard wired remote designed to work with IN3500 Series switchers.
Control System - many control systems are capable of providing contact closures.
Control Parameters
In order to select a channel, the channel select pin (pins 1 - 6 and pin 8) must be connected to Common
(pin 7).
The contact closures may be momentary or continuous (latching). However, if the closure is latching, it
must be opened before another channel can be selected.
Example: To switch to Input Channel #4, apply a contact closure between Pin 4 and Pin 7.

4
IN3526 OPERATION MANUAL - REV. 1 11/11/96 ©1996 - INLINE, INC.
Tally Output
The I/O port also provides tally outputs (pins 10 - 15) which may be used to trigger other devices (such as the
IN3546), or provide feedback to a control system. When a channel is selected, either from the front panel the I/O
port or RS-232 , the Tally Output for that channel is switched on. The Tally Output is high when off, and goes
low when switched on.
Control Port Pin Outs The I/O port is a Female 15 Pin D connector with the following pin outs:
Pin 1 Select Input 1 Pin 9 +5 volts DC
Pin 2 Select Input 2 Pin 10 Tally output for Input 6
Pin 3 Select Input 3 Pin 11 Tally output for Input 5
Pin 4 Select Input 4 Pin 12 Tally output for Input 4
Pin 5 Select Input 5 Pin 13 Tally output for Input 3
Pin 6 Select Input 6 Pin 14 Tally output for Input 2
Pin 7 Common Pin 15 Tally output for Input 1
Pin 8 Select Blank
Using the IN3546 Stereo Audio Switcher
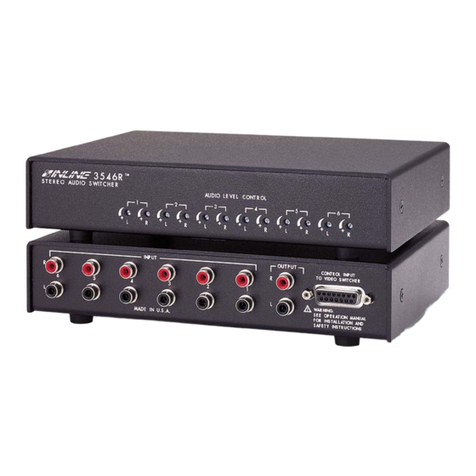
The IN3546 Stereo Audio Switcher may be attached to the IN3526 via the REMOTE CONTROL port. This
provides a +5V power supply for the IN3546 Switcher and a control link. When the IN3546 is attached to the
control port using an IN9112 control link cable, the IN3546 will automatically switch to the appropriate input
channel, mirroring the input selected on the attached RGBS switcher and adding audio-follow-video capability to
the switcher.

5
© 1996 - INLINE, INC. IN3526 OPERATION MANUAL - REV. 1 11/11/96
Using RS-232 Control
The IN3526 has an RS-232 ports which will accept serial commands from a control system,
computer serial port, or any other device capable of sending out serial ASCII commands at
compatible baud rates. All switching and most configuration and set-up parameters can be
controlled using RS-232 commands.
Communication Protocol:
The baud rate is selectable from 1200 to 19,200 baud. Communication parameters are as follows:
1200 baud (Factory default setting)
No Parity
8 data bits
1 stop bit
Protocol Structure:
All commands sent to the unit must contain a leading character, the actual command, and an ending character.
Each command must be completely executed by the IN3526 before it will accept a new command. When a
command is executed, the unit provides the response [OK] to indicate that the command was received and
executed. The response [ERR] indicates that there was a problem and the command was not executed.
The IN3526 can recognize one of four sets of leading and ending characters, also called the Command Codes.
These are: [ ] { } ( ) < >. The factory default for the Command Code is [ ]. The Command code can
only be changed via RS-232.
A complete command string consists of:
[The leading character
CH2 The actual command.
]The ending character
Some sample commands are as follows:
[CH1] Select Input 1
[FP0] Disable the front panel operation
CONTROLLING MULTIPLE INLINE PRODUCTS
Many INLINE products such as the IN3526, PATHFINDER, and the IN1024/IN1224/IN1424 scan doublers use
similar communication protocol structures. By setting each unit to a different Command Code, up to four
INLINE products can be controlled independently by a single RS-232 serial control port (Note: An RS-232
distribution amplifier may be required.)

6
IN3526 OPERATION MANUAL - REV. 1 11/11/96 ©1996 - INLINE, INC.
ADVANCED SETTINGS
MASTER/SLAVE SWITCHER
Large switching systems can be configured by cascading multiple IN3526 switchers. Connect the output of the
first switcher to Input 1 of the next switcher and continue for as many switchers as you are cascading. Also,
connect the RS-232 Transmit pin of the first switcher to the RS-232 Receive pin of the next switcher and
continue for as many switchers as you are cascading.
Lastly, you need to configure all switchers except the last one as a Master switcher. When an IN3526 is set-up as
a Master switcher, it transmits the RS-232 command [CH1] every time a switch occurs. This command causes
the next switcher to switch to channel 1, and this proceeds for all down-stream switchers so that the selected
channel is sent to the output. You can set an IN3526 as a Master or Slave switcher via a Power-On Setting.
(Note: All switchers must be set for the same baud rate and command codes for cascading to operate properly.)
A Slave switcher does not send out any RS-232 command when a switch occurs. This is the default mode of
operation.

7
© 1996 - INLINE, INC. IN3526 OPERATION MANUAL - REV. 1 11/11/96
POWER-ON SETTINGS
The power-on settings set the IN3526 for specific applications. These settings will generally be set by the
installing technician when the unit is first installed and rarely changed. Power-On settings are selected by
holding down a specific front panel button for approximately 3 seconds while applying power to the unit. These
settings are not selectable when the unit is already powered up (except through RS-232 commands.)
Reset to Factory
Default Settings Hold down the INPUT 1 button while applying power to the unit. This will reset
the unit to the following state:
Front Panel operation enabled
Slave Switcher operation
1200 baud
“[ ]” Command codes
Front Panel
Operation Hold down the INPUT 2 button while applying power to the unit. This will allow
the front panel and contact closure remote control to function (these can be
disabled by putting the unit in RS-232 Operation Only.)
RS-232 Operation
Only Hold down the INPUT 3 button while applying power to the unit. The front panel
and contact closure remote control will be disables. The only was to switch the
unit is via RS-232 control
Master Switcher Hold down the INPUT 4 button while applying power to the unit. This will set the
unit up as a master switcher (see Master/Slave Operation)
Slave Switcher Hold down the INPUT 5 button while applying power to the unit. This will set the
unit up as a slave switcher (see Master/Slave Operation)
Baud Rate
Selection Hold down the BLANK button while applying power to the unit. Upon releasing
the button, the BLANK LED will begin to flash. Press one of the input buttons to
select the baud rate shown below.
INPUT 1 1200 Baud
INPUT 2 2400 Baud
INPUT 3 4800 Baud
INPUT 4 9600 Baud
INPUT 5 19200 Baud

8
IN3526 OPERATION MANUAL - REV. 1 11/11/96 ©1996 - INLINE, INC.
RS-232 COMMAND PROTOCOL
Command* Function Response*
ACI3 Set baud rate to 1200, default setting OK
ACI4 Set baud rate to 2400 OK
ACI5 Set baud rate to 4800 OK
ACI6 Set baud rate to 9600 OK
ACI7 Set baud rate to 19200 OK
BLANK0 Blank output (no input selected) OK or CH1
BLANK1 Un-blank output (selects prvious input) OK or CH1
CH0 Blank output (same as pressing the front panel BLANK button) OK or CH1
CH1 Select Input 1 OK or CH1
CH2 Select Input 2 OK or CH1
CH3 Select Input 3 OK or CH1
CH4 Select Input 4 OK or CH1
CH5 Select Input 5 OK or CH1
CH6 Select Input 6 OK or CH1
CMDCD0 Select "[" & "]" OK
CMDCD1 Select "{" & "}" OK
CMDCD2 Select "(" & ")" OK
CMDCD3 Select "<" & ">" OK
FP Enable/Disable the front panel (toggle) OK
FP0 Disable the front panel OK
FP1 Enable the front panel OK
INF0 Get the firmware version IN3526 V1.0
INF1 Get the currently selected input 0 to 6 (0 is for Blank)
* Command codes are not shown for clarification purposes.
EXAMPLES
Description Command Response
Switch to Input 2 (for a Slave switcher) [CH2] [OK]
Switch to Input 2 (for a Master switcher) [CH2] [CH1]
Get status of input selected [INF1] [2]
Disable Front Panel operation [FP0] [OK]
Change baud rate to 4800 [ACI5] [OK]
Change command codes to { } [CMDCD1] {OK}

9
© 1996 - INLINE, INC. IN3526 OPERATION MANUAL - REV. 1 11/11/96
UNIVERSAL POWER SUPPLY
The IN3526 switcher employs a universal (switch mode) power supply which automatically adjusts to accept
input voltages worldwide. Input voltages can range between 90 and 260 VAC and frequency may range from 47
to 63 Hz. The power supply entry module uses an IEC standard male connector for power connection. U.S
domestic units are shipped with a standard IEC female to Edison male power cable.
Changing Fuses
The power entry module includes a quick-change fuse holder. This holder contains the main fuse and a spare. If
the unit does not power-up, check the fuse. If the fuse is blown:
1. Remove the power cord from the unit.
2. Use a flat blade screwdriver to pull out the fuse holder.
3. Replace the blown fuse with the spare.
4. Replace the spare fuse with a new 125 mA, 250 V fuse.
5. Push the fuse holder back into the casing.
SPECIFICATIONS
IN3526 Composite/S-Video Switcher
Inputs
Connector type Six BNC female for composite video
Six 4 pin mini-din female for S-Video
Signal Compatibility Composite Video, S-Video (Y/C), Monochrome with Sync
Output
Connector type One BNC female for composite video
One 4 pin mini-din female for S-Video
Bandwidth 200 MHz @ -3dB
Power
Universal Power Supply 90 - 260 VAC, 47 to 63 Hz.
Power Consumption 3 Watts maximum
Fuse 250 VAC, 125mA
Dimensions
Length x Depth x Height 8.5” x 6.5” x 1.75”
Optional Accessories
Stereo Audio Switcher IN3546 Stereo Audio Switcher - Featuring 6 Inputs and 1 Output, the IN3546
adds stereo audio -follow-video capabilities to IN3500 Series Switchers. The
IN3546 attaches to the IN3500 Series I/O port and receives both power and
switching commands from the control port.
Control IN3590 Wired Remote Control with 25' Long Cable. Allows Remote Channel
Selection for IN3500 Series Switchers

10
IN3526 OPERATION MANUAL - REV. 1 11/11/96 ©1996 - INLINE, INC.
WARRANTY
♦INLINE warrants the equipment it manufactures to be free from defects in materials and workmanship.
♦If equipment fails because of such defects and INLINE is notified within two (2) years from the date of
shipment, INLINE will, at its option, repair or replace the equipment at its plant, provided that the
equipment has not been subjected to mechanical, electrical, or other abuse or modifications.
♦Equipment that fails under conditions other than those covered will be repaired at the current price of
parts and labor in effect at the time of repair. Such repairs are warranted for ninety (90) days from the
day of re-shipment to the Buyer.
♦This warranty is in lieu of all other warranties expressed or implied, including without limitation,
any implied warranty or merchantibility or fitness for any particular purpose, all of which are
expressly disclaimed.
The information in this manual has been carefully checked and is believed to be accurate. However, Inline, Inc. assumes
no responsibility for any inaccuracies that may be contained in this manual. In no event will Inline, Inc. be liable for
direct, indirect, special, incidental, or consequential damages resulting from any defect or omission in this manual, even if
advised of the possibility of such damages. The technical information contained herein regarding IN3526/IN3546 features
and specifications is subject to change without notice.
All Rights Reserved © Copyright 1996
©INLINE, INC. ♦♦ 1901 E. LAMBERT ROAD, SUITE 110 ♦♦ LA HABRA, CA 90631
(800) 882-7117 ♦♦ (310) 690-6767 ♦♦ FAX (310) 691-5247 ♦♦ www.inlineinc.com
Table of contents
Other Inline Switch manuals

Inline
Inline 33271O User manual

Inline
Inline 62652I User manual

Inline
Inline 33051H User manual

Inline
Inline IN3552R User manual

Inline
Inline 32305Q User manual

Inline
Inline 62602I User manual

Inline
Inline IN3546R User manual

Inline
Inline 33293I User manual

Inline
Inline 60603I User manual

Inline
Inline IN3526vi User manual

Inline
Inline 33271N User manual

Inline
Inline A3H User manual
Inline
Inline IN3606 User manual

Inline
Inline 32316P User manual

Inline
Inline 62642I User manual

Inline
Inline IN3504 User manual

Inline
Inline IN3554 User manual

Inline
Inline IN3564HR User manual

Inline
Inline 63652I User manual
Inline
Inline 32308M User manual