manuals.online logo
Brands
  1. Home
  2. •
  3. Brands
  4. •
  5. Steren
  6. •
  7. Switch
  8. •
  9. Steren SWI-600 User manual

Steren SWI-600 User manual

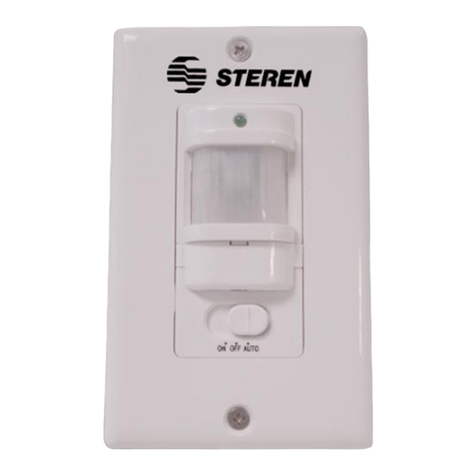
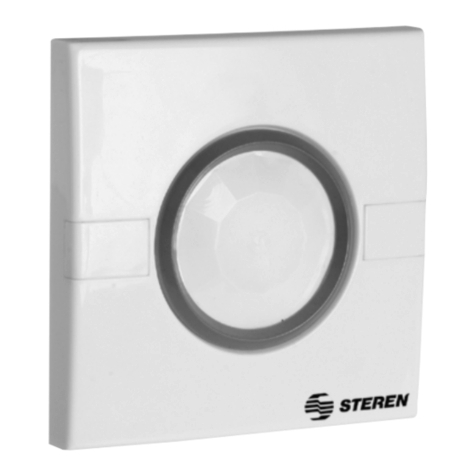
Product / Producto: WIRELESS
WALL SWITCH AND 4-CHANNEL
LIGHT SWITCH REMOTE CONTROL /
INTERRUPTOR DE PARED
INALÁMBRICO Y CONTROL
REMOTO PARA INTERRUPTOR DE
PARED
Model / Modelo: SWI-600, SWI-610,
SWI-620
Brand / Marca: Steren
CONDICIONES
1. Para hacer efectiva esta garantía se requiere: La presentación de esta póliza y del producto, en el lugar en donde fue adquirido o en ELECTRONICA STEREN S.A. DE C.V.
2. ELECTRONICA STEREN S.A. DE C.V. se compromete a reparar el producto en caso de estar defectuoso sin ningún cargo al consumidor.
3. El tiempo de reparación en ningún caso será mayor a 30 días contados a partir de la recepción del producto en cualquiera de los sitios en donde pueda hacerse efectiva la
garantía.
4. El lugar donde puede adquirir partes, componentes, consumibles y accesorios, así como hacer válida esta garantía es: En cualquiera de las direcciones arriba mencionadas.
ESTA GARANTIA NO ES VALIDA EN LOS SIGUIENTES CASOS:
1. Cuando el producto ha sido utilizado en condiciones distintas a las normales.
2. Cuando el producto no ha sido operado de acuerdo con el instructivo de uso.
3. Cuando el producto ha sido alterado o reparado por personas no autorizadas por ELECTRONICA STEREN S.A. DE C.V.
Nota: El consumidor podrá solicitar que se haga efectiva la garantía ante la propia casa comercial, donde adquirió el producto. Si la presente garantía se extraviara, el
consumidor puede recurrir a su proovedor para que le expida otra póliza de garantía, previa presentación de la nota de compra o factura respectiva.
DATOS DEL DISTRIBUIDOR
DISTRIBUTION / NOMBRE / DISTRIBUIDOR:
ADDRESS / DOMICILIO:
PRODUCT / PRODUCTO: BRAND / MARCA:
MODEL / MODELO: SERIAL NUMBER / No. DE SERIE:
DATE OF DELIVERY / FECHA DE ENTREGA:
Call Center / Centro de Atención a Clientes
del Interior 01 800 500 9000
Mexico City / Cd. de México: 53 54 22 90
Warranty
CONDITIONS:
1. This warranty card with all the required information, the invoice or purchase ticket, the product box or package, and the product, must be presented with the product
when warranty service is required.
2. If the product stills on the warranty time, the company will repair it free of charge even the transportation charges.
3. The repairing time will not exceed 30 natural days, from the day the claim was received.
4. Steren sells parts, components, consumables and accessories to customer, as well as warranty service, at any of the following addresses:
THIS WARRANTY IS VOID ON THE NEXT CASES:
If the product has been damage by an accident, acts of God, mishandling, leaky batteries, failure to follow enclosed instructions, improper repair by unauthorized
personal, improper safe keeping or otherwise.
Notes:
a) The customer can also claim the warranty service on the purchase establishment.
b) If you lose the warranty card, we can reissue it just showing the invoice or purchase ticket.
Póliza de Garantía
This Steren product is warranted under
normal usage against defects in
workmanship and materials to the original
purchaser for one year from the date of
purchase.
Garantiza este producto por el término de
un año en todas sus partes y mano de obra
contra cualquier defecto de fabricación y
funcionamiento, a partir de la fecha de
entrega.
SWI-600
SWI-610 SWI-620
V0906
INSTRUCTIVO DE USO DE INTERRUPTOR DE PARED INALÁMBRICO
Y CONTROL REMOTO INALÁMBRICO PARA INTERRUPTOR DE
PARED
Modelo: SWI-600, SWI-610, SWI-620
Marca: Steren
Antes de utilizar su nuevo equipo lea este instructivo para evitar
cualquier mal funcionamiento. Guárdelo para futuras referencias.
El control remoto inalámbrico digital puede controlar hasta 4 diferentes
interruptores (los interruptores deben ser inalámbricos, modelos SWI-610
y/o SWI-620), cada interruptor puede controlar 1 lámpara o carga
equivalente a 250W
Los interruptores pueden ser sencillos o dobles.
El control cuenta con 4 canales A, B, C y D permitiéndole controlar hasta 4
lámparas (una por cada interruptor). Las lámparas pueden ser
incandescentes o fluorescentes.
El interruptor de pared ha sido diseñado con un estilo moderno por lo que
es la perfecta combinación con cualquier tipo de decoración. Dependiendo
de su modelo, contará con un apagador (SWI-610) o dos apagadores
(SWI-620) en una sola placa. Los interruptores junto con el control remoto
son perfectos para encender o apagar lámparas desde el lugar en el que
se encuentre.
IMPORTANTE
Asegúrese de desconectar la corriente eléctrica antes de realizar alguna
instalación, para evitar un choque eléctrico.
En caso de que NO tenga CONOCIMIENTOS de electricidad, se
recomienda acudir con un técnico ESPECIALISTA.
Cada modelo se vende por separado.
NOTAS:
En una instalación eléctrica podemos contar con 4 tipos de cables:
Cable de línea “ + ”
Cable neutro “ - ”
Cable a tierra “ ”
Cable de retorno (principalmente conectado entre los apagadores y las
lámparas)
INSTALACIÓN DEL INTERRUPTOR DE PARED
Para comenzar la instalación de su interruptor, es necesario que
cuente con una caja de montaje de pared (chalupa).
1.- Ubique el cable de la energía (*1) e introdúzcalo en el orificio marcado
con el número 1.
2.- Ubique el cable neutro (*2) e introdúzcalo en el orificio marcado con el
número 0 o la letra L.
3.- Atornille firmemente a fin de realizar un buen contacto y evitar su
desprendimiento.
4.- Asegure la placa de los interruptores en la caja de montaje de pared.
5.- Coloque la placa de plástico final encima de los interruptores.
*1 Cable de línea “+“
*2 Cable de retorno a la lámpara (foco)
INSTRUCTION MANUAL FOR WIRELESS WALL SWITCH AND
4-CHANNEL LIGHT SWITCH REMOTE CONTROL
Model: SWI-600, SWI-610, SWI-620
Brand: Steren
Before using your new device, please read this instruction manual to
prevent any damage. Put it away in a safe place for future references.
The wireless digital remote control can control up to 4 different wall switch
(the wall switch must be wireless such as models SWI-610 and/or
SWI-620), each switch can control a lamp or an equivalent charge of
250W
The wall switch can be single or double.
The remote control counts with 4-channels A, B, C and D allowing you to
control up to 4 different lamps (one per switch). You can use incandescent
or fluorescent bulb lamps.
The wall switch has been designed with a modern style, and is the perfect
combination with all kind of decoration. Depending of the model, you
counts with one switch (SWI-610) or two switches (SWI-620) all in one
plaque. The switch and the remote control are perfect to power on or
power off the lamps wherever you are inside of your home or office.
IMPORTANT
Make sure to disconnect the electrical current system, before make any
installation, to avoid an electrical shock.
If you don't have any electricity knowledge, go with an electrician.
Each model sold separately.
NOTES:
You can find 4 different types of cables in an electrical installation:
Line wire “ + ”
Neutral wire “ - ”
Ground wire “ ”
Retunring cable (basically is the connection between the switch and the
lamps)
INSTALLATION OF THE WALL SWITCH
To start the installation of the wall switch, is necessary that you have
a back box.
1.- Locates the energy wire (*1) and put it on the hole marked with number
1.
2.- Locates the neutral wire (*2) and put it on the hole marked with number
0 o la letra L
3.- Screw them firmly, in order to have a good contact and avoid their
detachment.
4.- Fasten the switch plaque on the back box.
5.- Place the plastic plaque over the switches.
*1 Line wire
*2 Return to lamp wire (bulb light)
CONTROLES
1.- Interruptor de encendido ............. Enciende o apaga el equipo
conectado al interruptor de pared
2.- Indicador LED .............................. Enciende cuando el interruptor
de pared está en proceso de
configuración
3.- Botón de Configuración ............... Permite entrar al modo de
configuración del control remoto
SWI-600 (el control remoto se
vende por separado)
4.- Botones de selección .................. Botones de programación para
el encendido / apagado de
equipos conectados a los
interruptores de pared modelos
SWI-610 y SWI-620 (los
interruptores se venden por
separado)
5.- Antena telescópica ...................... Permite el envío de señal del
control remoto a los interruptores
de pared modelos SWI-610 y
SWI-620 (los interruptores se
venden por separado)
CONTROLS
1.- On / Off switch ............................ Power on or power off the
connected device to the wall
switch
2.- Indicating LED ........................... Light on when the wall switch
is in learning process
3.- Learning button ........................... Allow one to enter to learning
mode on the remote control
model SWI-600 (remote control
sold separately)
4.- Selection buttons ......................... Programmed buttons to power
on or power off the connected
devices onto the wall switch
(SWI-6100 or SWI-620) (wall
switch sold separately)
5.- Telescopic antenna ........................ Send signal from remote control
to wall switch (models SWI-610
and/or SWI-620) (wall switch
sold separately)
Fig. 1
1
0
Caja de montaje de pared
(Chalupa)
/ Back box
Cable de línea
/ Line wire
Cable de retorno
a lámpara
/ Return to
lamp wire
Cable de línea
/ Line wire
Cable de retorno
a lámpara
/ Return to
lamp wire
Cable neutro
/ Neutral wire
CONFIGURACIÓN DEL CONTROL REMOTO SWI-600 Y LOS
INTERRUPTORES SWI-610 / SWI-620
Asegúrese de que el interruptor de pared esté correctamente
conectado a la corriente eléctrica.
1.- Retire la cubierta superior del interruptor de pared que desee controlar
(Fig. 2) así como el botón de apagado / encendido (Fig. 3).
2.- Presione el interruptor de encendido (1), la lámpara se encenderá.
3.- Presione el botón de configuración (3) con un objeto puntiagudo. El
LED indicador comenzará a parpadear (2).
4.- Ubique el control remoto hacia el interruptor de pared.
5. Presione el botón con el que desea controlar el interruptor en el control
remoto (A, B, C o D) (4). El LED indicador (2) se encenderá una vez más y
se apagará después de un segundo.
6.- Presione el botón con el que programó el interruptor (4), la lámpara se
apagará y encenderá cuando lo desee.
Notas:
Si no presiona algún botón del control remoto durante el proceso de
configuración en un lapso de 16 segundos, el interruptor saldrá del modo
de configuración.
Cuando realice el proceso de configuración extienda la antena del control
remoto en su totalidad.
Si desea utilizar otro control remoto repita los pasos 2 al 6 para configurar
el nuevo equipo.
ESPECIFICACIONES
Control
Entrada: 12V (1 batería A27)
Frecuencia: 315MHz
Alcance: Hasta 25m
Interruptores SWI-610 / SWI-620
Contactos: 127V~ 60Hz 2A
Potencia máxima: 250W
Nota:
El diseño del producto, las especificaciones y las ilustraciones pueden
cambiar sin previo aviso.
HOW TO CONFIGURE THE REMOTE CONTROL SWI-600 AND THE
WALL SWITCH SWI-610/ SWI-620
Make sure that the wall switch is correctly installed to electrical
current system.
1.- Release the top cover from the wall switch (Fig. 2). Release the on / off
button (Fig. 3), too.
2.- Press on/off switch (1), the lamp will light on.
3.- Press Learning button (3) with a pointed object. The indicating LED (2)
starts to blink.
4.- Aim the remote control to the wall switch.
5.- Press the button which you want to control the wall switch (A, B, C or
D) (4) once. The indicating LED (2) blinks once again and then turn off
after a second.
6.- Press the programmed button (4), the lamp will turn off and turn on.
Notes:
If you don't send any signal from the remote control to the wall switch
during learning process after 16 seconds, the wall switch will go out from
learning mode.
When you realize the remote control Learning process, extend the
antenna totally.
When you requires to use another remote control, repeat steps 2 to 6 to
configure the new device.
SPECIFICATIONS
Control
Input: 12V (1 battery type A27)
Frequency: 315MHz
Maximum distance: Up to 82ft
SWI-610 / SWI-620 Switches
Outlets: 127V~ 60Hz 2A
Maximum power: 250W
Note:
Product design, specifications and illustrations are subject to change,
without notice.
Fig. 2 Fig. 3

Other manuals for SWI-600

1

This manual suits for next models

2

Other Steren Switch manuals

Steren COM-315 User manual

Steren

Steren COM-315 User manual

Steren COM-320 User manual

Steren

Steren COM-320 User manual

Steren SHOME-140 User manual

Steren

Steren SHOME-140 User manual

Steren 201-737 User manual

Steren

Steren 201-737 User manual

Steren EXT16-4B User manual

Steren

Steren EXT16-4B User manual

Steren 550-010 User manual

Steren

Steren 550-010 User manual

Steren COM-365 User manual

Steren

Steren COM-365 User manual

Steren SHOME-110 User manual

Steren

Steren SHOME-110 User manual

Steren SWI-005 User manual

Steren

Steren SWI-005 User manual

Steren USB-524 User manual

Steren

Steren USB-524 User manual

Steren SWI-024 User manual

Steren

Steren SWI-024 User manual

Steren EL-101 User manual

Steren

Steren EL-101 User manual

Steren SWI-008 User manual

Steren

Steren SWI-008 User manual

Steren SWI-510 User manual

Steren

Steren SWI-510 User manual

Steren 200-386 User manual

Steren

Steren 200-386 User manual

Steren USB-523 User manual

Steren

Steren USB-523 User manual

Steren SWI-50 User manual

Steren

Steren SWI-50 User manual

Steren USB-537 User manual

Steren

Steren USB-537 User manual

Steren V0310 User manual

Steren

Steren V0310 User manual

Steren SWI-005 User manual

Steren

Steren SWI-005 User manual

Steren COM-315 User manual

Steren

Steren COM-315 User manual

Steren USB-528 User manual

Steren

Steren USB-528 User manual

Steren ALA-003 User manual

Steren

Steren ALA-003 User manual

Steren FASTHOME 550-030 User manual

Steren

Steren FASTHOME 550-030 User manual

Popular Switch manuals by other brands

Signady SCU91T user manual

Signady

Signady SCU91T user manual

steute Ex ZS 80-3G Mounting and wiring instructions

steute

steute Ex ZS 80-3G Mounting and wiring instructions

Albalá Ingenieros ASW3000C01 manual

Albalá Ingenieros

Albalá Ingenieros ASW3000C01 manual

Rose electronics UltraMatrix AV DVI Installation and operation manual

Rose electronics

Rose electronics UltraMatrix AV DVI Installation and operation manual

ORiNG TPS-3882GT-M12-BP1 user manual

ORiNG

ORiNG TPS-3882GT-M12-BP1 user manual

FineTek SIS Operation manual

FineTek

FineTek SIS Operation manual

technetix AIMA-RFSW Product user manual

technetix

technetix AIMA-RFSW Product user manual

Siemens RUGGEDCOM RX1511 installation manual

Siemens

Siemens RUGGEDCOM RX1511 installation manual

SMC Networks SMC8126L2 Management guide

SMC Networks

SMC Networks SMC8126L2 Management guide

Edimax EK-PS2P user manual

Edimax

Edimax EK-PS2P user manual

Cisco Small Business 200 Series Administration guide

Cisco

Cisco Small Business 200 Series Administration guide

Daxten SCOUTMICRO brochure

Daxten

Daxten SCOUTMICRO brochure

Rockwell Automation Allen-Bradley Guardmaster 440G-LZS21SP... user manual

Rockwell Automation

Rockwell Automation Allen-Bradley Guardmaster 440G-LZS21SP... user manual

Ubiquiti EdgeSwitch ES-10XP quick start guide

Ubiquiti

Ubiquiti EdgeSwitch ES-10XP quick start guide

Siemens SIMATIC NET RUGGEDCOM M2100F installation manual

Siemens

Siemens SIMATIC NET RUGGEDCOM M2100F installation manual

DEGREE-N DIA2104-005 instruction manual

DEGREE-N

DEGREE-N DIA2104-005 instruction manual

Omron WLM - datasheet

Omron

Omron WLM - datasheet

Ruijie RG-S5750-S Series Hardware  installation and reference guide

Ruijie

Ruijie RG-S5750-S Series Hardware installation and reference guide

manuals.online logo
manuals.online logoBrands
  • About & Mission
  • Contact us
  • Privacy Policy
  • Terms and Conditions

Copyright 2025 Manuals.Online. All Rights Reserved.