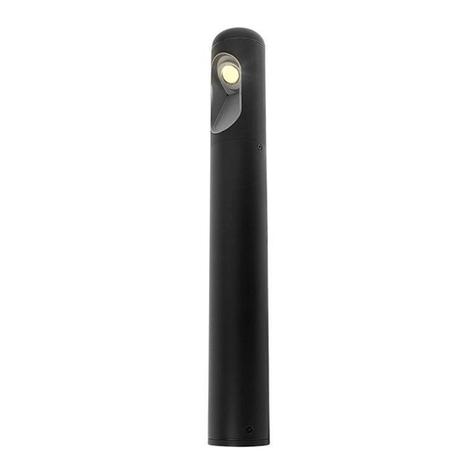
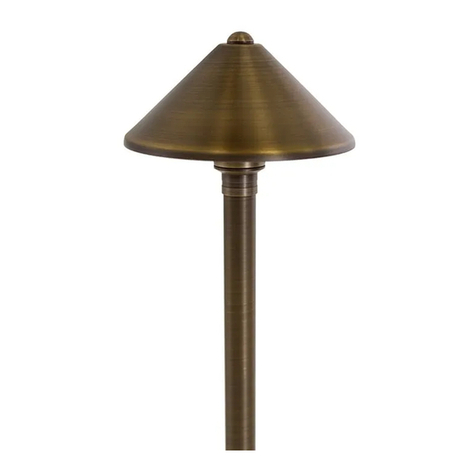
Inlite FISH EYE LOW User manual

in-lite
www.in-lite.com
05010

FISH EYE LOW/HIGH (WW)
in-lite
05010
NL Handleiding
EN Manual
D Installationshinweise
F Manuel d’utilisation
ES Manual de instrucciones

FISH EYE LOW/HIGH (WW)

1 2

deze vervolgens door de schroeven aan te draaien. Let op! Draai de
schroeven niet te strak aan, vast is vast.
Lichtbron
Het armatuur is uitgerust met een hoogwaardige LED lichtbron. Deze
lichtbron kenmerkt zich door een lange levensduur (ca. 25.000 uur) en
een hoge lichtopbrengst. Het energieverbruik en de warmteontwikke-
ling zijn daarentegen extreem laag.
Belangrijk!
Gebruik de laagspanningskabel nooit in combinatie met 100-240V.
Deze is alleen geschikt voor het gebruik in combinatie met een laag-
spanningssysteem, 12V. Dit product alleen gebruiken binnen het in-lite
systeem. Bij gebruik van andere dan in-lite producten vervalt de
garantie.
Geniet van de verlichting in uw tuin.
Inhoud
1x FISH EYE LOW/HIGH (WW) 12V/5W
1x grondpen
1x RVS ring
3x bevestigingsschroef
1x Easy-Lock
1x Torx sleutel
Materiaal
RVS, slagvast polycarbonaat
Lees voorafgaande aan de installatie de volgende voorschriften.
Geadviseerd wordt deze installatievoorschriften te bewaren.
Ondanks dat het 12V systeem veilig is, raden we u aan om een
erkend installateur de installatie te laten controleren.
Gebruik
Dit armatuur is op twee verschillende manieren te gebruiken:
Met kopreector
Geschikt als bovengrondse verlichting voor in de tuin of als licht-
markering langs pad, terras of oprit.
Zonder kopreector
Geschikt als spot voor het uitlichten van speciale plekken in de tuin.
Gebruik hiervoor de 360° draaibare lichtunit. Om de ‘Fish Eye’ te rich-
ten moeten de drie schroeven van de bovenplaat een klein beetje los
worden gedraaid. Draai het oog naar de gewenste positie en xeer
NL

ES
Opciones para la colocación del
cable de 12 V
A Lineal
Se desenrolla el cable y se
conecta el transformador.
14/2 a 40 metros / 131 pies
10/2 a 80 metros / 262 pies
B Derivada
Puede cortar el cable en 2 tramos
y volver a unirlos mediante un
empalme de cables (CC-2.)
14/2 hasta 40 metros / 131 pies
10/2 hasta 80 metros / 262 pies
C En circuito
En caso de cables 14/2 de más
de 40 metros / 131 pies y cables
10/2 de más de 80 metros / 262
pies, se recomienda hacer una
conexión en circuito. Así, la
alimentación se hace por los
2 lados y se evita la pérdida
innecesaria de corriente,
consiguiendo un rendimiento
lumínico óptimo.
En caso de utilizar armaduras
con un bajo consumo de
potencia, el efecto de la ‘pérdida
de rendimiento lumínico’ será
menor con respecto a las
armaduras con un alto consumo
de potencia.
El extremo del cable se devuelve
y se conecta de nuevo al cable
lo más cerca posible del
transformador. Asegúrese de
unir los mismos lados del cable,
ranurado o liso.
Longitud del cable 14/2 hasta ±
60 metros / 197 pies
Longitud del cable 10/2 hasta
160 metros / 525 pies*
* A excepción de un esquema de
iluminación con foco de 50 W.
Los cables 14/2 y 10/2 pueden
someterse a cargas de hasta
250 W.

NL
Het installeren van het armatuur op 12V
Door de reeds gemonteerde lichtbron is het armatuur direct geschikt
voor gebruik. U hoeft dus niet eerst de lichtbron te plaatsen.
Het armatuur wordt gemonteerd geleverd, met kopreector. Voor
gebruik zonder de kopreector draait u de drie Torx schroeven los en
vervangt u de kopreector door de bijgeleverde RVS ring.
Stap 1
Het armatuur kan worden bevestigd op een harde ondergrond middels
bijgeleverde schroeven of in een zachte ondergrond worden geplaatst
met behulp van de bijgeleverde grondpen. De grondpen kan een-
voudig bevestigd worden door deze in de onderkant van de voet van
het armatuur te draaien.
Verwijder bij gebruik op een harde ondergrond eerst de zwarte grond-
plaat uit de voet van het armatuur middels het losdraaien van de Torx
schroeven. Bevestig daarna de plaat op de ondergrond met behulp
van bijgeleverde schroeven. Plaats daarna de armatuur terug op de
grondplaat en draai de Torx schroeven weer aan.
Stap 2
Sluit de Easy-Lock connector aan op de hoofdkabel. (Afb. 1)
a. Er zijn twee kabelgootjes. Het gootje met de smalste uitsparing is
geschikt voor de 14/2 en 10/2 hoofdkabel. Wordt er gebruik ge-
maakt van de oude (dikke) 10/2 kabel, gebruik dan het gootje met
de brede uitsparing.
b. Klem het juiste kabelgootje bovenop de hoofdkabel. Er blijft geen
ruimte over tussen de kabel en het gootje.
c. Plaats het kabelgootje (met de kabel aan de onderzijde) in de Easy-
Lock connector.
d. Draai de dop met schroefdraad op de Easy-Lock connector. De
contacten worden nu door het isolatiemateriaal van de kabel ge-
drukt. Bij het aandraaien van de dop, wordt er een klein beetje gel
tegen de contacten in de Easy-Lock connector geperst. Dit dient
om de contacten te beschermen tegen vocht. Mogelijk komt er ook
wat gel uit de Easy-Lock connector: was dan na installatie de han-
den met water en zeep (en/of vóór een maaltijd) en voorkom oog-
contact met de gel.
Stap 3
Maak verbinding tussen voedingskabel en armatuur door de mini-
connector aan te sluiten. (Afb. 2)
Indien de lamp niet correct functioneert, controleer dan of de Easy-
Lock connector juist op de hoofdkabel is aangesloten. Doe dit ook voor
de mini-connector. Herhaal stap 2 en 3. Controleer hierbij of de con-
tacten van de Easy-Lock connector tijdens het aansluiten van het ar-
matuur op de hoofdkabel niet zijn geknikt. Komt u hier niet uit, neem
dan contact op met uw dealer.
Algemeen onderhoudsadvies
Wij adviseren u het armatuur minimaal eens per jaar met een schone
doek en warm water af te nemen.

EN
Contents
1x FISH EYE LOW/HIGH (WW) 12 V / 5 W
1x ground stake
1x stainless steel ring
3x xing screws
1x Easy-Lock
1x Torx key
Material
Stainless steel, impact-resistant polycarbonate
Please read the following instructions before installing. You are
advised to keep these installation instructions in a safe place.
Although a 12 V system is safe, we advise you to have a qualied
electrician check the installation.
Use
This xture can be used in two ways:
With top reector
Suitable for above-ground lighting in the yard or to mark a pathway,
drive or patio.
Without top reector
Suitable as a spot light to illuminate special places in the yard. Use the
360° rotating light unit light unit for this. To direct the ‘Fish Eye’, you
must rst slightly loosen the three screws of the top plate. Turn the eye
to the desired position and then x it in place by tightening the screws.
Attention! Do not over-tighten the screws; only tighten them enough to
x the eye in place.
Lamp
The xture is equipped with a high-quality LED lamp. These lamps
have a long life (about 25,000 hours) and a high light output and their
power consumption and the heat produced are extremely low.
Important!
Never connect the low-voltage cable directly to a 100-240 V power
source. It is only suitable for use in combination with a 12 V low-voltage
system. This product should only be used within the in-lite system. Use
of products other than those made by in-lite will invalidate the warranty.
Enjoy the lighting in your yard.

EN
Connecting the xture to 12 V
The already installed lamp means the xture is immediately ready for
use. Therefore you do not need to install the lamp rst.
The xture is delivered ready assembled and with a top reector. To
use without the top reector loosen the three Torx screws and replace
the top reector with the stainless steel ring supplied.
Step 1
The xture can be mounted on a hard surface using the screws sup-
plied or in soft surface using the ground stake supplied. The ground
stake is easily xed by screwing it in the underside of the foot of the
xture.
When using on a hard surface rst remove the black ground plate from
the foot of the xture by loosening the Torx screws. Next, x the plate
to the surface using the screws supplied. Then place the xture back
onto the ground plate and tighten the Torx screws.
Step 2
Join the Easy-Lock connector to the main cable. (Fig. 1)
a. There are two cable ducts. The duct with the narrowest slot is suit-
able for the 14/2 and 10/2 main cable. When using the old (thick)
10/2 cable, you should use the duct with the wide slot.
b. Clamp the correct cable duct on top of the main cable. There
should be no space left between the cable and the duct.
c. Place the cable duct (with the cable at the bottom) in the Easy-
Lock connector.
d. Tighten the threaded cap on the Easy-Lock connector. This will
cause the contacts to be pushed through the insulation on the
cable. In tightening the cap, a little gel is applied to the contacts in
the Easy-Lock connector. This serves to protect the contacts
against moisture. A little gel may possibly come out of the Easy-
Lock connector: so after installation (and/or before a meal), wash
your hands with soap and water, and avoid the gel coming into
contact with your eyes.
Step 3
Connect the power cable to the xture by connecting the mini-
connector. (Fig. 2)
If the lamp does not work correctly, check that the Easy-Lock connec-
tor is properly connected to the main cable. Do the same for the mini-
connector. Repeat steps 2 and 3. When the xture is connected to the
main cable also check that the contacts of the Easy-Lock connector
are not bent. If you have any problems, contact your dealer.
General maintenance advice
We advise wiping the xture down at least once a year using a clean
cloth and warm water.

D
Inhalt
1x FISH EYE LOW/HIGH (WW) 12 V / 5 W
1x Bodenspieß
1x Edelstahlring
3x Befestigungsschraube
1x Easy-Lock
1x Torx-Schlüssel
Material
Edelstahl, schlagfestes Polycarbonat
Lesen Sie vor der Installation die folgenden Hinweise aufmerksam
durch. Es wird empfohlen, diese Installationshinweise aufzubewahren.
Trotz der Sicherheit des 12-V-Systems empfehlen wir Ihnen, die
Installation von einem anerkannten Installateur prüfen zu lassen.
Verwendung
Diese Armatur kann auf zwei Arten verwendet werden:
Mit Kopfreektor
Oberirdische Beleuchtung für den Garten oder als Lichtmarkierung an
Wegen, Auffahrten oder Terrassen.
Ohne Kopfreektor
Als Spot zur Anstrahlung besonderer Elemente im Garten. Verwenden
Sie hierzu die um 360º drehbare Lichtquelle. Zur Ausrichtung des Fish
Eye müssen zunächst die drei Schrauben der Deckplatte leicht gelo-
ckert werden. Drehen Sie das Fish Eye in die gewünschte Richtung
und xieren Sie es in dieser Position, indem Sie die Schrauben wieder
anziehen. Achtung! Ziehen Sie die Schrauben nicht übermäßig an,
sondern nur, bis sie fest sitzen.
Lichtquelle
Diese Armatur ist mit einer hochwertigen LED-Lichtquelle ausgestattet.
Diese Lichtquelle kennzeichnet sich durch eine lange Lebensdauer
(ca. 25 000 Stunden) und eine hohe Lichtausbeute. Der Energie-
verbrauch und die Wärmeentwicklung dagegen sind extrem niedrig.
Achtung!
Verwenden Sie das Niederspannungskabel niemals mit einer Span-
nung von 100-240 V. Das Kabel eignet sich ausschließlich für den
Betrieb an einem Niederspannungssystem von 12 V. Verwenden Sie
dieses Produkt ausschließlich zusammen mit dem in-lite-System. Bei
Verwendung anderer Produkte als der in-lite-Produkte erlischt die
Garantie.
Wir wünschen Ihnen viel Freude mit Ihrer Gartenbeleuchtung!

D
Anschluss der Armatur an 12 V
Dank der bereits installierten Lichtquelle ist die Armatur gebrauchs-
fertig; es braucht also nicht erst eine Lichtquelle eingesetzt zu werden.
Die Armatur wird fertig montiert mit Kopfreektor geliefert. Wenn Sie
die Armatur ohne Kopfreektor verwenden möchten, lösen Sie die
drei Torx-schrauben und ersetzen Sie den Kopfreektor durch den
mitgelieferten Edelstahlring.
Schritt 1
Die Armatur wird auf hartem Untergrund mit den mitgelieferten
Schrauben und in weichen Böden mit dem mitgelieferten Bodenspieß
befestigt. Der Bodenspieß ist durch einfaches Eindrehen in den Fuß
der Armatur zu befestigen.
Entfernen Sie bei Verwendung auf hartem Untergrund zunächst die
schwarze Bodenplatte aus dem Fuß der Armatur, indem Sie die Torx-
schrauben lösen. Befestigen Sie die Platte anschließend mit den mit-
gelieferten Schrauben auf dem Untergrund. Setzen Sie die Armatur
dann wieder auf die Bodenplatte auf und ziehen Sie die Torx-schrauben
fest.
Schritt 2
Schließen Sie den Easy-Lock-Verbinder an das Hauptkabel an. (Abb. 1)
a. Es sind zwei Kabelkanäle vorhanden. Der Kanal mit der schmals-
ten Aussparung ist für das 14/2- und 10/2-Hauptkabel geeignet.
Wenn das alte (dicke) 10/2-Kabel verwendet wird, dann den Kanal
mit der breiten Aussparung verwenden.
b. Den richtigen Kabelkanal auf das Hauptkabel klemmen. Es bleibt
kein Zwischenraum zwischen Kabel und Kanal.
c. Den Kabelkanal (mit dem Kabel an der Unterseite) in den Easy-
Lock-Verbinder einsetzen.
d. Schrauben Sie nun den Deckel mit Gewinde auf den Easy-Lock-
Verbinder. Die Kontakte werden so durch die Isolierung des Kabels
gedrückt. Beim Zuschrauben des Deckels wird zum Schutz der
Kontakte gegen Feuchtigkeit eine kleine Menge Gel gegen die
Kontakte im Easy-Lock-Verbinder gepresst. Sollte etwas Gel aus
dem Easy-Lock-Verbinder austreten, waschen Sie sich bitte nach
der Installation (und vor dem Essen) die Hände mit Wasser und
Seife und vermeiden Sie, dass Gel in die Augen gelangt.
Schritt 3
Verbinden Sie das Netzkabel mit der Armatur, indem Sie den Mini-
Verbinder anschließen. (Abb. 2)
Sollte die Lampe nicht funktionieren, prüfen Sie, ob der Easy-Lock-
Verbinder ordnungsgemäß an das Hauptkabel angeschlossen ist.
Prüfen Sie auch den Mini-Verbinder. Wiederholen Sie den 2. und 3.
Schritt. Kontrollieren Sie dabei, ob die Kontakte des Easy-Lock-Ver-
binders beim Anschluss der Armatur an das Hauptkabel nicht geknickt
wurden. Wenn die Beleuchtung weiterhin nicht funktioniert, wenden
Sie sich bitte an Ihren Händler.
Allgemeiner Wartungshinweis
Wir empfehlen Ihnen, die Armatur mindestens einmal jährlich mit
einem sauberen Tuch und warmem Wasser abzuwischen.

F
Contenu
1x FISH EYE LOW/HIGH (WW) 12 V/5 W
1x piquet de terre
1x anneau inox
3x vis de xation
1x Easy-Lock
1x clé Torx
Matériau
Inox, polycarbonate résilient
Lisez attentivement les instructions suivantes avant de procéder
à l’installation. Il est vivement conseillé de conserver les présentes
instructions d’installation.
Bien que le système 12 V soit sécurisé, nous vous conseillons de le
faire contrôler par un installateur électricien agréé.
Utilisation
Cette armature s’utilise de deux façons différentes :
Avec réecteur de tête
Éclairage de surface pour le jardin ou le balisage lumineux de
sentiers, terrasses ou voies d’accès.
Sans réecteur de tête
Spot d’éclairage d’endroits spéciques du jardin. Dans ce cas, utiliser
la source lumineuse pivotant à 360°. Pour faire pivoter l’éclairage
« Fish Eye », desserrer légèrement les trois vis placés sur la partie
supérieure de l’armature. Positionner la source lumineuse sous
l’angle souhaité, puis la xer en serrant les vis. Attention ! Ne pas trop
serrer les vis, il suft de xer la position.
Source lumineuse
Cette armature est dotée d’une source lumineuse LED de qualité supé-
rieure. Cette source lumineuse se distingue par sa grande longévité
(environ 25 000 heures) et un excellent rendement lumineux. Par
contre, la consommation d’énergie et la production de chaleur sont
extrêmement basses.
Important !
Ne combinez jamais le câble basse tension à une source de 100-240 V.
Ce câble ne peut être combiné qu’à un système basse tension de 12 V.
Utilisez ce produit uniquement avec un système in-lite. L’utilisation de
produits autres que les produits in-lite annulera la garantie.
Protez de l’éclairage de votre jardin.

F
Installation de l’armature sur 12 V
La source lumineuse étant déjà montée, l’armature est immédiatement
prête à l’emploi. Il est donc inutile de commencer par poser la source
lumineuse.
L’armature est livrée déjà montée, avec réecteur de tête. Pour l’utiliser
sans réecteur de tête, dévisser les trois vis Torx et remplacer le
réecteur par l’anneau en inox livré.
Étape 1
L’armature peut être xée sur une surface dure au moyen des vis four-
nies ou dans un sol mou à l’aide du piquet de terre fourni. Le piquet de
terre se xe aisément : il suft de le visser à la partie inférieure du pied
de l’armature.
En cas d’installation sur un sol dur, commencer par ôter la plaquette
noire du pied de l’armature en desserrant les vis Torx. Fixer ensuite
la plaquette au sol à l’aide des vis livrées. Replacer l’armature sur la
plaquette et revisser les vis Torx.
Étape 2
Raccordez le connecteur Easy-Lock au câble principal. (g. 1)
a. Il y a deux gouttières de câble. La gouttière dont l’évidement est le
plus étroit convient aux câbles principaux 14/2 et 10/2. Si vous
faites usage de l’ancien câble (épais) 10/2, utilisez donc la gout-
tière dont l’évidement est large.
b. Fixez la gouttière de câble appropriée en dessus du câble princi-
pal. Il ne reste plus d’espace entre le câble et la gouttière.
c. Placez la gouttière de câble (avec le câble du côté inférieur) dans
le connecteur Easy-Lock.
d. Serrez le capuchon leté sur le connecteur Easy-Lock. Les
contacts sont ainsi poussés au travers du matériau d’isolation du
câble. Au serrage du capuchon, une petite quantité de gel est
pressée contre les contacts dans le connecteur Easy-Lock. Ceci
pour protéger les contacts contre l’humidité. Il se peut que du gel
sorte également du connecteur Easy-Lock. Après l’installation,
lavez-vous les mains à l’eau et au savon (et/ou avant un repas) et
évitez tout contact des yeux avec le gel.
Étape 3
Connectez le câble d’alimentation à l’armature en raccordant le mini-
connecteur. (g. 2)
Si la lampe ne fonctionne pas correctement, assurez-vous que le
connecteur Easy-Lock est correctement raccordé au câble principal.
Vériez aussi la connexion du mini connecteur. Répétez les étapes 2 et
3. Vériez si les contacts du connecteur Easy-Lock n’ont pas été en-
dommagés pendant le raccordement de l’armature au câble principal.
Si vous n’y parvenez pas, contactez votre distributeur.
Conseils généraux d’entretien
Il est conseillé de nettoyer l’armature au moins une fois par an à l’aide
d’un chiffon propre et d’eau chaude.

ES
Contenido
1x FISH EYE LOW/HIGH (WW) 12 V / 5 W
1x pin subterráneo
1x anilla de acero inoxidable
3x tornillo de jación
1x Easy-Lock
1x llave Torx
Material
Acero inox, policarbonato resistente a impactos
Lea las siguientes instrucciones antes de proceder a la instalación.
Se recomienda guardar las instrucciones de instalación.
Aunque el sistema de 12 V es un sistema seguro, le recomendamos
que un instalador autorizado compruebe la instalación.
Uso
Esta armadura puede utilizarse de dos maneras diferentes:
Con reector esférico
Indicado como iluminación aérea para el jardín o como señalización
luminosa de un camino, entrada o terraza.
Sin reector esférico
Indicado como foco para iluminar lugares especiales del jardín. Utilice
para ello la unidad de luz giratoria 360°. Para dirigir la “Fish Eye”,
deben aojarse levemente los tornillos de la chapa superior. Oriente
el ojo a la posición deseada y, a continuación, bloquéelo apretando los
tres tornillos. ¡Atención! No apriete excesivamente los tornillos. Basta
con apretarlos sucientemente.
Fuente de iluminación
Esta armadura está equipada con una fuente de iluminación LED de
alta calidad. Esta fuente de iluminación se caracteriza por una larga
vida útil (aprox. 25 000 horas) y un alto rendimiento lumínico. En cam-
bio, el consumo de energía y la producción de calor son extremada-
mente bajos.
¡Importante!
El cable de baja tensión no debe utilizarse nunca en combinación con
100-240 V. Sólo es apto para su uso en combinación con un sistema de
baja tensión de 12 V. Este producto debe utilizarse únicamente en
combinación con el sistema in-lite. En caso de emplear productos dis-
tintos de los productos in-lite, caducará la garantía.
Disfrute de la iluminación en su jardín.

ES
Instalación de la armadura a 12 V
Gracias a que la fuente de iluminación ya viene instalada, la armadura
está lista para su uso inmediato y no es necesario colocar primero la
fuente de iluminación.
La armadura se suministra montada, con reector esférico incluido.
Para su empleo sin el reector esférico, aoje los tres tornillos Torx y
sustituya el reector esférico por la anilla de acero inoxidable.
Paso 1
La armadura puede jarse en una supercie dura mediante los
tornillos suministrados o en una supercie blanda mediante el pin
subterráneo suministrado. El pin subterráneo se puede unir cómoda-
mente a la armadura, enroscándolo en la parte inferior del pie de la
misma.
En caso de montaje en una supercie dura, desmonte primero la
placa de base de la parte inferior de la armadura desenroscando los
tornillos Torx. Fije a continuación la placa al suelo por medio de los
tornillos suministrados. A continuación, coloque la armadura de nue-
vo en la placa de base y vuelva a apretar los tornillos Torx.
Paso 2
Conecte el conector Easy-Lock al cable de alimentación. (Fig. 1)
a. Hay dos canaletas para cables. La canaleta de sección más estre-
cha es apta para los cables principales 14/2 y 10/2. Si se utiliza el
cable 10/2 antiguo (el grueso), se recomienda usar la canaleta de
sección ancha.
b. Apriete la canaleta adecuada sobre el cable principal. No debe
quedar espacio entre el cable y la canaleta.
c. Coloque la canaleta (con el cable por debajo) en el conector Easy-
Lock.
d. Después, enrosque el tapón de rosca en el conector Easy-Lock.
Los contactos perforan ahora el material aislante del cable. Al
apretar el tapón se extiende un poco de gel sobre los contactos en
el conector Easy-Lock. Esto sirve para proteger los contactos con-
tra la humedad. Posiblemente salga un poco de gel del conector
Easy-Lock: en ese caso, lávese las manos con agua y jabón des-
pués de la instalación (y/o antes de cada comida) y evite el con-
tacto del gel con los ojos.
Paso 3
Efectúe la conexión entre el cable de alimentación y la armadura, co-
nectando el miniconector. (Fig. 2)
Si la lámpara no funciona correctamente, compruebe si el conector
Easy-Lock está conectado correctamente al cable de alimentación.
Haga lo mismo para el miniconector. Repita los pasos 2 y 3. Comprue-
be a este respecto si los contactos del conector Easy-Lock no se han
doblado al conectar la armadura al cable de alimentación. Si no con-
sigue resolver el problema, póngase en contacto con su distribuidor.
Recomendación general de mantenimiento
Le recomendamos limpiar la armadura, al menos una vez al año, con
un paño limpio y agua caliente.

TRAFO A
CC2
TRAFO B
CC2
TRAFO C

Opties voor het leggen van
12 Volt kabel
A Lineair
De kabel wordt uitgerold en aan-
gesloten op de transformator.
14/2 tot 40 meter
10/2 tot 80 meter
B Gesplitst
U kunt de kabel in 2 stukken
knippen en daarna weer ver-
binden met een kabelverbinder
(CC-2).
14/2 tot 40 meter
10/2 tot 80 meter
C Ring
Het is raadzaam om bij een 14/2
kabel boven de 40 meter en een
10/2 kabel boven de 80 meter een
zogenaamde ringleiding aan te
leggen. Deze zorgt voor voeding
van 2 kanten en voorkomt
onnodig verlies van stroom. De
lichtopbrengst zal hierdoor
optimaal zijn.
Bij het gebruik van armaturen met
een laag opgenomen vermogen
zal het effect van ‘verlies aan
lichtopbrengst’ minder snel op-
treden als bij armaturen met een
hoog opgenomen vermogen.
Het einde van de kabel wordt
teruggeleid en zo dicht mogelijk
bij de trafo weer op de kabel
aangesloten.
Let erop dat u dezelfde kabel-
zijde, geribbeld of glad, op elkaar
aansluit.
Kabellengte
14/2 tot ± 60 meter
Kabellengte
10/2 tot 160 meter*
* Lichtplan met 50W spot
uitgezonderd.
De 14/2 en 10/2 voedingskabels
zijn belastbaar tot 250W.
NL EN
Options for laying 12 V cable
A Linear
The cable is unrolled and con-
nected to the transformer.
14/2 up to 40 metres / 131 feet
10/2 up to 80 metres / 262 feet
B Split
You can cut the cable into
2 pieces and then connect the
two parts again using a cable
connector (CC-2).
14/2 up to 40 metres / 131 feet
10/2 up to 80 metres / 262 feet
C Ring
When using a 14/2 cable longer
than 40 metres / 131 feet and
a 10/2 cable longer than
80 metres / 262 feet, it is advis-
able to lay a ring circuit. This
provides electricity from 2 sides
and prevents unnecessary loss
of current. This will optimise the
light output.
When using xtures that have
a low power consumption,
the loss of light output will be
slower to come into effect than
with xtures with a high power
consumption.
The end of the cable is led back
and connected to the cable again
as close as possible to the
transformer.
Ensure that you connect the two
parts of the cable with the sides
(ridged or smooth) matching.
Cable length 14/2 up to approx.
60 metres / 197 feet
Cable length
10/2 up to 160 metres / 525 feet*
* With the exception of lighting
plan with 50 W spotlights.
The 14/2 and 10/2 power cables
can be used for up to 250 W.

Options pour la pose du câble
de 12 V
A En ligne
Le câble est déroulé et raccordé
au transformateur.
14/2 jusqu’à 40 mètres/131 pieds
10/2 jusqu’à 80 mètres/262 pieds
B Scindé
On peut couper le câble en deux
et réunir les deux parties à l’aide
d’un raccord de câble (CC-2).
14/2 jusqu’à 40 mètres/131 pieds
10/2 jusqu’à 80 mètres/262 pieds
C En boucle
Pour une longueur de câble 14/2
de plus de 40 mètres/131 pieds
et une longueur de câble 10/2 de
plus de 80 mètres/262 pieds, il
est conseillé de poser un
câblage en boucle. Il veille à
une alimentation électrique des
deux côtés et évite toute perte
de courant inutile. Résultat : un
rendement lumineux optimal.
Lors de l’utilisation d’armatures
à faible absorption de puissance,
l’effet de « perte de rendement
lumineux » surviendra moins
rapidement que pour les
armatures à absorption de
puissance élevée.
L’extrémité du câble est ramenée
et raccordée au câble le plus
près possible du transformateur.
Attention : veillez à raccorder les
mêmes côtés de câble, cannelés
ou lisses.
Longueur de câble
14/2 jusqu’à ± 60 mètres/
197 pieds
Longueur de câble
10/2 jusqu’à 160 mètres/
525 pieds*
*Plan lumineux avec spot de
50 W non compris.
Les câbles d’alimentation 14/2 et
10/2 supportent jusqu’à 250 W.
Optionen für die Verlegung des
12-Volt-Kabels
A Linear
Das Kabel wird ausgerollt und
an den Transformator ange-
schlossen.
14/2 bis 40 Meter
10/2 bis 80 Meter
B Geteilt
Das Kabel kann in zwei Teile
geschnitten werden, die an-
schließend mit einem Kabelver-
binder (CC-2) wieder miteinander
verbunden werden.
14/2 bis 40 Meter
10/2 bis 80 Meter
C Ringförmig
Bei 14/2-Kabeln ab 40 Meter
und 10/2-Kabeln ab 80 Meter
empehlt es sich, eine so
genannte Ringleitung anzulegen.
Sie sorgt für eine beiderseitige
Stromversorgung und verhindert
unnötige Stromverluste. Dadurch
gewährleistet sie eine optimale
Lichtausbeute.
Bei Verwendung von Armaturen
mit einer niedrigen Leistungsauf-
nahme wird der Effekt eines Ver-
lusts an Lichtausbeute geringer
ausfallen als bei Armaturen mit
hoher Leistungsaufnahme.
Das Ende des Kabels wird zu-
rückgeführt und möglichst nahe
beim Transformator wieder
an das Kabel angeschlossen.
Achten Sie darauf, dass Sie
immer dieselben Kabelseiten
(geriffelt oder glatt) miteinander
verbinden.
Kabellänge
14/2 bis ca. 60 Meter
Kabellänge
10/2 bis 160 Meter*
*Gilt nicht für Lichtpläne mit
50-W-Spot.
Die 14/2- und 10/2-Netzkabel sind
bis 250 W belastbar.
D F
This manual suits for next models
1
Table of contents
Languages:
Other Inlite Landscape Lighting manuals
Inlite
Inlite PUCK User manual

Inlite
Inlite scope User manual
Inlite
Inlite HYVE 22 User manual

Inlite
Inlite LIV LOW User manual

Inlite
Inlite SWAY User manual
Inlite
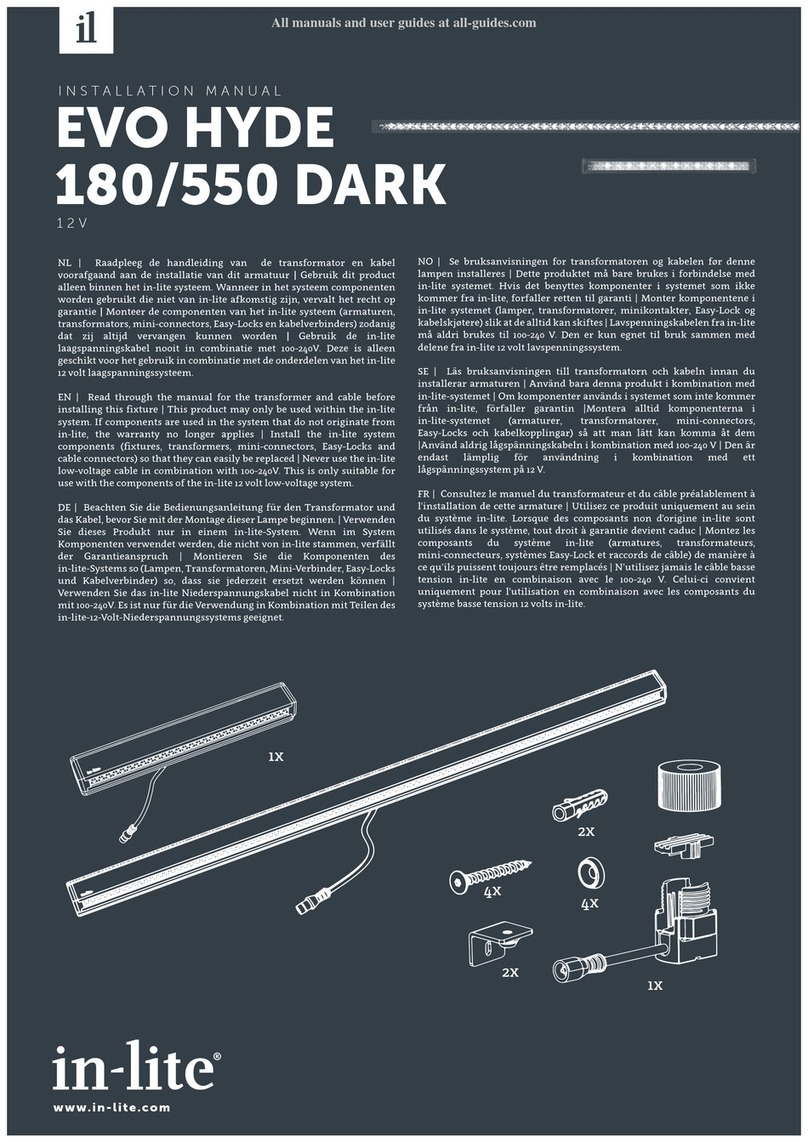
Inlite EVO HYDE 180 DARK User manual
Inlite
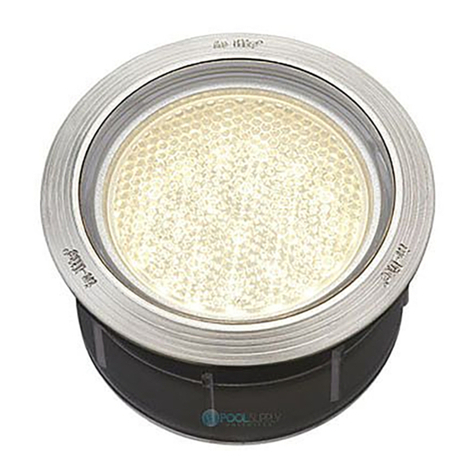
Inlite HYVE User manual
Inlite
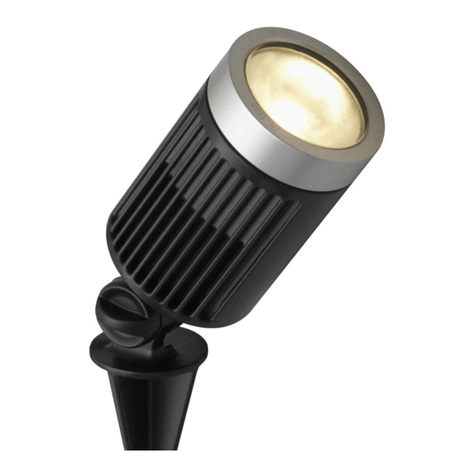
Inlite FLUX 60 User manual
Inlite
Inlite BIG SCOPE NARROW User manual
Inlite
Inlite CB-010E User manual

