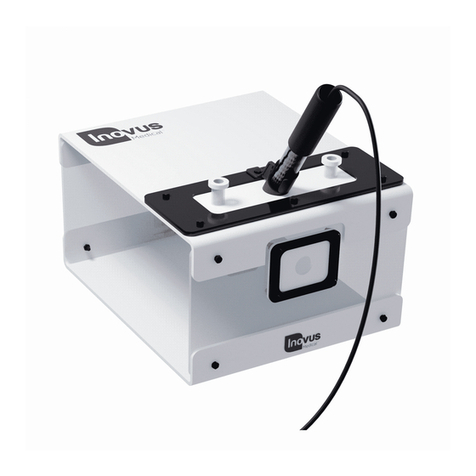
Inovus Medical Lapar Pro User manual

accessible affordable functional accessible affordable functional
Pro

P1.
1 | When opening your simulator it is
recomended that you unpack all package
contents and arrange them before starting
construction. Once you have done this, take
therstpartlabelledAR20_BTM01andlayit
onasecureatsurface.
2| Now take the following parts:
MA01x2
AR20_U02x1
WN14x2
M5B24x2.
Usingtheimageasaguide,payclose
attention to the part orientation in this step
or you will have to undo work at a later
stage.
3 | Screw into place using:
MA01x2
M5B24x2
WN14x2
(UsethepinonpartMA01tond
the correct position).
4 | Repeatthelasttwostepswith
the same parts on the front panel
AR20_U01asshownintheimage.

P2.
5| Take4xAR20_M-BKT,positiontheminthe
keys provided. In a practical sense this will
need to be done one at a time with the
simulator positioned on its side.
6 | Using4xM5B24screweachAR20_M-
BKTintopositiononthebase.Theseparts
are threaded for ease of assembly.
7 | Atthisstagethesimulatorshouldlook
exactlylikethereferenceimage.
If something appears to be incorrect,
go back through the steps again.
8 |Locate the following parts:
AR20_TPB01x1
AR20_BKTx2
AR20_SKx2
M5B24x6
WN14x6
PlacingtheAR20_SKontothetopsurface
oftheAR20_TPB01ensurethattheholes
align correctly. You can now position the
blackAR20_BKTontopofthesiliconeskin,
pushingthreeM5B24throughtheholes.
Nowmovetothenextstep.

P3.
9 | Nowattach3xWN14totheboltscoming
throughthebottomsurface.Repeatthis
process on the opposite side
to complete the assembly.
10| RemovetheAR20_CAMfromitspackaging
and place into positon as shown.
11 | Take2xM5B24boltsandafxtheAR20_
CAMintoposition.DONOTplug-inat
this stage.
12| Takethesub-assemblyfromthelastfour
steps and place it over the upright panels
of the simulator as shown.

P4.
15| YouwillusetheatplatformforLapPass®
andanyothernon-ARtasks.Enterprise
users can use this for any tasks they
like,includingthosewhereelectro-surgical
instruments are required.
14 |It is important to note that the simulator is
capable of multiple platform positions. When
insertingAR20_TAByouwillmostcommonly
usetheangledbaseforAugmentedReality
applications.
13 |Locate following parts:
MA01x4
WN14x4
M5B24x4
Repeattheprocessfromsteps2,3&4.Do
this on each corner so that a magnet is in
place for the side panels to connect into.
16 | Snap into place both side panels and move
on.

P5.
17 | ConnecttheUSBmicrointothebackofthe
camera.
18 |Start the assembly of your portable trolley
systembyunscrewingtheM8boltsatthe
rearofchassissothatyouhavearound3-4mm
of space between the head of the bolt and
the chassis wall. You can do this using the
allenkeyprovided.TaketheLshapedscreen
bracketandplaceitontotheM8boltsas
shown.
19 | Drop the bracket onto the bolts.
20|Screw the bolts tight using the allen key
provided.Becarefulnottoovertightenatthis
stage.

P6.
21| Taketheassembledmonitorbracketand
clamp it in position as shown.
22|Screw the clamp until tight.
23| Attachthemonitorscreenusingthe
4xM4boltsprovided.
24| Asshownintheimage,pluginthe
IEC,HDMI&USBcables.

P7.
26|Position the wires as such and plug in
to the appropriate socket.
27| PlugtheIECconnectorintotheback
of the system.
28|Plug the connector into the
mains power.
25| Carefullythreadthe3wireswepluggedin
during the previous step up through the L
shaped bracket and onto the monitor bracket.
Movetothenextstep.

P8.
29| If a WIFI connection isn’t present, plug in
the network cable provided with the system.
30|Place your constructed simulator that you
should have already assembled onto the top
surface.
31 | PlugintheUSBcabletotheUSBports
on the trolley system (Note: depending
onthesystemyouhavepurchased,USB
port location may vary).
32| Turnthesystemonusingthepowerswitch
on the front. Once the computer has loaded
up,selecttheLapAR™icononthedesktop
and follow the instructions inside the
software.

P9.
Warranty
This limited warranty applies to any order, purchase, receipt, delivery or use of any products and services (collectively, in a “purchase”) from Inovus Ltd or any of its
subsidiaries or afliates or authorised reseller (“reseller”). If you enter into a separate written agreement with any of the aforementioned this warranty may be declared
null and void.
This warranty applies to your purchase unless you notify Invous® Ltd in writing that you do not agree to this agreement within 15 days after you receive this agreement
and you return your product or cancel services under Inovus Ltd’s refund policy. This agreement contains a dispute resolution clause (please see below).
THE TERMS AND CONDITIONS APPLICABLE TO INOVUS® LIMITED WARRANTY ARE AS SET FORTH BELOW:
Limited Warranty
Inovus® Ltd warrants to the end user (“Customer”) that the product will be free from defects in workmanship and materials, under normal use and service, for one (1)
year, or such longer period as Inovus® Ltd may announce publicly from time to time for particular products, from the date of purchase from Inovus® Ltd or an
authorized reseller. Inovus® Ltd’s sole obligation under this expresswarrantyshallbe,atInovus®Ltd’soptionandexpense,torepairthedefectiveproductorpart,deliv-
ertoCustomeranequivalentproductorparttoreplacethedefectiveitem,orifneither of the two foregoing options is reasonably available, Inovus® Ltd may, in its sole
discretion, refund to Customer the purchase price paid for the defective product. All products that are replaced will become the property of Inovus® Ltd.
Replacement products or parts may be new or reconditioned. Inovus® Ltd warrants any replaced or repaired product or part for ninety (90) days from shipment, or the
remainder of the initial warranty period, whichever is longer. Products returned to Inovus© Ltd must be sent prepaid and packaged appropriately for safe shipment, and
it is recommended that they be insured or sent by a method that provides for tracking of the package. Responsibility for loss or damage does not transfer to Inovus®
Ltd until the returned item is received by Inovus® Ltd. The repaired or replaced item will be shipped to Customer, at Inovus® Ltd’s expense, no later than thirty (30)
days after Inovus® Ltd receives the defective product, and Inovus® Ltd will retain risk of loss or damage until the item is delivered to Customer.
Exclusions
Inovus® Ltd will not be liable under this limited warranty if its testing and examination show that the alleged defect or malfunction in the product does not exist or
results from:
• Failure to follow Inovus® Ltd installation, operation, or maintenance instructions
• Unauthorized product modication or alteration
• Unauthorized use of common carrier communication services accessed through the product
• Abuse, misuse, negligent acts or omissions of Customer and persons under Customer’s control; or
• Acts of third parties, acts of God, accident, re, lighting, power surges or outages, or other unpredictable random hazards.
WARRANTY EXCLUSIVE. IF AN INOVUS® LTD PRODUCT DOES NOT OPERATE AS WARRANTED ABOVE, CUSTOMER’S SOLE REMEDY FOR BREACH OF THAT
WARRANTY SHALL BE REPAIR, REPLACEMENT, OR REFUND OF THE PURCHASE PRICE PAID, AT INOVUS© LTD’S OPTION. TO THE FULL EXTENT ALLOWED BY
LAW, THE FOREGOING WARRANTIES AND REMEDIES ARE EXCLUSIVE AND ARE IN LIEU OF ALL OTHER WARRANTIES, TERMS, OR CONDITIONS, EXPRESS
OR IMPLIED, EITHER IN FACT OR BY OPERATION OF LAW, STATUTORY OR OTHERWISE, INCLUDING WARRANTIES, TERMS, OR CONDITIONS OF , FITNESS
FOR A PARTICULAR PURPOSE, SATISFACTORY QUALITY, CORRESPONDENCE WITH DESCRIPTION, AND NON-INFRINGEMENT, ALL OF WHICH ARE EXPRESSLY
DISCLAIMED. INOVUS® LTD NEITHER ASSUMES NOR AUTHORIZES ANY OTHER PERSON TO ASSUME FOR IT ANY OTHER LIABILITY IN CONNECTION WITH THE
SALE, INSTALLATION, MAINTENANCE OR USE OF ITS PRODUCTS.
Support and service agreements
If you purchased your product from an Inovus® Ltd Authorized Reseller, contact the Authorized Reseller for information about support and service agreements
applicable to your product. For information on Inovus® Ltd’s service, go to the Inovus Ltd web site www.inovus.org, or contact Inovus® Ltd at [email protected]g.
Limitation of Liability
TO THE FULL EXTENT ALLOWED BY LAW, INOVUS® LTD EXCLUDES FOR ITSELF AND ITS SUPPLIERS ANY LIABILITY, WHETHER BASED IN CONTRACT OR TORT
(INCLUDING NEGLIGENCE), FOR INCIDENTAL, CONSEQUENTIAL, INDIRECT, SPECIAL, OR PUNITIVE DAMAGES OF ANY KIND, OR FOR LOSS OF REVENUE OR
PROFITS, LOSS OF BUSINESS, LOSS OF INFORMATION OR DATA, OR OTHER FINANCIAL LOSS ARISING OUT OF OR IN CONNECTION WITH THE SALE,
INSTALLATION, MAINTENANCE, USE, PERFORMANCE, FAILURE, OR INTERRUPTION OF ITS PRODUCTS, EVEN IF INOVUS® LTD OR ITS AUTHORIZED RESELLER
HAS BEEN ADVISED OF THE POSSIBILITY OF SUCH DAMAGES, AND LIMITS ITS LIABILITY TO REPAIR, REPLACEMENT, OR REFUND OF THE PURCHASE PRICE
PAID, AT INOVUS® LTD’ OPTION.
THIS DISCLAIMER OF LIABILITY FOR DAMAGES WILL NOT BE AFFECTED IF ANY REMEDY PROVIDED HEREIN SHALL FAIL OF ITS ESSENTIAL PURPOSE.

P10.
ReturnsPolicy
ThankyouforpurchasingfromInovus.Ifyouarenotentirelysatisfiedwithyourproductthentherearefewwayswecanhelp:
Returns
Youhave14calendardaystoreturnanitemfromthedateyoureceivedit.Tobeeligibleforareturn,youritemmustbeunusedandinthesameconditionthatyou
receivedit.Youritemmustbereturnedintheoriginalpackagingandyoumusthavethereceiptorproofofpurchase.Responsibilityfortheproductwillremainwith
youuntil it is received by Inovus.
Refunds/Replacements
Once we receive your item, we will inspect it and notify you that we have received your returned item. We will immediately notify you on the status of your refund after
inspecting the item. If your return is approved, we will initiate a refund to your credit card (or original method of payment) or dispatch a replacement item depending
on your preference. If you opt for a full refund you will receive the credit within a certain amount of days, depending on your card issuer’s policies.
Shipping
You will be responsible for paying for your own shipping costs for returning your item. Shipping costs are nonrefundable. If you receive a refund, the cost of return
ship-ping will be deducted from your refund.
ContactUs
Ifyouhaveanyquestionsonhowtoreturnyouritemtous,contactusviaemailatsupport@inovus.orgortelephone(+44)01744752952.

Designed and manufactured by
accessible affordable functional
T: +44 (0) 1744 752 952
W: www.inovus.org
Table of contents
Other Inovus Medical Medical Equipment manuals
Popular Medical Equipment manuals by other brands
Physio Control
Physio Control HeartStart MRx user guide
natus
natus ALGO 5 Installation and assembly instructions
Vetario
Vetario S40 User instructions
SCHWIND
SCHWIND Carriazo-Pendular user manual
Gaymar
Gaymar T/PUMP TP400 Series Service manual

KYRA MEDICAL
KYRA MEDICAL k-tek Comfort KTEK3000 Instructions for use
Cane
Cane CRONO PCA50 Short Instruction

Baylis Medical
Baylis Medical RFP-101 Instructions for use
Vapotherm
Vapotherm precision flow Instructions for use

THERANICA
THERANICA Nerivio user manual
Ossur
Ossur PRO-FLEX PFP0 Series Instructions for use

Patterson Medical
Patterson Medical Metron Value 9235-23 Assembly instructions

