inscabin IR-D8 User manual

www.inscabin.com
Design by Locitech Group ( Hong Kong ) Limited
Assemble by Pingxiang Locitech Co., Ltd.
Made in China
IR-D8
INTERNET RADIO WIRELESS SPEAKER
USER MANUAL
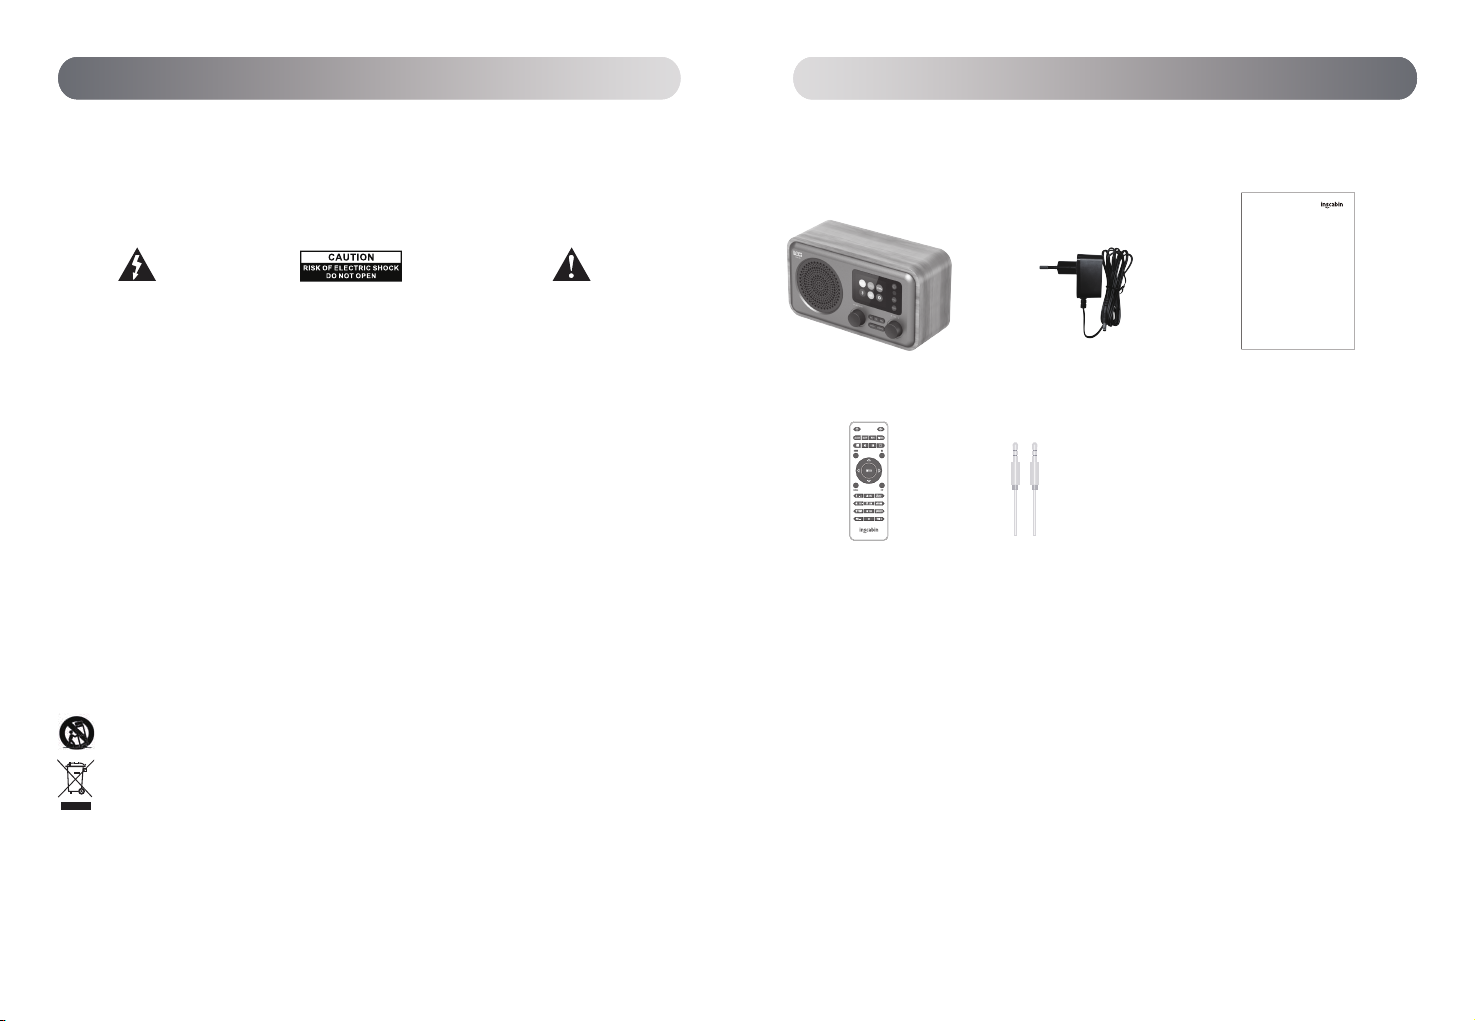
Internet Radio Adapter
Audio cable
User Manual
●Power amplifier output power 8.0W (1KHz 0dB sine wave signal)
●Power amplifier signal-to-noise ratio: ≥70dB
●Distortion: ≤1%
●Frequency response: 100Hz-18KHz
●Speaker: 77mm (4 ohms)
●Input power: 9V/1.3A
●AUX maximum input sensitivity: 800mv
●FM receiving sensitivity: -105dB
●Working environment temperature: -10℃~50℃
●Storage temperature: -20℃~70℃
●Product specifications: 220mm(W)*126.5mm(H)*96mm(D)
●Net weight: about 920g
01 02
English
Specifications
Packing List
WARNING: To reduce the risk of fire or electric shock, do not expose this apparatus to rain or moisture.
Thank you for purchasing this inscabin product. For generations, inscabin tries to provide powered speaker products
to satisfy the
need of our end customers, even the most demanding ones. This product can add to your home entertainment,
personal
computer, and mini home theater great sound performance. Please read this manual carefully to obtain the best of this
system.
The lightning flash with arrowhead inside
thetriangle, is intended to alert the user
to the presence of un-insulated dangerous
voltage within the product's enclosure
that may be of a sufficient magnitude to
constitute a risk of electric shock to persons.
To prevent the risk of electric shock, do not
remove cover (or back). No user-serviceable
Parts inside. Refer servicing to qualified
Service personnel only.
The exclamation point inside the triangle
is intended to alert the user to the presence
of important operating and maintenance
(servicing) instructions in the literature
accompanying the product.
1. Read these instructions. 2. Keep these instructions.
3. Heed all warnings. 4. Follow all instructions.
5. Do not use this apparatus near water. 6. Clean only with dry cloth.
7. Do not block any ventilation openings. Install in accordance with the manufacturer’s instructions.
8. Do not install near any heat sources such as radiators, heat registers, stoves, or other apparatus (including amplifiers) tha
produce heat.
9. Do not defeat the safety purpose of the polarized or grounding-type plug. A polarized plug has two blades with one wider tha
the other. A grounding type plug has two blades and a third grounding prong. The wide blade or the third prong are provided
for your safety. If the provided plug does not fit into your outlet, consult an electrician for replacement of the obsolete
10. Protect the power cord from being walked on or pinched particularly at plugs, convenience receptacles, and the point where
they exit from the apparatus.
11. Only use attachments/accessories specified by the manufacturer.
12. Unplug this apparatus during lightning storms or when unused for long periods of time.
13. Refer all servicing to qualified service personnel. Servicing is required when the apparatus has been damaged in any way, su
as power-supply cord or plug is damaged, liquid has been spilled or objects have fallen into the apparatus, the apparatus
been exposed to rain or moisture, does not operate normally, or has been dropped.
14. The MAINS plug or an appliance coupler is used as the disconnect device, the disconnect device shall remain readily operabl
Note:There is a built-in rechargeable lithium-ion battery in the speaker. Danger of explosion if disassemble the speaker. The speak
shall not be placed close to excessive heat such as fire or the like.
The battery shall not be exposed to excessive heat such as sunshine, fire or the like. Danger of explosion if the ba
incorrectly replaced.
Replace only with the same or equivalent type.
Use only with the cart, stand, tripod, bracket, or table specified by the manufacturer, or sold with the apparatus. When
a cart is used, use caution when moving the cart/apparatus combination to avoid injury from tip-over.
Correct Disposal of this product. This marking indicates that this product should not be disposed with other household
wastes throughout the EU. To prevent possible harm to the environment or human health from uncontrolled waste
disposal, recycle it responsibly to promote the sustainable reuse of material resources. To return your used device,
please use the return and collection systems or contact the retailerwhere the product was purchased. They can take
this product for environmental safe recycling.
Unpack the boxImportant safety instructions
Important safety instructionsDesempaque la caja
English
Remote control
IR-D8
WIRELESS SPEAKER
USR MANUAL

03
English
04
English
01
02
07
05
03
06
04
08
09
10
11
12
13
14
15
17
18
Product ViewProduct View
TFT display
Left speaker unit
Volume +/- knob
Rotate left and right: adjust the volume
Short press: turn mute on or off
FAV1,2,3 buttons
Short press to call up a pre-stored radio station and play it,
Long press to store the current station to 1/2/3 position
STANDBY button
Shutdown state: short press ON/OFF
Alarm sound: short press to cancel the alarm and enter standby
Remote control receiving port
MENU button
Short press to enter the main menu, long press on the main menu interface to switch between black and white/
color display, long press to enter the WPS pairing network state when in the "InternetRadio USB UPnP Local
Radio" mode.
PRESET button
Short press to enter the interface for recalling radio stations, and long press to enter the interface for
pre-stored stations.
SKIP+/- knob
Rotate left and right: move left and right
Short press: select to confirm
LEFT button
Short press: move left/return
RIGHR button
Short press: move right/forward
Products schematic back
Radio antenna
AUX audio input port
Connect to the computer through the audio cable provided
/Mobile phone or other audio equipment
USB input port
Power switch
Power input port
Power on through the supplied adapter
Power indicator
After the power is turned on, the indicator light is red,
Pilot hole
Product View
Product View
16
02
03
0401
06
07
05
08
09
10 11
15
16
14
13
12
18
17

05
English
Front view of the remote control Front view of the remote control
02
03
01
04
05
06
10
07
09
11
08
12
14
15
13
16
17
18
21
20
19
22
01
02
07
05
03
06
04
08
09
10
11
12
13
14
15
16
17
18
19
20
21
22
Short press to enter standby/function mode
Sleep button: Short press to set the Sleep time
Alarm button: Short press to enter Alarm setting
Short press the play/pause button
Previous song/Previous station
MENU button: short press to enter the main menu
Move up/increase FM frequency
Move left/return
ENTER button: short press to select and confirm;
LOCAL button: short press to enter "Enter Local Radio" mode
Number input button, short press for number input
VOL-button: Short press the volume to decrease
Mute button ON/OFF
WPS button: fast networking button, if the router has a WPS button, you can short press this button to
quickly connect to the network
Brightness adjustment
Short press to stop playback
Next song/next station
EQ button: short press to adjust EQ
Move right/forward
Move down/decrease FM frequency
FAV button: short press to enter the interface of calling out radio stations, long press to enter the interface
of pre-stored stations
VOL+ button: Short press the volume to increase
Front view of the remote control
06
English

07
English
lnstruction lnstruction
08
English
Turn On
After connecting the power, turn the power switch to ON, the screen will show the boot interface, and the
machine will be turned on after about 30 seconds. The language will be selected for the first power on. There
are 18 languages to choose from, turn the "SKIP+/- knob" to select , Short press "Enter" key to confirm.
Internet Radio function
①Power on and press the "MENU" key to enter the main interface, turn the "SKIP+/- knob" to select the
Internet Radio icon, and short press the "Enter" key to confirm to enter the Internet Radio mode.
②Combine the "SKIP+/- knob" and "Enter" keys to select the option in the Radio Station submenu to play, for
example, select: Radio Station/Country/Location/Asia/China/China/Top10 in the "AisaFM Network" network The
radio station is playing. At this time, the machine receives the radio station information and displays it on the
screen, and the short FM Network" Internet radio station is played. At this time, the machine receives the radio
station information and displays it on the screen. Press the "Enter" key to pause the current The radio station is
played and returns to the Internet radio station selection interface. Rotate the "SKIP+/- knob" to move
up/down to select a radio station, and then short press the "Enter" key to play the current radio station.
③When in the music playing interface, short press the "RIGHT" button to enlarge the song picture information,
and short press the "LEFT" button to return. Long press the "RIGHT/LEFT" key to switch the previous/next
station to play. You can choose according to the Internet radio stations you like to listen to. Turn the
"VOLUME+/- knob" to increase or decrease the volume, short press the MUTE key to switch the mute on/off.
④Long press the "PRESET" button to enter the radio station prestore interface, turn the "SKIP+/- knob" to
move the prestore position forward or backward, and short press the "Enter" key to store the radio station to
the current position. Short press the "PRESET" button to enter the tuning interface, turn the "SKIP+/- knob" to
move the pre-stored position forward or backward, and short press the "Enter" button to recall the stored radio
station for playback.
⑤Note: In the network radio station name display interface, short press the "RIGHT" key to enter the radio
operation interface: "Add to My Favorite, Auto Scan, Play".
When short press the "PRESET" key or "FAV" on the remote control to call up the radio interface, short press
the "RIGHT" key to enter the radio operation interface: "Delete, Shift Up, Shift Down, Rename, Play".
Remarks: 1. Every time the machine is turned on, the system clock is 00:00 and will not run. When connected
FM function
①Power on and press the "MENU" key to enter the main interface, turn the "SKIP+/- knob" to select the FM
icon, and short press the "Enter" key to confirm entering FM mode.
②Rotate the "SKIP+/- knob" or short press the "RIGHT/LEFT" button to fine tune the radio station forward or
backward, jump one step at 0.05MHz, short press the "Enter" key to enter the automatic station search
interface, the screen displays "Auto Scan" , Rotate the "SKIP+/- knob, select "Yes", short press the "Enter" key
to confirm, the machine will perform automatic search from 87.5-108.0MHZ and automatically save the
searched stations. Long press the "RIGHT/LEFT" button to Search forward or backward semi-automatically for
radio stations, but the searched radio stations will not be saved automatically.
③Turn the "VOLUME+/- knob" to increase or decrease the volume. Short press the MUTE button to switch
mute on/off.
④Long press the "PRESET" button to enter the radio station prestore interface, turn the "SKIP+/- knob" to
move the prestore position forward or backward, and short press the "Enter" key to store the radio station to
the current position. Short press the "PRESET" button to enter the tuning interface, turn the "SKIP+/- knob" to
move the pre-stored position forward or backward, and short press the "Enter" key to recall the stored radio
station for playback
; Operate the number keys on the remote control to call up the pre-stored radio station.
⑤When this icon appears in the lower right corner of the display, you can switch between WIFI network
radio and FM radio by long pressing the "Enter" key.
Internet connection
After the language is selected for the first time, the "Privacy" interface will appear. Short press the "SKIP+/-
knob" to enter the "Enable'Check Network when Power On'" interface. Rotate the "SKIP+/- knob" to move as
needed "Enter" key to confirm. Then enter "Would you like to configure Network now" and select "Yes". The
machine will search for the nearby wireless network name, turn the "SKIP+/- knob" to move to the wireless
network that needs to be connected, and short press the "Enter" key to confirm , Enter the "Enter Password"
interface, turn the "SKIP+/- knob" to select the wireless network password. Left/right click to move. When the
correct wireless network password is entered (you can use the 0-9 keys on the remote control to enter the
password), Then short-press and short-press the "Enter" key to connect. After successfully connecting to the
wireless network, you will enter the main interface. If the connection is not successful or you need to change
the wireless network again, short press the "MENU" button to enter the main menu interface, turn the "SKIP+/-
knob" to move to "Configuration" and short press the "Enter" key to enter. Turn the "SKIP+/- knob" to move to
‘Nework’ and short press the "Enter" key to enter. Turn the "SKIP+/- knob" to move to ‘Wireless Network
Configuration’ and short press the "Enter" key to enter. After selecting ‘Enable’ to enter the machine, it will
search for nearby wireless networks and display them, and then select the network that needs to be connected
to connect.
Note: You can also connect to the WIFI network manually through APP and WPS; when connecting to the WIFI
network through APP, the device and the machine must be in the same local area.
to the network or FM radio, the machine will automatically update the time and the clock will start to run.
2. The machine system clock updates the time in the nternet Radio mode, the machine system clock will also
update the time again in the FM mode, and the machine system clock will be based on the FM update time.
3. After using the network to update the machine system clock, you can manually set the system clock; if the FM
mode is used to update the machine system clock, the manual setting of the system clock is invalid.
lnstruction

lnstruction lnstructionlnstruction
09
English
10
English
AUX function
①Power on and press the "MENU" key to enter the main interface, turn the "SKIP+/- knob" to select the AUX icon,
and short press the "Enter" key to confirm entering AUX mode.
②Turn the "VOLUME+/- knob" to increase or decrease the volume. Short press the "MUTE" button to switch mute
on/off.
Podcast function
①Power on and press the "MENU" key to enter the main interface, turn the "SKIP+/- knob" to select the Podcast
icon, and short press the "Enter" key to confirm to enter the Podcast mode.
②Rotate the "SKIP+/- knob" and "Enter" key to select the option in the Radio Station submenu to play, for
example, select: "Franciacorta" Internet radio station in Country/Location/Germany/Arts/Weinstein-Podcast to play ,
The machine receives the radio station information and displays it on the screen, short press the "Enter" key to
pause the current radio station and return to the Internet radio station selection interface, turn the "SKIP+/- knob"
to move up/down to select a radio station, and then short press " Enter" key to play the current radio station.
③When in the music playing interface, short press the "RIGHT" button to enlarge the song picture information, and
short press the "LEFT" button to return. Long press the "RIGHT/LEFT" key to switch the previous/next station to
play. You can choose according to the Internet radio stations you like to listen to. Turn the "VOLUME+/- knob" to
increase or decrease the volume, short press the MUTE key to switch the mute on/off.
④Long press the "PRESET" button to enter the radio station prestore interface, turn the "SKIP+/- knob" to move
the prestore position forward or backward, and short press the "Enter" key to store the radio station to the current
position. Short press the "PRESET" button to enter the tuning interface, turn the "SKIP+/- knob" to move the
pre-stored position forward or backward, and short press the "Enter" key to recall the stored radio station for
playback.
⑤Note: In the network radio station name display interface, short press the "RIGHT" key to enter the radio
operation interface: "Add to My Favorite, Play, Download". When short pressing the "PRESET" key or "FAV" on the
remote control to call up the radio interface, short pressing the "RIGHT" key will enter the interface for radio
operation: "Delete, Shift Up, Shift Down".
position. Short press the "PRESET" button to enter the tuning interface, turn the "SKIP+/- knob" to move the
pre-stored position forward or backward, and short press the "Enter" button to recall the stored radio station for
playback.
⑥Note: In the network radio station name display interface, short press the "RIGHT" key to enter the radio
operation interface: "Add to My Favorite, Auto Scan, Play". When short press the "PRESET" key or "FAV" on the
remote control to call up the radio interface, short press the "RIGHT" key to enter the radio operation interface:
"Play, Delete, Shift Up, Shift Down."
Bluetooth playback function
①Power on and press the "MENU" key to enter the main interface, turn the "SKIP+/- knob" to select the
Bluetooth icon, and short press the "Enter" key to confirm to enter the Bluetooth mode.
②Use the mobile phone to search for the Bluetooth device, and then search for the Bluetooth device with
"inscabin IR-D8" and click on the Bluetooth connection with "inscabin IR-D8", and you will hear "connected"
and the machine display shows "Bluetooth Connected", indicating that the Bluetooth has been connected
successfully.
③Rotate the "SKIP+/- knob" or long press the "RIGHT/LEFT" button to next or previous song, short press the
"Enter" key to play or pause. Turn the "VOLUME+/- knob" to increase or decrease the volume. Short press the
"MUTE" button to switch mute on/off.
④Since Bluetooth can obtain the picture of the song from the Internet, short press "RIGHT/LEFT" to zoom in
and out the picture of the song.
⑤Long press "Enter" key will pop up "Pair another device" and "iphone" (the name of the connected device), if
you select "Pair another device", short press "Enter" key to confirm, the machine will disconnect the current
device Connect and re-enter the pairing state. Long press the "Enter" key again, and "Pair another device" and
"iphone" will pop up. If you select "iphone", short press the "Enter" key to confirm, and the machine will
automatically connect to the "iphone" device.
UPnP function
inscabin IR-D8 can connect to a wireless network and use Windows operating system, Apple Mac or Linux music
player as the playback platform, that is, UPnP sharing to play songs; take the Windows media player of the
majority of users as an example, Windows Media Player 12 The supported playback formats are: MP3, WMA,
AAC and WAV.
Open UPnP to share your music <Take Windows Media Player 12 as an example>
1. Open the built-in (or downloaded) Windows Media Player of the computer, and add your favorite music to
the media library (how to use Windows Media Player to add music, please refer to Microsoft's media player
instructions).
2. Click "Media Stream" in the Windows Media Player window, select "Automatically allow devices to play my
media", and then accept "Automatically allow all computers and multimedia devices" to quickly turn on UPnP for
music sharing and playback (as shown in the upper right ).
3. You can also edit the name of the media stream and allow/block the device to play your music through UPnP.
Click on the "Other Streaming Options" in the Windows Media Player window to customize the media library
name (as shown in the figure below right) Point 1), so that users can quickly identify when IRD50BT searches
for media devices; in the display device column, you can also customize whether to allow a specific device to
play media stream music through UPnP (as shown in the figure on the right below) point).
[Note] It is recommended to replace the Chinese name with English for the name of the media stream to
facilitate identification when selecting a device.
①Power on and press "MENU" to enter the main interface, select the "Media Center" icon, short press the
"Enter" key to confirm, turn the SKIP+/- knob, select the "UPnP" item, and short press "Enter" to enter the
UPnP mode. Rotate the SKIP+/- knob to select your UPnP device (for example, UPnP:KENT-PC:Kent Liu:), short

lnstruction lnstructionlnstruction
press the "Enter" key to confirm the selection.
[Note] It may take tens of seconds to search for UPnP devices. If inscabin IR-D8 does not find UPnP devices, the
display will return to the “Media Center” menu.
②Select the music folder under the "UPnP:KENT-PC:Kent Liu:" device, short press the "Enter" key to confirm the
operation, the screen will display the song name, turn the "SKIP+/- knob" to move up/down to select the song ,
Short press "Enter" to select a song to play.
③When entering the interface of playing music, short press the "RIGHT" button to enlarge the song picture
information, and short press the "LEFT" button to return. Turn the "SKIP+/- knob" to return to the song list
interface, and short press the "Enter" key to play or pause.
④Turn the "VOLUME+/- knob" to increase or decrease the volume. Short press the "MUTE" button to switch mute
on/off.
U disk playback function
①Power on and press "MENU" to enter the main interface, select the "Media Center" icon, short press the "Enter"
key to confirm, turn the SKIP+/- knob, select the "USB" item, and short press "Enter" to enter the USB mode.
②When the machine reads the USB flash drive, it will display the songs in the USB flash drive, short press the
"RIGHT" key, the screen will display: Delete delete this song and Play play this song two options, short press the
"Enter" key to confirm the required To operate, short press the "LEFT" button to return to the previous interface,
turn the "SKIP+/- knob" to move to the song list, and short press the "Enter" button to play.
③When entering the interface of playing music, short press the "RIGHT" button to enlarge the song picture
information, and short press "LEFT" to return. Turn the "SKIP+/- knob" to return to the song list interface, and
short press the "Enter" key to play or pause.
④Turn the "VOLUME+/- knob" to increase or decrease the volume. Short press the "MUTE" button to switch mute
on/off.
⑤This machine supports a U disk with a capacity of 64G; supported audio formats: WAV, WMA, MP3, FLAC, AAC.
STANDBY mode
①Short press "STANDBY" key to enter standby or work mode. Standby mode can display time and weather.
a. There are two ways to display the standby time. Turn on and press the "MENU" button to enter the main menu,
turn the "SKIP+/- knob" to move to "Configuration" and short press the "Enter" key to enter, and turn the "SKIP+/-
knob" to move to " Time Display" and select, there are two options to choose from "Analog" and "Digital". The boot
default is "Digital-White"
b. To display the weather, enter the "Configuration" interface and select "Weather", select "Show on Standby", and
select "On". In the "Weather" interface, you can also select the weather of which place you want to enter the "Set
Location" to select the weather forecast of your city.
Local Radio function
①Turn on and press the "MENU" key to enter the main menu and then turn the "SKIP+/- knob" to move to "Local
Radio" and short press the "Enter" key to enter the "Local Radio" mode. The screen displays: Auto Detect
(Coun-try), Manual Setup (Country), Manual Setup (State), Manual Setup (City), Manual Setup (US Zip Code) five
options, select Auto Detect (Country), short press " Enter" key to confirm, the machine will open the Internet radio
folder option of your country.
②Select one of the folders, the screen displays the name of the Internet radio station of this folder, short press the
"RIGHT/LEFT" button to enter the next interface or return to the previous interface, turn the "SKIP+/- knob" to
move up/down to select the Internet radio station, Short press "Enter" key to play.
③When entering the interface of playing music, short press the "RIGHT" button to enlarge the song picture
information, and short press the "LEFT" button to return. Rotate the "SKIP+/- knob" to return to the song list
interface, and short press the "Enter" key to exit or enter the Internet radio play. You can choose to play according
to the Internet radio stations you like to listen to.
④Long press the "PRESET" button to enter the radio station prestore interface, turn the "SKIP+/- knob" to
move the prestore position forward or backward, and short press the "Enter" key to store the radio station to
the current position. Short press the "PRESET" button to enter the tuning interface, turn the "SKIP+/- knob" to
move the pre-stored position forward or backward, and short press the "Enter" key to recall the stored radio
station for playback.
My mediaU function
①First, you have to register an account at https://www.mediayou.net, and log in successfully. Then click
"Radio", output the name of the machine you want in the "Name your radio here" box, and enter the serial
number in the "SERIAL NUMBER" box. How to get serial number (1.Turn on radio. Go to "Information Center",
select "System Information" select "Wireless Info". 2. You'll find "MAC Address" serial number. You can choose
you on this website "Favorite Station","Favorite Location/Genre","Local Radio(City)","Manu-ally Add".
②Click "my mediaU" on the website to manage "Favorite Station", "Favorite Location/Genre", "Local
Radio(City)", and "Manually Add".
③Power on, short press the "MENU" button to enter "Configuration", select "Manage my mediaU" and then
select "Enable". Enter "mediaU" on the machine and you can see your "Favorite Station", "Favorite
Location/Genre", "Local Radio(City)", "Manually Add" on the website.
Alarm function
Time/calendar settings
①Power on and press "MENU" to enter the main menu, turn the "SKIP+/- knob" to move, short press "Enter"
to enter the "Configuration" interface, select "Date&Time", and enter the "Date&Time" interface with three
options.
a. Select "Set Date and Time". If it is connected to the network, you can select "Auto Detect" or set the time by
yourself. Select "Manual Setup". Short press the "RIGHT/LEFT" button to move, and turn the "SKIP+/- knob" to
change the time , Short press "Enter" key to confirm.
b. Select "Set Time Format", there are 12-hour system and 24-hour system to provide options.
c. There are three display modes for selecting "Set Date Format": YYYY/MM/DD, DD/MM/YYYY/MM/DD/YYYY.
Display mode.
Alarm setting
①Power on and press "MENU" key to enter the main menu, turn "SKIP+/- knob" to move, short press "Enter"
key to enter the "Configuration" interface, select "Alarm" to enter "Alarm" and there are two alarm clocks to
choose from. Turn the "SKIP+/- knob" to move up and down, and short press the "SKIP+/- knob" to confirm.
②Select "Alarm1", select "Turn On" to enter the Alarm setting interface
a. Select "Repeat" to select "Everyday" "Once" "Mon" "Tue" "Wed" "Thu" "Fri" "Sat" "Sun".
b. Select "Time" and turn "SKIP+/- knob" to change the size of the alarm time, short press "RIGHT/LEFT" to
move, and short press "Enter" to confirm.
c. Select "Sound" to select the sounds in "Beep", "Melody", "Interne dio", "FM", and "USB" for alarm. The
default “Sound” is “Melody” when it is turned on.
③You can also select "NAP Alarm", you can select "Turn Off", "5 Minutes", "10 Minutes", "20 Minutes", "30
Minutes", "60 Minutes", "90 Minutes", and "120Minutes"
"120 Minutes", the alarm sound is Beep.
④Select "Alarm Volume" and short press "RIGHT/LEFT" to increase or decrease the alarm sound.
⑤When the alarm sounds, short press the "STANDBY" button to turn off the alarm, short press other buttons
to enter snooze, the snooze time is 5 Minutes.
11
English
12
English
lnstruction lnstructionlnstruction
APP control
①For iPhone, search for “AirMusic Control” in “App Store” to download this APP.
②Download "AirMusic Control" from Anzhuo mobile phone
a. Short press the "MENU" button when power on, select "Configuration/Device/App"
b. Select "App" and scan the QR code that appears on the machine with your mobile phone.
13
English
14
English
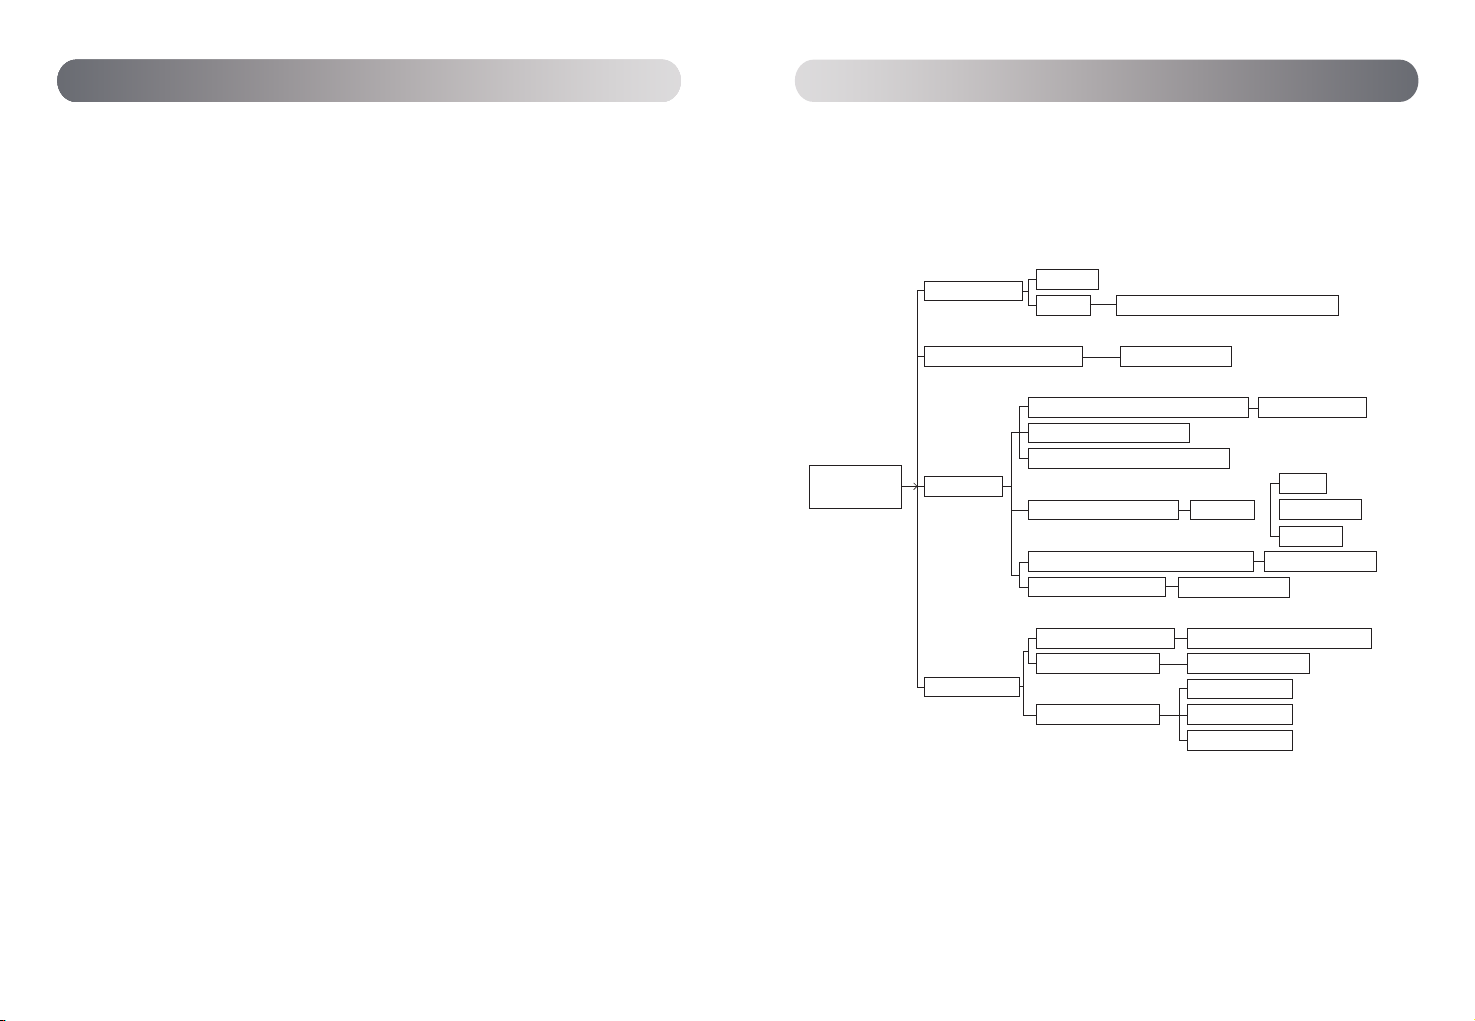
Configuration settings tree:
Configuration
(1.-22.)
Analog
Digital Blue/Green/Oragne/Red/White
Enable/Disable
Wireless Network Configuration Enable/Disable
Wireless Network(App)
Wireless Network(WPS PBC)
DHCP
Manual Configuration Wireless Enter SSID
Manage
Check Network when Power On Enable/Disable
Setup PIN for APP Enable/Disable
Set Date and Time Manual Setup/Auto Detect
Set Time Format 12 Hour/24 Hour
YYYY/MM/DD
Set Date Format DD/MM/YYYY
MM/DD/YYYY
1.Time Display
3.Network
4.Date&Time
2.Manage my mediaU
③The mobile phone can use the APP "AirMusic Control" to remotely control the machine by connecting the mobile
phone to the same network as the machine.
Reset to Default
① Turn on the machine and press the "MENU" key to enter the main menu. Select "Configuration", select "Reset to
Default", select "YES" and wait for a while to restore factory settings.
FCC Statement
Changes or modifications not expressly approved by the party responsible for compliance could void the user's authority to
operate the equipment.
This equipment has been tested and found to comply with the limits for a Class B digital device, pursuant to Part 15 of the
FCC Rules. These limits are designed to provide reasonable protection against harmful interference in a residential installation.
This equipment generates uses and can radiate radio frequency energy and, if not installed and used in accordance with the
instructions, may cause harmful interference to radio communications. However, there is no guarantee that interference will
not occur in a particular installation. If this equipment does cause harmful interference to radio or television reception, which
can be determined by turning the equipment off and on, the user is encouraged to try to correct the interference by one or
more of the following measures:
-- Reorient or relocate the receiving antenna.
-- Increase the separation between the equipment and receiver.
-- Connect the equipment into an outlet on a circuit different from that to which the receiver is connected.
-- Consult the dealer or an experienced radio/TV technician for help.
This device complies with part 15 of the FCC rules. Operation is subject to the following two conditions (1)this device may not
cause harmful interference, and (2) this device must accept any interference received, including interference that may cause
undesired operation.
This equipment complies with FCC radiation exposure limits setforth for an uncontrolled environment. This equipment should
be installed and operated with minimum distance 20cm between the radiator & your body.

lnstruction Configuration settings tree:Configuration settings tree:
15
English
16
English
Everyday/Once
Repeat Everyday Mon/Tue/Wed
Turn On Time:00:00 Thu/Fri/Sat/Sun
Sound Beep/Melody/Internet Radio
FM/USB
Turn Off/5Minutes/10Minutes/20Minutes
30Minutes/60Minutes/90Minutes/120Minutes
Everyday/Once
Repeat:Everyday Mon/Tue/Wed
Thu/Fri/Sat/Sun
Time: 00:00-00:00
Internet Radio
Sound FM
Turn Off
English/German/Spanish/French/Portuguese/Netherlands
Italian/Russian/Swedish/Norwegian/Danish/Hungarian
Czech/Slovakian/Polish/Turkish/Finnish/Greek
Alarm 1(Turn Off)
Alarm 2(Turn Off)
NAP Alarm(Turn Off)
Alarm Volume
5.Alarm
6.Timer
7.Scheduled Playing
8.Language
Turn On
Turn Off
Power Saving
9.Dimmer
Turn On
Color/Monochrome
Turn Off/5Minutes/15Minutes/30Minutes
Turn Off/15Minutes/30Minutes/60Minutes
90Minutes/120Minutes/150Minutes/180Minutes
Set Location/Temperature Unit/Show on Standby
FM Mode:Set Mono/Set Stereo
FM Sensitivity:Strong/Default/Weak
Service following(FM/Wi-Fi):Enable/Disable
Auto Detect(Country)/Manual Setup(Country)
Set Location Manual Setup(State)/Manual Setup(City)
Manual Setup(US Zip Code)
Off/Repeat all/Repeat one/Shuffle
Local Radio/my mediaU/Internet Radio
Sleep Radio/Podcast/USB/UPnP/Media Center/FM/DAB(Wi-Fi)
/AUX/Bluetooth/Timer/Alarm
Normal/Flat/Jazz/Rock/Soundtracks
Classical/Pop/News/my EQ
10.Display
11.Power Management
12.Sleep Timer
13.Weather
14.FM Setup
15.Local Radio Setup
16.Playback Setup
17.Menu
18.Equaliser
On/Off
System Information/Rename(inscabin IR-D8)/APP/Privacy
Software Update(Yes)/Software Update(No)
Yes/No
19.Resume When Power On
20.Device
21.Software Update
22.Reset to Default
Table of contents
Other inscabin Radio manuals


