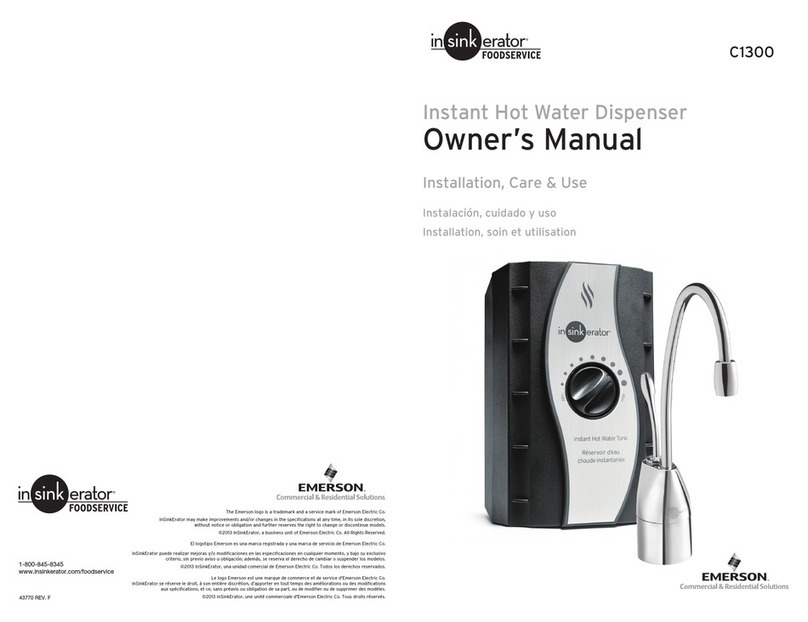
InSinkErator C1300 User manual

System provides
100 cups of instant,
200° water per hour.
Instalación,
Cuidado & Uso
Installation,
Sions & Utilisation
Installation,
Care & Use
Food Service Equipment
Instant Hot Water Dispenser
Owner’s Manual
Model
C1300
Model
H778

Equipment You May Need:
■■For your satisfaction and safety, read all instructions, cautions, warnings and dangers before installing
or using this instant hot water dispenser.
■■Make sure that all electrical wiring and connections conform to local codes.
■■A standard 115-volt grounded electrical outlet is required for the dispenser’s electrical power.
■■The wall outlet powering the dispenser must have power supplied to it continuously.
■■To ensure proper operation, this unit is not intended to be flushed with chlorine. If you suspect elevated
levels of chlorine in the water, it is recommended to use our water filtration system.
■■Moving parts inside the tank causing a rattling noise is normal.
WHAT YOU SHOULD KNOW BEFORE YOU BEGIN
Equipment Required:
■ Drill
■ Compression fitting,
T-fitting or saddle valve
■ Adjustable wrench
■ Phillips and flat blade screwdrivers
■ Pencil
■ Tape Measure
■ Level
■■Anchors for drywall
■■Hole saw
■■Basin wrench
■■Hole punch
2
IN THIS PACKAGE
Mounting ScrewMounting WasherFiber Gasket4" Extension
C1300
H778
3/4" Screws(2)
Semi-circular
Mounting Plate
Hex Nut Hex Tool 3/4" Screws(2)Rubber O-Ring
Food Service Equipment
Instant Hot Water Dispenser
Installation, Care & Use Manual

For Technical Assistance
1-800-845-8345
For Technical Assistance
1-800-845-8345 3
OVERVIEW OF A
COMPLETED SETUP
■■Turn off water supply.
■■If using the sinksprayer hose hole,
remove nut that connects sprayer
hose at bottom of faucet.
■■Using adjustable wrench, remove nut
connecting sprayer washer flange in
sprayer hole.
■■Plug hose opening with either a 1/8"
plug or a 1/4"cap (not supplied).
B
If you have to drill through sink or
countertop, you may need to rent or purchase
the appropriate tools.
PREPARATION
START HERE PROPER INSTALLATION SHOULD TAKE ABOUT 2-4 HOURS
■■Identify locations for the dispenser
faucet, tankand filter (if applicable).
■■Checkto make sure there is proper
clearance (see chart at left) for
dispenser handles to be fully opened.
■■Checkto make sure counter is not
too thick(see chart at left).
■■Make sure there is a grounded
electrical outlet within 30"of the tank.
1A
The wall outlet for your dispenser must have power
supplied to it continuously and must be fused.
It should not be controlled by the same wall switch
that operates your disposer.
C1300 .............. 43⁄8" ..........................3"
H778 ................ 2" ............................3"
Note: Hole size requirement is 11⁄4"– 11⁄2"
Required minimum from
center of hole to wall Maximum counter
thickness (depth)
Electric Shock Hazard: Using an ungrounded or improperly connected
appliance can result in serious injury or death from electrical shock.
This appliance must be grounded. This instant hot water dispenser is equipped with a cord that has
a grounding conductor and a grounding pin. The plug must be connected to an appropriate outlet that
is properly installed and grounded in accordance with all local codes and ordinances.
Do not modify the plug provided with the appliance.

Property Damage: Do not pinch or break copper
tubing. Do not distort the last 1 inch of tubing.
C1300
C1300
C1300
C1300
■■From under the sink, place the
semi-circular mounting plate onto
the threaded stud.
■■Place hex nut onto the threaded stud.
Ensure faucet head is at desired angle.
■■Insert screwdriver into hole on side of
hex tool (creating a “T”), and use tool
to tighten nut and secure faucet.
2
Semi-circular mounting plate should
encircle all descending tubes and
extend beyond sink hole when tight.
■■Ensure that the blackO-ring is
properly seated in the base of the
dispenser head (the groove on the
underside of the dispenser).
■■Feed tubes down through the hole
in the sinkor countertop until the
base is at rest on the sinkor
countertop surface.
■■
Unpackdispenser components.
■■
On a firm, flat surface, carefully
straighten the copper tubing.
An assistant may be needed to hold
the dispenser head in place
while securing the dispenser.
B
A
C
D
Make sure to use rubber O-ring
to ensure proper seal.
INSTALLING THE FAUCET - C1300
4

For Technical Assistance
1-800-845-8345 5
Property Damage: Do not pinch or break copper
tubing. Do not distort the last 1 inch of tubing.
Make sure to use fiber gasket
to ensure proper seal.
■■
Unpackdispenser components.
■■
On a firm, flat surface, carefully
straighten the copper tubing.
■■Ensure that the fiber gasket is
properly seated against the base of
the dispenser head.
2
B
A
Fiber
Gasket
H778
H778
■■From below the sink, place semi-
circular metal mounting washer over
the mounting screw, ensuring the
mounting washer extends beyond
the sinkhole.
■■Slide washer over so that the screw
is now inside the smaller hole.
Tighten the screw until snug.
■■Feed tubes down the hole in the sink
or countertop until the base is at rest
on the sinkor countertop surface.
■■Position faucet head at the desired
angle.
Half moon shaped metal washer
should cradle all descending tubes.
An assistant may be needed to hold
the dispenser head in place
while securing the dispenser.
C
DH778
H778
DO NOT remove mounting screw or
fiber gasket from base of dispenser.
INSTALLING THE FAUCET - H778

Mount tank vertically in an area that
allows clearance on the underside of the
tank for drainage, if necessary.
DO NOT over tighten screws.
■■Pre-drill 1/8"pilot holes at marks.
■■Turn screws into pre-drilled holes,
leaving 1/4"exposed.
■■Hang the tankon the screws.
■■Tighten the screws with only 1/2 turn
clockwise.
B
A■■Select a spot under the sinkto mount
tankvertically within reach of both
plumbing and electrical connections.
The tankshould be within 16"or less
of faucet water lines and within 30"
or less of a standard grounded outlet.
■■While holding tankin place on
the spot selected for installation,
use a pencil to marklocations for
2 hanging screws.
Property Damage: Tank must be located within 16" of
faucet and within 30" or less of a standard grounded
outlet. DO NOT extend plumbing or electrical lines.
3
■■Without depressing the gray button,
place the snap-connect fitting at
the end of the blue 1/4"tube onto
the left plastic fitting on the tank,
pushing until it clicks into place. (1)
■■Slip the flexible white 7/16"tube
over barbed middle fitting and slide
down approximately 1/2". (2)
4
12
A
Property Damage: Pinched or blocked water lines
may cause damage to the dispenser tank.
■■Slip the clear 5/16"tube over the
far right smooth fitting and slide
down approximately 1/2". (3)
■■Visually checkfor pinched or
crimped tubes.
B
3
Property Damage: Check to make sure
tubes are connected properly and are
pushed in as far as possible.
Screws provided are for use in wood
studs or cabinets only. Use wall anchors
(not supplied) for installation into drywall.
Leave 1/4"for
hanging tank.
CONNECTING FAUCET TO TANK
MOUNTING THE TANK
Tank must be
mounted level
to ensure
proper operation.
6

For Technical Assistance
1-800-845-8345 7
Scalding Hazard: The faucet dispenses water up
to 210ºF, which can instantly cause scalds or burns.
Use care when operating this appliance.
Property Damage: Join remaining tube
to cold water supply only.
B
■■
Turn on the cold water supply.
■■Depress
or twist the dispenser handle
and hold it until water flows from the spout.
■■
Run the water for at least 2 minutes to
flush lines (both the hot and cold handles
independently if applicable).
A
A
6
■■
Checkall connections to ensure they are
tight
and that there are no leaks.
■■
Plug in instant hot water tank.
Water will be cold at first.
Allow 12-15 minutes for water to reach
target temperature.
Gurgling or hissing is normal during the
initial heating cycle.
5
Brass Nut
Ferrule
■■
Install a compression fitting, T-fitting
or saddle valve onto the cold water
supply line.
■■
At the end of the copper 1/4"tube,
slide the fitting’s brass nut and ferrule
over the tube.
■■
Insert the copper tube into the 1/4"
compression fitting and tighten.
Property Damage: A standard grounded outlet within
30" of the dispenser is required under the sink. Do
not use an extension cord set with the dispenser.
FINAL WATER CONNECTION
FILL TANK & THEN CONNECT POWER
Property Damage: To avoid water damage, replace any loose or split tubing.
Periodically inspect the unit for any signs of leakage and immediately remove from
service any unit suspected of leaking.
Personal Injury: This tank is a non-pressurized tank. DO NOT modify this system.
DO NOT close vent tube or connect other type dispensers or valves to the tank. Use
only the In-Sink-Erator dispenser faucet supplied. Use only parts provided. Contact
an authorized In-Sink-Erator Service agent for repairs or replacement components.
Fire Hazard: To minimize possibility of fire, DO NOT store flammable items such as
rags, paper or aerosol cans near the tank. DO NOT store or use gasoline or other
flammable vapors and liquids in the vicinity of this or any other appliance.

Scalding Hazard: Do not allow
water to boil. May result in
severe burns.
■■
Only use mild cleaners to clean the
dispenser’s faucet and plastic components.
■■
Cleaners with acids, alkaline, and organic
solvents will result in deterioration of the
plastic components and void the warranty.
CLEANING THE FAUCET AND TANK
Factory temperature pre-set is 200˚F.
To reset the thermostat to 200°,
turn the indicator one notch to the
right of vertical. After adjusting,
depress or twist the dispenser handle
for 20 seconds for water to re-heat to
the new setting.
■■
To adjust water temperature, turn thermostat
dial on the front of the tankclockwise to
increase temperature or turn counter clockwise
to decrease temperature. Repeat if necessary.
All changes should be minimal.
■■
Regularly inspect the unit for any signs of
leakage. If there are signs of water damage,
immediately remove the unit from service.
■■
To avoid water damage from leakage,
replace all cut, loose or split tubing.
■■
A drain pan, plumbed to an appropriate
drain or outfitted with a leakdetector,
should be used in those applications where
any leakage could cause property damage.
PROPERTY DAMAGE
Anytime the instant hot water dispenser is not used
for extended periods of time, unplug and drain unit.
If it is below freezing you will need to unplug the
unit and drain it.
SEASONAL STORAGE/DRAINAGE
■■
Disconnect power from unit.
■■
Push hot water dispenser faucet lever and
allow water to flow until it is cool.
■■
Shut the dispenser off at the valve.
■■
Remove drain screw located on bottom
center of dispenser tankand drain the
water into empty pail.
■■
Empty the tankand then reinstall drain
screw onto the bottom of tank, turning
until snug. Do NOT over tighten.
■■
To place backin order, fill tankwith water
and re-connect the electrical plug.
CARE AND USE
Electric Shock Hazard: To prevent electrical shock, disconnect power before
servicing unit. Use only a properly grounded and polarized electric outlet.
approx. 200°
ADJUSTING THE THERMOSTAT
1-year warranty on dispenser & tank
Covers all replacement parts and labor to correct defects in material or workmanship in the dispenser system for the full warranty
period from the date of installation. The warranty includes parts and labor, provided the service is performed by an In-Sink-Erator®
Factory Authorized Service Center. If the dispenser is replaced rather than repaired, the warranty on the new unit shall be for the
duration of the remaining portion of the original dispenser’s warranty.
Note: Warranty is determined by unit serial number and/or
date of installation. Purchase or installation receipt may be required to verify warranty status. When service is required, and for the
location of your nearest factory authorized service center, call toll free 1-800-845-8345
.
The foregoing warranty does not apply to damage or inoperation resulting from accident, alteration, misuse, abuse,
improper installation, installation not in accordance with these instructions or local electrical and/or plumbing codes. We do not
assume any responsibility for consequential damage. Install using genuine In-Sink-Erator manufactured components only. Use of
non In-Sink-Erator components will void the warranty.
Some states do not allow limitations on how long an implied warranty lasts, or the exclusion or limitations of incidental or
consequential damages, so the above limitations or exclusion may not apply to you. This warranty gives you specific legal rights,
and you may also have other rights which vary from state to state.
WARRANTY INFORMATION
8

9
TROUBLESHOOTING
WHAT TO DO
Water and steam spits
forcefully from spout
without turning on the
dispenser faucet.
Water is not hot
• Unit is boiling.
May be normal during initial setup.
• The unit may not be plugged in.
• The electric outlet is inoperative.
•
Depress faucet lever to release some water from
the tank.
• Adjust water temperature using dial on tank front.
Remember that at higher altitudes, water boils
at lower temperatures.
•
Make sure the unit is connected to a properly grounded
electric outlet.
• Make sure the circuit breaker or fuses are
functioning properly.
• Check that the outlet is not switched off.
Water is too hot
or not hot enough
• Thermostat is not adjusted to
your needs.
•
Adjust the thermostat slowly, then depress or twist faucet handle
for 20 seconds to bring in fresh water to be heated at the new
setting. Allow 5-7 minutes for water to reach new temperature.
Water comes out the
vent instead of spout
• Outlet tube is blocked. •
Check that outlet tube is not kinked, twisted or pinched.
•
Unscrew spout end piece and clean out any debris.
Water is dripping from
the spout/vent
intermittently
• The expansion chamber isn’t draining
properly due to low water pressure.
• The spout is blocked.
• Unplug the unit. If the dripping doesn’t stop after a few
minutes, check the supply valve to ensure that is fully
open and there are no obstructions in the water line
reducing the pressure below 30 psi (
i.e., a poorly mounted
saddle valve, a clogged water filter, or a partially opened
shut-off valve).
•
Unscrew spout end piece and clean out any debris.
Water is dripping
from the spout/vent
constantly
• Debris in the water line may be
in the faucet valve seat causing a
slow water leak.
•
Unscrew spout end piece and clean out any debris.
•
Depress or twist lever 7-10 times to flush faucet & lines.
Divided stream • Debris in the faucet lines. •
Unscrew spout end piece and clean out any debris.
PROBLEM POSSIBLE CAUSE
If you are still experiencing trouble,
visit www.insinkerator.com or call 1-800-845-8345.
An instant hot water dispenser, like any water heater, has a limited life and will eventually fail. To avoid
possible property damage, this instant hot water dispenser should be regularly examined for leakage and
replaced when necessary. A drain pan, plumbed to an appropriate drain or outfitted with a leak detector,
should be used in those applications where any leakage could cause property damage.

El sistema proporciona
100 tazas del instante,
agua 200° por hora.
Instalación,
Cuidado & Uso
Installation,
Sions & Utilisation
Installation,
Care & Use
Equipo Del Servicio
De Alimento
Dispensador de agua
caliente instantánea
Manual del usuario
Modelo
C1300
Modelo
H778

Equipo que puede necesitar:
Herramientas:
■ Taladro
■ Adaptador de compresión,
conector "T"o válvula de asiento
■ Llave ajustable
■ Destornilladores Phillips y planos
■ Lápiz
■ Cinta métrica
■■Tarugos para panel de yeso
■■Broca corta-círculos
■■Llave para fregadero
■■Punzón
LO QUE USTED NECESITA PARA COMENZAR
Para La Asistencia Técnica
1-800-845-8345
■■Para su satisfacción y propia seguridad, lea todas las instrucciones, así como los enunciados de precaución,
advertencia y peligro antes de instalar o de utilizar su dispensador de agua instantánea.
■■Para conectar el dispensador en la tubería de alimentación de agua potable no se necesita trabajo especial
de plomería.
■■El dispensador debe enchufarse en una toma eléctrica estándar de 115 voltios con conexión a tierra ubicada
bajo el fregadero.
■■Esta toma eléctrica debe tener energía ininterrumpida.
■■La toma debe contar con un fusible y no debe ser controlada por el mismo interruptor de pared con el que
funciona el dispensador, excepto si usted tiene un interruptor marca SinkTop Switch™de In-Sink-Erator®.
■■Las partes internas del tanque provocan un traqueteo normal.
LO QUE USTED DEBE SABER ANTES DE COMENZAR
CONTENIDO DE ESTE PAQUETE
C1300
Placa de montaje
semicircular
Tuerca hexagonal
Herramienta
hexagonal
Tornillosde 3/4" (2)Anillo "O" de caucho
Tornillo de montajeArandela de montajeJunta de fibra
4" Extensión
H778
Tornillosde 3/4" (2)
Equipo Del Servicio De Alimento
Dispensador de agua caliente instantánea
Instalación, Cuidada & Uso
11

VISTA GENERAL DE LA
INSTALACIÓN TERMINADA
■■
Cierre la toma del agua.
■■
Si utiliza el orificio de la manguera del
rociador, quite la tuerca que conecta la
manguera del rociador debajo del grifo.
■■
Quite con la llave ajustable la pestaña
de la arandela del rociador que está en
el orificio del rociador.
■■
Tape la abertura de la manguera con un
tapón de 1/8"o de 1/4"(no incluido).
B
Si es necesario perforar el fregadero o la cubierta,
es posible que tenga que rentar o comprar
las herramientas apropiadas.
PREPARACIÓN
COMIENCE AQUÍ
LA INSTALACIÓN CORRECTA DEBE HACERSE ENTRE 2-4 HORAS
■■Identifique las ubicaciones del grifo, tanque
y filtro (si es el caso) del dispensador.
■■Compruebe que haya espacio libre
suficiente (vea la tabla a la izquierda) para
poder abrir las manijas del dispensador.
■■
Asegúrese de que la cubierta no sea
demasiado gruesa (vea la tabla a la
izquierda).
■■Asegúrese de que haya una toma eléctrica
con conexión a tierra debajo del fregadero.
1A
La toma eléctrica de pared para el surtidor debe
tener alimentación continua y un fusible.
No debe ser controlada por el mismo interruptor
con el que funciona el dispensador.
C1300 .............. 43⁄8" ..........................3"
H778 ................ 2" ............................3"
Nota: El requisito del tamaño del agujero es el 11⁄4" a el 11⁄2"
Mínimo requerido del
centro del orificio a la pared Grosor máximo de la
cubierta (profundidad)
Riesgo de descarga eléctrica: El uso del dispositivo sin conexión a tierra o conectado
incorrectamente puede ocasionar lesiones graves o la muerte debido a una descarga
eléctrica.
PELIGRO
Este electrodoméstico debe estar conectado a tierra. Este dispensador está equipado con un cable eléctrico
que tiene un conductor con conexión a tierra y un polo de conexión a tierra. El enchufe debe conectarse a una
toma instalada correctamente y conectada a tierra de acuerdo con los códigos y normas eléctricas de su localidad.
No modifique el cable proporcionado con el aparato; en caso de que no se pueda enchufar en la toma, contrate los
servicios de un técnico especializado para instalar la toma eléctrica. Si duda de que su dispensador esté
conectado correctamente a tierra, consulte a un técnico especializado.
12

Para La Asistencia Técnica
1-800-845-8345
Daños materiales: No apriete ni rompa el tubo de
cobre. No deforme la última pulgada (2.5 cm) del
extremo del tubo de cobre.
C1300
C1300
C1300
C1300
■■
Coloque la placa de montaje semicircular en
el perno roscado por abajo del fregadero.
■■
Enrosque la tuerca hexagonal en el perno.
Compruebe que la cabeza del grifo quede
al ángulo deseado.
■■
Inserte un destornillador en el orificio de la
herramienta hexagonal (para formar una
“T”), y apriete la tuerca y fije el grifo con
esta herramienta.
2
La placa de montaje semicircular debe circundar
todos los tubos que descienden y rebasar el
agujero del fregadero cuando esté apretada.
■■
Compruebe que el anillo "O"quede
sentado correctamente en la base de la
cabeza del dispensador (la ranura en la
parte inferior del dispensador).
■■
Inserte los tubos por el orificio en el
fregadero o cubierta hasta que el
extremo descanse en la superficie del
fregadero o cubierta.
■■
Desempaque los componentes
del surtidor.
■■
Enderece con cuidado el tubo de cobre
sobre una superficie firme y plana.
Puede ser necesario un ayudante para
sostener el dispensador mientras
se fija en su lugar.
B
A
C
D
PRECAUCIÓN
Asegúrese de usar una anillo "O" de caucho
para obtener un sellado correcto.
INSTALACIÓN DEL GRIFO - C1300
13

Daños materiales: No apriete ni rompa el tubo de
cobre. No deforme la última pulgada (2.5 cm) del
extremo del tubo de cobre.
PRECAUCIÓN
Asegúrese de usar una junta de fibra
para obtener un sellado correcto.
■■
Desempaque los componentes del
dispensador.
■■
Enderece con cuidado el tubo de cobre
sobre una superficie firme y plana.
■■
Compruebe que la junta de fibra
quede sentada correctamente en la
base de la cabeza del dispensador.
2
B
A
Junta
de fibra
H778
H778
■■
Por abajo del fregadero, coloque la
arandela metálica de montaje
semicircular en el tornillo de montaje y
verifique que la arandela de montaje
rebase el orificio del fregadero.
■■
Deslice la arandela de modo que el
tornillo quede ahora dentro del orificio
menor. Apriete el tornillo hasta que
quede fijo.
■■
Inserte los tubos por el orificio en el
fregadero o cubierta hasta que el
extremo descanse en la superficie del
fregadero o cubierta.
■■
Coloque la cabeza del grifo al ángulo
deseado.
La arandela metálica con forma de media luna
debe soportar todos los tubos que descienden.
Puede ser necesario un ayudante para
sostener el dispensador en
su lugar mientras se fija.
C
D
Arandela
de montaje
H778
H778
NO QUITE el tornillo de montaje o la junta
de fibra de la base del dispensador.
INSTALACIÓN DEL GRIFO - H778
14

Para La Asistencia Técnica
1-800-845-8345
Monte el tanque verticalmente en un lugar que
permita tener un espacio libre abajo para
drenarlo si es necesario.
NO APRIETE los tornillos excesivamente.
■■Haga orificios guía de 1/8"(0.3 cm) en las
marcas.
■■Inserte los tornillos en los orificios guía y
deje 1/4"(0.6 cm) de tornillo expuesto.
■■Cuelgue el tanque en los tornillos.
■■Apriete los tornillos media vuelta.
B
A
■■
Seleccione un punto debajo del fregadero para
montar el tanque verticalmente al alcance de
las conexiones de plomería y eléctricas. El
tanque debe estar a una distancia máxima de
16"(40 cm) del grifo y a una distancia máxima
de 30"(75 cm) de una toma eléctrica estándar
con conexión a tierra.
■■
Sostenga el tanque en el punto seleccionado
para instalarlo y marque con un lápiz los
lugares para colocar dos tornillos para colgarlo.
Daños materiales: El tanque debe estar colocado dentro de una distancia de
16" (40 cm) del grifo y a 30" (75 cm) o menos de una toma eléctrica estándar
con conexión a tierra. NO EXTIENDA las líneas de plomería y eléctricas.
3
■■
Inserte el conector de inserción del tubo
azul de 1/4"en el conector rápido
(izquierda) del tanque. (1)
■■
Inserte el tubo blanco flexible de 7/16"
en el conector escalonado del centro
y deslícelo aproximadamente 1/2"
(1.3 cm). (2)
4
12
A
Daños materiales: Las líneas de agua estrechas o
bloqueadas pueden dañar al tanque.
■■
Inserte el tubo transparente de 5/16"en
el conector liso de la derecha y deslícelo
aproximadamente 1/2"(1.3 cm). (3)
■■
Revise visualmente para que los tubos no
queden aplastados ni torcidos.
B
3
Daños materiales:
Compruebe que los tubos
queden conectados correctamente e insertados
la mayor distancia posible.
Los tornillos incluidos sólo deben usarse en
montantes de madera o gabinetes. Para instalarse
en paneles de yeso utilice tarugos (no incluidos).
Deje los tornillos
expuestos 1/4"(0.6 cm)
para colgar el tanque.
ADVERTENCIA
PRECAUCIÓN
PRECAUCIÓN
CONEXIÓN DEL GRIFO EN EL TANQUE
MONTAJE DEL TANQUE
El tanque debe
montarse nivelado
para asegurar su
funcionamiento
correcto.
15

Peligro de quemaduras: El grifo surte agua a una temperatura
de hasta 210 °F, la cual puede causar escaldaduras o
quemaduras. Tenga cuidado cuando utilice este aparato.
ADVERTENCIA
Daños materiales:
Conecte el tubo restante
al agua fría de entrada solamente.
PRECAUCIÓN
B
■■
Abra la línea de agua fría.
■■Oprima o gire la manija
HOT (CALIENTE)
del dispensador hasta que salga el agua
por el grifo.
■■
Deje salir el agua por lo menos durante dos
minutos para limpiar las líneas (las manijas de
agua caliente y fría en forma independiente si
es el caso).
A
A
6
■■
Revise todas las conexiones para asegurarse de
que estén apretadas y que no presenten fugas.
■■
Enchufe el tanque de agua caliente.
El agua saldrá fría en un principio.
Espere entre 12 y 15 minutos para que el agua
se caliente a la temperatura indicada.
Durante el ciclo inicial de calentamiento es
normal escuchar gorgoteos y siseos.
5
Tuerca de latón
Casquillo
■■
Instale una válvula de asiento, adaptador de
compresión o una "T"en la línea de agua
fría.
■■
Deslice la tuerca de latón y el casquillo en el
extremo del tubo de cobre de 1/4".
■■
Inserte el tubo de cobre en el adaptador de
compresión de 1/4"y apriete.
Daños materiales: Es necesario tener una toma eléctrica estándar
con conexión a tierra a una distancia de 30" (75 cm) debajo del
fregadero. No utilice extensiones eléctricas con el dispensador.
ADVERTENCIA
CONEXIÓN FINAL DEL AGUA
LLENE EL TANQUE Y ENSEGUIDA ENCHÚFELO
Daños materiales: Para evitar daños causados por el agua, cambie cualquier tubería floja
o dañada. Inspeccione periódicamente la unidad para detectar posibles signos de fugas y
retírela de servicio inmediatamente si sospecha que presenta fugas.
Lesiones personales: Este tanque no trabaja a presión. NO MODIFIQUE este sistema.
NO CIERRE el tubo de purga ni conecte otro tipo de dispensadores o válvulas en el
tanque. Utilice sólo el grifo del dispensador In-Sink-Erator proporcionado. Utilice sólo las
partes incluidas en el paquete. Si necesita reparación o partes de repuesto, comuníquese
con su agente autorizado de servicio In-Sink-Erator.
PRECAUCIÓN
ADVERTENCIA
PRECAUCIÓN
Riesgo de incendio: Para minimizar la posibilidad de incendio, NO GUARDE objetos infla-
mables como trapos, papel o envases con aerosol cerca del tanque. NO GUARDE o use
gasolina u otros vapores o líquidos inflamables cerca de éste u otros aparatos eléctricos.
16

Para La Asistencia Técnica
1-800-845-8345
Riesgo de escaldado: No deje
hervir el agua. Esto puede
producir lesiones graves.
■■Use solamente limpiadores suaves para
limpiar el grifo y los componentes de plástico
del dispensador.
■■El uso de limpiadores que contienen ácidos,
álcalis y disolventes inorgánicos causa deterioro
de los componentes plásticos y anula la garantía.
LIMPIEZA DEL GRIFO Y DEL TANQUE
La temperatura establecida de fábrica es
de 200 °F. Para reajustar el termostato
a 200°, gire el indicador una muesca
hacia la derecha de la vertical.
Después de ajustar, oprima o gire la
manija del dispensador durante 20
segundos para que el agua vuelva a
calentarse a la nueva temperatura.
■■
Para ajustar la temperatura del agua, gire el
indicador del termostato que está enfrente del
tanque en sentido horario para aumentar la
temperatura y en sentido contrario para disminuirla.
Repita estos pasos según sea necesario. Todos los
cambios deben ser mínimos.
■■
Revise periódicamente la unidad por posibles signos
de fuga. Si encuentra signos de daños causados por
el agua, retire inmediatamente la unidad de servicio.
■■
Para evitar que el agua cause daños debido a fugas,
cambie cualquier tubo que encuentre cortado, suelto
o dañado.
■■
En caso de que una fuga pueda causar daños
materiales, se debe usar una bandeja de goteo
conectada a un tubo de drenado adecuado o
equipada con un detector de fugas.
DAÑOS MATERIALES
Si el dispensador no se va a usar durante periodos largos,
desenchúfelo y drénelo. Si la temperatura ambiental está
por abajo del punto de congelación, desenchufe y drene el
dispensador.
ALMACENAMIENTO TEMPORAL Y DRENADO
■■Desconecte la alimentación eléctrica de
la unidad.
■■Oprima la palanca del grifo y deje salir el
agua hasta que esté fría.
■■Cierre el dispensador en el punto de la
válvula.
■■Quite el tornillo de drenado ubicado en la
parte inferior central del tanque del
dispensador y drene el agua en un recipiente
vacío.
■■Vacíe el tanque, reinstale el tornillo de
drenado en la parte inferior del tanque y
gírelo hasta que quede apretado. NO
APRIETE excesivamente.
■■Para volver a poner a funcionar la unidad,
llene el tanque con agua y conecte el
enchufe.
MANTENIMIENTO Y USO
ADVERTENCIA
aprox. 200°
AJUSTE DEL TERMOSTATO
Garantía de un año en dispensador y tanque
Cubre todas las partes de reemplazo y mano de obra para corregir defectos de los materiales o de fabricación en el sistema del dispensador, con
excepción del cartucho reemplazable del filtro, durante el periodo completo de garantía a partir de la fecha de instalación en su hogar.
Si se requiere servicio de garantía durante el periodo de garantía, póngase en contacto con un agente de servicio autorizado de In-Sink-Erator para
que reemplace o repare la unidad en su hogar en forma gratuita. Si su dispensador es reemplazado y no reparado, la garantía de la nueva unidad
cubrirá lo que dure el periodo restante de la garantía original del dispensador. Nota: La garantía se determina de acuerdo con el número de serie y
fecha de instalación de la unidad. Es necesario presentar el comprobante de compra o instalación para verificar el estado de la garantía. Cuando
necesite mantenimiento y para encontrar el centro de servicio de fábrica más cercano a usted, llame al número gratuito 1-800-558-5700.
La garantía precedente no aplica a daños o mal funcionamiento que resulten de accidentes, alteraciones, mal uso, abuso, instalación
incorrecta e instalación que no esté hecha de acuerdo con las presentes instrucciones o con las normas eléctricas y de plomería locales. No
asumimos ninguna responsabilidad por daños consecuentes. Instale solamente con componentes originales In-Sink-Erator®. El uso de
componentes que no sean In-Sink-Erator anula la garantía.
Algunos estados no permiten limitaciones acerca del tiempo que duran las garantías implícitas o la exclusión de limitaciones de daños
incidentales o consecuentes, por lo que es posible que las limitaciones mencionadas anteriormente no sean aplicables en su caso. Esta garantía le
otorga derechos legales específicos, y usted puede tener además otros derechos que varían de estado a estado.
INFORMACIÓN SOBRE LA GARANTÍA
Riesgo de descarga eléctrica: Para evitar descargas eléctricas, desconecte la electrici-
dad antes de dar mantenimiento a la unidad. Utilice una toma conectada a tierra y
polarizada correctamente.
PELIGRO
17

IDENTIFICACIÓN Y SOLUCIÓN DE PROBLEMAS
SOLUCIÓN
El agua y el vapor salen
forzadamente por el grifo
sin abrir la manija del
dispensador.
El agua no está caliente
• El agua de la unidad está hirviendo.
Puede ser durante el ajuste inicial.
• Posiblemente la unidad no está
enchufada.
• La toma eléctrica no funciona.
• Oprima la palanca del grifo para que salga agua del tanque.
• Ajuste la temperatura del agua con el indicador que está en
frente del tanque.
Recuerde que a mayor altitud, el agua hierve a menor temperatura
• Verifique que la unidad esté enchufada en una toma eléctrica
conectada a tierra correctamente.
• Asegúrese de que el interruptor de circuito o los fusibles
funcionen correctamente.
• Compruebe que la corriente de la toma eléctrica no esté
interrumpida.
El agua está demasiado
caliente o no está
suficientemente caliente
• El termostato no está ajustado como
usted lo necesita.
• Ajuste el termostato lentamente y luego oprima o gire la
manija del grifo durante 20 segundos para que entre agua
fría y se caliente a la nueva temperatura ajustada. Espere
entre cinco y siete minutos para que el agua se caliente a la
nueva temperatura.
El agua sale por el orificio
de purga y no por la llave
• El tubo de salida está bloqueado. • Revise que el tubo de salida no esté torcido o estrechado.
• Desatornille la pieza del extremo del grifo y quite cualquier
residuo depositado.
El agua gotea por la llave u
orificio de purga
intermitentemente
• La cavidad de expansión no está
drenando correctamente debido a una
presión baja del agua.
• El grifo está bloqueado.
• Desenchufe la unidad. Si el goteo no cesa después de
algunos minutos, revise la válvula de suministro para verificar
que esté completamente abierta y que no haya obstrucciones
en la tubería de agua que causen reducción de la presión por
abajo de 30 psi
(por ejemplo, la válvula de asiento mal
instalada, el filtro de agua tapado o la válvula de cierre
parcialmente abierta)
.
El agua gotea por la llave
u orificio de purga
constantemente
• Los residuos en la línea de agua pueden
estar en la válvula del grifo y causan
una salida lenta del agua.
• Desatornille la pieza del extremo del grifo y quite cualquier
residuo depositado.
• Oprima o gire la manija de 7 a 10 veces para limpiar el grifo y
las líneas.
Corriente dividida • Residuos en las líneas del grifo. • Desatornille la pieza del extremo del grifo y quite cualquier
residuo depositado.
PROBLEMA CAUSA POSIBLE
Si los problemas continúan, visite www.insinkerator.com
o solicite ayuda en la línea en el número 1-800-845-8345.
Los dispensadores de agua caliente instantánea, igual que cualquier otro calentador de agua,
tienen una vida útil limitada y en algún momento fallarán. Para evitar posibles daños materiales,
este dispensador debe revisarse periódicamente por posibles fugas y cambiarse cuando sea
necesario. En caso de que una fuga pueda causar daños materiales, se debe usar una bandeja
de goteo conectada a un tubo de drenado adecuado o equipada con un detector de fugas.
18

Le système fournit
100 tasses d'instant,
l'eau 200° par heure.
Instalación,
Cuidado & Uso
Installation,
Sions &
Utilisation
Installation,
Care & Use
Équipement De Service
de Traiteur
Modèle
C1300
Modèle
H778
Distributeur d’eau très chaude instantanée
Manuel du propriétaire

Pour L'Assistance Technique
1-800-845-8345
Équipement dont vous pourriez avoir besoin :
Équipement nécessaire :
■ Perceuse
■ Raccord de compression, raccord
en T ou robinet-vanne à étrier
■ Clé anglaise
■ Tournevis à têtes Phillips et plate
■ Crayon
■ Ruban à mesurer
■■Ancrages pour mur sec
■■Scie cylindrique
■■Clé à robinet de montée
■■Emporte-pièce
CE QUE VOUS AVEZ BESOIN POUR COMMENCER
■■Pour votre satisfaction et votre sécurité, lisez bien toutes les instructions, précautions, avertissements et dangers
avant d’installer ou d’utiliser ce distributeur d’eau très chaude instantanée.
■■Le raccordement du distributeur à votre système d’eau régulier ne nécessite aucune plomberie spéciale.
■■Une prise électrique avec prise de terre de 115 volts ordinaire est nécessaire sous l’évier pour l’alimentation
électrique du distributeur.
■■La prise murale alimentant votre distributeur doit avoir du courant d’une façon continue.
■■Cette prise doit être dotée d’un fusible et ne doit pas être contrôlée par le même interrupteur mural que celui qui
fait fonctionner du broyeur, à moins que vous n’ayez un commutateur SinkTop SwitchMC de In-Sink-Erator®.
■■Les pièces mobiles à l’intérieur du réservoir peuvent causer un son de crécelle. Ceci est normal.
CE QUE VOUS DEVRIEZ SAVOIR AVANT DE COMMENCER
DANS CET EMBALLAGE
C1300 Plaque de montage
semi-circulaire
Écrou hex Outil hex Vis3/4 po (2)
Joint torique
en caoutchouc
Visde montage
Rondelle
de montage
Garniture de fibre
Prolongation
de 4 po
H778 Vis3/4 po (2)
Équipement De Service de Traiteur
Distributeur d’eau très chaude instantanée
Installation,Sions & Utilisation
20
Other manuals for C1300
2
This manual suits for next models
1
Table of contents
Languages:
Other InSinkErator Dispenser manuals
Popular Dispenser manuals by other brands

Fluid Management
Fluid Management Blendorama 22PC Operating and maintenance manual

SPM
SPM LOLA instruction manual

Bunn
Bunn ThermoFresh SERVER Use & care instructions

Dolphin
Dolphin BC194 Instructions to Replace Wearing Parts

lancer
lancer 500 Series Operation manual

Murdock
Murdock A152.8FG-BF3 Series Installation & maintenance instructions