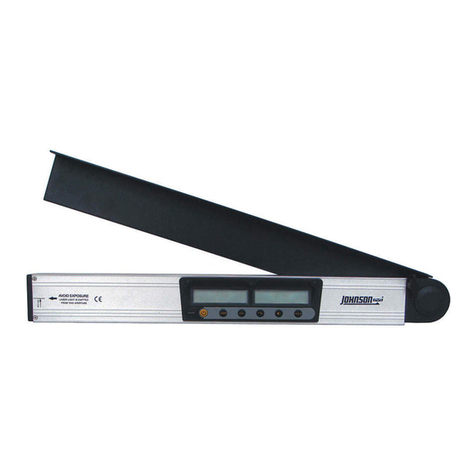
insize ISE-2DT User manual

MN ISE- -2DT-E
DIGITAL LEVEL
ISE-2DT
www.insize.com
OPERATION MANUAL
V0

1 2
1
Thanks for buying our product. ISE-2DT is a high precision dual axis
level with a color LCD and touch panel. It is possible to do high speed
horizontal plane setting for high precision machines or home
appliance as like laundry machine.
Introduction
Specialty:
Easy to set the level of the space with 2 axis angles display at
once.
Power on: Pushing the key once if power is off then the power
is on with a sound.
Power off: Pushing the key for around 2 sec when the power is
on. Then the power is off.
Flash on/off: Pushing the key for under 1 sec after power is
on. Then the flash is on / off. The touch panel is not worked
when the flash is on.
Touch panel calibration: Pushing the key for over 5 sec. Then
it is in the calibration mode of touch panel.
- This function is used when the touch panel doesn't work well.
- The power should be on to enter this calibration mode.
Set the tolerance and the display is shown in different colors.
2Structure:
color LCD and touch panel
power key
direction of
incline
absolute/incremental mode
angle of incline
LED light
charge and data output
4 thread mounting holes
V-slot for cylinder
1Power key has 4 functions below.
Power Key And Touch Panel
2Touch panel : There are 3 sections on the touch panel that have
their own function. The below functions are exceeded if each
sections are touched.
Main menu entrance: To enter the main menu, touch the
'MENU' area.
Absolute/Incremental mode change area : To change the X/Y
to absolute or incremental mode. (ABS REL)
- Absolute mode: The displayed values of X/Y are from the
absolute coordinate system. The absolute coordinate system
is set from the factory or user's updating at the calibration
menu.
- Incremental mode: To make current X/Y values to zero.
↔
Tilt direction display area: To change the tilted direction
display method. (line↔bubble)
line bubble
Level up the visual-effects by the color LCD.
Small & light so that possible to use to a sensor unit.
Possible to insert to high precision systems.
Built-in Li-ion rechargeable battery. (Rechargeable to USB
port on PC)
Note: You must keep touching action until reach the change .

34
3
The main menu is composed as the picture. Each functions
can be chosen by touching the letters.
following
Main Menu Spec: To setup the spec. for the FLAT mode.
2Mode: To change the mode of display.
1Run: To exit the main menu and display the measuring screen.
Go Back: To exit the 'Spec' menu.
Tolerance: To setup the tolerance of the tilted direction display
line, the green line or bubble means within the tolerance.
Model: 10 memory spaces are given to save the users'
specification setting. And user could recall them later.
X: The width of the setting points.
Y: The length of the setting points.
Pitch: The pitch of the screwed legs at the home appliances or
other machines.
Angle: It is set by 360 deg. normally.
4Calibration: To calibrate the absolute zero. Please follow the
steps carefully. If not, it can not be guaranteed the angle data.
XY Calibration: Put the level on the surface as following
picture and choose the 'XY 1st'. Then you might see 'XY 1st
Please Touch Screen'. If the level is settled well on the
surface, touch the screen and wait until the level gathers the
data and averages them.
Turn the level 180 degrees and choose the 'XY Rev'. And
touch the screen if the level is settled.
X Calibration: Put the on the surface
and choose the 'X 1st'. Then you might see 'X 1st Please
Touch Screen'. If the level is settled well on the surface, touch
the screen.
level as following picture

5
Turn the 180 degrees and choose the 'X Rev'. And touch
the screen if the level is settled.
level
Default: If the calibration is not done well, user can choose the
'default'. Then level will recall the zero setting values at the
factory.
5Average: To change the number of inputting row data to average
them. It can be set from 1 to 30.
6Display: To change display options as like brightness, display off
time, etc.
7Save: To save whatever user has changed, it should be done. If
user doesn't want to save the current changes, just turn off the
power .
8About: To see the information of the manufacturer.
Go Back: To exit the Display' menu. '
Touch Calibration: To calibrate the touch panel.
Brightness: To change the brightness of the screen.
Display Off: To change the display on time. The screen will be
off after this time.
Power Off: To change the power on time. The power will be off
after this time.
Line width: To change the width of the tiled direction indicating
line at the POLE mode.
6
1Three using method:
Operation
horizontal use vertical use lie-down use
2Flat mode: Flat mode is used to adjust the 4 legs machines, as
like laundry machine, etc., very easily. There are shown the 3
points, that makes a plane, with the heights to raise up.
The floated point should be taught by user. It could be P1, P2, P3,
or P4 depend on situation. If user touches the area of the floated
point on the screen, ISE-2DT calculates and displays the heights
of the other 3 points. The floated point should be filled up at the
last after user finishes to adjust the 3 points level.
Note:
Before measuring, to use this flat mode, user also has to set the
parameters.
P1
P2
P3
P4 floated point
P1 should be up 2 96mm.
P2 4 00mmshould be up .
P3 doesn’t need to adjust
P4 is floated point
