Intellijel mVCA II User manual

µVCA Manual v1.00
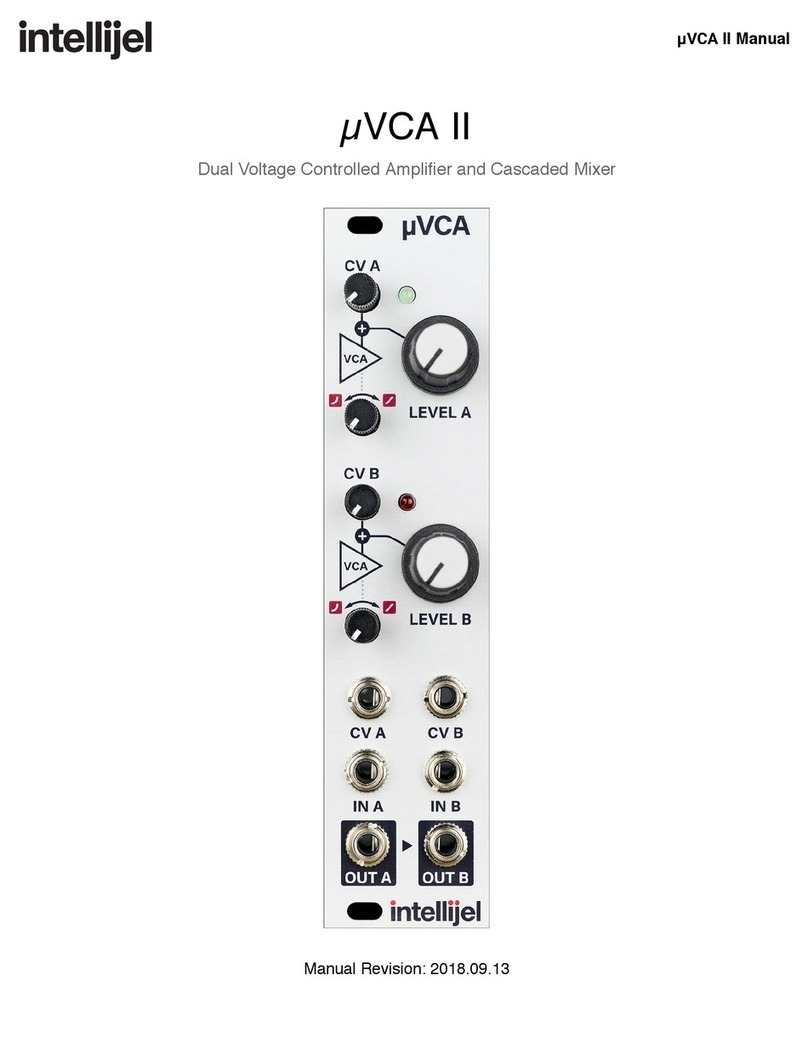
µVCA II
Dual Voltage Controlled Amplifier and Cascaded Mixer

µVCA Manual v1.00
Table of Contents
Table of Contents
Overview
Features
Installation
Before Your Start
Installing Your Module
Front Panel
Controls
Inputs and Outputs
Instructions
Technical Specifications
Page 1

µVCA Manual v1.00
Overview
The µVCA II is a two-channel voltage controlled amplifier that features a response curve
continuously adjustable between linear and exponential response.
Features
●Continuously adjustable response curve between linear and exponential
●Gain trimmer with above-unity gain
●Dedicated CV attenuators
●LEDs for monitoring CV signal
Page 2

µVCA Manual v1.00
Installation
Intellijel Eurorack modules are designed to be used with a Eurorack-compatible case and power
supply.
Before Your Start
Before installing a new module in your case you must ensure your case’s power supply has
sufficient available capacity to power the module:
● Sum up the specified +12V current draw for all modules, including the new one. Do the
same for the -12 V and +5V current draw. The current draw will be specified in the
manufacturer's technical specifications for each module.
● Compare each of the sums to specifications for your case’s power supply.
● Only proceed with installation if none of the values exceeds the power supply’s
specifications. Otherwise you must remove modules to free up capacity or upgrade your
power supply.
You will also need to ensure you have enough free space (hp) as well as free power headers in
your case to fit the new module.
You can use a tool like ModularGrid to assist in your planning. Failure to adequately power your
modules may result in damage to your modules or power supply. If you are unsure, please
contact us before proceeding.
Installing Your Module
When installing or removing a module from your case always turn off the power to the case and
disconnect the power cable. Failure to do so may result in serious injury or equipment damage.
Ensure the 10-pin connector on the power cable is connected correctly to the module before
proceeding. The red stripe on the cable must line up with the -12V pins on the module’s power
connector. The pins are indicated with the label -12V, a white stripe next to the connector, the
words “red stripe”, or some combination of those indicators.
Page 3

µVCA Manual v1.00
Most modules will come with the cable already connected but it is good to double check the
orientation. Be aware that some modules may have headers that serve other purposes so
ensure the cable is connected to the right one.
The other end of the cable, with a 16-pin connector, connects to the power bus board of your
Eurorack case. Ensure the red stripe on the cable lines up with the -12V pins on the bus board.
On Intellijel power supplies the pins are labelled with the label “-12V” and a thick white stripe:
If you are using another manufacturer’s power supply, check their documentation for
instructions.
Page 4

µVCA Manual v1.00
Once connected, the cabling between the module and power supply should resemble the
picture below:
Before reconnecting power and turning on your modular system, double check that the ribbon
cable is fully seated on both ends and that all the pins are correctly aligned. If the pins are
misaligned in any direction or the ribbon is backwards you can cause damage to your module,
power supply, or other modules.
After you have confirmed all the connections, you can reconnect the power cable and turn on
your modular system. You should immediately check that all your modules have powered on
and are functioning correctly. If you notice any anomalies, turn your system off right away and
check your cabling again for mistakes.
Page 5

µVCA Manual v1.00
Front Panel
Page 6

µVCA Manual v1.00
Controls
1. CV A - Sets the amount of attenuation for the CV A input. When fully clockwise the CV
input is unattenuated. When fully counter-clockwise the CV input has no effect. The
brightness of the LED to the right of the attenuator varies according to the level of the
resulting CV.
1. BIAS A - Sets the initial level of amplifier A before CV is applied. The maximum bias is
5V which provides a gain of 1.
2. EXP-LIN A - Sets the response curve of amplifier A. Linear when fully counter-clockwise
and exponential when fully clockwise.
3. CV B - Same as CV A but for channel B.
4. BIAS B - Same as BIAS A but for channel B.
5. EXP-LIN B - Same as EXP-LIN A but for channel B.
Note that prior to fall 2015 the BIAS and CV knob positions were reversed but their functionality
was the same.
Inputs and Outputs
A. CV A - Control voltage input for the level of amplifier A. Summed with the BIAS A
control. Voltages above 5 V will result in a gain greater than 1.
B. IN A - Input signal for amplifier A. This is a direct coupled input so DC or AC signals can
be fed here.
C. OUT A - Output signal for amplifier A.
D. CV B - Control voltage input for the level of amplifier B. Summer with the BIAS B control.
Voltages above 5 V will result in a gain greater than 1.
E. IN B - Input signal for amplifier B. This is a direct coupled input so DC or AC signals can
be fed here.
F. OUT B - Output signal for amplifier B. As of the fall 2015 model OUT A is normalled to
be mixed into this output as long as nothing is patched in OUT A. This means you can
use the module as a simple two channel mixer.
Page 7

µVCA Manual v1.00
Technical Specifications
Width
6 hp
Maximum Depth
35 mm
Current Draw
36 mA @ +12V
35 mA @ -12V
Page 8
Other Intellijel Mixer manuals
