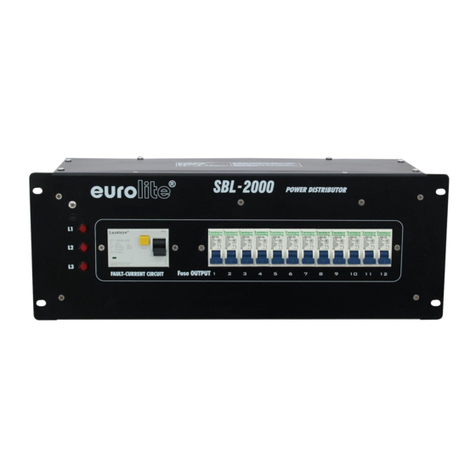
Intertech NitroX SD-1688 User manual

PDU SD-1688
Per outlet current monitoring
Per outlet control
User Manual
© 2013 – Inter-Tech Elektronik Handels GmbH – D-30855 Langenhagen –
Germany www.inter-tech.de – vertrieb@inter-tech.de

2
Safety Precauons
To avoid potenal problems when using PDU:
● If the building has 3-phase AC power, ensure that the server
and monitor are on the same phase. For best results, they
should be on the same circuit.
● To avoid potenally fatal shock hazard and possible damage
to equipment, test AC outlets at the server and monitor for
proper polarity and grounding.
● To ensure the safety of network communicaon, it is
recommended that the PDU be installed in a network firewall
to prevent malicious aacks by hackers, which will affect the
safety of power consumpon.
Safety instrucons
Read all the following safety guidelines to protect yourself and
your PDU.
WARNING: All outlets of the PDU output high voltage. Necessary
precauons should be taken.
WARNING: Do not push any objects through the openings of the
PDU. Doing so may cause fire or electric shock by
shorng out interior components.
WARNING: There is a possibility of severe electrical shock from
either the live or neutral side of any of the power
outlets or their wiring, even if one of the circuit

3
breakers is disabled.
WARNING: The PDU is intended for indoor use only.
WARNING: To help protect the PDU from electrical power
fluctuaons, use a surge suppressor, line condioner
or uninterrupble power supply.
WARNING: Be sure that nothing rests on the cables of the PDU
and that it is not located where it may be stepped on
or tripped over.
WARNING: Do not spill food or liquids on the PDU. If it gets wet,
disconnect the power immediately.
WARNING: Keep the PDU away from heat sources.
WARNING: One output can only be connected to a single device.
Do not use extension cords to power mulple devices,
so as not to damage the output relay due to the
accumulaon of inrush currents from mulple devices.
Rack mount safety consideraons
When installing the PDU, make sure the following environmental
specificaons are met:
Elevated Operang Ambient Temperature: If the PDU is installed
in a closed or mul-unit rack assembly, the operang ambient
temperature of the rack environment may be greater than room
ambient temperature. Therefore, consideraon should be given to
installing the equipment in an environment compable with the
manufacturer’s maximum rated ambient temperature. See above.

4
Reduced Air Flow: Installaon of the equipment in a rack should
be such that the amount of air flow required for safe operaon of
the equipment is not compromised.
Mechanical Loading: Mounng of the equipment in the rack
should be such that a hazardous condion is not created due to
uneven mechanical loading.
Circuit Overloading: Consideraon should be given to the
connecon of the equipment to the supply circuit and the effect
that overloading of circuits might have on over current protecon
and supply wiring. Appropriate consideraon of equipment
nameplate rangs should be used when addressing this concern.
Reliable Grounding: Reliable grounding of rack-mounted
equipment should be maintained.
Parcular aenon should be given to supply connecons other
than direct connecons to the branch circuit, such as power strips
or extension cords.

5
Features and Benefits
The PDU is an Internet-ready power strip equipped with an
intelligent current meter to indicate the total power consumpon
of the Power Distribuon Unit (PDU). Each PDU includes PDU
Ulity soware to monitor and manage mulple PDUs.
Funcons Descripon
Ethernet Ethernet connecon for the built-in
web server.
Audible Alarm Holes for audible alarm.
Warning- 1 beep in 1 second.
Overload- 3 beeps in 1 second.
Note: The audible alarm will keep
beeping unl the current gets back to
normal and the current is lower than
the threshold to 0.5 amps.

6
Funcon
Buon
A funcon buon that can be used to
change the meter display
● Press and hold the key aer 1
beeping; it can let the meter to
show up the current informaon
and temperature/humidity in
sequence.
● Press and hold the key aer 2
beeping; it can let the meter to
show up the IP address
● Press and hold the key aer 4
beeping; it can change the way to
get IP by DHCP or Fixed IP.
Press buon then release it aer 6
beeping; reset PDU back to default
seng.
Aer six beeps to return to
factory sengs, do not cut
off the power when the
long beep sounds unl the power
informaon is displayed, otherwise
the system will be damaged and
may not work normally.
Meter A built-in true Root Meter Square
(RMS) current meter.
3 digits to display current and IP
Address.

7
ID The idenficaon of power circuit.
LED Indicator SSL (Blue): Light on means web access
is protected by SSL.
DHCP (green): Light on means PDU gets
IP from DHCP server.
Circuit Status (red): Circuit Status LEDs
labeled alphabecally to indicate the
PDU’s circuit status. The number of
LED will vary according to different
models.
ENV1 / ENV2 RJ11 connecon for oponal accessory
to measure temperature and humidity.
Circuit Breaker Overload power protecon.

8
Alarms and monitoring
The PDU delivers accurate, real-me global current monitoring of
all connected devices via the onboard web interface or through
the PDU Ulity soware. Users have the ability to set a current
alarm threshold that, once exceeded, will cause the PDU to sound
an alarm or send a noficaon message, or both.
Sequenal power applicaon
The PDU incorporates a sequenal power applicaon feature that
prevents all power outlet receptacles from turning on at once,
eliminang the potenal of current surges that could render the
equipment inoperable. Together with the global current
monitoring, the sequenal power applicaon feature lets users
safely install more equipment on exisng power circuits without
the worry of current overloads.
Features:
System
Built-in Web Server to Support Remote Power Management.
Local LED Displays Amps, IP Address ,Temperature or Humidity
Daily, Weekly, Monthly & Yearly Power Consumpon Data
10/100 Base-T Ethernet Port
IPv4 and IPv6 Support
SNMP Control (v1,v2c,v3)
Telnet, SSHv2 Encrypon Support
Radius Authencaon
User Account for Three Different Permissions Management

9
System
Alarm Noficaon via Email, SNMP, Syslog, LED or audible alarm
SSLv3, TLS1.0,TLS1.1,TLS1.2 Support
IP Address Filtering
Max. of 100000 entries for each Power Consumpon Data and
Event Log
Remote firmware Upgrade Support
Alive of Heart Beat Trap Available.
Definable Reset Buon
Fahrenheit and Celsius Switchable
Export and Import PDU Configuraon
Support wireless network connecon
Power Management
True RMS Current Measurement.
Remote Per Outlet On/Off Power Switching
Remote Per Outlet Current Monitoring
User Defined Alarm Thresholds for Warning and Overload.
User Defined Power On/OFF Sequence Time.
Timed & Scheduled On/Off/Reboot Switching
Alternave Outlet Restart Mode: Memorized Previous Status,
Always On or Always Off
Ping-No-Answer Alarm
Outlet Acon via Pre-Set Event, Including Power Event,
Environment Event and Receiving Trap from Other Devices.
Circuit Breaker Protecon
Free Bundle Management Ulity.

10
Geng Started
Before installing your PDU, refer to the following list to ensure you
have all items that shipped with the PDU, as well as other items
necessary for proper installaon. The standard PDU package
includes the following:
• Power Distribuon Unit
• Rack mounng brackets
• Four retaining screws for each rack mounng bracket.

11
Installaon Instrucons
This secon will provide a quick instrucon to install the PDU.
A) Elevated Operang Ambient - If installed in a closed or
mul-unit rack assembly, the operang ambient temperature
of the rack environment may be greater than room ambient.
Therefore, consideraon should be given to installing the
equipment in an environment compable with the maximum
ambient temperature specified by the manufacturer.
B) Reduced Air Flow - Installaon of the equipment in a rack
should be such that the amount of air flow required for safe
operaon of the equipment is not compromised.
C) Mechanical Loading - Mounng of the equipment in the
rack should be such that a hazardous condion is not
achieved due to uneven mechanical loading.
D) Circuit Overloading - Consideraon should be given to the
connecon of the equipment to the supply circuit and the
effect that overloading of the circuits might have on over
current protecon and supply wiring. Appropriate
consideraon of equipment nameplate rangs should be
used when addressing this concern.
E) Reliable Earthing - Reliable earthing of rack-mounted
equipment should be maintained. Parcular aenon should
be given to supply connecons other than direct connecons
to the branch circuit (e.g. use of power strips)."
Diagram

12
Hardware
1. Install mounting brackets.
The PDU comes with brackets for mounting in a rack.
To mount the PDU into a rack performs the following
procedure:
1.1 Attach the mounting brackets to the unit, using the
four retaining screws provided for each of the
brackets.
Horizontal:

13
1.2 Choose a location for the brackets.
1.3 Align the mounting holes of brackets with the
notched hole on the vertical rail and attach with the
retaining screws.
2. Connect input and output power.
3. Connect Ethernet cable to the PDU.
4. Power on the PDU.

14
Web interface:
The default seng for the way to get IP address is DHCP. If
PDU can not get the IP from DHCP server, the IP address will
stay at 192.168.0.216
Default ID: snmp
Default Password: 1234
Aer login to web, user can check all operaon instrucon in web
page of “Info.”

15
Informaon
Overview
Display current, temperature and humidity informaon, event log
and outlet status.
Note:
Current Monitor
ENV Monitor
Event List
Outlet Status

16
Seng column
S: Schedule is set. PDU will execute the pre-set outlet acon in
specified me automacally.
P: Ping funcon is acve. If the specified device stops ping
response, PDU will execute the pre-set outlets acon
E: PDU will execute the pre-set outlets' acon according to event
happen.
Power
Each outlet current consumpon
System
System informaon
Event Log
System memory can log up to 100000 entries.
Data Log
System memory can log up to 100000 entries.

17
Chart
Display history chart for current, temperature and humidity.
Select any PDU and
me interval; press the
Filter buon, its data
log will be displayed

18
Chart: It can display amp,temperature and humidity history chart
Select any PDU and
me interval; press the
Filter buon, its chart
will be displayed

19
Management
Control
1. Directly control outlet.
2. Set a number of outlets as a group to control them by one
funcon buon.

20
Schedule
Pre-set me to turn on or off the specified outlet
1. Outlet A is scheduled to off at 10:00 on 2022/03/29.
2. Outlet B executes off/on at 12:00 every Sunday.
3. Outlet C executes on at 14:00 every day.
This manual suits for next models
1
Table of contents
Other Intertech Power Distribution Unit manuals
