ion science PhoCheck+ Series User manual

PhoCheck+ 1, 2, 3 & 5000Ex User Manual V2.1
_________
Part No 845221 www.ionscience.com

PhoCheck+ 1, 2, 3 & 5000 Ex Ion Science Ltd
Page 1 of 52

PhoCheck+ 1, 2, 3 & 5000 Ex Ion Science Ltd
Page 2 of 52
Declaration of conformity
Manufacturer: Ion Science Ltd, The Way, Fowlmere, Cambridge, England. SG8 7UJ
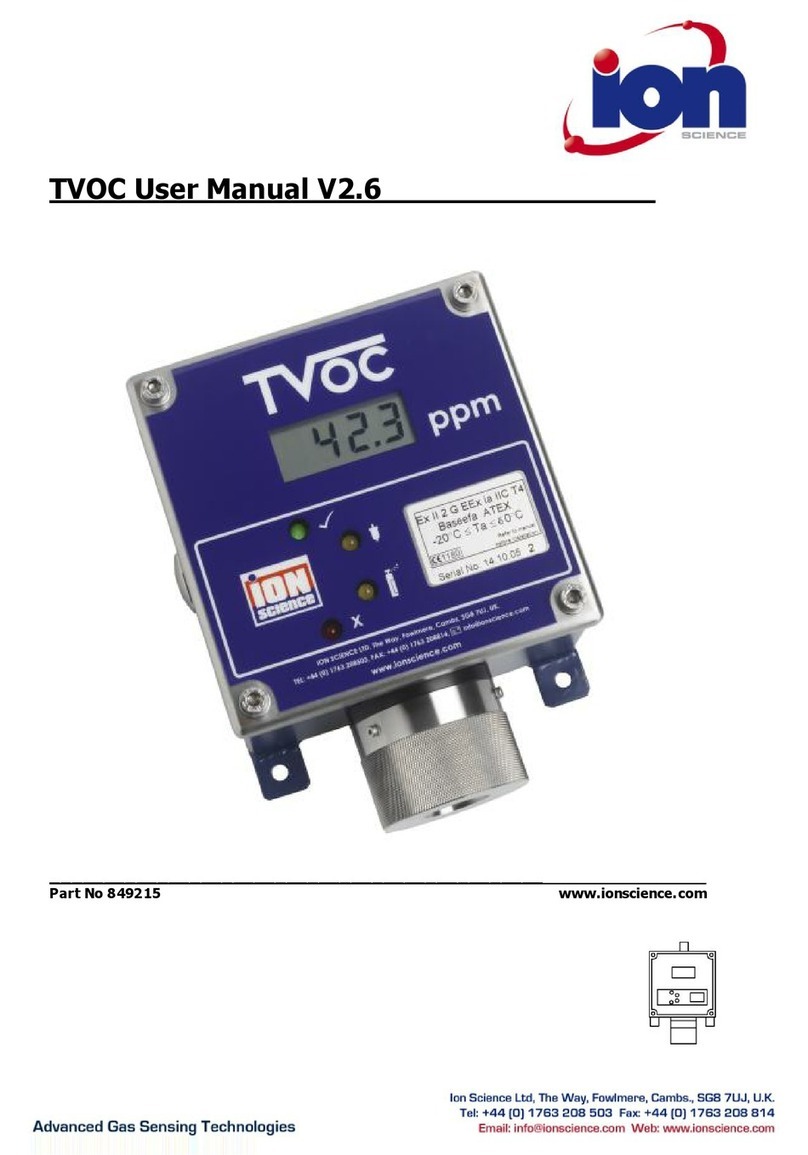
Product: PhoC heck+ 1000, 2000, 3000 and 5000
Product description: Intrinsically safe photo-ionisation detector for detecting volatile organic compounds
Directive 94/9/EC ATEX
Identification: II 2 G Ex ia IIC T4 (-20°C ≤Ta ≤+60°C)
Notified Body: Baseefa Ltd, 1180, Buxton, UK
EC Type Examination Certificate(s)
Baseefa03ATEX742 latest supplement Baseefa03ATEX742/7X issued 19
th November 2008
IECEx BAS 04.0033 latest revision no.4 issued 20
th November 2008
Standards
BS EN 60079- 0:2006 Electrical Apparatus for Potentially Explosive Atmospheres–General Requirement
BS EN 60079- 1:2007 Explosive Atmospheres –Equipment Protection by Flameproof Enclosures ‘d’
BS EN 60079- 11:2007 Explosive Atmospheres –Equipment Protection by Intrinsic Safety‘i’
BS EN 61010-1:2001 Safety requirements for electrical equipment for measurement, control and
Laboratory use –General requirements
Directive 2004/108EC Electrical Equipment –Electromagnetic Compatibility (EMC)
BS EN 61326- 1:2006 Electrical equipment for measurement, control and laboratory use–EMC
Requirements (Class B and General Immunity)
Other Standards
BS EN ISO 9001:2000 Quality Management Systems –Requirements
BS EN 13980:2002 Potentially Explosive Atmospheres –Application of Quality Systems
On behalf of Ion Science Ltd, I declare that, on the date this product accompanied by this declarationis placed on the
market, the product conforms to all technical and regulatory requirements of the above listed directives.
Name: Mark Stockdale Position: Technical Director
Signature: Date: 20th November 2008
PhoCheck+ 1, 2, 3 & 5000 Ex Ion Science Ltd
Page 3 of 52
Contents Page
Declaration of Conformity . . . . 2
ATEX intrinsic safety ratings . . 2
EMC Emissions and Immunity . . 2
Statements . . . . . 5
Responsibility for use . . . 5
Warnings . . . . 5
Caution . . . . . 5
Quality Assurance . . . 6
Disposal . . . . 6
Calibration Facility . . . 6
Ion Science Contact Details . . 6
Introduction to PhoCheck+. . . . 7
Getting Started . . . . . 8
Packing List . . . . 8
Removing PhoCheck+ from its case . 8
Setting alarm levels . . . 9
Setting date and time . . . 9
Selecting a gas . . . . 9
Rechargeable Batteries . . . 9
Alkaline Batteries . . . 9
Instrument Functions . . . . 10
Keypad Function Descriptions. . . 10
Function Locations . . . 11
How the PhoCheck+ Menu Works . 12
Quick Reference . . . . . 13
Instrument Displays . . . . 15
Symbols Explained . . . 15
Graph Screen. . . . . 16
Large Number Screen . . . 17
Function Menu . . . . 17
Instrument Menu . . . . . 18
Data logging . . . . 18
View Data . . . . 18
Zone Maintenance . . . 19
Data Transfer . . . . 20
Alarm . . . . . 20
Sound (Confidence Beep) . . 21
Calibration . . . . 21
Back-light . . . . 24
Date / Time . . . . 24
PID Gas Selection . . . 24
PID Lamp . . . . 25
Unit Selector . . . . 25
Data Log Memory Alarm. . . 25
Application (Health & Safety). . . 26
Application (Survey) . . . 26
Security . . . . 26

PhoCheck+ 1, 2, 3 & 5000 Ex Ion Science Ltd
Page 4 of 52
Contents Page
IonPC Software . . . . . 27
PC Requirements . . . 27
Installation . . . . 27
Connection . . . . 28
Starting . . . . . 28
IonPC Software Features . . . . 29
Download data logged readings . . 29
File . . . . . 30
Calibration . . . . 30
Data . . . . . 31
Gas Table (and setting alarm levels) . 31
Instrument . . . . 32
Menu Set-up . . . . 32
Settings. . . . 32
Lamp . . . . 33
Applications . . . 33
Backlight . . . 34
Setting the clock . . 34
File . . . . 34
Zones . . . . . 35
View . . . . . 35
Help . . . . . 35
Software disclaimers . . . 36
Batteries . . . . . . 38
Diagnostics . . . . . 40
Maintenance . . . . . 43
Accessories . . . . . 46
IS protective cover instructions . . . 47
Upgrade Options . . . . . 48
Service Options . . . . . 49
Technical Specification . . . . 50

PhoCheck+ 1, 2, 3 & 5000 Ex Ion Science Ltd
Page 5 of 52
Statements _____
Responsibility for Use
PhoCheck+ instruments detect a large range of gases, w hich are potentially dangerous from both a
poisoning and/or an explosive perspective. PhoCheck+ instruments have many adjustable and selectable
features allowing the detector to be used in a variety of ways.
Ion Science Ltd can accept no responsibility for the incorrect adjustment of features that cause harm or
damage to persons or property.
PhoCheck+ can be used as a personal safety device. It is the user’s responsibility to respond appropriately t o
an alarm situation.
! WARNINGS!
1. For reasons of Intrinsic Safety, batteries MUST NOT be charged or replaced within potentially
flammable areas. Ensure you are in a SAFE area before carrying out any type of maintenance on
the PhoCheck+ instrument.
2. Substitution of components may impair intrinsic safety and resultin unsafe conditions.
3. For safety reasons, the PhoCheck+ must only be operated and serviced by qualified personnel.
4. Please read and understand this User Manual fully before operating or servicing the PhoCheck+.
! CAUTION!
It is essential that the PhoCheck+ is always used with a supplied PTFE 0.5 micron filter fitted to the front of
the instrument. The PhoCheck+ internal pump draws over 200 ml/min of air into the instrument and without
a filter; particles of debris and dust will be drawn into the cell inhib iting the correct function of the
instrument. These filters are consumable and should be changed every 100 hours of use. The frequency of
replacement should be increased for dusty or moisture laden environments. Filters are available for purchase
from Ion Science; see our accessories page (pg 46) for more information.

PhoCheck+ 1, 2, 3 & 5000 Ex Ion Science Ltd
Page 6 of 52
Statements _____
Quality Assurance
PhoCheck+ has been manufactured i n compliance with ISO9001:2000, which ensures that t he equipment
supplied to our customers has been designed and assembled reproducibly, from traceable components, and
leaves Ion Science calibrated to stated standards.
Disposal
Dispose of PhoCheck+, its components and any used batteries in accordance with all local and national
safety and environmental requirements. This includes the European WEEE (Waste Electrical and Electronic
Equipment) directive. Ion Science Ltd offers a take back service. Please contact us for more information.
The PhoCheck+ field case material is recyclable polypropylene.
Calibration Facility
Ion Science Ltd offers a calibration service including the issue of certification confirming calibration with
equipment traceable to UK national standards.
A PhoCheck+ Calibration Kit is available from Ion Science to allow a two-point calibration to be carried out in
the field as a custom calibration. However Ion Science does recommend the annual return of all instruments
for a yearly service and calibration.
Contact Ion Science Ltd
By Post Ion Science Ltd
The Way
Fowlmere
Cambridge
SG8 7UJ
UK
By Telephone +44 (0) 1763 208503
By Fax +44 (0) 1763 208814
By Email info@ionscience.com

PhoCheck+ 1, 2, 3 & 5000 Ex Ion Science Ltd
Page 7 of 52
Introduction to PhoCheck+_________________________________________
PhoCheck+ is a portable gas detector, suitable for the detection of a large range of Volatile Organic
Compounds (VOC's), which are dangerous from both a poisoning and explosive perspective. Total VOC’s are
detected using PID (Photo Ionisation Detection) technology.
The PhoCheck+ versions are fully upgradeable in the field (i.e. PhoCheck+ 1000 to a 5000 or a 2000 to a
3000 etc). Also available is the option to upgrade to the FirstCheck+ multigas range of instruments upon
return of your instrument to Ion Science. Please see page 48 for more details relatingto upgrade options.
PhoCheck+ has two principle modes of operation, Health & Safety and Survey mode.
Health & Safety mode is used to check for conformity of short-term exposure levels (STEL) or time-weighted
averages (TWA) that are specific for particular hazardous environments (for example EH40 in the UK and
OSHA in the USA). In this mode of operation STEL's and TWA's are continually calculated and compared to
levels set in the instruments gas table.
Survey is the default mode of operation whenever the Health & Safety mode is NOT selected. This mode is
often used in applications where several areas (or Zones) are to be monitored and readings data logged. All
sensor readings are real time measurements and alarm levels are set manually.
For more information on these modes of operation please see page 25.
PhoCheck+ versions 2000, 3000 and 5000 automatically data log the instruments readings every second.
These readings are stored in the instrument's memory with a date and time stamp. For more i nformation
please see page 17.

PhoCheck+ 1, 2, 3 & 5000 Ex Ion Science Ltd
Page 8 of 52
Getting started _____
Packing List
Please take a little time to check the contents in the PhoCheck+ case.
Item Description Qty.
1. PhoCheck+ instrument 1
2. PID lamp (fitted) 1
3. Probe - 100mm (fitted) 1
4. PTFE filter - 50 micron (fitted) 1
5. Battery charger (if rechargeable type) 1
6. Battery clip (if non-rechargeable) 1
7. Screw driver (if non-rechargeable) 1
8. Manual 1
9. IonPC software CD 1
10. IS Protective Cover 1
11. Cal Kit Sample containing:
·PID lamp cleaning Kit (Includes alumina
powder and 2 applicators for 1 clean) 1
·Carbon canister 1
·PTFE filter –50 micron 1
·Cal adaptor* 1
·
Lamp removal tools (neoprene sleeves) 2
* Please note that the Cal adaptor is to be used in conjunction with a PhoCheck+ Calibration Kit accessory
(part number A-845213). WARNING: when fitting the Cal adaptor onto the gas tube (part of the
Calibration kit) ensure that the small breather hole of the Cal adaptor is not covered as this will cause the
instruments internal pump to be damaged beyond repair. Your warranty will be invalidated if the pump is
damaged in this way.
Removing the PhoCheck+ from its case
Carefully remove the PhoCheck+ instrument from its case being careful not to damage the filter and pr obe
assembly. 'Luer' type connectors are used to connect the PhoCheck+, filter and probe together and require a
quarter-turn ONLY to connect / disconnect them. Do not over tighten.
To avoid drawing dust or particulate matter into the detector cell we suggest always fitting the filter with the
Ion Science logo facing away from the instrument, therefore dust only collects on the same one side of the
filter and is not inadvertently drawn into the instrument if the filter is attached the other way round.

PhoCheck+ 1, 2, 3 & 5000 Ex Ion Science Ltd
Page 9 of 52
Getting started
1. Turn the instrument on by pressing the key.
2. Press and hold the key and check the correct gas, alarm levels and zero mode are selected.
3. The screen will flash for 1 minute while the detector warms up–check for a reading on the display
Between 0.2ppm and 2ppm.
4. Replace the probe and filter with the blue carbon filter–check for a reading from 0.0 to 0.2ppm.
5. Remove the carbon filter and replace the probe and filter.
6. If the results are not as expected, perform a custom calibration first ensuring the correct gas is
selected.
Setting alarm levels
We recommend that alarm levels are setto user specifications as soon as possible before being used for the
first time. Please see page 19 for details of how to set alarm levels.
Setting date and time
We recommend that the correct local date and time be set to the instrument as soon as possible before
being used for the first time. Please see page 23 for details on how to set the date and time.
Selecting a gas from the inte rnal gas table
PhoCheck+ instruments leave Ion Science pre-set for gas type TVOC (total volatile organic compounds).
Instruments are factory calibrated against isobutylene and all response factors are equivalent to this. By
changing the gas from the gas table all readings will be given using that gases response factor. To change
the selected gas please see pages 23 & 24.
Rechargeable Batteries
Although PhoCheck+ instruments leave the factory fully charged, prolonged periods of storage may result in
the battery pack discharging. We recommend charging the instrument for 12 hours before use. See the
battery section of this manual page 38.
Alkaline Batteries
Fit the battery pack supplied with the PhoCheck+. For more information please see the battery section of
this manual page 38.

PhoCheck+ 1, 2, 3 & 5000 Ex Ion Science Ltd
Page 10 of 52
Instrument Functions _____
Keypad function descriptions
On/Off.
To switch the PhoCheck+ instrument 'ON' - Press the 'ON/OFF' key.
To switch the PhoCheck+ instrument 'OFF' - Ensure you are on the ‘Display/Function
Selection screen’or a Display screen. Press and hold the 'ON/OFF' key. A 'Timer' symbol
will appear and a line will travel across the bottom on the screen, release the 'ON/OFF'
button once the line has travelled the length of the screen. The‘Delay’symbol will briefly
appear before the instrument turns ‘OFF’completely. This procedure has been designed
to avoid accidental switch OFF.
ENTER
This key selects options and confirms settings.
ESCAPE
This key is used to return the display to the previous screen and to abort an adjustment.
Repeated pressing of this key will return the display to the 'Display/Function Selection
screen'.
UP
Use to scroll up or changes selection
DOWN
Use to scroll down or changes selection
ZERO
Pressing the Zero key Zeros -out background readings. See the 'Instrument
Displays' section of this manual for more detail (Page 15)
Delay
Symbol

PhoCheck+ 1, 2, 3 & 5000 Ex Ion Science Ltd
Page 11 of 52
Instrument Functions _____
Function locations
From the ‘Display/Function Selection' screen highlight the function menu icon then press‘Enter’, use the
'Up/Down' keys to view the available functions then press 'Enter' to select the function options
LEL Gas Selection (P26)
Display/Function
Selection (P 14)
View Data (P 17)
Zone Maintenance (P 18)
Data Transfer (P 19)
Alarm (P 19)
Sound (P 20)
Calibration (P 20)
Back-light (P 23)
Date & Time (P 23)
Gas Selection (P 23)
PID Lamp (P 24)
Units (P 24)
Data Log Memory Alarm
(P 25)
Application mode -
H & S or Survey (P 25)

PhoCheck+ 1, 2, 3 & 5000 Ex Ion Science Ltd
Page 12 of 52
Instrument Functions _____
How the PhoCheck+ Menu Works
Once in the function menu with the function-symbol you require on the screen press
the 'Enter' key to select it. (See Figure 1.)
A cursor (highlighted symbol or number) can be moved from one selection
to another by using the 'UP' and 'DOWN' keys. (See Figure 2.) Pressing
'Enter' will cause the selection to flash.
When flashing use the 'UP' and 'DOWN' keys to adjust it.
When you have adjusted the parameter to an acceptable level press the 'Enter' key. The adjusted parameter
will be stored. In many cases a tick (ü) will appear to confirm the action.
Although there is a variation in complexity of some functions, this basic concept of selection, adjustment and
confirmation is common throughout this instrument.
You can abort a selection by pressing the 'Escape' (Esc) key.
Fig 1
Fig 2

PhoCheck+ 1, 2, 3 & 5000 Ex Ion Science Ltd
Page 13 of 52
Quick Reference _____
This quick reference indicates which functions are relevant to which instruments.
1 = PhoCheck+ 1000 2 = PhoCheck+ 2000 3 = PhoCheck+ 3000 5 = PhoCheck+ 5000
Display/Function Selection 1, 2, 3, & 5(Page 14)
Allows the user to view detected VOC levels in either graph or number
format and to adjust the instrument functions and parameters.
View Data 2, 3 & 5 (Page 17)
Allows viewing of stored data in the instruments internal memory.
Zone Maintenance 2, 3 & 5 (Page 18)
Allows the creation, selection and deletion of Zone names.
Data Transfer 1, 2, 3 & 5 (Page 19)
Enables data transfer between instrument and PC/laptop.
Alarm 1, 2, 3 & 5 (Page 19)
Allows the adjustment of upper and lower Alarm levels in survey mode.
Sound 1, 2, 3 & 5 (Page 20)
Allows the selection of audible indicators including a confidence beep.
Calibration 1, 2, 3 & 5 (Page 20)
Allows the selection of Factory or Custom calibration
.

PhoCheck+ 1, 2, 3 & 5000 Ex Ion Science Ltd
Page 14 of 52
Quick Reference _____
Back-light 1, 2, 3 & 5 (Page 23)
Allows the selection of back-light options.
Date / Time 2, 3 & 5 (Page 23)
Allows the adjustment of the date and time.
PID Gas Selection 1, 2, 3 & 5 (Page 23)
Allows the selection of gases from the internal gas table.
PID Lamp 2, 3 & 4 (Page 24)
Allows the selection of different PID lamps.
Units 1, 2, 3 & 5 (Page 24)
Allows the selection of ppb, ppm or mg/m
3as measurement units.
Data log Memory Alarm 2, 3, & 5 (Page 25)
Allows the setting of an alarm to warn t he user w hen the data logging
memory is full.
Application 3 & 5 (Page 25)
Allows the selection of modes of operation, ‘Health and Safety’for STEL and
TWA monitoring or ‘Survey’for general use. The PhoCheck+ 1000 & 2000
instruments do not have Health & Safety mode as standard and are Survey
instruments only, however Health and Safety mode is an upgradeable
feature.

PhoCheck+ 1, 2, 3 & 5000 Ex Ion Science Ltd
Page 15 of 52
Instrument Displays
Display/Function Selection Screen
The 'Display/Function Selection screen' is shown when the PhoCheck+ is switched on and can always be
located by repeatedly pressing the 'Esc' (Escape) key. The 'Display/Function screen' allows the user to view
detected gas levels in a variety of formats or to adjust the instruments functions and parameters. The
symbols shown on this screen can be selected using the UP and DOWN keys. The highlighted symbol
appears as shown in the example below for the function menu.
Instrument Symbols Explained
A number of symbols are used to indicate various features when in the viewing screens. Please see an
explanation of each below.
Bump test
This symbol of a gas bottle can be set via the IonPC software to be displayed once a week when the
instrument is turned on. This is to remind the user to test the instrument responses accurately when it is
supplied with gas. See page 32 of the software section for more information.
Battery Status
The battery status indicator can be accessed by pressing and holding Enter on the graph and the large number
screens.
Peak Hold
The numerical measurement to the right of this symbol indicates the highest gas concentration reached by
the instrument since being switched ON. This 'Peak' reading can be reset by pressing and holding the 'Enter'
key for 5 seconds.
Graph
Screen
Large Number
Screen
Funct ion me nu
Charged
Discha rge d

PhoCheck+ 1, 2, 3 & 5000 Ex Ion Science Ltd
Page 16 of 52
Instrument Displays _____
Background Zero Reference
When in 'Survey' mode pressing the 'Zero' key alternates
between 'Relative' and 'Absolute' modes. There is a constant
level of detectable gas in ambient air, which is detectable with
PhoCheck+. 'Absolute mode' displays the entire sensor signal.
'Relative' mode 'removes' the background signal and sets the
'Zero' point at an artificial level.
Alarm arrows
The arrows represent the importance level of the alarm. The single arrow represents the lower alarm and
the two arrows represent the upper alarm.
Application
When the symbol is present the instrument is in 'Health & Safety' mode. When it is absent the instrument reverts
to 'Survey' mode. Please see Application section of this manual for more information (page 25).
Display Screens Explained
Graph Screen
Allows the viewing of real-time measurements in graph format
relative to the set alarm levels.
When in 'Survey' mode (see page 25) the type of gas being
detected, the measured units, the peak hold and real-time
readings are also displayed.
Additional information such as alarm levels and battery status
can be viewed by pressing and holding the Enter key.
When in 'Health & Safety' mode (see page 25) the on screen i nformation is slightly
different as STEL and TWA calculations are displayed in figures and the graph
remains in real time. Again additional information can be viewed by pressing and
holding the Enter Key.
Relat ive
Absolute
Ind icat es that 'He alt h & S afety ' mo de is selec ted
Uppe r and lo wer
alarm levels

PhoCheck+ 1, 2, 3 & 5000 Ex Ion Science Ltd
Page 17 of 52
Instrument Displays __
Large Number Screen
Enables the viewing of real time measurements in large numerical format for easy
viewing in difficult conditions.
Additional information such as alarm levels, battery status and a
peak hold reading can be viewed by pressing and holding the ENTER
key.
When in 'Health & Safety' mode the STEL and TWA alarm
levels and calculated values are shown when holding the Enter key.
Function Menu
Once selected use the ‘UP’and ‘DOWN’keys to highlight the function you require and press ‘ENTER’to
select. Many features can be adjusted in this section including gas selection, zone maintenance, data transfer
and alarm levels. Details of these and other functions are to be found on the following pages.
The instrument has 8Mb of memory, which is divided into1Mb segments. When a segment becomes full,
data is then stored in the next segment.
Each time the user starts data logging, a new file is created. So, for example, six data logging sessions will
create six data files.
When a data logging session records data which spans across two or more 1Mb segments, a corresponding
number of files will be created and stored within the instrument and will apply to that particular data logging
session only. So, for example, two 1Mb segments spanned will result in twofiles created.
When the data is to be downloaded via the IonPC software, any files that have spanned two or more 1Mb
segments (i.e. two or more files) will be recognised and downloaded as a single file.
Funct ion
menu

PhoCheck+ 1, 2, 3 & 5000 Ex Ion Science Ltd
Page 18 of 52
Instrument Menu _____
General
In the function menu use the ‘Up’and ‘Down’keys to find the function you require. To enter the function,
press the ‘Enter’key.
Data Logging, Zones & Files
PhoCheck+ versions 2000, 3000 and 5000 automatically data log the instruments readings every second.
These readings are stored in the instrument's memory with a date and time stamp. The instrument has been
designed to continuously store data; once the memory has reached its full capacity (8 Mb) it will
automatically begin to over write previous readi ngs. An alarm can be set (see page 25) to inform the user
that this is due to happen giving time to download any data that may be over written.
Data logged measurements are stored in files created automatically and issued a number that is
incremented each time a new file is opened. Stored data can be viewed on the PhoCheck+ instrument or it
can be downloaded to a PC for analysis and to be archived. Ion Science recommends downloading saved
readings once a week.
In some applications readings need to be recorded in many different locations leading to many hundreds of
stored files. PhoCheck+ was designed with these requirements in mind and has the facility to store files into
'Zones'. The PhoC heck+ has a default Zone called Zone 0 (which can not be deleted), unless specified all
readings will automatically be stored under this Zone. The PhoCheck+ has an additional 199 Zones whic h
the user can name themselves, either direct via the instrument or by using the IonPC software.
________________________________________________________________
View Data (2, 3 & 5)
This function allows the viewing and detection
of Data Logged Files within the PhoCheck+
memory.
First select the Zone of interest by moving the cursor using the
‘up' and 'down' keys, press 'enter' toselect it. Then select the
required File in the same way. Now select the View Data symbol,
this will show the first reading logged with a date and time stamp
and the number of logged readings within the selected file.
To view the stored data in a graphical form press the 'enter' key.
A graph representing the stored readings within the selected file
will be displayed. The flashing cursor can be moved along the graph
to a reading of interest. When the cursor stops the reading will be
displayed in the units selected, press the enter key to see the date
and time stamp of that reading if required.
Date/T ime
Num ber of lo gg ed
readings
Alarm
ckno wleadge me nt
Reading
Alarm In dicat or
Cursor
Zone
Dele te
View Data
File

PhoCheck+ 1, 2, 3 & 5000 Ex Ion Science Ltd
Page 19 of 52
Instrument Menu _____
View Data (Continued)
The Alarm Indicator dotted line is present on a graph to show that this is the exact point at which analarm
was set off. The instrument will continue to alarm until the alarm is acknowledged by the user by pressing
the 'Enter' key, this is shown on the graph as a dashed line (Alarm acknowledgement).
Deleting a File
Should you wish to delete a File, select the Zone and file to be deleted
as if you were about to view the data. Now select the delete symbol
(Trash can) in the View Data screen. Options are given to delete the
currently selected File or All Files.
WARNING: Selecting All Files will delete all files stored in all Zones.
A tick 'ü' confirms the function has been carried out.
Zone Maintenance (2, 3 & 5)
Zones can be created, selected or deleted in this
function. Select the 'New' symbol to create a
new zone name, the 'List' symbol toselect an
existing 'Zone' and the Delete symbol to delete an existing
zone name.
________________________________________________________________
Selecting the 'New' symbol allows the creation of Zone names made
up of 8 characters consisting of letters, numbers and symbols. Use
the up and down keys to choose the characters and press enter
to confirm your selection. Letter order on the instrument is
shown on the right, the highlighted ‘a’is the start letter.
Incorporating a useful memory recall the following character will
always start as the previous selected aiding your navigation
through the letters, numbers and symbols.
Selecting the 'List' symbol allows you to view existing Zone
names, and to select the zone under which you wish to save data.
Selecting the 'Delete' symbol allows the previously created Zone names to be deleted. A
tick 'ü' confirms a Zone has been deleted.
Single File All
Files
New L ist De lete
Zon
e
Dele te
View data
File
This manual suits for next models
4
Table of contents
Other ion science Security Sensor manuals

ion science
ion science PhoCheck TIGER User manual

ion science
ion science GasCheck 3000IS User manual

ion science
ion science CUB User manual

ion science
ion science TVOC User manual

ion science
ion science TIGER User manual

ion science
ion science TIGER LT User manual

ion science
ion science GasCheck Tesla User manual