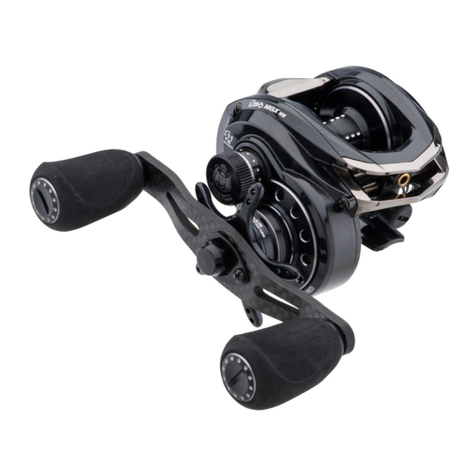
How To Disassemble Your Reel
1. Remove the spindle screw by turning
it counter-clockwise with a at bladed
screw driver.
2. Remove the dragknob by hand, turning
it counter-clockwise untill you can
remove it.
Underneath the dragknob there will be
a stainless steel washer. It will either be
stuck to the bottom of the dragknob or
to the top of the dragspring.
3. Grasp the outside of the frame with one
hand and the spool with the other, and
pull the frame and spool apar t.
At this point there should be 6 free
assemblies: Retaining Screw, Dragknob,
Dragknob Washer, Dragspring, Spool,
and Frame.
Reassembly is the opposite of disassembly. When you are reinstalling the
drag knob, make sure the stainless steel washer is under the drag knob
and not under the dragspring.
(B) Dragknob Figure 1
(A) Retaining Screw
1) Clicker
A) For a louder
outgoing click
Figure 4 2) Clicker Spring
B) For a softer
outgoing click
Figure 2
Left-Hand Retrieve
Figure 3
Right-Hand Retrieve
Tuning
It’s possible to tune the outgoing click (somewhat). For these
adjustments, you will need to disassemble your reel.
1. To make the outgoing click louder, push the clicker
spring in the direction shown by [A], Figure 4.
Push the spring until the clicker [1] is pointing
directly at the bearing on the rear of the spool.
2. To make the outgoing click softer, push the clicker
spring [2] in the direction shown by [B], Figure 4.
Do not push spring more than a few degrees, as
pushing too far will disengage the clicker.
1. Disassemble your reel.
2. Remove the spindle O-Ring (see exploded view).
3. Lift the Clutch Assembly (see exploded view).
4. Arrange the pawl direction as per Fig. 3 or Fig. 4.
5. Replace Clutch Assembly and Spindle O-Ring.
6. Reassemble your reel.
Retrieve Conversion (Right & Left-Hand)
Cleaning and Lubricating Your Reel
1. Frame Assembly and Foot / Reel
Seat - Rinse and dry af ter use.
2. Pawl Assemblies - Remove old oil and
any grit. Apply a drop of oil around
the springs and pawl.
3. Spindle - Remove all the old lubricant
and any grit from the spindle and
apply a small amount of grease to the
base of the spindle.
4. Clutch Surface - Wipe cork surface to
remove excess oil and graphite. Apply
a small amount of oil and powdered
graphite to the cork surface and work
it in with your nger.
5. Clutch Assembly - Remove old grease and any grit from the bearing, inside and out. Apply
a small amount of grease to the bearing. Remove old grease from between the teeth of the
clutch. Apply a small amount of grease between the teeth.
6. Spindle O-Ring - Remove old grease and any grit prior to clutch installation.
This level of cleaning or lubrication should be carried
out once every 3-4 shing trips. Because of saltwater
conditions, it is important that the reel be rinsed off under
a warm water stream after each trip. While the reel is
saltwater safe, the quick rinse will help your reel perform
better in the long run. Avoid immersing the spool in water,
because moisture will be retained by the backing and line.
7. Spool Assembly - Rinse and dry after
use.
8. Front and Rear Spool Bearings - Remove
old grease and grit with a dry cloth. Apply
a small amount of grease to the exposed
bearing shields.
9. Handle Assemblies - If the handles start
to stick, you can remove the handle from
the base by undoing the handle screw and
remove any grit. No lubrication is required.
10. Dragspring and Drag Knob Washer -
Remove old grease and any grit.
11. Drag Knob - Remove old grease and any
grit. Clean center threads using a cotton
swab or a small cloth. Apply a small amount
of grease to the inside threads.
12. Spindle Screw - Remove old grease and
any grit. Apply a very small amount of
grease around the threads.
13. Clicker Assembly - Remove old oil and any
grit. Apply a drop of oil through each hole
on the clicker, around the screw head and
around the clicker spring.
Your reel comes from the factory lubricated.
Periodic lubrication is recommended to maintain
optimum performance.
1. 2. 3.
4.
7. 8.
9.
10.
11.
12.
13.
5.
6.
