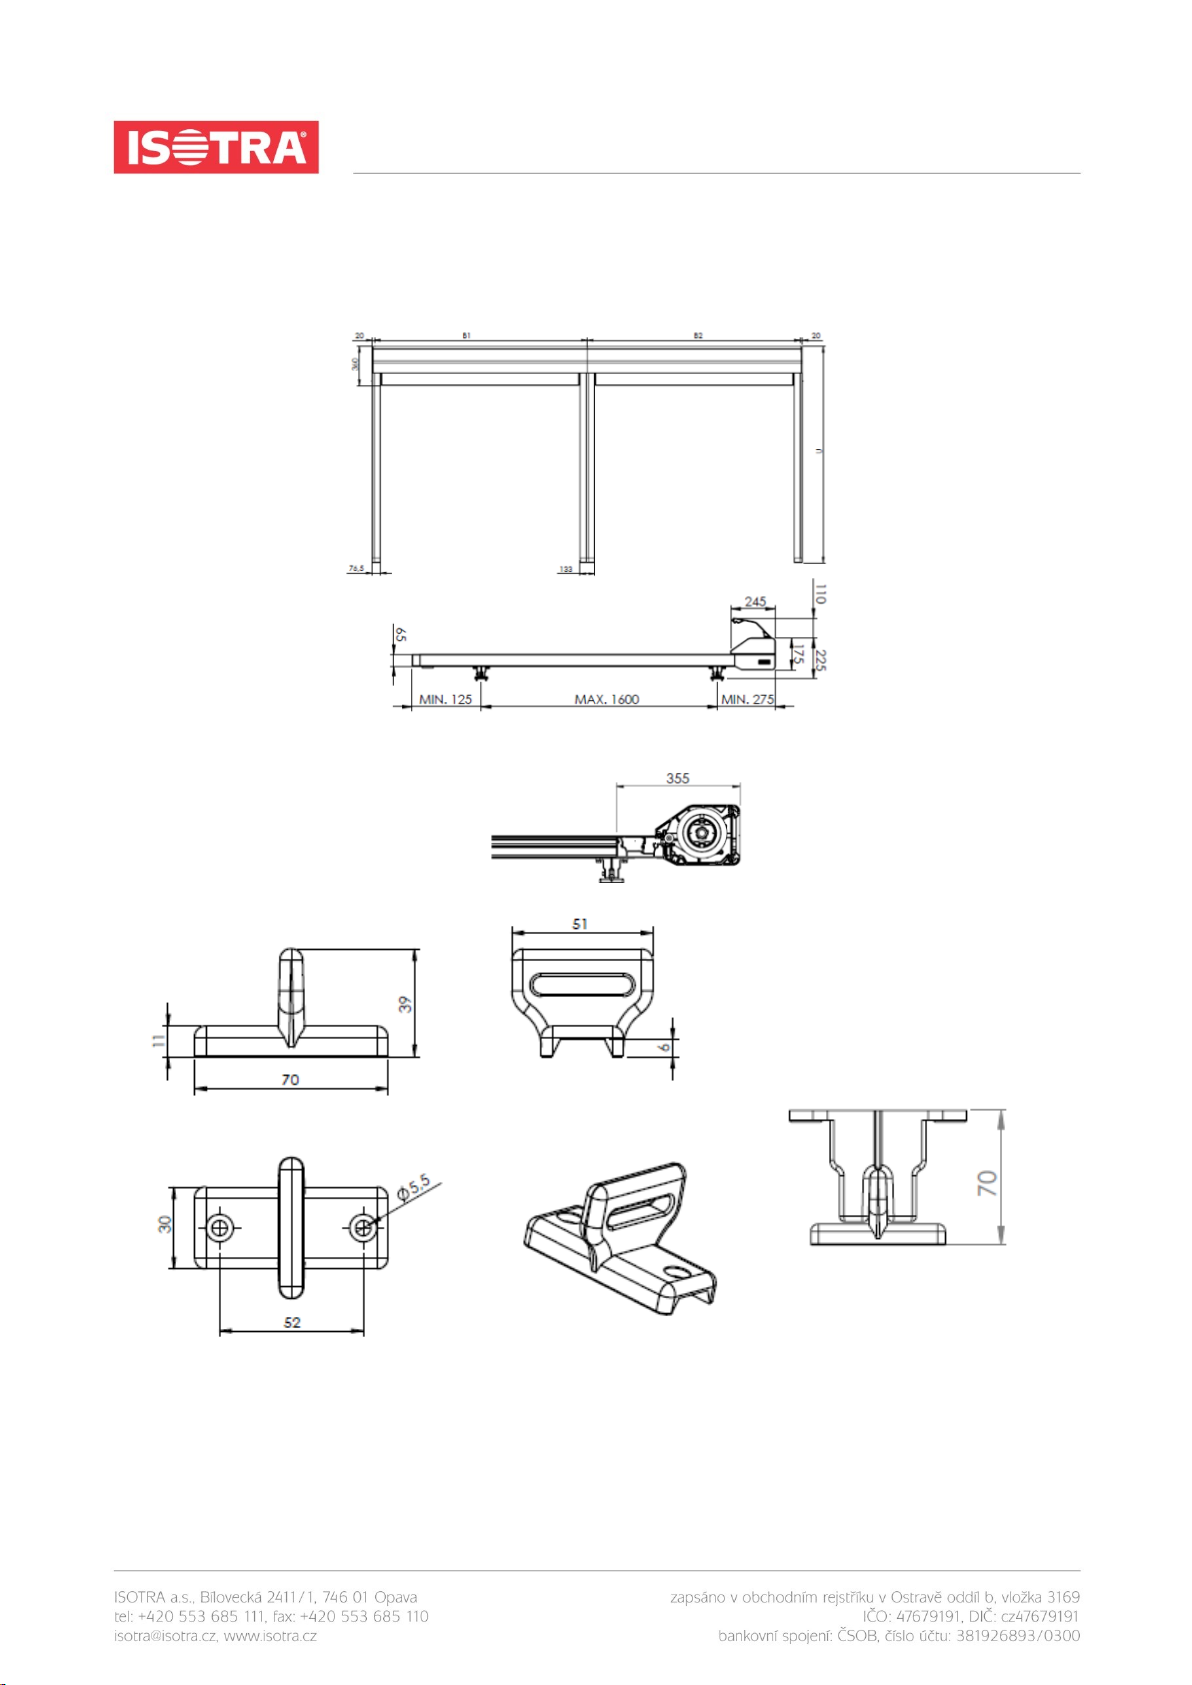
MEASUREMENT AND ASSEMBLY
GENERAL INFORMATION
To a great extent, the VHRV80-ZIP veranda screen allows regulating the sunlight penetration into a room and thus
avoids unpleasant high amount of light and heat. The fabric is protected when rolled in the box which is closed by
bottom section in the fully retracted position. The box is attached to guide rails.
Safe distance between the fabric and the veranda roof is ensured by the guide rails and the spring system that keeps the
fabric taut continuously. This system is designed to easily overcome any small tolerances of roof construction. The
whole system is made from corrosion-resistant materials.
There are several installation options available. The standard option is having the HRV80-ZIP blind installed above the
veranda, as the most efficient sun protection is above the glazing. Then it can be installed to the veranda sections using
the various types of brackets available.
The HRV08-ZIP screen is equipped with a zipper system that ensures the fabric stays properly taut in every position of
the bottom section and avoids fabric slipping out from the guide rails. The individual parts of the fabric are always fitted
with a zipper on both the left and right side, while the thicker part locks with the plastic zipper section inserted in an
aluminium guide rail.
The HRV80-ZIP veranda screen consists of the following parts:
• Box with an easily removable, motor-driven winding cylinder,
•Fabric with a zipper, wound in the box,
• Guide rails for easy connection of the zipper section,
• Bottom section with a spring that keeps the fabric taut.
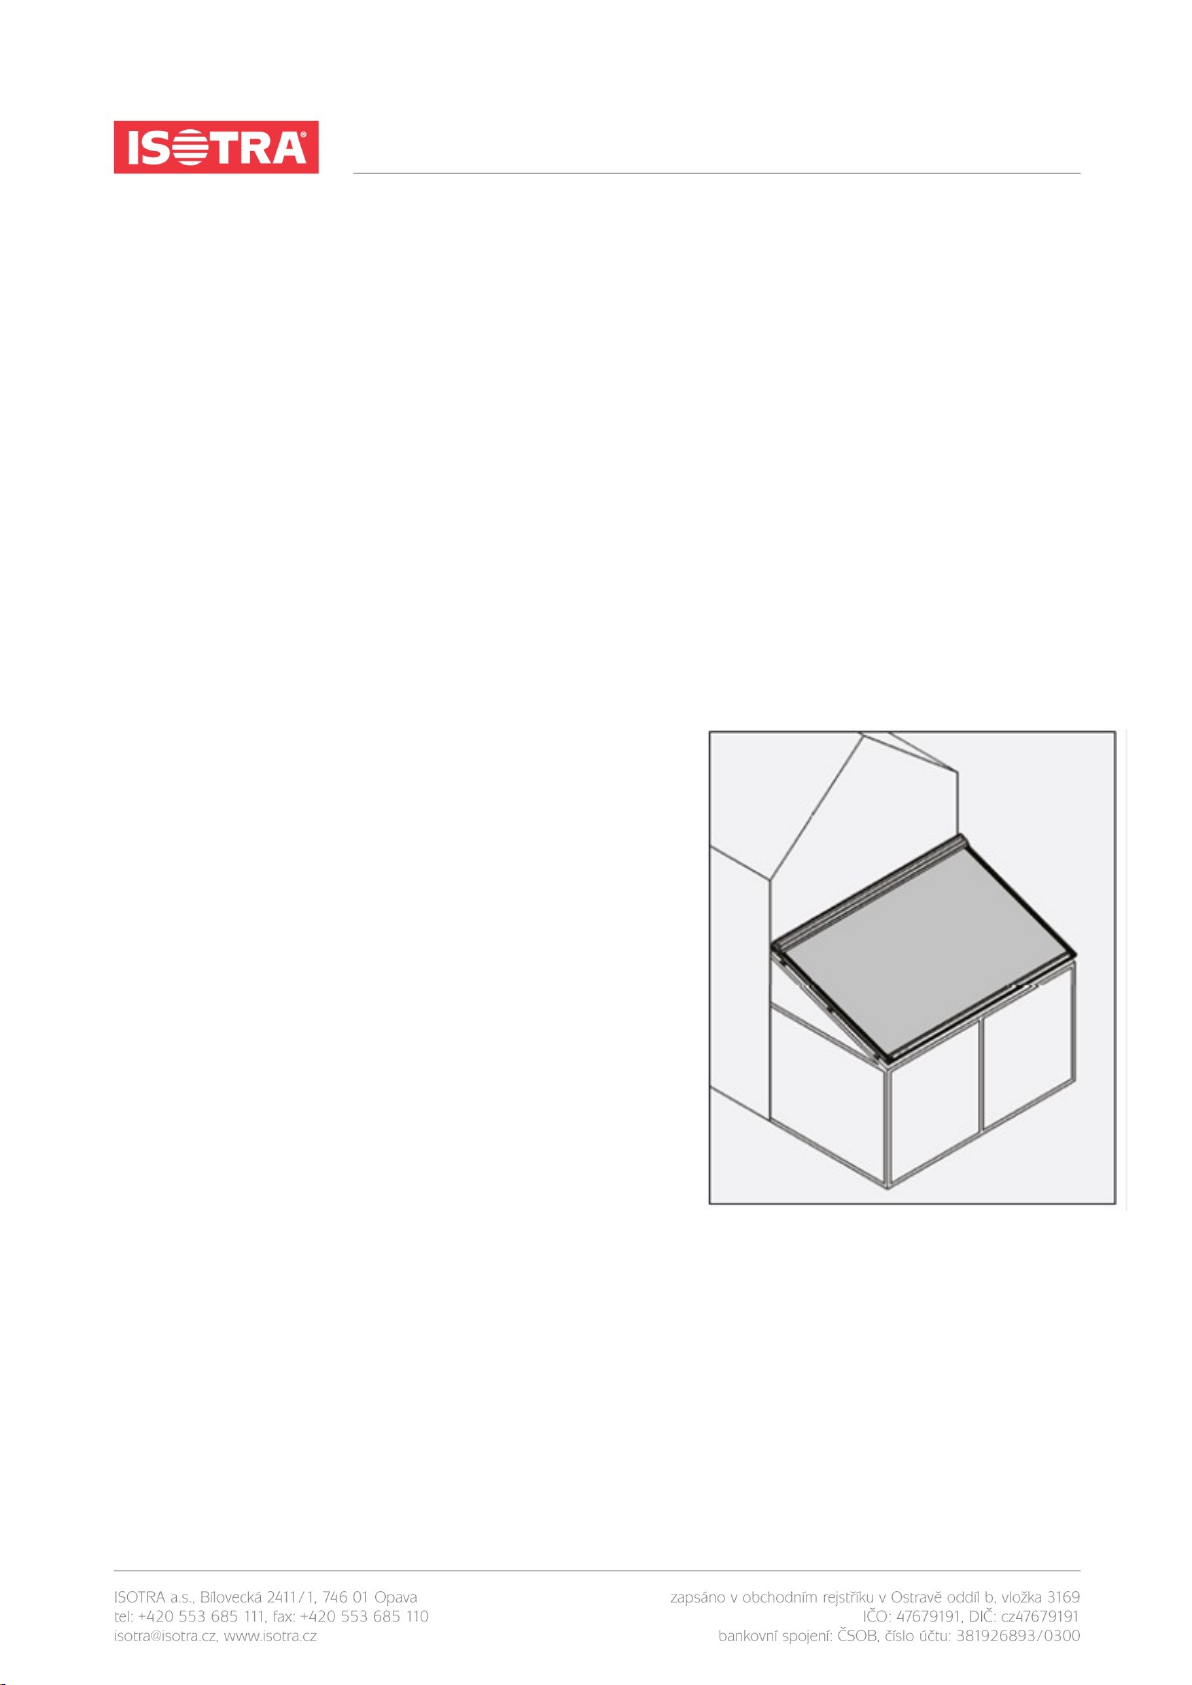
INSTALLATION OPTIONS
The HRV80-ZIP screen can be installed in one way only –to the
supporting structure top down.
• Exterior installation.
• The fabric is placed on the outside.
• The sun screen is visible from the outside.
• The zipper is on the window side.
• In Soltis 86 and 92 fabric, the aluminium side faces the sun.
• In blackout fabrics, the grey film is on the window side.
Note: It is necessary to observe the minimum slope requirements for
the fabrics, otherwise water will accumulate on the fabric, which will
bend and possibly deform permanently. This would void the
guarantee. If the screen remains open during the rain, water will
uncontrollably flow to the sliding blocks of the bottom section. There
is no water collecting mechanism (eaves) under the guide rails.
The minimum recommended gradient of slope for Soltis 86 and 92 fabrics is 8°
With integrated LED illumination, the minimum slope is 10°!
The minimum recommended gradient of slope for blackout fabrics is 14°!
The maximum gradient of slope for all variants is 30°!