IST Proline IF-O User manual

IF-O Owner ’s Manual

Thank you for choosing IST IF-O Inflator-Octo
1. IMPORTANT WARNINGS
WARNING
THIS MANUAL MUST BE READ AND UNDERSTOOD ENTIRELY BEFORE USING
THE PRODUCT.IT IS ADVISED THAT YOU KEEP THIS MANUAL IN YOUR
POSSESSION DURING THE ENTIRE LIFE OF YOUR IF-O.
When diving,you must follow the rules and apply the skills taught by arecognized
scuba diving certification agency.Before taking part in any diving activity, it is mandatory
to have successfully completed ascuba diving course covering both theoretical and
technical aspects of diving.
Do not push down on the purge button in low temperatures, as this may cause asecond
stage freeze-up.
Max Intermediate Pressure is 1.103 kPa (155 psi).
Using the IF-O with first stages exceeding this intermediate pressure may cause air
leakage from the mouthpiece and inflation of the buoyancy vest.
2. CE CERTIFICATION
IF-O has successfully passed the certification tests required by
EN250:2014 to an auxiliary emergency breathing device integrated
with abuoyancy inflator system.
The use of IF-O as regulator is certified exclusively for diving in water temperature higher
than 10ºC(50ºF),as indicated by the markings on the unit.
Do not use the IF-O as aregulator while diving in water temperature
below that limit.
Failure to follow this instruction could lead to serious injury or death.
IST
WARNING
WARNING
WARNING
WARNING
1

push connect
pull sleeve to disconnect
Power inflation
button
Oral inflation/
deflation button
corrugated hose
3/4〞or 1〞
Hose adapter assembly
cable tie
IST
2

Cable for dumping air
Make sure the adapter sleeve is in place and the
hose
is not pushed tight against it, or it will not spin freely.
Secure the barbed end to the hose with anew cable
ties.
To attach the IF-O to the adapter, slide the adapter into the threaded
fitting on the IF-O and tighten by hand.It should be snug enough
that it will not become unscrewed accidentally yet not so tight as to
damage the plastic parts.
slip the threaded sleeve over the barbed
end of the adapter before connecting the
cable or installing into the corrugated
hose .
←Adapters
↙
If your BCD has acable attached to the inflator for dumping air, push
the retaining pin out of the inflator and disconnect it from the cable.
Sleeve
5
Reconnect the cable by placing the pin through loop
of the cable and inserting the pin though the holes in
the adapter .The pin should fit completely through
and be flush with the outside diameter of the adapter.
You are now ready to secure the corrugated hose to
the adapter barbed nipple.
cable tie
IST
3

Check before dive
Slowly turn on the air
1. Test the IF-O for inflation and deflation.
2. Fully inflate the BCD and leave inflated for afew minutes to check
for leaks around the corrugated hose and fittings.
3. If there was acable dump attached to the IF-O, fully inflate the BCD
and pull the corrugated hose to check for proper operation.
4. Check the breathing operation of the IF-O regulator.
Dive operation
Operation of the IF-O is the same as any conventional
inflator
Breathing
The IF-O breathes like any conventional second stage.Clear the IF-O
of water by first exhaling or using the purge button (front cover), then
breathe normally through the mouthpiece.
1. Power inflation is done by depressing the smaller, oval shaped
inflation button
2. Deflation is done by holding the IF-O overhead and partially
depressing the larger deflation button.
3. Oral inflation is done by fully depressing the deflation button and
exhaling air into the mouthpiece.Fully depressing the button seals off
the regulator exhaust valve and directs the exhaled air into the BCD to
inflate it.Release the deflation button to keep the air in the BCD.
Regulator
purge
Oral inflation/
deflation button
Power inflation
button
IST
4

Care
•After use, especially in chlorinated water, the IF-O should be set up on a
scuba tank, pressurized, and thoroughly rinsed with fresh water.
•Should water accidentally enter the low pressure hose, connect the
regulator to the cylinder, open the valve and press the second stage purge
button down until all water has been expelled.
•Let water run into the mouthpiece and flow out the exhaust port.
•Dry your regulator completely inadry ventilated place, away from heat
and direct sunlight.
Maintenance
•Maintenance procedures beyond the simple operations described in the
preceding paragraph should not be carried out by the user.
•IF-O must be overhauled by an authorized technician every year.
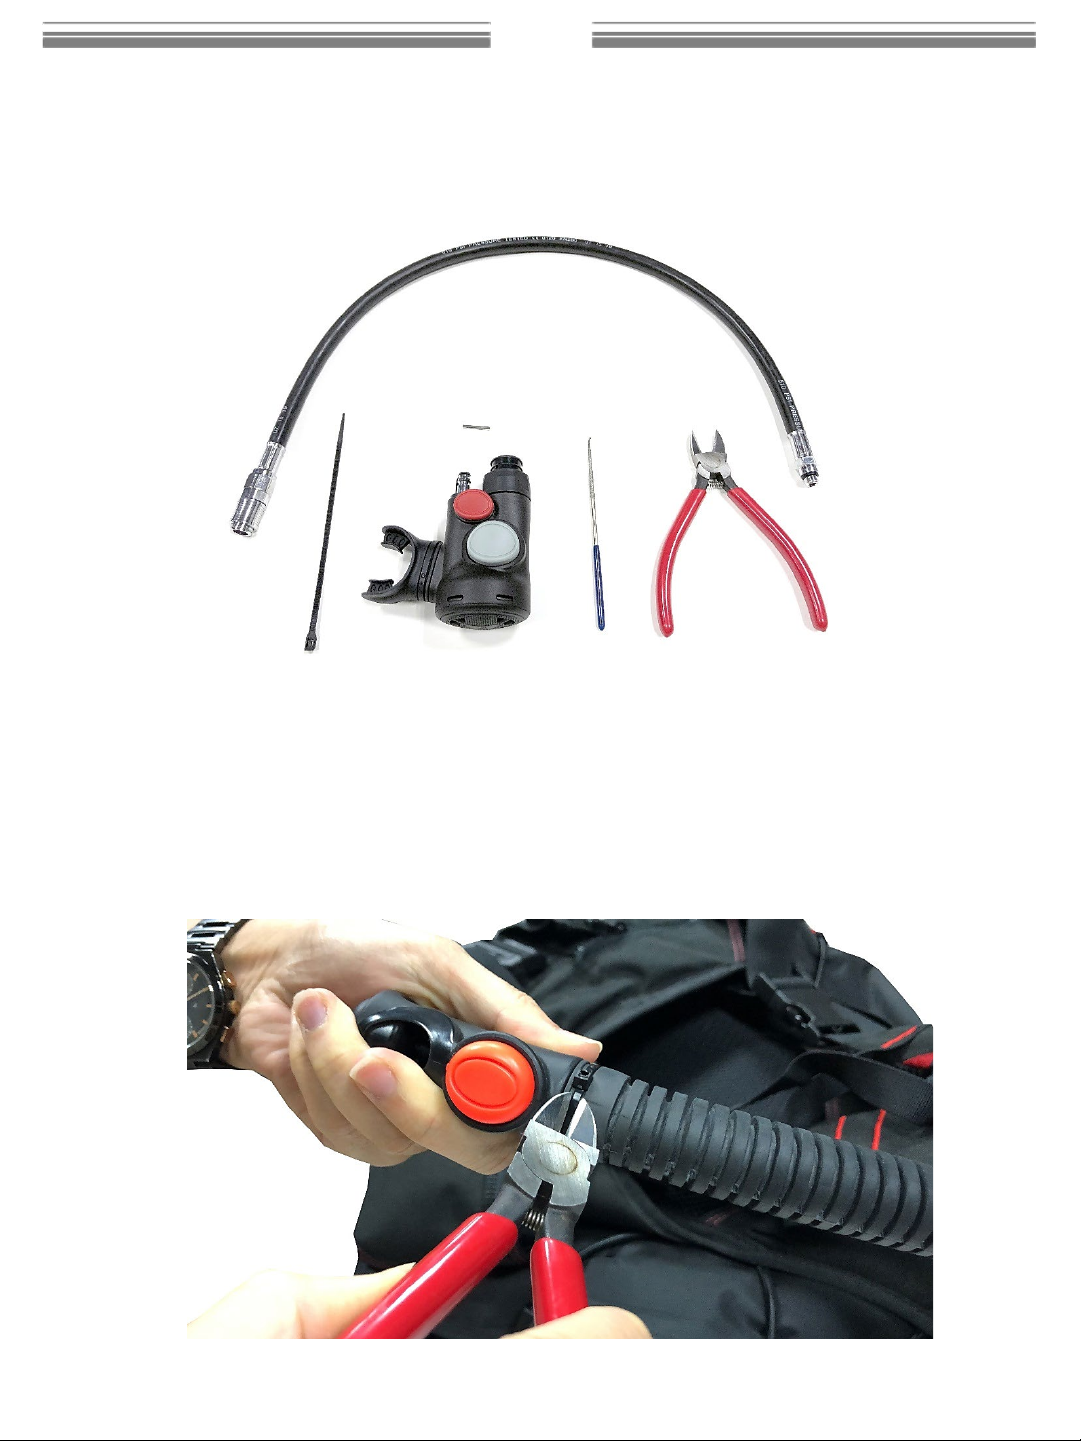
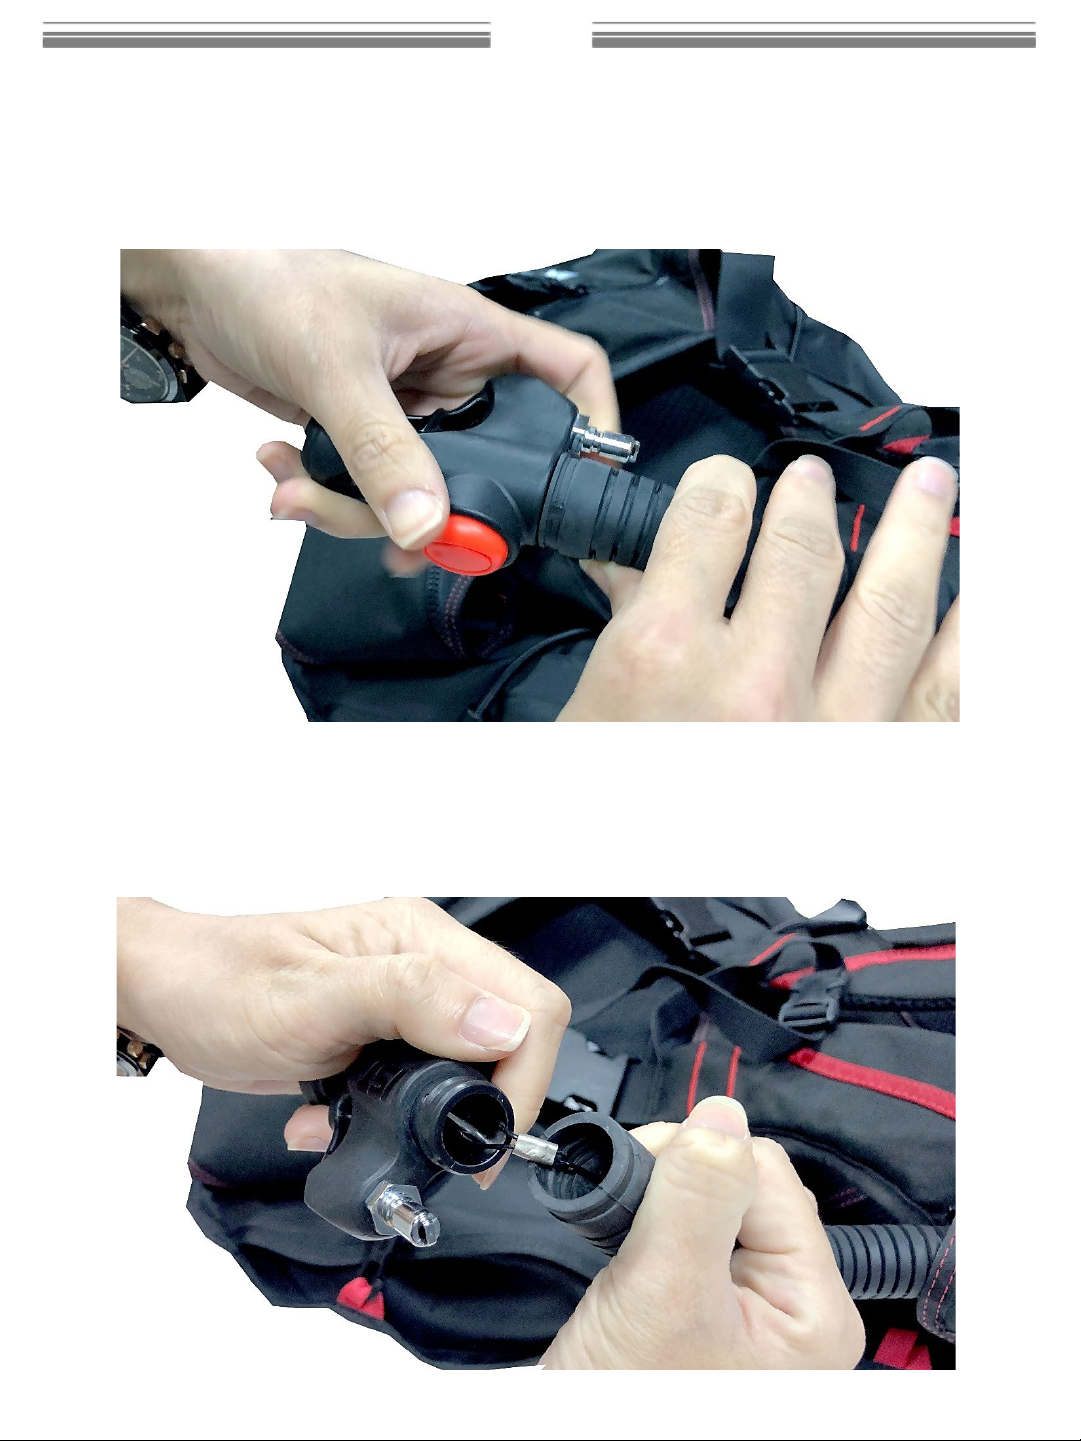
Warning Do not attempt any disassembly or repair of the IF-O.
Disassembly and service of the IF-O must only be performed by an
authorized, factory trained scuba repair technician or by the factory.
Warning DO NOT USE silicone grease on the diaphragm and/or the
exhaust valve, it may cause damage to the silicone rubber.
WARRANTY
All warranty transactions must be accompanied by proof of original purchase
from an authorized dealer.Be sure to save your sales receipt, and present it
whenever returning your regulator for warranty service.
Limited Lifetime Warranty
This IF-O is warranted against defects in materials and workmanship for the
3years of the original owner with the exception of mouthpieces, o-rings, or
valve seats.
This warranty does not apply to units subjected to misuse, abuse, neglect,
modification, or unauthorized service. This limited warranty is extended only
to the original purchaser for products purchased directly from an authorized
dealer, and is not transferable.
This warranty is limited to repair or replacement only at the discretion of
the factory.
IST
5

IF-O SPECIFICATIONS
Materials:
-Case Fiberglass Reinforced Nylon
-Diaphragm Silicone Rubber
-Exhaust Valve Silicone Rubber
-Spring Stainless Steel
-Demand Valve Brass, Chrome Plated
Weight 150 grams(5.3 oz.)
(W/O quick-disconnect and hose)
Average Flow Rates: 340 liters/minute
Demand Valve Design Downstream, Venturi Assisted
• Hose Length 70cm standard
• Thread 3/8”—24 UNF
• Pressure rating 125-150psi (8.6-10.5 bar)
Hose
IST
6

IF-O Installation
1. Tools
IST
2. Remove the original power inflator.
2-1. Cut the zip tie on the corrugated rubber hose with a
pliers or a knife.
7

IF-O Installation
2-2. Pull and remove the power inflator from the rubber hose.
IST
2-3. If there is a pull-dump wire connected, use a sharp cone
to push and remove the pin on the inflator and disconnect the
wire.
8

IF-O Installation
IST
9

IF-O Installation
3. Install the IF-O inflator Octopus.
3-1. Insert the pin to the IF-O and make sure the pin goes
through the loop of the pull-dump wire to connect the pull-
dump valve properly.
IST
10

IF-O Installation
3-2. Assemble the IF-O with the corrugated rubber hose of
the BCD and secure with a zip tie.
IST
11

IF-O Installation
3-3. Cut and discard the extra zip tie.
IST
3-4. Remove the dust cover of the IF-O.
12

IF-O Installation
3-5. Connect the IF-O to the regulator with a low-pressure BC
hose.
IST
4.Finish
13

SERVICE & INSPECTION RECORD
Serial No:
Purchase Date:
Store name:
IST
14

IST
IST Sports Corp.
Address: Room A, 6th Floor, No.6, Lane 345, Yangkuang St.,
Neihu, Taipei, Taiwan 11491
Tel: +886 2 26272516
Fax: +886 2 26599056
Email: [email protected]
Web: www.istsports.com
Printed in Taiwan
15
Table of contents
Popular Power Tools manuals by other brands

Bosch
Bosch GST 90 BE Original instructions

Festool
Festool VS-600 Original operating manual/spare parts list

Meister
Meister MPS800-1 Translation of the original instructions

EINHELL
EINHELL GC-CG 3,6 Li WT Original operating instructions

DeWalt
DeWalt D25501-AR instruction manual

Tanco
Tanco AUTOWRAP I70 Operator's handbook