iTero HD2.9 User manual

October 2012

iTero HD2.9 Operation Manual English
2 Publication SD08477-A-C
COPYRIGHT
Copyright © by Cadent. 2012. All rights reserved.
The information contained in this manual is subject to change without notice.
The hardware and software described in this manual are supplied under a Sales and Services
Agreement and may be used only in accordance with the terms of that agreement.
No part of this manual may be reproduced, photocopied, stored in a retrieval system, or transmitted in
any manner (electronic or mechanical) for any purpose other than the customer’s normal usage,
without the prior written permission of Cadent.
This manual describes the iTero HD2.9 Optical Impression Device.
English language version. Updated October 2012
TRADEMARKS
The following are trademarks and/or service marks of Align Technology, Inc. or one of its subsidiaries
or affiliated companies and may be registered in the U.S. and/or other countries: Cadent, iTero
Any other trademarks or registered trademarks appearing in this manual are the property of their
respective owners.
USA OFFICE
ISRAEL OFFICE
Corporate Headquarters
Align Technology, Inc.
2560 Orchard Parkway
San Jose, California 95131
www.aligntech.com
Tel: +1 (408) 470-1111
Fax: +1 (408) 470-1010
Cadent Ltd.
3 Ariel Sharon Blvd.Or Yehuda
Israel
Tel: +972 (3) 634-0020
Fax: +972 (3) 634-1440
EUROPEAN AUTHORIZED REPRESENTATIVE
Obelis s.a.
Boulevard Général Wahis 53
1030 Brussels, Belgium
www.obelis.net
Tel: +32.2.732.59.54
Fax: +32.2.732.60.03
E-mail: m[email protected]
CUSTOMER SUPPORT
Tel: +1 (800) 577-8767
E-mail: iterosupport@aligntech.com
E-mail: orthocadsupport@aligntech.com

English iTero HD2.9 Operation Manual
Publication SD08477-A-C 3
CLASS 1 LASER COMPLIANCE
CSA COMPLIANCE
This device complies with the following CSA standard for Canada and the USA:
"UL Std No. 60601-1 Second Edition –Medical Electrical Equipment Part 1: General Requirements
for Safety"
FCC COMPLIANCE
This device complies with Part 15 of FCC Rules and its operation is subject to the following two
conditions:
1) This device may not cause harmful interference.
2) This device must accept any interference received, including interference that may cause
undesired operation.
FCC Warning
Modifications to the device that are not expressly approved by the manufacturer may void your
authority to operate the device under FCC Rules.
EMC COMPLIANCE
This device complies with the following EMC standard:
“IEC 60601-1-2 Medical electrical equipment - Part 1-2: General requirements for basic safety and
essential performance - Collateral standard: Electromagnetic phenomena - Requirements and tests”
CE COMPLIANCE
This device complies with Council Directive 93/42/EEC for Medical Devices.
This device complies with:
“21 CFR 1040.10” and “EN 60825-1”.
Class 1 Laser Product

iTero HD2.9 Operation Manual English
4 Publication SD08477-A-C
SYMBOLS
The following symbols may appear on iTero HD2.9 hardware components, and may also appear
within this manual and other iTero literature.
Wherever this symbol appears on the device, it is recommended to refer to this
manual for information on proper usage of the device.
Applied part type B. Any component on which this symbol appears is electric
isolation type B.
Separate collection of waste electrical and electronic equipment is required.
Attention: This symbol is used to highlight the fact that there are specific warnings
or precautions associated with the device. Wherever this symbol appears on the
device, it is mandatory to refer to safety-related information within this manual.
Parts or accessories on which this symbol occurs should not be reused.
“Rx only”
CAUTION: US Federal Law restricts this device to sale by or on the order of a
licensed Dentist, Orthodontist or Dental Professional. The system serves as a
prescription medical device and should be operated by qualified health-care
providers only.
Surfaces of the ME Equipment where a RISK of overbalancing the ME Equipment
exists from pushing, leaning, resting etc., permanently marked with a CLEARLY
LEGIBLE warning of this RISK by use of safety sign ISO 7010-P017.
SHIPPING REGULATIONS
According to the US Department of Transportation (DOT) regulations, the internal UPS battery must
be disconnected before shipping. Please contact an Align technician for assistance before shipping.

English iTero HD2.9 Operation Manual
Publication SD08477-A-C 5
SAFETY INSTRUCTIONS
Before beginning to work with the system, all users are required to read these safety instructions.
Power Supply
Power is supplied to the system via an internal medical grade isolation
transformer. When connecting the power supply, ensure that the provided
voltage is in the allowed range as specified in the Hardware Specifications.
Electric
Warning
Electric shock hazard!! Only authorized Align technicians can remove
external panels and covers. There are no user-serviceable parts inside.
To avoid risk of electric shock, iTero HD2.9 must only be connected to a
supply mains with protective grounding.
Wireless LAN
The system comes equipped with a Wireless LAN unit. Using standard wired
communications will violate the AC mains power isolation.
Safety
Classifications
Type of protection against electrical shock: Class 1
Degree of protection against electrical shock: Type B
Degree of protection against harmful ingress of water: Ordinary
Equipment not suitable for use in presence of flammable anesthetic mixtures.
Mode of operation: Continuous
Recycling of
Batteries
Follow local governing ordinances and instructions regarding disposal or
recycling of batteries.
Prescription
Health Device
The system serves as a prescription medical device and should be operated
by qualified health-care providers only.
Scanner
Warnings
The scanner emits red laser light (660 nm Class 1) as well as multi-colored
light emissions. Normal usage of the scanner does not present any danger to
the human eye. However, doctors should refrain from shining the scanner
directly into the patient’s eyes.
Avoid twisting cable, knotting cable, pulling on cable, stepping on cable, or
running over cable with cart wheels.
Cleaning &
Disinfection
To avoid cross contamination, it is mandatory that after each patient session
the disposable plastic sleeve be replaced and the scanning unit be disinfected.
Dispose of scanner sleeves according to standard operating procedures or
local regulations for the disposal of contaminated medical waste.
Unpacking &
Installing
The system should be unpacked and installed by Align authorized personnel
only. No attempt should be made by the user to unpack or install the device.
Due to its weight and delicate components, it is recommended that the system
be lifted using a power lift or mechanical lift (and not by hand).
Work
Environment
The system should be wheeled between rooms by at least two people, using
maximum care to avoid bumping and jolting the cart.
Do not block either of the two air vents on the sides of the cart.
System is intended for indoor use only. It should not be exposed to direct
sunlight, excessive heat or humidity.
Electro
Magnetic
Interference
WARNING: This device has been tested and found to comply with the
requirements for medical devices according to standard EN60601-1-2. This
standard is designed to provide reasonable protection against harmful
interference in a typical medical installation. However, because of the
proliferation of radio-frequency transmitting equipment and other sources of
electrical noise in the healthcare environments (e.g., cellular phones, mobile
two-way radios, electrical appliances), it is possible that high levels of such
interference due to close proximity or strength of source, may result in
disruption of performance of this device.
General
WARNING: No modification of this equipment is allowed.

iTero HD2.9 Operation Manual English
6 Publication SD08477-A-C
TABLE OF CONTENTS
Chapter 1: Introduction ........................................................................................................7
About this Operation Manual...............................................................................................7
Intended Use.......................................................................................................................7
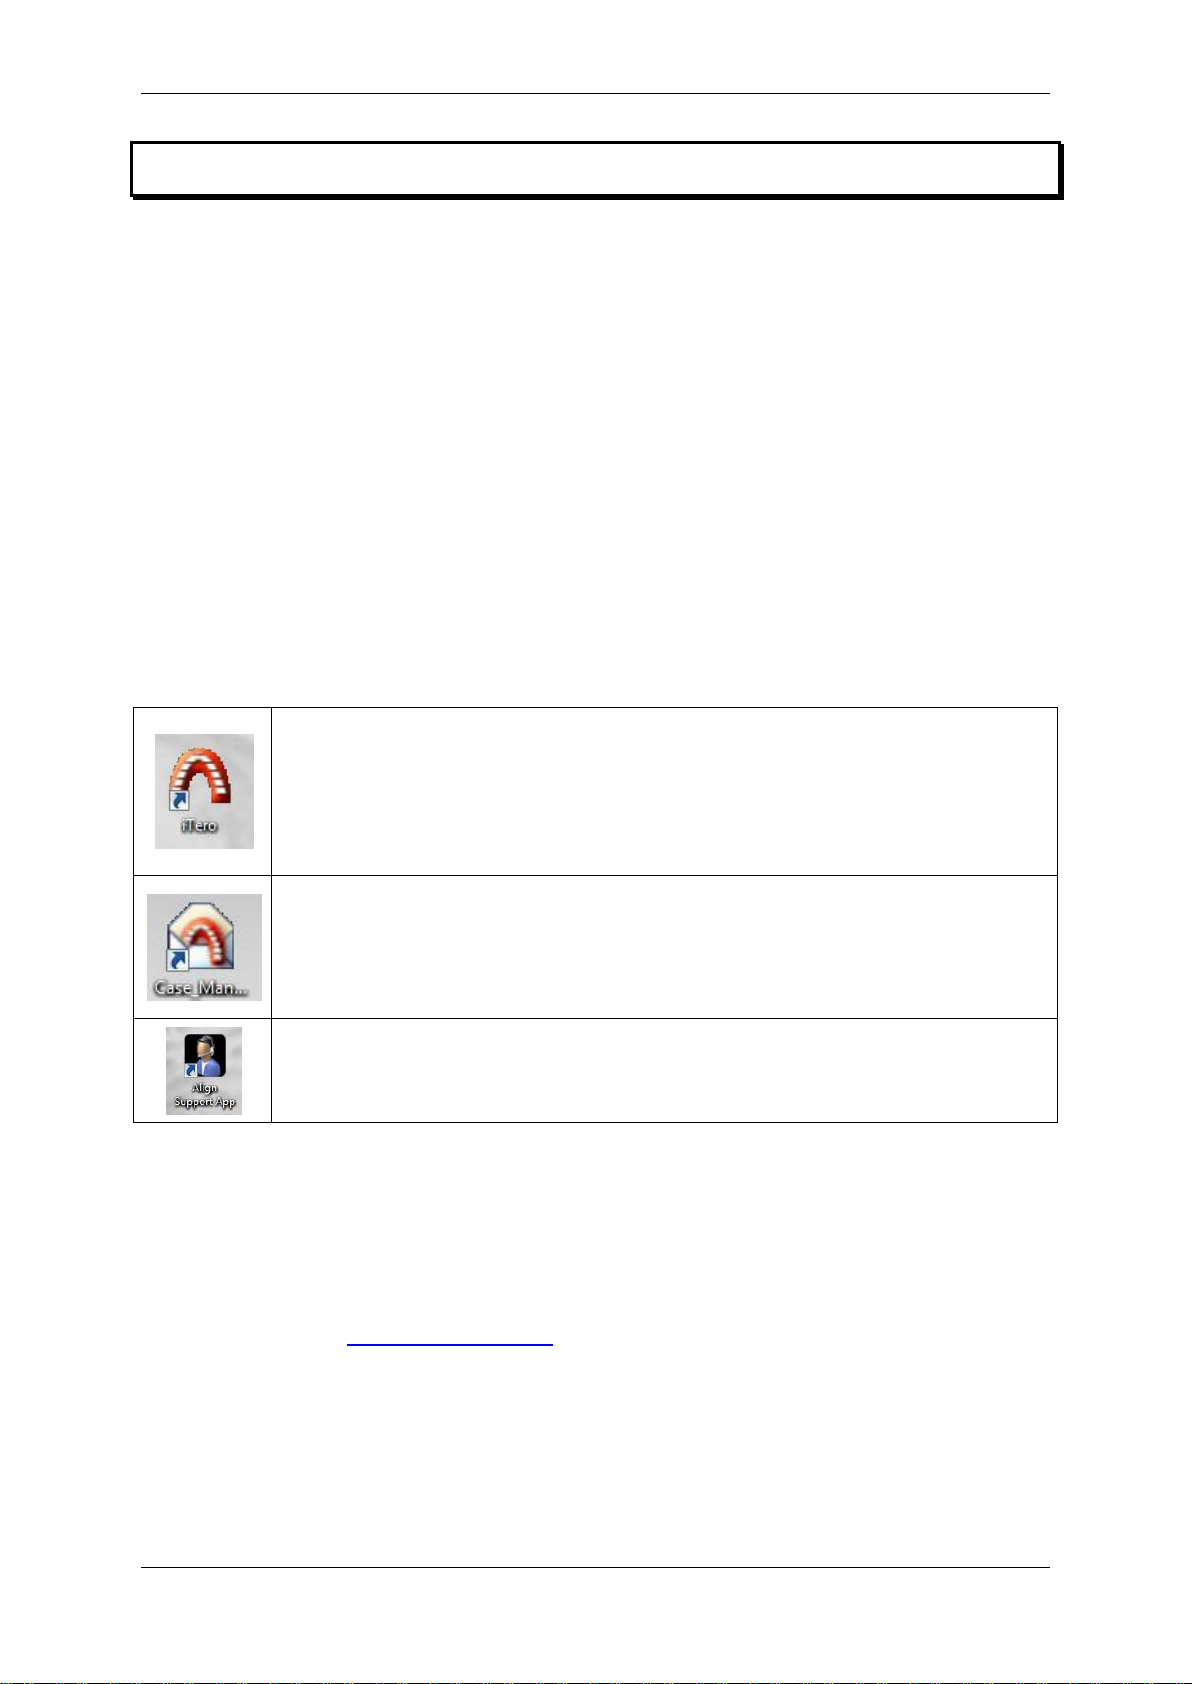
The iTero Applications.........................................................................................................7
Benefits of the iTero HD2.9 system.....................................................................................7
Chapter 2: Basic Hardware Features...................................................................................8
Front View of Cart ...............................................................................................................8
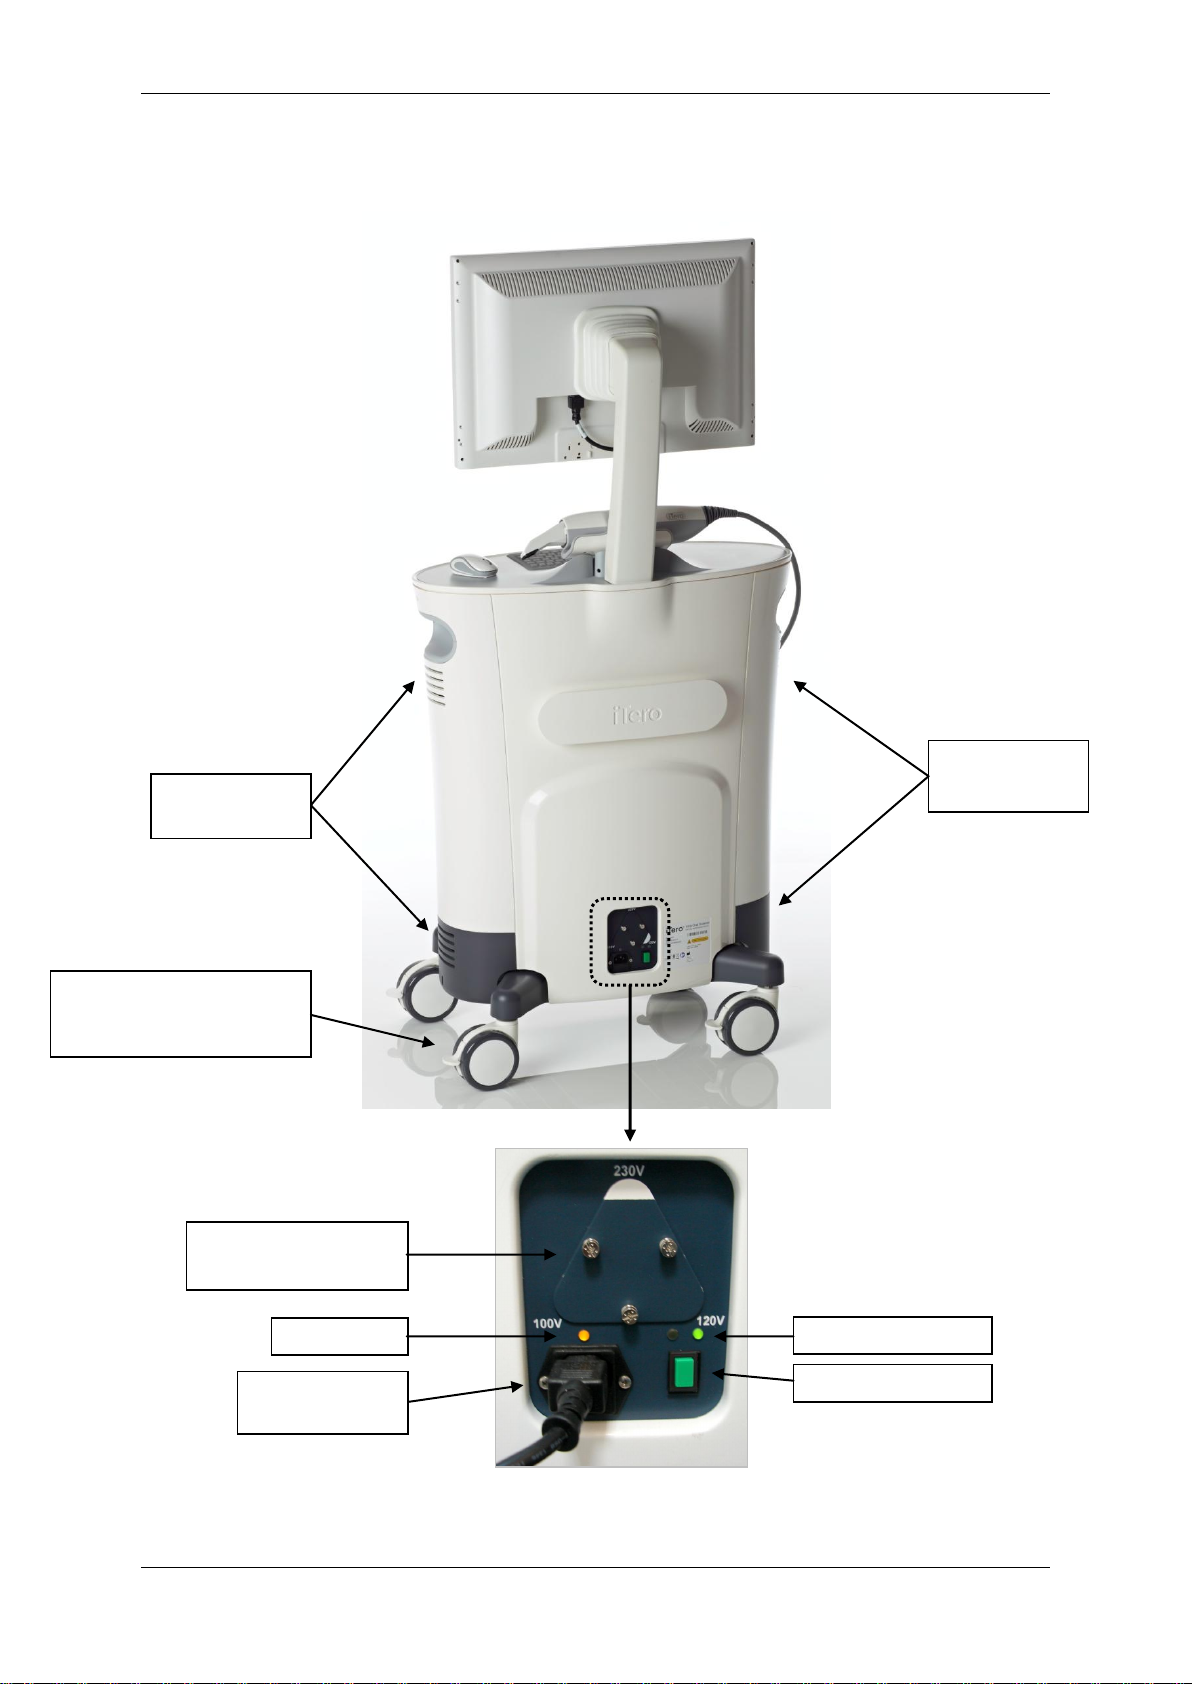
Back View of Cart................................................................................................................9
Chapter 3: Operating Instructions.....................................................................................10
Initial Power-Up and Boot..................................................................................................10
End-of-Day Shut down ......................................................................................................10
Start-of-Day Boot...............................................................................................................10
About the Internal Uninterruptible Power Supply (UPS).....................................................11
Moving Cart within Office...................................................................................................11
Automatic Shut down.........................................................................................................11
Chapter 4: AC Power Problems - Troubleshooting ..........................................................12
SYMPTOM: System Begins to Beep Unexpectedly..........................................................12
Checking & Replacing Main Fuses....................................................................................13
Chapter 5: Proper Handling of Scanner ............................................................................14
Handling of the Scanning Unit ...........................................................................................14
Handling of the Scanner Cable..........................................................................................14
Chapter 6: Changing Sleeves between Patients...............................................................15
Cleaning the Scanning Unit...............................................................................................15
Replacing Disposable Sleeve............................................................................................15
Scanner Sleeves...............................................................................................................16
Chapter 7: Basic Maintenance Tasks ................................................................................17
Checking Foot Pedal Battery.............................................................................................17
Replacing Foot Pedal Batteries .........................................................................................17
Replacing Mouse Battery...................................................................................................17
Wireless Dongles Replacement.........................................................................................18
Cleaning Monitor...............................................................................................................19
Replacing the Keyboard....................................................................................................19
Appendix A: EMC Declaration............................................................................................20
Appendix B: Hardware Specifications...............................................................................24

English iTero HD2.9 Operation Manual
Publication SD08477-A-C 7
Chapter 1: Introduction
About this Operation Manual
The iTero HD2.9 system is delivered as a proprietary, PC-based workstation for performing
intra-oral scans in the doctor’s office. This Operation Manual describes how to boot and shut
down the system, how to correctly handle the scanning unit/wand and cable, how to clean
the scanning unit and replace its sleeves between patients, and how to perform basic
maintenance tasks such as mouse and foot pedal battery replacement.
Intended Use
The system is an intra-oral optical impression system for computer assisted design and
manufacturing (CAD/CAM) used to record topographical characteristic of teeth, dental
impressions, or stone models by analog or digital methods for use in computer-assisted
design and manufacturing of dental restorative prosthetic devices.
The iTero Applications
The following iTero applications operate on the iTero HD2.9 system.
The iTero HD2.9 system provides an intuitive user interface for performing digital
scans of preparation teeth. The doctor is guided through the scanning sequence
by means of visual, text and/or voice assistance. The mouse and foot pedals are
used to respond to screen instructions during the scanning process. For more
information, open the application and press F1 to display the iTero HD2.9 system
help.
The iTero Case Manager works interactively with iTero HD2.9 system and
handles file communications between the doctor’s office, partnered labs, and the
Align Centers. The Case Manager also allows doctors to track the progress of
their cases at all stages. For more information, open the application and press F1
to display the iTero Case Manager help.
The Align Support icon enables the Align Help Desk to provide remote training
and support to your system.
Benefits of the iTero HD2.9 system
iTero HD2.9 system provides important advantages over existing crown-production methods,
including powder-free scanning, greater crown-production accuracy, and immediate
feedback during the scanning process.
Refer to our website http://www.itero.com/ to learn how the iTero Service can enhance your
business by increasing patient satisfaction, improving clinical outcomes, and enhancing
office efficiency.

iTero HD2.9 Operation Manual English
8 Publication SD08477-A-C
Chapter 2: Basic Hardware Features
Front View of Cart
The basic hardware features of the cart front are listed below.
Grasp monitor firmly with two hands
to swivel the monitor in any direction.
Scanning Unit (Wand)
Replaceable keyboard
POWER switch for boot up
Step down on levers to lock wheels.
Lift levers to free wheels.
Wireless Mouse
Wireless foot pedal unit for
controlling the scan process.

English iTero HD2.9 Operation Manual
Publication SD08477-A-C 9
Back View of Cart
The basic hardware features of the cart back are listed below.
Air vent
(Do not block)
Voltage indicator and
voltage selector
Power LED
Power inlet and
fuse holder
UPS status LEDs
UPS Power switch
Step down on levers to
lock wheels.
Lift levers to free wheels.
Air vent
(Do not block)

iTero HD2.9 Operation Manual English
10 Publication SD08477-A-C
Chapter 3: Operating Instructions
Initial Power-Up and Boot
STEP 1
Plug mains cable into cart and other end into wall outlet. The yellow LED
will light up to indicate presence of power.
STEP 2
TURN ON the UPS power switch on the back side of the cart (the green
button on the picture to the right) by pressing it for 4 seconds until a short
beep is heard, and then release the button. The green LED should light
up.
STEP 3
Press the POWER switch to start the system and run MS Windows™.
It is recommended to keep the system in operation during office hours to allow background
file transfers between the doctor’s office, the doctor’s partnered labs, and the Align Center. It
is recommended to shut down the system at the end of the day, and to reboot in the
morning.
End-of-Day Shut down
STEP 1
Close all files and applications.
STEP 2
Use the Windows START Menu Shut down. Do not do a forced shut down.
Start-of-Day Boot
STEP 1
Press the POWER switch to start system and run MS Windows™.

English iTero HD2.9 Operation Manual
Publication SD08477-A-C 11
About the Internal Uninterruptible Power Supply (UPS)
The cart may be unplugged from the wall outlet and wheeled to another room without
performing a shut down. During that time, the system is powered by an internal UPS. The
system will shut down after 5 minutes.
For first-time usage or when the UPS has been drained, an 8-hour period is necessary to
achieve full charge. To ensure the UPS remains fully charged, it is recommended to leave
the system connected to the wall outlet at all times without turning off the UPS Power Switch
button on the rear of the cart.
For more information on the UPS, see the “Internal UPS” specifications at the end of this
manual.
Moving Cart within Office
To ensure maximum cart protection, it is recommended to have two people move the cart.
Follow these instructions for relocating the cart:
(1) Save current case in iTero Scanner application.
(2) Attach foot pedal to front of cart.
(3) Free all four wheels by lifting wheel locks.
(4) Unplug cart from the wall outlet. System beeps indicating that UPS backup power is
being utilized.
(5) Move the cart slowly and carefully with two people to avoid any bumps or scrapes.
(6) Place the cart at its new location and plug into wall outlet. System stops beeping.
(7) Lock all four wheels by stepping down on wheel locks.
(8) Resume work.
NOTE: If you are moving the cart over rough or bumpy surfaces, it is recommended to shut
down the system beforehand to avoid possible damage. Use the cart handles when moving
the cart.
Automatic Shut down
When the cart is unplugged or a power outage occurs, a warning beep indicates that UPS
backup power is being utilized. If the system is left unplugged, warning messages begin to
appear on the screen and the status of the internal UPS battery will be displayed. After 5
minutes the system will automatically shut down. After the cart is plugged back into a wall
outlet, it may be necessary to press the POWER switch to reboot the system.

iTero HD2.9 Operation Manual English
12 Publication SD08477-A-C
Chapter 4: AC Power Problems - Troubleshooting
SYMPTOM: System Begins to Beep Unexpectedly
REASON:
The system is not receiving AC power and therefore the system is using UPS backup power.
NOTE:
When relocating the cart between rooms, beeping is normal. The cart should be reconnected
as soon as possible.
TROUBLESHOOTING INSTRUCTIONS:
1. Ensure that the power cord is attached firmly at both ends (the wall socket and the cart
input socket).
2. Check the yellow power LED above the cart input socket.
3. If the left of the two UPS LEDs is ON, the internal UPS may be faulty. Contact Align
support.
4. If both UPS LEDs are OFF, follow these steps:
4a) If the system is running, shut down the system as follows:
Close all files and applications.
Shut down system using Windows Start Menu Shut down.
TURN OFF the UPS power by pressing the switch on the back side of the cart
(the green button on the picture above) for 3 seconds.
4b) If a power outage has occurred, wait for power to return.
4c) If a power outage has not occurred, check the fuses as described in “Checking &
Replacing Mains Fuses” on the next page.
UPS LEDs
Power Cord

English iTero HD2.9 Operation Manual
Publication SD08477-A-C 13
Checking & Replacing Main Fuses
STEP 1: Unplug Cord from Wall
Unplug the power cord from the wall socket.
STEP 2: System Access
Move cart away from any wall to allow easy
access to the power cord and fuse tray.
STEP 3: Disconnect Cord from Cart
Unplug the power cord from the back of the
cart.
STEP 4: View Fuse Tray
The fuse tray is located below the power
socket.
STEP 5: Open Fuse Tray
Pull the fuse tray to open it.
STEP 6: Remove & Check Fuses
Carefully remove each fuse from the tray.
Check fuses visually (and with tester if
available).
STEP 7: Replace Fuse
If either fuse is blown or suspect, replace
both fuses (See “Fuse Type” specifications at
the end of the manual.)
STEP 8: Close Fuse Tray
Close the fuse tray and insert cord firmly.

iTero HD2.9 Operation Manual English
14 Publication SD08477-A-C
Chapter 5: Proper Handling of Scanner
Handling of the Scanning Unit
The scanning unit contains delicate components and should be handled with care.
Maximum effort should be made to keep the scanner cable off the floor at all times.
Handling of the Scanner Cable
The scanner cable contains delicate components and should be treated with care to
avoid possible damage.
Avoid twisting cable, knotting cable, pulling on cable, stepping on cable, or running over
cable with cart wheels.
Between patient sessions, it is recommended to undo any twists and knots in order to
relieve all tension from the scanner cable.

English iTero HD2.9 Operation Manual
Publication SD08477-A-C 15
Chapter 6: Changing Sleeves between Patients
Cleaning the Scanning Unit
To avoid cross contamination, it is essential that after each patient you fully disinfect the
Scanning Unit and replace the disposable plastic sleeve. First use disinfectant wipes to
clean the Scanning Unit, cradle, keyboard and mouse. Then proceed with the steps below to
remove the used sleeve and attach a new sleeve.
CAUTION: Dispose of scanner sleeves according to standard operating
procedures or local regulations for the disposal of contaminated medical waste.
Replacing Disposable Sleeve
STEP 1
Press firmly on both sides of disposable
sleeve to release it.
STEP 2
Pull disposable sleeve slowly off Scanning
Unit and discard.

iTero HD2.9 Operation Manual English
16 Publication SD08477-A-C
WARNING - OPTICAL SURFACE!
Do no touch the optical surface. Contact may
cause damage. If cleaning is necessary, refer
to directions in the scanner sleeves box.
STEP 3
Continue to slide sleeve slowly onto
Scanning Unit until it clicks into place.
Scanner Sleeves
We recommend that you maintain a full stock of scanner sleeves in your office.
SCANNER SLEEVES BOX
Boxes containing 25 Scanner Sleeves may
be ordered by contacting Customer Support.
PATIENT SCANNING SLEEVE
HARDWARE DIAGNOSTIC &
PROTECTIVE SLEEVE
A special gray protective sleeve is used to
protect the Scanning Unit’s head during
shipping and between patients. This sleeve
may be used by Customer Support for
troubleshooting the system.

English iTero HD2.9 Operation Manual
Publication SD08477-A-C 17
Chapter 7: Basic Maintenance Tasks
Checking Foot Pedal Battery
The foot pedal unit contains two AA 1.5V batteries. It is
recommended to keep back-up batteries of this type in
your office.
Replacing Foot Pedal Batteries
To change the foot pedal battery, follow the
instructions below:
1. Open the battery cover on the bottom of the foot
pedal.
2. Replace batteries with new ones and close the
cover.
CAUTION: Be sure to follow local governing ordinances and recycling
instructions regarding disposal or recycling of batteries.
Replacing Mouse Battery
The wireless mouse contains a single AAA battery. It is recommended to keep back-up
batteries of this type in your office. When the battery is low, the mouse may not respond
properly and a screen message will appear requesting replacement of the battery.
To replace battery, follow these instructions:
(1) Slide the battery compartment lid on back of mouse to open it.
(2) Remove old battery, insert new AAA battery and close lid.
(3) If mouse does not function, verify the switch on the back is turned ON.
CAUTION: Be sure to follow local governing ordinances and recycling instructions
regarding disposal or recycling of batteries.

iTero HD2.9 Operation Manual English
18 Publication SD08477-A-C
Wireless Dongles Replacement
When the iTero Wireless Mouse or the iTero Wireless Foot Pedal require replacement, their
respective dongles must also be replaced. The new Mouse and Dongle MUST BE supplied
by Cadent.
Wireless Mouse Dongle Replacement
Follow these instructions to replace the Wireless Mouse dongle.
(1) Slide open the battery compartment lid on the bottom side of the Mouse.
(2) Extract the Wireless Dongle, and close the lid.
(3) Use a small flat-tipped screwdriver to lift the edge of the keyboard and then move the
keybord to the side to reveal the Wireless Dongles below. Note the labels above the
opening: the Mouse Wireless Dongle is the on the right side.
(4) Extract the old dongle and insert the new one in its place.
(5) Put the keyboard back into place.
Wireless Foot Pedal Dongle Replacement
Follow these instructions to replace the Wireless Foot Pedal dongle.
(1) Extract the Wireless Dongle from the slot on the bottom side of the Foot Pedal.

English iTero HD2.9 Operation Manual
Publication SD08477-A-C 19
(2) Use a small flat-tipped screwdriver to lift the edge of the keyboard, and then move the
keybord to the side to reveal the Wireless Dongles below. Note the labels above the
opening: the Wireless Foot Pedal Dongle is on the left side.
(3) Extract the old dongle and insert the new one in its place.
(4) Put the keyboard back into place.
Cleaning Monitor
Follow these instructions to clean the LCD monitor.
(1) Turn OFF the monitor switch on the monitor’s back side.
(2) Lightly dampen a clean white cotton cloth with water and wipe monitor clean.
(3) Dry the monitor immediately using another clean white cotton cloth.
(4) If further cleaning is necessary, use another clean white cotton cloth to wipe off the
monitor with a small amount of alcohol.
Do not use liquid cleaners, chemicals or aerosol sprays to clean monitor.
Do not use abrasive cleaning materials such as newspaper or plastics to clean monitor.
Replacing the Keyboard
(1) Use a small flat-tipped screwdriver to lift the edge of the keyboard and then move the
keybord to the side to reveal the Wireless Dongles below. Note the labels above the
opening: the Keyboard connector is in the center.
(2) Extract the USB cable from its socket, and remove the old keyboard. Get the new
keyboard, and insert its connector into the socket.

iTero HD2.9 Operation Manual English
20 Publication SD08477-A-C
Appendix A: EMC Declaration
Cadent Ltd. iTero HD2.9 EMC Declaration
Cadent Ltd. Declaration –Electromagnetic Emissions
iTero HD2.9 is intended for use in the electromagnetic environment specified below. The
customer or the user of the iTero HD2.9 should assure that it is used in such environment.
Emissions Test
Compliance
Electromagnetic Environment –Guidance
RF emissions
CISPR 11
Group 1
iTero HD2.9 uses RF energy only for its internal
function. Therefore, its RF emissions are very
low and are not likely to cause any interference
in nearby electronic equipment.
RF emissions
CISPR 11
Class B
Harmonic emissions
IEC 61000-3-2
Complies, class A
Voltage fluctuations/
flicker emissions IEC
61000-3-3
Complies
iTero HD2.9 is suitable for use in all
establishments, including domestic
establishments and those directly connected to
the public low-voltage power supply network
that supplies buildings used for domestic
purposes.
Table of contents
Other iTero Medical Equipment manuals
Popular Medical Equipment manuals by other brands

Smart MED
Smart MED iDisc Series user manual

Ambu
Ambu aScope 4 RhinoLaryngoIntervention Instructions for use

Interacoustics
Interacoustics Air Fx Instructions for use

Weinmann
Weinmann MEDUMAT Transport Instructions for use

Amico
Amico AHM Installation and adjustment instructions

Masimo
Masimo Rad-5 Operator's manual