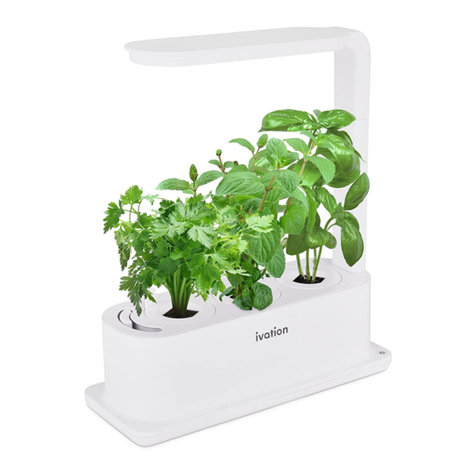
Ivation IVAHG7POD User manual

7-Pod Indoor Herb Garden Kit
SKU: IVAHG7POD
User Guide

2
INTRODUCTION
INTRODUCTION
Thank you for purchasing the Ivation® 7-Pod Indoor Herb
Garden Kit. This User Guide is intended to provide you with
guidelines to ensure that operation of this product is safe
and does not pose risk to the user. Any use that does not
conform to the guidelines described in this User Guide may
void the limited warranty.
Please read all directions before using the product and
retain this guide for reference. This product is intended for
household use only. It is not intended for commercial use.
This product is covered by a limited one-year warranty.
Coverage is subject to limits and exclusions. See warranty
for details.
SAFETY
INSTRUCTIONS
CARE
SPECIFICATIONS
FAQS
TROUBLESHOOTING
WARRANTY
GET IN TOUCH!
3
4
8
9
10
14
15
16
TABLE OF CONTENTS

3
SAFETY
SAFETY PRECAUTIONS
• Before plugging this device in, make sure that the power
cord and wattage/voltage of the outlet supplying power to
the unit comply with the recommended wattage/voltage
on the rating label.
• Before cleaning, make sure to completely turn o and
unplug this appliance.
• This appliance should not be used by children or persons
with reduced physical, sensory, or mental capabilities, or
lack of experience and knowledge, unless they are closely
supervised at all times, and/or have received extensive
instruction and training on how to use this device by a
person responsible for their safety.
• This product has no user-serviceable parts. Do not attempt
to repair this product on your own. Only qualified service
technicians should repair or service this appliance.
• Always make sure this appliance is turned o before
connecting the power to a wall outlet.
• This product is neither designed nor intended to light large
spaces, such as living rooms. Do not use this product as a
lighting appliance.
• If for some reason the power cord becomes damaged,
it must be replaced by either Ivation®, an authorized
serviceperson, or a similarly qualified professional as soon
as possible. Do not attempt to repair or replace the power
cord on your own.
• The operation of this machine requires that there is water
and 24 V DC power supplied to the product. Make sure
electric components are not exposed to water to prevent
damage to the machine.
• After adding or handling water for the product, please
make sure to dry your hands before connecting the
adapter to a power supply. Handling the power adapter
with wet hands will create the risk of electric shock.
SAFETY

4
INSTRUCTIONS
INSTRUCTIONS
PACKAGE CONTENTS
SETUP INSTRUCTIONS
SETTING UP THE GARDEN GROWER
1. Take the garden grower out of its
packaging. Place the grower on a flat,
level surface.
2. Pull the lighting panel up by using the
extendable rod (Fig. 1). Hold down the
water tank of the grower as you pull up
the lighting panel so the grower stays stable.
3. Remove the water tank cover and take the
accessories out of the tank (Fig. 2). Then,
place water tank cover back on grower.
4. Plug the power adapter into the back of the
garden grower (Fig. 3). Then, plug the other
end of the adapter into a power outlet.
NOTE: When the power is properly connected,
the grower will beep, to indicate that it is ready
for operation.
7-pod garden grower
Power adapter
Water tank plug
14 x planting baskets
14 x sponges
Nutrient A powder
Nutrient B powder
User guide
Fig. 1
Fig. 2
Fig. 3

5
INSTRUCTIONS
INSTRUCTIONS
PLANTING INSTRUCTIONS
PREPARING NUTRIENT SOLUTION
1. Pour 100 ml of fresh, clean water into the bottle of nutrient A
powder. Next, mix and stir the powder and liquid in the bottle.
Then, pour another 100 ml of water into the bottle of nutrient
B powder and stir the contents in the bottle.
2. Shake the bottles thoroughly to fully mix the contents.
3. Pour five (5) ml of nutrient A liquid solution into the bottle
cap. Then, pour five (5) ml of nutrient B liquid solution into
the other bottle cap. (The bottle caps also serve as measuring
cups in milliliters.)
4. Add the bottle cap of five (5) ml nutrient A solution into one
(1) liter of water, then stir. Next, add the bottle cap of five (5)
ml nutrient B solution to the same liter of water.
A B
NOTE: The amount of water you are using determines how
much nutrient solution you should add to the water. Add
five (5) ml of nutrient A solution and five (5) ml of nutrient B
solution to one (1) liter of water for a total of 10 ml, add 10 ml
of each liquid solution if you have two (2) liters of water, and
add 15 ml of each liquid solution if you have three (3) liters. The
water tank holds 3.5 liters of liquid all together.
5. Stir until the solutions are equally distributed in the water.
CAUTION: Nutrients have a storage life of two (2) years
in unopened bottles if stored away from sunlight at room
temperature. Mixed nutrient solution with added water has a
storage life of five (5) months if stored away from sunlight.

6
INSTRUCTIONS
INSTRUCTIONS
PREPARING GARDEN GROWER
1. Remove the water tank plug located on the water tank cover.
2. Pour the liter of prepared A/B nutrient solution into the
water tank. For the beginning of the planting process, it is
recommended to add water slightly above the MAX indicator
located under the water tank plug.
3. Push one or two (1-2) seeds (not included) into the sponge of
the basket. (It is recommended to let seeds soak in warm water
for an hour before placing them in grower for most eective
sprouting.)
4. Place baskets into the pods of the garden grower located on
the water tank cover. (The grower can hold up to seven baskets
at once.)
NOTE: Use the extendable rod to lower the lighting panel close
to the baskets, maximizing light intensity on seeds. Raise the
lighting panel as plants grow taller. It is completely possible
that some seeds may not grow. Every seed works dierently,

7
INSTRUCTIONS
INSTRUCTIONS
and your results may vary. If this happens, remove the seed(s)
and replace them with new ones.
5. Allow your seeds time to grow. After 24 hours, the seeds
should begin to show signs of sprouting. Even if they do not,
please allow the growing process to continue.
NOTE: Mold may form around the basket if the grower is not
properly maintained. A little mold will not aect your plants,
but a lot of mold may cripple the plant growth. If this happens,
remove the sponge from the basket. Then, remove seed(s)
from the sponge. Next, rinse o and wipe down the basket.
Place the sponge back into the basket. Add new seed(s) to the
sponge of the basket, place the basket back in the water tank
cover, and start the growing process again.
GARDEN GROWER CONTROL PANEL
• POWER/10 H/NORMAL – Turns on the machine and starts
“Normal mode.” In this mode, the light will stay on for 14 hours,
then turn o for 10 hours, and continue with that cycle.
• 12 H/ENJOY – Switches system to “Enjoy mode.” In this mode,
the light intensity will be automatically reduced. The light will
stay on for 12 hours, then turn o for 12 hours, and continue
with that cycle.
• 8 H/GROW – Switches system to “Grow mode.” In this mode,
the light intensity will be automatically increased. The light will
stay on for 16 hours, then turn o for 8 hours, and continue
with that cycle.
Maximum Height
NOTE: Adjust height of the light panel as your plant grows.
Keep the light panel close to the plant. As the plant grows,
raise up the light panel along with it.
19.7"
7.8"
13"
13.8"
5.5"
Minimum Height Closed Garden
Grower

8
CARE
CARE
NOTE: The grower will make a beep sound when you press a
button for a dierent mode.
NOTES CONCERNING INTERNAL GROWER CLOCK
The garden grower features an internal clock that begins a Lights
On/Lights O cycle once the machine is connected to power. The
timing may vary slightly. In order to properly boost the growth
of your seeds, we recommend that you begin the lighting cycle
around 5:00 – 9:00 AM.
If the machine was not set up at the time you want, simply
disconnect the power cord and leave it o for five (5) seconds.
Then, plug the machine back in and turn on the lighting. This
process will reset the activation time for the lighting cycle.
If you want the lighting to be on, but the machine has entered
“Lights O” mode, hold the POWER button down for three (3)
seconds. The lighting will blink three times then remain on. The
system will remain on until the next day where the system will
automatically go back and continue its Lights On/Lights O cycle.
CARE/MAINTENANCE
• Algae can occasionally develop in the water tank, but this is
natural and harmless. Make sure to regularly clean the water
tank with disinfectant to reduce the development of algae.
• Always make sure that the water level stays at an ecient level.
If the sponges receive too little water, the roots will wither. If
the sponges receive too much water, the sponges may develop
algae growth.
• If algae forms around the water tank, use a soft cloth to wipe
down the water tank.
• When the water level falls to an amount that can no longer
sustain the plants, a buzzer in the machine will go o. Fill water
tank back up to a sucient level then buzzer will automatically
stop.
• If the lights do not come on and buttons do not make a sound
after being pressed, then it is likely that machine was not

9
SPECIFICATIONS
SPECIFICATIONS
SPECIFICATIONS
plugged in properly. Unplug the machine and reconnect it or
check power supply making sure it has ecient power.
• When maintaining your grower, keep in mind that lifting the
water tank cover to a certain height will turn o the lighting
panel. To turn on the lighting, simply place the cover back on
the water tank and press the POWER button.
• Plants can grow up to 13" under the lighting panel. Tend to and
allow your plants to continue to grow eectively by cutting o
dried leaves and stems.
• Dried-up leaves may fall o on their own around the grower.
Wipe dried leaves and dust away around the grower
occasionally to reduce risk of insects.
• Mold may form around the basket if the grower is not properly
maintained. If this happens, remove seed(s) from sponge and
clean o the basket. Add new seed(s) to the sponge of the
basket and start the growing process again.
Max Product Height: 19.7" (500 mm)
Weight: 3.0 lbs. (1350 g)
Rated Input Power: AC 110 – 240 V
Rated Output Voltage: 24 V DC
Water Tank Capacity: 3.5 L
LED Power: 25 W
LED Brightness: 120 Lumens (3 W)
LED Color Temperature: 6000 K (Bright white)
Illumination Cycles:
Normal: 14 hrs. On / 10 hrs. O
Enjoy: 12 hrs. On / 12 hrs. O
Grow: 16 hrs. On / 8 hrs. O

10
FAQS
FAQS
FREQUENTLY ASKED QUESTIONS
Why is it that plants grow faster in my 7-Pod Indoor Herb
Garden Kit than they naturally would in conventional soil?
The growth and development of your plants is 100% natural. The
faster growth is due to the composition of the nutrient solutions.
Most plants can only absorb ionic elements. When plants grow
in conventional soil, these elements must first be dissolved from
other organic elements and transported to the root, which then
absorbs and further processes them. These same elements are
contained directly in the nutrient solutions, without any further
processing required by the plant. Furthermore, having your
garden indoors means that there are no detrimental eects
from the weather, such as heavy winds, flooding, or excessive
heat. For these reasons, plants will grow more quickly in your
7-Pod Indoor Herb Garden Kit than they would when planted in
conventional soil.
Does growing vegetables attract insects?
Your garden kit should be insect-free, since it uses no
conventional soil, so there is no opportunity for insects to
lay eggs. We recommend keeping your garden in a clean
environment and regularly cleaning up the dust and fall leaves, to
make sure it does not attract bugs.
Does the LED light produce any harmful UV rays?
The LED light system does not generate any ultraviolet radiation,
because it is not necessary for plant growth.
Where is the best location to place my 7-Pod Indoor Herb
Garden Kit? Do the plants require any additional natural
sunlight?
Your Ivation® 7-Pod Indoor Herb Garden Kit only requires a

11
FAQS
FAQS
power connection to operate. However, in order to more easily
facilitate the transportation of water to and from the kit, it can
be advantageous to place the kit in a room with easy access
to a sink or other source of water. You can place the kit in your
bedroom, in your kitchen, or even in a basement, as the ideal
growth conditions for your plants are facilitated by the kit’s
systems. You should not, however, place it on any balconies or
terraces, regardless of whether they are open or closed. Too
much sunlight, too high of a temperature, and other weather
eects can hurt the growth of your plants.
Is it acceptable to plant seeds in dierent growth phases
directly next to one another?
The more mature a plant is, the stronger its roots and the bigger
its leaves are. Both of these factors can aect the growth of
smaller plants that might be in the vicinity of a more well-
developed plant. Therefore, newer plants should always be
planted a sucient distance from existing ones.
Can algae growth occur in my 7-Pod Indoor Herb Garden Kit?
Algae can occasionally develop in the water tank, but this is safe,
natural, and not harmful. To reduce the risk of algae, make sure
to regularly clean the water tank with disinfectant.
How often should the nutrient solution/water mixture be
refilled?
For optimal results, always mix the nutrient solution with water
directly before filling the water tank. While your plants are small,
the nutrient solution should be replenished every two (2) weeks.
What kind of seeds can be planted?
The grower can take care of and grow herbs, flowers, fruits,
and vegetables. However, plants that grow downward (carrots,
potatoes, etc.) and plants that grow over 13" (which goes above

12
FAQS
FAQS
the max height of the lighting panel) can’t be cultivated in the
grower.
How often does the water in the tank need to be changed?
The water in the tank does not need to be replaced. We have
designed a water circulation system in the tank to ensure that
the water in your tank will not deteriorate or spoil.
How often does the water tank need to be filled?
When you feel the water level in the water tank is too low or the
alarm system goes o, indicating low water levels. As a result,
add the nutrient solution to the water tank accordingly.
What kind of water should be using?
No special water is required, normal water is fine. However, we
recommend using purified water to dilute the nutrient powder.
Will the plants in the garden grower attract mosquitos?
Mosquitoes like the taste of carbon dioxide. As long as there are
plants, mosquitoes will be attracted to the garden grower. Make
sure to maintain the sanitation of the garden grower to reduce
the risk of mosquitoes.
Do you need to arrange an authorized personnel to come to
install it?
The 7-Pod Indoor Herb Garden Kit is designed to be easy and
quick to assemble. The users can complete the assembly by
carefully following the instructions above. There are no tools
needed for the garden kit assembly.
Once the first wave of planting is complete, how do you start
the second wave?
Once the first set of seeds planted finishes growing, the herbs
and vegetables can be harvested. After harvesting, unplug the

13
FAQS
FAQS
machine and clean the tank and water tank cover. The baskets
are reusable and can be set up once again after cleaning. The
sponges in the baskets are made from disposable material so it is
recommended that new sponges are purchased for new planting.
Does the garden grower use a lot of power?
The lighting of the grower is adjusted to the maximum to
ensure that the plants can get enough light. However, the power
consumption of the machine is adjusted to the minimum to
ensure minimum power is being consumed. The approximate
power consumption of the grower is 1 KWH for one week of
operation.
Why after planting for a period of time, are there small insects
next to the plant? How to deal with the breeding of small
insects? How can we avoid the breeding of small insects?
a. The breeding of small insects is generally related to the
environment; if there are mosquitoes and other small flying
insects indoors, it is easier for insects to breed near the garden
grower.
b. It is recommended to clean your garden grower as soon as
possible if you suspect the breeding of insects near your plants.
To do this, use some insecticidal or disinfection treatment or
replace the water.
c. To avoid the breeding of insects, keep your indoor area
surrounding your garden grower clean.

14
TROUBLESHOOTING
TROUBLESHOOTING
Problems Causes Solutions
LED light is not working. The power is not running to
the garden grower properly.
Unplug, then reconnect the power
adapter. The garden grower will make a
beep sound indicating that it is ready for
operation.
The garden grower was not
turned on.
Once the machine is plugged in, be sure
to press the POWER button on top of
lighting panel. After a buzz sounds, the
lighting should come on.
The garden grower was not
set up properly.
Check your garden grower that
everything is set up and connected
properly. Make sure power adapter is
securely connected to the grower and
power supply.
Components in the LED light
are damaged.
The garden grower may have defective or
damaged parts. If that is the case, please
contact your authorized serviceperson
for assistance.
The pump in the water
tank is not working.
Pump will not work just
after turning on the garden
grower.
The pump was meant to work underwater.
As a result, the pump will not start working
immediately. The pump will start working a
minute after starting up the grower to give
up time to fill the tank with water.
Pump may be defective. If the pump stops working for over
30 minutes, then please contact your
authorized serviceperson for assistance.
Extendable rod keeps
sliding down on its own.
The extendable rod may be
defective.
Please contact your authorized
serviceperson for assistance.
Water is leaking. Water may leak out of the
garden grower due to wet
components of the machine.
Disconnect the power adapter. Then
clean the part where the water is leaking
from. The machine should be dry before
plugging the adapter back in.
Machine may be defective
causing nonstop leakage.
If water leakage continues, please contact
your authorized serviceperson for assistance.
Missing accessories Packaging may have come
with missing or broken parts.
Please read the list of package contents
to check which part(s) are missing, and
contact your authorized serviceperson
for assistance.
There are no seeds in
packaging.
The 7-Pod Indoor Herb
Garden Kit does not come
with seeds.
Due to laws and regulations in various
regions, plant seeds are not oered with
garden kit. However, you can buy and
plant a variety of your favorite seeds in
the grower.
An abnormal sound
goes o.
The abnormal sounds can
be a result of the internal
aerobic system or the
detection system.
The internal aerobic system, inside the
machine, increases the oxygen content in
water periodically. The sound increases
as the water level is reduced. To reduce
the sound, add more water to the tank.
The machine is equipped with a water
level detection system. The machine will
continuously send out an alarm sound
to remind the user to increase water and
nutrient solutions to ensure the proper
growth of the plants.

15
WARRANTY
WARRANTY
LIMITED WARRANTY ON IVATION® 7-POD INDOOR
HERB GARDEN KIT
THIS LIMITED WARRANTY GIVES YOU SPECIFIC LEGAL RIGHTS
AND YOU MAY ALSO HAVE OTHER RIGHTS, WHICH VARY FROM
STATE TO STATE.
WE WARRANT THAT DURING THE WARRANTY PERIOD, THE
PRODUCT WILL BE FREE FROM DEFECTS IN MATERIALS AND
WORKMANSHIP.
LIMITATION OF LIABILITY
TO THE EXTENT NOT PROHIBITED BY LAW, THIS WARRANTY
IS EXCLUSIVE AND IN LIEU OF ALL OTHER WARRANTIES,
ORAL, WRITTEN, STATUTORY, EXPRESS OR IMPLIED. EXCEPT
FOR THE EXPRESS WARRANTIES CONTAINED IN THIS LIMITED
WARRANTY STATEMENT AND TO THE EXTENT NOT PROHIBITED
BY LAW, WE DISCLAIM ALL OTHER WARRANTIES, EXPRESSED
OR IMPLIED, STATUTORY OR OTHERWISE, INCLUDING WITHOUT
LIMITATION, THE WARRANTIES OF MERCHANTABILITY AND
FITNESS FOR A PARTICULAR PURPOSE. SOME STATES DO
NOT ALLOW DISCLAIMERS OF IMPLIED WARRANTIES, SO THIS
DISCLAIMER MAY NOT APPLY TO YOU. TO THE EXTENT SUCH
WARRANTIES CANNOT BE DISCLAIMED UNDER THE LAWS OF
YOUR JURISDICTION, WE LIMIT THE DURATION AND REMEDIES
OF SUCH WARRANTIES TO THE DURATION OF THIS EXPRESS
LIMITED WARRANTY.
OUR RESPONSIBILITY FOR DEFECTIVE GOODS IS LIMITED TO
REPAIR, REPLACEMENT OR REFUND AS DESCRIBED BELOW IN
THIS WARRANTY STATEMENT.
WHO MAY USE THIS WARRANTY? C&A Marketing, Inc. located at
114 Tived Lane East, Edison, NJ (“we”) extend this limited warranty
only to the consumer who originally purchased the product (“you”).
It does not extend to any subsequent owner or other transferee of
the product.
WHAT DOES THIS WARRANTY COVER? This limited warranty
covers defects in materials and workmanship of the Ivation® 7-Pod
Indoor Herb Garden Kit (the “product”) for the Warranty Period as
defined below.
WHAT DOES THIS WARRANTY NOT COVER? This limited warranty
does not cover any damage due to: (a) transportation; (b) storage;
(c) improper use; (d) failure to follow the product instructions or
to perform any preventive maintenance; (e) modifications; (f)
unauthorized repair; (g) normal wear and tear; or (h) external causes

16
GET IN TOUCH!
GET IN TOUCH!
such as accidents, abuse, or other actions or events beyond our
reasonable control.
WHAT IS THE PERIOD OF COVERAGE? This limited warranty starts
on the date of your purchase and lasts for one year (the “Warranty
Period”). The Warranty Period is not extended if we repair or replace
the product. We may change the availability of this limited warranty
at our discretion, but any changes will not be retroactive.
WHAT ARE YOUR REMEDIES UNDER THIS WARRANTY? With
respect to any defective product during the Warranty Period, we
will, at our sole discretion, either: (a) repair or replace such product
(or the defective part) free of charge or (b) refund the purchase
price of such product if an exchange unit cannot be provided.
HOW DO YOU OBTAIN WARRANTY SERVICE? To obtain warranty
service, you must contact us at 1-866-849-3049 or by email at info@
myivation.com during the Warranty Period to obtain a Defective
Merchandise Authorization (“DMA”) number. No warranty service
will be provided without a DMA number and return shipping costs to
our facilities shall be assumed by you, the purchaser. Shipping costs
of the replacement unit to you shall be assumed by us.
GET IN TOUCH!
info@myivation.com
1-866-849-3049
IVATION is a trademark of C&A IP Holdings, LLC, in the U.S, Canada, and the E.U.
All other products, brand names, company names, and logos are trademarks of their
respective owners, used merely to identify their respective products, and are not meant to
connote any sponsorship, endorsement or approval.
Distributed by C&A Marketing, Inc., 114 Tived Lane East, Edison, NJ 08837.
MADE IN CHINA
© 2020. C&A IP Holdings, LLC. All Rights Reserved.
Table of contents
Other Ivation Lawn And Garden Equipment manuals