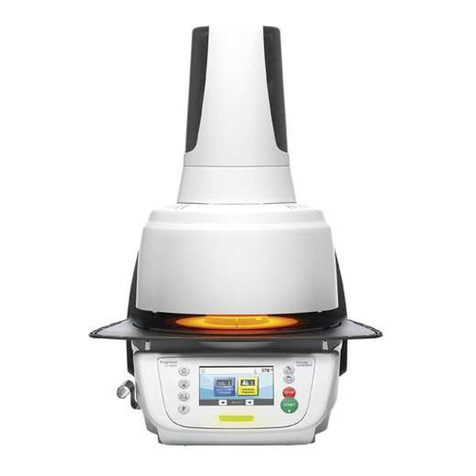
Ivoclar Vivadent Programat EP 5010 Manual

Programat®EP 5010
Short Instructions |Kurzanleitung |
Mode d’emploi : l’essentiel |
Istruzioni d’uso – versione ridotta |
Guía rápida |Guia Rápido


Dear Customer
Thank you for having purchased the Programat®EP 5010. In order to render the setting-up and the initial use of the furnace
as easy as possible, we have prepared these short instructions.
These short instructions replace by no means the detailed Operating Instructions. We therefore kindly
ask you to thoroughly read the Operating Instructions and follow the notes contained therein.
Enjoy working with the Programat EP 5010.
english
Programat®EP 5010
Short Instructions

1 2
4
5
C D
2
3
B
A
E F
1 1
1. Installation
Remove the furnace components from their packaging and place the unit
on a suitable table. Please observe the instructions on the outer
packaging. Make sure the voltage indicated on the rating plate complies
with the local power supply. If this is not the case, the furnace must not
be connected.
AMounting the cooling tray
Remove both screws (1) for the cooling tray and the transport
protection of the infrared camera.
BPlace the cooling tray (2) on the frame plate (3). Make sure that the
cooling tray is correctly positioned on the frame plate.
CSecure the cooling tray with the two screws (1).
DPlacing the firing plate
The firing plate (4) can now be placed on the firing plate holder (5).
EMounting the furnace head
The furnace head is best mounted with the rear panel of the furnace
pointing towards the user. Lift the furnace head with both hands as
shown in the picture and place it on the furnace head mounting.
FMount the furnace head as shown in the picture until it
audibly snaps into place. Make sure that the firing plate or the
insulation is not damaged by mounting the furnace head.

GEstablishing the connections
Connect the cables of the furnace head with the furnace base.
Proceed as follows:
– Connect the vacuum hose (6).
– Insert the thermocouple plug (7). (Make sure that the polarity of the
plug is correct.)
– Insert the press drive plug (8).
– Insert the heater plug (9).
HInsert the heater plug into the intended connector. Secure the heater
plug by rotating it 45°.
IClosing the covering hood
Once all cables are correctly connected to the furnace base, close the
cover (10) to protect the connections until you feel it click into place.
JMounting the connection cover
The connection cover (11) can now be mounted and secured with the
screws.
The furnace may only be used with the covering hood closed
and the connection cover mounted!
KEstablishing additional connections
Power connection
Make sure that the voltage indicated on the rating plate complies with
the local power supply. Subsequently, connect the power cord (12)
with the power socket of the Programat (13).
Connecting the vacuum pump
Connect the vacuum pump plug (14) with the vacuum pump socket (15).
We recommend using only a vacuum pump from Ivoclar Vivadent, since
these pumps are especially coordinated with the furnace. If other pumps
are used, please observe and do not exceed the indicated maximum
power consumption.
english
1
2
76
G
I
K
H
J
8
9
12
13
1514
10
11

2. User interface
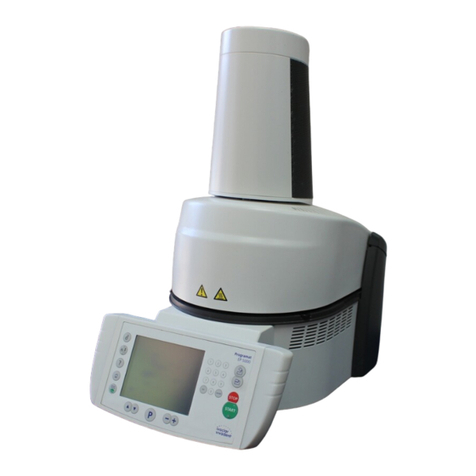
The Programat EP 5010 has a wide-screen colour display. The keypad and
the touch screen allow user-friendly handling. By tapping slightly with
your fingertips on the touch screen, the buttons are activated and the
furnace performs the requested function.
Keypad:
HOME key
Switch to Home screen (main menu).
PROGRAM key
Pressing once: The currently selected program is displayed.
Pressing twice: The program selection via number entry is
accessed.
CHANGE OPERATING MODE key
By pressing this key, you can switch between the firing and the
press mode.
IRT key
With this key, the infrared image of the object can be displayed
during the closing process.
POWER SAVING key
This key activates the power-saving function.
OPEN FURNACE HEAD key
CLOSE FURNACE HEAD key
START key (Start LED)
Starts the selected program. The green LED indicates that a
program is running. If the program is paused (1 x STOP), the
Start LED flashes until renewed pressing of START results in the
program being resumed.
STOP key
A running program can be paused by pressing the STOP key
and terminated by pressing the key twice. Movement of the
furnace head can be stopped at any time by pressing STOP.
Acoustic signals can be turned off by pressing the STOP key.
PRESSING
HOLDING
READY
NOT READY
PREDRYING
HEATING
COOLING
Index Änderung Datum Name
Gepr.
Gez.
Datum Name
Maßstab
Maße ohne
Werkstoff:
Toleranzangabe:
= Fanger %%c= 6 H7
= Lochpfeife %%c= 2.8
L
Format
Zeichn.-Nr.:
Bezeichnung:
Projekt-Nr.:
Es gilt Urheberschutz nach DIN 34
Oberfläche:
Werkzeug-Nr.:
d110.2588_Modi_99_-
Druckzeichnung
-
A3
20.07.2016 SJ
20.07.2016 SJ
Blatt 1 von 1
1059.0010.99
Siehe Stückliste
-
bis 300 %%P0,2
über 300 %%P0,3
1:1
P
SAVING
POWER
START
P
O
T
S
5010
EP
Programat
13.99 FFR = RAL 5012 Lichtblau 0505.5012.000.00
12.99 FFR = RAL 4010 Telemagenta 0505.4010.000.00
15.99 FFR = RAL 9016 Verkehrsweiß Verschwindeef. 0505.9003.444.72
14.99 FFR = RAL 7035 Lichtgrau (Hinterdruck) 0505.7035.000.00
11.99 FFR = RAL 5002 Ultramarinblau 0505.5002.000.00
10.99 FFR = RAL 3020 Verkehrsrot 0505.3020.000.00
9.99 FFR = RAL 6024 Verkehrsgrün 0505.6024.000.00
8.99 FFR = RAL 2003 Pastellorange 0505.2003.000.00
7.99 FFR = RAL 1018 Zinkgelb 0505.1018.000.00
6.99 FFR = RAL 9016 Verkehrsweiß
5.99 FFR = RAL 7035 Lichtgrau
4.99 FFR = RAL 3020 Verkehrsrot
3.99 FFR = RAL 6024 Verkehrsgrün
2.99 FFR = RAL 5002 Ultramarinblau
1.99 FFR = RAL 7012 Basaltgrau
0505.9003.000.00
0505.7035.000.00
0505.3020.000.00
0505.6024.000.00
0505.5002.000.00
0505.7012.000.00
Farben Frontfolie :
= Ausstanzung
#=Index siehe Grundprojekt
Kunden-Artikel Nr. : EP5010
Farben der Zeichnung entsprechen nicht den Siebdruckfarben
Abmessungen siehe Fertigungszeichnung
Hinweise :
3 SM-LPV"#" = Isolack
2 SM-LPV"#" = Graphit
1 SM-LPV"#" = SLF
4 SM-LPV"#" = SLF
Farben SMD-Leiterplatte :
english
3. Operation
Start-up
Connect the power cord with the wall socket and put the On/Off switch
at the rear of the furnace to position "I".
After the self-test is completed, the furnace
will automatically display the screen to select
the desired operating mode. Select the firing
or press mode.
3.1 Operation in the FIRING mode
Step 1:
Select the program type.
The furnace offers several types of programs:
– firing programs for Ivoclar Vivadent
materials
– 500 free, individually adjustable firing
programs
Step 2:
Select the program group.
The program types are subdivided into
program groups. Each program group
consists of 20 programs.
Step 3:
Select the desired firing program.
In this screen, firing programs can be started
or edited.
Step 4:
Edit the firing program.
To edit a parameter, press the respective
button and enter the desired value.
Subsequently, confirm the entry by pressing
the green button.
When the furnace is delivered ex factory,
Ivoclar Vivadent programs are write-protected.
The write-protection can be deactivated in the
Options menu, where additional program
options are available.
Step 5:
Load the furnace and start the program.
Open the furnace head using the OPEN FURNACE HEAD key and position
the firing tray with the object in the furnace. Activate the program by
pressing the START key.
Programat Infrared Technology: Please read the information provided in
Chapter 6.5 of the Operating Instructions thoroughly before the initial
start-up of this furnace. The notes regarding the Programat Infrared
Technology must always be observed!

3.2 Operation in the PRESS mode
Step 1:
Select the program type.
The furnace offers several types of programs:
– press programs for Ivoclar Vivadent
materials
– 20 free, individually adjustable press
programs
Step 2:
Select the desired press program.
Step 3:
Load the furnace and start the program.
If the IRT investment ring analysis is active,
please follow the instructions on the display
and load the furnace.
If the IRT investment ring analysis is inactive,
select the desired investment ring size.
Editing press programs
The Ivoclar Vivadent press programs are equipped ex factory with the
optimum parameters for Ivoclar Vivadent pressed ceramic materials. These
programs are write-protected and cannot be edited. Individual press
programs can be edited in the same way as the firing programs (see 3.1).
Please see the Operating Instructions for more detailed
information.

Programat®EP 5010
Kurzanleitung
deutsch
Sehr geehrter Kunde
Es freut uns, dass Sie sich für den Kauf des Programat®EP 5010 entschieden haben. Um Ihnen die Inbetriebnahme und die
erste Anwendung des Gerätes so einfach wie möglich zu gestalten, haben wir diese Kurzanleitung verfasst.
Diese Kurzanleitung ersetzt keinesfalls die umfassende Bedienungsanleitung. Wir bitten Sie daher,
auch die Bedienungsanleitung genau durchzulesen und die Hinweise zu beachten.
Wir wünschen Ihnen viel Freude und Erfolg mit dem Gerät.

1 2
4
5
C D
2
3
B
A
E F
1 1
1. Installation
Gerätekomponenten aus der Verpackung nehmen und das Gerät auf
einen geeigneten Tisch stellen. Bitte beachten Sie die Anleitung auf der
Aussenverpackung. Prüfen Sie, ob die angegebene Spannung des
Typenschilds mit der vorhandenen Netzspannung übereinstimmt. Ist dies
nicht der Fall, darf das Gerät nicht angeschlossen werden!
AMontage der Brenngut-Ablageplatte
Entfernen Sie die zwei Befestigungsschrauben für die Brenngut-
Ablageplatte (1) und den Transportschutz der Infrarotkamera.
BLegen Sie nun die Brenngut-Ablageplatte (2) auf die Rahmenplatte (3).
Achten Sie dabei, dass die Brenngut-Ablageplatte korrekt auf der
Rahmenplatte (3) aufliegt.
CSichern Sie nun die Brenngut-Ablageplatte (2) mit den zwei
Befestigungsschrauben (1).
DAufnahmeplatte auflegen
Die Aufnahmeplatte (4) kann nun auf die Aufnahme (5) aufgelegt
werden.
EOfenkopf montieren
Der Ofenkopf kann am einfachsten montiert werden, wenn die Ofen-
Rückseite zum Anwender zeigt. Heben Sie den Ofenkopf mit beiden
Händen wie auf dem Bild ersichtlich und setzen Sie ihn auf die
Ofenkopfhalterung.
FDie Ofenkopfhalterung wie auf dem Bild ersichtlich aufsetzen
bis der Ofenkopf spürbar einrastet. Achten Sie darauf, dass die
Aufnahmeplatte bzw. die Isolation durch die Ofenkopf-
montage nicht beschädigt wird.

GAnschlüsse herstellen
Verbinden Sie nun die Kabel des Ofenkopfes mit dem Ofen-Unterteil.
Gehen Sie dabei wie folgt vor:
– Vakuumschlauch anschliessen (6)
– Stecker Thermoelement (7) einstecken (auf richtige Polung achten)
– Stecker Pressantrieb einstecken (8)
– Stecker Heizung einstecken (9)
HStecken Sie den Heizungsstecker in den vorgesehenen Anschluss.
Fixieren Sie den Heizungsstecker durch eine 45°-Drehung.
IAbdeckhaube anklappen
Wenn alle Kabel korrekt mit dem Ofen-Unterteil verbunden sind,
klappen Sie die Abdeckhaube (10) über die Anschlüsse bis jene
einrastet.
JAnschlussabdeckung montieren
Nun kann die Anschlussabdeckung (11) aufgesetzt und mit der
Befestigungsschraube fixiert und gesichert werden.
Das Gerät darf nur mit angeklappter Abdeckhaube und
montierter Anschlussabdeckung in Betrieb genommen werden!
KWeitere Anschlüsse herstellen
Netzanschluss herstellen
Bitte überprüfen Sie vor dem Anschliessen, ob die Netzspannung mit
Ihrer örtlichen Netzspannung übereinstimmt. Anschliessend können Sie
das Netzkabel (12) mit der Gerätesteckdose (13) verbinden.
Vakuumpumpe anschliessen
Stecken Sie den Vakuumpumpen-Netzstecker (14) in die Vakuum-
pumpe-Gerätesteckdose (15). Wir empfehlen Ihnen eine Vakuumpumpe
von Ivoclar Vivadent zu verwenden, da diese Pumpen speziell auf den
Ofen abgestimmt sind. Falls eine andere Vakuumpumpe angeschlossen
wird, beachten Sie dabei bitte die maximal zulässige Leistungsaufnahme
auf dem Typenschild.
1
2
76
G
I
K
H
J
8
9
12
13
1514
10
11
deutsch

2. Bedienelemente
Der Programat EP 5010 verfügt über ein Breitbild-Farbdisplay. Die intuitive
Bedienung erfolgt über die Folientastatur und den Touch-Screen. Durch
leichtes Antippen der Anzeige mit der Fingerkuppe können Touch-Buttons
betätigt werden und das Gerät führt die gewünschte Funktion aus.
Folientasten:
HOME
Wechsel zum „Home-Screen“ (Hauptmenü)
PROGRAMM-Taste
Einmaliges Drücken: Anzeige des aktuell gewählten Programms.
Zweimaliges Drücken: Wechsel in die Programmauswahl via
Nummern-Eingabe
BETRIEBSART WECHSELN
Mit dieser Taste kann zwischen Brenn- und Pressbetrieb
gewechselt werden
IRT-Taste
Mit dieser Taste kann das Infrarotbild angezeigt werden.
STROMSPAR-Taste
Mit dieser Taste wird die Stromspar-Funktion aktiviert.
OFENKOPF ÖFFNEN
OFENKOPF SCHLIESSEN
START (Start-LED)
Startet das gewählte Programm. Ein aktives Programm wird
durch die grün leuchtende LED signalisiert. Wird das Programm
pausiert (1 x STOP), blinkt die Start-LED bis zur Fortsetzung
durch erneutes START.
STOP
Ein aktives Programm kann durch Drücken der STOP-Taste
pausiert und durch zweimaliges Drücken beendet werden. Eine
Kopf-Bewegung kann mit der STOP-Taste jederzeit angehalten
werden. Signaltöne können mit der STOP-Taste quittiert werden.
PRESSING
HOLDING
READY
NOT READY
PREDRYING
HEATING
COOLING
Index Änderung Datum Name
Gepr.
Gez.
Datum Name
Maßstab
Maße ohne
Werkstoff:
Toleranzangabe:
= Fanger %%c= 6 H7
= Lochpfeife %%c= 2.8
L
Format
Zeichn.-Nr.:
Bezeichnung:
Projekt-Nr.:
Es gilt Urheberschutz nach DIN 34
Oberfläche:
Werkzeug-Nr.:
d110.2588_Modi_99_-
Druckzeichnung
-
A3
20.07.2016 SJ
20.07.2016 SJ
Blatt 1 von 1
1059.0010.99
Siehe Stückliste
-
bis 300 %%P0,2
über 300 %%P0,3
1:1
P
SAVING
POWER
START
P
O
T
S
5010
EP
Programat
13.99 FFR = RAL 5012 Lichtblau 0505.5012.000.00
12.99 FFR = RAL 4010 Telemagenta 0505.4010.000.00
15.99 FFR = RAL 9016 Verkehrsweiß Verschwindeef. 0505.9003.444.72
14.99 FFR = RAL 7035 Lichtgrau (Hinterdruck) 0505.7035.000.00
11.99 FFR = RAL 5002 Ultramarinblau 0505.5002.000.00
10.99 FFR = RAL 3020 Verkehrsrot 0505.3020.000.00
9.99 FFR = RAL 6024 Verkehrsgrün 0505.6024.000.00
8.99 FFR = RAL 2003 Pastellorange 0505.2003.000.00
7.99 FFR = RAL 1018 Zinkgelb 0505.1018.000.00
6.99 FFR = RAL 9016 Verkehrsweiß
5.99 FFR = RAL 7035 Lichtgrau
4.99 FFR = RAL 3020 Verkehrsrot
3.99 FFR = RAL 6024 Verkehrsgrün
2.99 FFR = RAL 5002 Ultramarinblau
1.99 FFR = RAL 7012 Basaltgrau
0505.9003.000.00
0505.7035.000.00
0505.3020.000.00
0505.6024.000.00
0505.5002.000.00
0505.7012.000.00
Farben Frontfolie :
= Ausstanzung
#=Index siehe Grundprojekt
Kunden-Artikel Nr. : EP5010
Farben der Zeichnung entsprechen nicht den Siebdruckfarben
Abmessungen siehe Fertigungszeichnung
Hinweise :
3 SM-LPV"#" = Isolack
2 SM-LPV"#" = Graphit
1 SM-LPV"#" = SLF
4 SM-LPV"#" = SLF
Farben SMD-Leiterplatte :
deutsch
3. Bedienung
Einschalten
Verbinden Sie das Netzkabel mit dem Leitungsnetz
und schalten Sie den Ein-/Aus-Schalter auf
der Geräterückseite auf die Position "I".
Nach erfolgtem Selbsttest erscheint auf der
Anzeige die Betriebsarten Auswahl.
Wählen Sie zwischen Brennen oder Pressen.
3.1 Bedienung in der Betriebsart „BRENNEN“
Schritt 1:
Programmbereich wählen
Das Gerät verfügt über mehrere
Programmbereiche:
– Brennprogramme für Ivoclar Vivadent-
Materialien
– 500 freie, individuell einstellbare Brennprogramme
Schritt 2:
Programmgruppe wählen
Die Programmbereiche werden jeweils in
Programmgruppen unterteilt.
Jede Programmgruppe verfügt über
20 Programme.
Schritt 3:
Wählen Sie das gewünschte
Brennprogramm.
In dieser Anzeige können Brennprogramme
gestartet oder editiert werden.
Schritt 4:
Editieren von Brennprogrammen
Um einen Parameter zu verändern, drücken
Sie auf den jeweiligen Button. Anschliessend
den gewünschten Wert eingeben und mit
dem grünen Button bestätigen.
Ivoclar Vivadent–Brennprogramme sind
werkseitig schreibgeschützt. Der Schreibschutz
kann im Optionen-Menü deaktiviert werden.
In diesem Menü stehen zusätzlich erweiterte
Programmoptionen zur Verfügung.
Schritt 5:
Bestücken des Ofens und Programm starten
Öffnen Sie den Ofenkopf mit der Taste OFENKOPF ÖFFNEN und stellen Sie
das Brennobjekt mit dem Brenngutträger in den Ofen. Durch Drücken der
START-Taste wird das Programm gestartet.
Programat Infrarot-Technologie: Bitte lesen Sie das Kapitel 6.5 in der
Bedienungsanleitung gründlich durch, bevor Sie das Gerät in Betrieb
nehmen. Die Hinweise zur Programat Infrarot-Technologie müssen
dringend beachtet werden!

3.2 Bedienung in der Betriebsart „PRESSEN“
Schritt 1:
Programmbereich wählen
Das Gerät verfügt über mehrere
Programmbereiche:
– Pressprogramme für Ivoclar Vivadent-
Materialien
– 20 freie, individuell einstellbare Pressprogramme
Schritt 2:
Wählen Sie das gewünschte
Pressprogramm.
Schritt 3:
Ofen bestücken und Programm starten
Bei aktivierter IRT-Muffelanalyse folgen Sie
nun den Hinweisen auf dem Display und
bestücken Sie den Ofen.
Bei deaktivierter IRT-Muffelanalyse wählen
Sie nun die gewünschte Pressmuffelgrösse
aus.
Editieren von Pressprogrammen
Ivoclar Vivadent-Pressprogramme sind bereits werkmässig mit den idealen
Parametern für Ivoclar Vivadent-Presskeramikmaterialien ausgestattet. Die
Programme sind schreibgeschützt und können nicht verändert werden.
Das Editieren von individuellen Pressprogrammen erfolgt auf selbe Weise
wie das Editieren von Brennprogrammen (siehe 3.1).
Ausführliche Informationen zur Anwendung
entnehmen Sie bitte der Bedienungsanleitung.

Programat®EP 5010
Mode d’emploi : l’essentiel
français
Cher client,
Nous vous remercions d’avoir fait l’acquisition du Programat®EP 5010. Les instructions ci-après vous permettront de simplifier
au maximum la configuration et la première utilisation de votre four.
Ces brèves instructions ne se substituent en aucun cas au Mode d’emploi détaillé. Par conséquent,
nous vous demandons de bien vouloir lire attentivement le Mode d’emploi et d’en suivre les
consignes.
Travaillez en toute simplicité avec le Programat EP 5010.

1 2
4
5
C D
2
3
B
A
E F
1 1
1. Installation
Déballer les composants du four et placer l’unité sur une table adaptée.
Respecter les consignes indiquées sur l’emballage extérieur. Veiller à
s’assurer que la tension indiquée sur la plaque d’identification est
conforme à l’alimentation locale. Dans le cas contraire, ne pas brancher le
four.
AMontage de la tablette de service
Retirer les deux vis de la tablette de service (1) et la protection de
transport de la caméra infrarouge
BPoser la tablette de service (2) sur la plaque supérieure (3).
Veiller à ce que la tablette de service soit correctement positionnée sur
la plaque supérieure.
CFixer la tablette de service (1) à l’aide des deux vis.
DPositionnement de la plaque de cuisson
La plaque de cuisson (4) peut alors être positionnée sur la plaque de
cuisson (5).
EMontage de la tête du four
Le plus simple est de monter la tête du four lorsque le panneau arrière
du four se trouve face à l’utilisateur. Soulever des deux mains la tête
du four, tel qu’indiqué sur l’image, et la positionner sur le support.
FMonter la tête du four tel qu’illustré sur l’image jusqu’à ce qu’elle
se trouve en place et qu’un clic se fasse entendre. Veiller à ce que
la plaque de cuisson et l’isolation ne soient pas endommagées
pendant le montage de la tête du four.

1
2
76
G
I
K
H
J
8
9
12
13
1514
10
11
GÉtablir les branchements
Relier les câbles de la tête du four à la partie inférieure.
Procéder comme suit :
– Raccorder le tuyau de vide (6).
– Insérer la fiche du thermocouple (7) (veiller à bien respecter la
polarité).
– Insérer le raccordement du dispositif de pressée (8)
– Insérer la fiche de chauffe (9).
HInsérer la fiche de chauffe dans le connecteur spécifié. Sécuriser la
fiche de chauffe grâce à une rotation de 45°.
IFermeture du capot de protection
Une fois tous les câbles correctement reliés à la base du four, abaisser
le capot (10) de protection des branchements jusqu’à ce qu’il soit en
place et qu’un clic se fasse entendre.
JMontage du couvercle de protection des branchements
Le couvercle de protection des branchements (11) peut alors être
monté et fixé à l’aide des vis.
Le four ne peut être utilisé qu’avec le capot de protection
fermé et le couvercle de protection des branchements monté !
KÉtablir d’autres branchements
Alimentation
Veiller à ce que la tension indiquée sur la plaque d’identification soit
conforme à l’alimentation locale. Relier ensuite le cordon
d’alimentation (12) à la prise correspondante du Programat (13).
Branchement de la pompe à vide
Relier la fiche de la pompe à vide (14) à la prise de la pompe (15). Nous
recommandons l’utilisation exclusive de la pompe à vide d’Ivoclar
Vivadent, étant donné que ces pompes sont spécialement adaptées à ce
four. En cas d’utilisation d’une autre pompe, respecter impérativement
la consommation maximale indiquée.
français

2. Interface utilisateur
Le Programat EP 5010 est doté d’un grand écran couleur. Le clavier et
l’écran tactile permettent une utilisation conviviale. Appuyer légèrement
sur l’écran tactile du bout des doigts permet d’activer les boutons. Le four
exécute alors la fonction demandée.
Clavier :
ACCUEIL
Retour à l’écran d’accueil (menu principal)
Bouton PROGRAMME
1 activation : Le programme sélectionné s'affiche.
2 activations : La sélection de programme par saisie de numéro
est activée.
Touche CHANGEMENT DU MODE D'EXPLOITATION
En appuyant sur cette touche, vous passez du mode de cuisson
au mode de pressée et inversement.
Bouton IRT
Cette touche permet d’afficher l’image infrarouge.
Bouton D’ÉCONOMIE D’ÉNERGIE
Ce bouton permet d’activer la fonction d’économie d’énergie.
OUVERTURE DE LA TÊTE DU FOUR
FERMETURE DE LA TÊTE DU FOUR
START (LED de démarrage)
Permet de lancer le programme sélectionné. La LED verte
indique qu’un programme est en cours. Si le programme est
interrompu (1 x STOP), la LED de démarrage clignote jusqu’à ce
que le bouton START soit à nouveau activé pour reprendre le
programme.
STOP
Un programme en cours peut être interrompu en appuyant sur
le bouton STOP et annulé en appuyant deux fois. Le bouton
STOP permet d’immobiliser la tête du four à n’importe quel
moment. Les signaux sonores peuvent être désactivés au moyen
du bouton STOP.
PRESSING
HOLDING
READY
NOT READY
PREDRYING
HEATING
COOLING
Index Änderung Datum Name
Gepr.
Gez.
Datum Name
Maßstab
Maße ohne
Werkstoff:
Toleranzangabe:
= Fanger %%c= 6 H7
= Lochpfeife %%c= 2.8
L
Format
Zeichn.-Nr.:
Bezeichnung:
Projekt-Nr.:
Es gilt Urheberschutz nach DIN 34
Oberfläche:
Werkzeug-Nr.:
d110.2588_Modi_99_-
Druckzeichnung
-
A3
20.07.2016 SJ
20.07.2016 SJ
Blatt 1 von 1
1059.0010.99
Siehe Stückliste
-
bis 300 %%P0,2
über 300 %%P0,3
1:1
P
SAVING
POWER
START
P
O
T
S
5010
EP
Programat
13.99 FFR = RAL 5012 Lichtblau 0505.5012.000.00
12.99 FFR = RAL 4010 Telemagenta 0505.4010.000.00
15.99 FFR = RAL 9016 Verkehrsweiß Verschwindeef. 0505.9003.444.72
14.99 FFR = RAL 7035 Lichtgrau (Hinterdruck) 0505.7035.000.00
11.99 FFR = RAL 5002 Ultramarinblau 0505.5002.000.00
10.99 FFR = RAL 3020 Verkehrsrot 0505.3020.000.00
9.99 FFR = RAL 6024 Verkehrsgrün 0505.6024.000.00
8.99 FFR = RAL 2003 Pastellorange 0505.2003.000.00
7.99 FFR = RAL 1018 Zinkgelb 0505.1018.000.00
6.99 FFR = RAL 9016 Verkehrsweiß
5.99 FFR = RAL 7035 Lichtgrau
4.99 FFR = RAL 3020 Verkehrsrot
3.99 FFR = RAL 6024 Verkehrsgrün
2.99 FFR = RAL 5002 Ultramarinblau
1.99 FFR = RAL 7012 Basaltgrau
0505.9003.000.00
0505.7035.000.00
0505.3020.000.00
0505.6024.000.00
0505.5002.000.00
0505.7012.000.00
Farben Frontfolie :
= Ausstanzung
#=Index siehe Grundprojekt
Kunden-Artikel Nr. : EP5010
Farben der Zeichnung entsprechen nicht den Siebdruckfarben
Abmessungen siehe Fertigungszeichnung
Hinweise :
3 SM-LPV"#" = Isolack
2 SM-LPV"#" = Graphit
1 SM-LPV"#" = SLF
4 SM-LPV"#" = SLF
Farben SMD-Leiterplatte :
français
3. Utilisation pratique
Démarrage
Reliez le cordon d'alimentation à la prise et allumez l’appareil en activant
l'interrupteur marche/arrêt situé à l'arrière de
l’appareil en position "I". Une fois l'auto-test
terminé, le four affiche automatiquement
l'écran permettant de choisir de mode
d'exploitation désiré. Choisissez le mode
Cuisson ou le mode Pressée.
3.1 Procédure de cuisson
Étape 1:
Choisir le type de programme.
Le four propose plusieurs types de
programmes :
– programmes de cuisson pour les
matériaux Ivoclar Vivadent
– 500 programmes libres, personnalisables
Étape 2:
Choisir le groupe de programmes.
Les types de programmes sont sous-divisés
en groupes de programmes. Chaque groupe
de programme contient 20 programmes.
Étape 3:
Choisir le programme de cuisson.
Le programme de cuisson peut maintenant
être démarré, ou vous pouvez en modifier
les paramètres.
Étape 4:
Modifier le programme de cuisson.
Pour modifier un paramètre, appuyez sur la
touche correspondante et entrez la valeur
souhaitée. Confirmez votre choix en
appuyant sur la touche verte.
Lorsque le four quitte l'usine, les programmes
Ivoclar Vivadent sont protégés en écriture.
La protection en écriture peut être désactivée
dans le menu Options, où d'autres options de
programmes sont disponibles.
Étape 5:
Charger le four et démarrer le programme.
Ouvrir maintenant la tête du four avec la touche OUVRIR LA TETE DU
FOUR et placer l’objet à cuire sur son support de cuisson dans le four.
Appuyer sur la touche START pour lancer le programme.
Technologie infrarouge Programat : Veuillez lire l'information fournie au
Chapitre 6.5 du mode d'emploi avant la mise en route initiale de ce
four. Les consignes relatives à la technologie infrarouge Programat
doivent toujours être respectées !

3.2 Procédure de pressée
Étape 1:
Choisir le type de programme.
Le four propose plusieurs types de
programmes :
– programmes de pressée pour les matériaux
Ivoclar Vivadent
– 20 programmes libres, personnalisables
Étape 2:
Choisir le programme de pressée.
Étape 3:
Charger le four et démarrer le
programme.
Si l'analyse IRT du cylindre est active, suivez
les instructions affichées à l'écran et chargez
le four. Si l'analyse IRT du cylindre est
inactive, choisissez la taille de cylindre
souhaitée.
Modification des programmes de pressée
Les programmes de pressée Ivoclar Vivadent sont déjà paramétrés pour les
matériaux céramiques de pressée Ivoclar Vivadent. Ces programmes sont
protégés en écriture et ne peuvent pas être modifiés. Les programmes de
pressée personnalisables peuvent être modifiés de la même manière que
les programmes de cuisson (voir 3.1).
Pour de plus amples informations, veuillez consulter le
mode d'emploi.
Other manuals for Programat EP 5010
1
Table of contents
Languages:
Other Ivoclar Vivadent Laboratory Equipment manuals

Ivoclar Vivadent
Ivoclar Vivadent Programat P710 Manual

Ivoclar Vivadent
Ivoclar Vivadent Programat CS4 User manual

Ivoclar Vivadent
Ivoclar Vivadent PrograPrint Clean Manual

Ivoclar Vivadent
Ivoclar Vivadent Programat EP 5000 G2 User manual

Ivoclar Vivadent
Ivoclar Vivadent IvoBase Series User manual

Ivoclar Vivadent
Ivoclar Vivadent Programat EP3010 Manual

Ivoclar Vivadent
Ivoclar Vivadent Multilink User manual