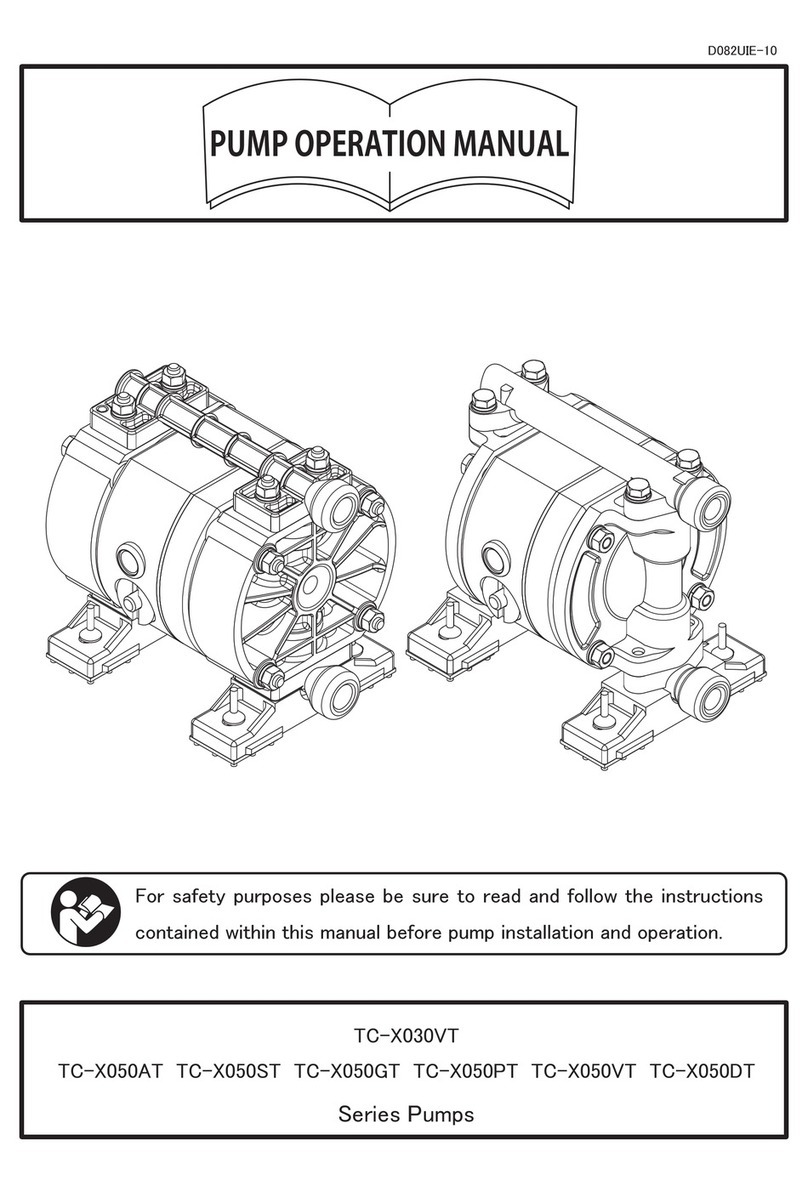
IWAKI TC-X152A User manual

SERVICE BOOK
Series Pumps
PUMP OPERATION MANUAL
For safety purposes please be sure to read and follow the instructions
contained within this manual before pump installation and operation.
TC-X152A TC-X152S
TC-X152P TC-X152V TC-X152D TC-X152C
D085UIE-11

Table of contents
Introduction..............................................................................................................................1
Important Items......................................................................................................................2
For safe operation.................................................................................................................2
For safety .................................................................................................................................3~5
Product information..............................................................................................................6~9
1.Specications....................................................................................................................6
2.Accessories included with the pump ...................................................................... 6
3.Names of parts and materials.................................................................................... 7
4.Dimensions.........................................................................................................................8
5.Performance curves....................................................................................................... 9
Installation ................................................................................................................................10 ~ 13
1.Installing and connecting the pump.........................................................................10
2.Recommended liquid piping connection diagram................................................12
3.Recommended air piping connection diagram..................................................... 13
Operation ..................................................................................................................................14 ~ 15
1.Pump start up...................................................................................................................14
2.Liquid ow adjustments ................................................................................................ 14
3.Stopping the Pump.........................................................................................................14
4.Releasing pressure .........................................................................................................15
5.Method of cleaning the pump..................................................................................... 15
Maintenance............................................................................................................................. 16 ~ 20
Daily Maintenance checks .................................................................................................16
Troubleshooting......................................................................................................................17
- 1 -
Introduction
Thank you for Purchasing our company Air Operated Double Diaphragm Pump. Diaphragm Pumps fall under the positive-
displacement pump category. They are powered by compressed air and transfer liquids through the movement of 2
diaphragms connected by a center shaft. The pump runs through the use of an air switching mechanism which diverts
air to each diaphragm in turn on a continuous fashion. Depending on the liquid to be transferred, pumps are available
in a variety of body materials including; aluminum, stainless steel, cast iron, polypropylene, polyvinylidene uoride. The
diaphragms and valves within the pump are also available in various rubber, plastic and thermoplastic elastomers each
with its own chemical resistance properties.
While pump is in operation do not cover the liquid inlet port with your hand or any another part of your body.
If the pump has remained unused for a long period or if you have any kind of misgivings about running the pump please
consult with your local our company distributor or contact our company directly.

Important Items
● Before using the pump, be sure to read this document carefully, particularly the "warnings and cautions," and
be fully familiar with the correct operating procedures.
For safe operation
● Within this document all the warnings and cautions will be indicated by the following symbols.
WARNING If you ignore the warning described and operate the product in an improper manner,
there is danger of serious bodily injury or death.
CAUTION If you ignore the caution described and operate the product in an improper manner,
there is danger of personal injury or property damage.
Furthermore, to indicate the type of danger and damage, the following symbols are also used along with those
mentioned above:
This symbol indicates a DON'T, and will be accompanied by an explanation on something you must
not do.
This symbol indicates a DO, and will be accompanied by instructions on something you must do in a
certain situation.
This symbol indicates important information is contained here.
!
- 2 -

For safety
WARNING
• When using compressed gas (hereinafter referred to as "compressed air") to drive this pump, be sure it is one of the following:
1)Compressed air supplied from an air compressor
(To drive this product, use supply air with a minimum moisture content.)
2)Nitrogen (N2) gas
The use of compressed air other than those mentioned above may cause air pollution, damage to the pump, or even an
explosion.
• Pressure Ratings are dependent on pump material and liquid temperature variations.
Please see the "Liquid Temperature Correlation Graph" in the [5. Performance curves] and check for the allowable working
pressure at the specic temperature of the liquid being pumped. Air pressure and discharge pressure must not exceed the
allowable working pressure. If air pressure and discharge pressure exceed the allowable working pressure, it may cause liquid
leaks, damage to the pump casings or diaphragms and could cause a fatal accident.
• Before moving this product, make sure that the internal pressure is released. If the pump is moved while under pressure, any
shock imparted by knocking or dropping the pump etc. may damage the pump or even cause an explosion.
• Improper electrical grounding, poor ventilation, or unshielded re or spark can create a danger of re or explosion.
Therefore, the following precautions are strongly advised.
* All peripheral equipment and piping connected to this product should be properly grounded.
* To pump ammable liquids, use a model with a conductive aluminum or stainless-steel casing.
* Whenever you notice any spark while operating this product, immediately stop its operation, and do NOT start using it again
unless you are sure of the cause and corrective actions have been taken out.
* Depending upon the type of uid being pumped, bubbles of ammable gas may be generated. Make sure that ventilation is
satisfactory.
* This product itself, its piping and exhaust ports should be kept away from unshielded re, spark and other causes of ignition.
If a diaphragm is damaged, uid may gush out together with air from the exhaust port.
* Do NOT leave gasoline or solvent etc. that contains waste at the work site.
* Machinery and other equipment near the place of installation of this product should be properly insulated to prevent
electrical conduction with each other.
* Do NOT operate heating devices naked ames or have heating laments anywhere near the pump or its piping.
* If there are ammable gases in the immediate atmosphere while the pump is operating, do NOT switch electric appliance on
and off.
* Do NOT operate gasoline engines around the pump work site.
* Restrict smoking around the pump work site.
!
!
!
!
- 3 -

For safety
WARNING
• When using this product, observe local relevant regulatory rules concerning transfer and storage of chemicals, re prevention,
labor safety standards, etc.
• Hazardous uids (such as strong acid or alkali, ammable or toxic liquids) or gas bubbles generated by such uids may cause
serious injury or even death if accidentally inhaled or consumed or if they come into contact with the eyes or adhere to the
skin. Therefore, the following precautions are strongly advised.
*Be fully familiar with the properties of the uid to be pumped and work in strict accordance with the operating instructions
provided by the suppliers of such uids (such as wearing goggles, gloves, mask or protective work clothes).
*When storing a hazardous uid, strictly comply with the regulatory procedures (such as using proper containers, storage
conditions, etc.).
*Install the piping and exhaust port of this pump away from areas frequented by human and animal trafc if there is a risk that
transferring liquids may affect the human body.
!
!
!
- 4 -
• Before using this product, be sure you are familiar with the precautions regarding the fluid to be pumped, and verify the
corrosion resistance of the parts that will come into contact with the uid (wetted parts). NEVER use the product with any
uid against which it does not have sufcient corrosion resistance or with a uid that poses a risk of explosion. If you are
unsure of the corrosion resistance, contact your nearest distributor or our company directly. If you use this product with any
uid against which the parts that will come in contact with the uid do not have sufcient corrosion resistance, it may result in
damaging the product or leakage of uid or pump failure.
• In case of transferring a high temperature uid, casing and piping heated and may cause burns by touching.
!

For safety
CAUTION
・ If a diaphragm of this product is damaged, the supplied air may mix with the uid or the uid may ow into the main body (air-
switching portion). If the air supply is inadequate or the pump is contaminated, do NOT operate the pump.
・ After you shut down the pump and disconnect the piping, some uid may still be remaining inside the pump. Also, if the pump
is left unused for a prolonged period, some uid may remain inside the pump and within the connected piping. Therefore, be
sure to purge the system of uid and clean the pump before prolonged disuse or storage. If the product is left unused for a
prolonged period with uid remaining in the connected piping as well as the pump itself, the uid may expand, depending on the
ambient temperature (because of freezing or heat), which may cause damage to the pump and/or piping and possible leakage
of uid.
・ The Pumps Non wetted parts are made from various materials and are not designed to withstand corrosive chemicals.
Therefore there is a possibility of damage to the pumps non wetted parts through leaks or breakage of the diaphragm as
well as liquid or gas permeation through the actual diaphragm material. There is also a possibility of damage due to chemical
fumes in the local environment or fumes entering into the air line through the compressor. It is also possible to damage
these components when incorrect lubrication is used. To help prevent any unnecessary damage please follow the following
precautions. Ventilation of the local environment, remove liquids when the pump is not in use. (Long term). Open ventilation of
the switching area of pump. Clean and ush the pumps air switching section if a leak or diaphragm breakage occurs.
• For safe transport be sure to prevent liquid leaking from pump for safe transport.
It is the end-users responsibility to thoroughly wash and clean the pump(s) to prevent accidents caused by liquid leaks.
!
!
!
• Always use genuine parts when replacing component parts of this product. Do not attempt to modify the components parts or
replace them with anything other than genuine parts.
!
- 5 -

Product information
CAUTION
・ After delivery open the product packaging and check to make sure that all included accessories are present and in good order.
・ Remember that the pump is heavy, so extreme care must be taken when lifting it. When lifting the pump using a chain hoist or
crane, be sure to lift the pump by the specied lift point(s). Be careful that nobody will pass under the pump when you lift it. It
will be very dangerous if the pump should fall.
・ When installing the accessories, please use the pipe sealing tape as provided for each threaded position, Also take care that
broken or shredded pipe sealing tape does not contaminate the liquid or Air inlets. Note that a contaminated airline may cause
failure of the pumps air switching unit.
!
!
!
!
1.Specications
□ Pump Operation Manual..........................................1
□ Service Book................................................................ 1
□ How to use the Service Book...............................1
□ Parts list ........................................................................1
□ Pump................................................................................1
2.Accessories included with the pump
□ Airline ball valve..........................................................1
□ Liquid Inlet/Outlet Plug........................................... 4
□ Pipe Seal tape ............................................................. 1
□ Hexalobular Tool (T45・T55)...................................1 (P.V.D only)
!
- 6 -
・ Please install the air inlet Airline ball valve by referring to [Outside view] of [3.Name of parts and materials].
・ Please install Liquid inlet/outlet plugs to discharge and suction ports as required and refer to [Outside view] of [3.Name of
parts and materials].
Model TC-X152A □ , TC-X152S □
[TC-X152A □ N, TC-X152S □ N]
TC-X152P □ , TC-X152V □ , TC-X152DT, TC-X152C □
[TC-X152P □ N, TC-X152V □ N, TC-X152DTN, TC-X152C □ N]
Liquid port Rc 1/2 [NPT 1/2]
Material ・ Weight Table 1
Operating pressure ※ 1 0.2 ~ 0.7 MPa [30-100 psi]
Max discharge pressure 0.7 MPa [100 psi]
Discharge volume/Cycle 85 mL
Max Discharge 65 L/min [17.2 Gallon/min] 62 L/min [16.4 Gallon/min]
Max air consumption 700 L/min(ANR) [24.72 SCFM]
Max solid size 2 mm or less -
Limitation of viscosity Self-priming 0.5 Pa ・ s or less
Ambient temperature 0 ~ 70 ℃ [32-158 ℉ ]
Liquid temperature 0 ~ 60 ℃ [32-140 ℉ ]
Dimensions Table 2
A-Weighted sound pressure level ※ 2 84dB
A-Weighted sound power level ※ 3 94dB
※ 1 The maximum applied air pressure of the plastic pump depends on the liquid temperature. (Table 3)
※ 2 Maasurement method of A-weighted sound pressure level is based on ISO 1996.
※ 3 Maasurement method of A-weighted sound power level is based on ISO 3744.

Product information
3.Names of parts and materials
Outside view
: Discharge Port
: Suction Port
Material and weight
Table 1
- 7 -
Out Manifold
Ground Connection Point
Out Chamber
Airline Ball Valve
Supply Air Port
Base
In Manifold
Ground Connection Point
Out Manifold
Out Chamber
Exhaust Port
In Manifold
Base
Lift Point
MODEL 152AC
[152ACN]
152AN
[152ANN]
152AT
[152ATN]
152AH
[152AHN]
152AS
[152ASN]
152SC
[152SCN]
152SN
[152SNN]
152ST
[152STN]
152SH
[152SHN]
152SS
[152SSN]
Pump Wetted Parts ADC12 SCS14
Diaphragm CR NBR PTFE TPEE TPO CR NBR PTFE TPEE TPO
Valve Stopper PA SCS14
Flat Valve
Ball Valve CR NBR PTFE NBR EPDM CR NBR PTFE NBR EPDM
Valve Seat A5056 SUS316
Center Disk A5056 SUS316
Weight 4.2 kg
[9.3 lbs]
6.7 kg
[14.8 lbs]
MODEL 152PC
[152PCN]
152PN
[152PNN]
152PT
[152PTN]
152PH
[152PHN]
152PS
[152PSN]
152VT
[152VTN]
152VS
[152VSN]
152DT
[152DTN]
152CC
[152CCN]
152CN
[152CNN]
152CT
[152CTN]
152CH
[152CHN]
152CS
[152CSN]
Pump Wetted Parts PP PVDF POM PP CONDUCTIVE
Diaphragm CR NBR PTFE TPEE TPO PTFE TPO PTFE CR NBR PTFE TPEE TPO
Valve Stopper PP PVDF POM PP CONDUCTIVE
Flat Valve PTFE PTFE PTFE PTFE
Ball Valve
Valve Seat PP PVDF POM PP CONDUCTIVE
Center Disk PP PVDF POM PP CONDUCTIVE
Weight 3.2 kg
[7.1 lbs]
4.2 kg
[9.3 lbs]
3.8 kg
[8.4 lbs]
3.2 kg
[7.1 lbs]

Product information
4.Dimensions
152P □ [152P □ N] ・ 152V □ [152V □ N]
152DT [152DTN] ・ 152C □ [152C □ N]
152A □ [152A □ N] ・ 152S □ [152S □ N]
Table 2
(Measure : mm [inch])
- 8 -
MODEL H W L a b d e f g i jl m n o p r AIR INLET AIR EXH LIQUID
IN/OUT
152A □
[152A □ N] 312
[12.28]
210
[8.27]
208
[8.19]
166
[6.54]
10
[0.39]
51
[2.01]
230
[9.06]
109
[4.29]
122
[4.80]
156
[6.14]
32
[1.26]
132
[5.20]
76
[2.99]
174
[6.85]
124
[4.88]
150
[5.91]
19
[0.75]
Rc1/4
[NPT1/4]
Rc3/8
[NPT3/8]
Rc1/2
[NPT1/2]
152S □
[152S □ N]
152P □
[152P □ N]
295
[11.61]
228
[8.98]
208
[8.19]
153
[6.02]
10
[0.39]
51
[2.01]
204
[8.03]
127
[5.00]
122
[4.80]
156
[6.14]
49
[1.93]
132
[5.20]
76
[2.99]
174
[6.85]
124
[4.88]
150
[5.91]
11
[0.43]
152V □
[152V □ N]
152DT
[152DTN]
152C □
[152C □ N]

Product information
5.Performance curves
152P □ ・ 152V □ ・ 152DT ・ 152C □
152A □ ・ 152S □
Discharge pressure
Discharge pressure
Discharge volume Discharge volume
Air consumption
Performance curve
NOTICE
・ The maximum safe working pressure of the pump depends
on the liquid temperature. Always refer to this liquid
temperature correlation chart when determining the
correct air pressure.
Liquid Temperature Correlation Graph
Table 3
Liquid TEMP.
Max supply air pressure
NOTICE
・ This is the measurement method used when determining the pumps performance curves.
Please refer to the below measurement instruments and testing procedure.
- 9 -
Air supply
Regulator Water
ow meter
Measurement
Water tank
Valve
Air ow meter
Pressure sensor
Pump
Reservoir tank
Valve
Pressure sensor
Liquid pumped: Fresh water
Temperature: Ambient
Condition of suction:
Flat suction 0 meter [0 ft] head
Measurement equipment and piping layout diagram

Installation
1.Installing and connecting the pump
・ Decide where the pump should be installed and secure a suitable space (see Examples of installations A to D).
Examples of pump installations
Air supply
Exhaust
A CB
D
For optimal performance try to keep the suction lift as short as possible.
To protect the diaphragms from abnormal damage or breakage, the inlet pressure must be kept below the following values:
※ PTFE Diaphragms : 0.02 MPa [3 psi] (height 2 m [6.6 ft]) During operation
: 0.05 MPa [7 psi] (height 5 m [16.4ft]) When not in operation
※ All other Diaphragms : 0.1MPa [14 psi] (height 10 m [32.8ft])
(The above values are when transferring fresh water under ambient temperature. Depending on the liquid these values may change.)
For 031, 051 series, it is required to change the exhaust port part in case exhaust outside connecting a hose or pipe. Please consult with
your distributor.
When installing the pump with enclosed rubber feet, please use a method that allows the pump to absorb vibration and avoid the bases
contact the ground directly. Use the optional vibration proof rubber depending on vibration intensity.
- 10 -

Installation
CAUTION
・ If the pump will be submerged into the liquid during operation, follow the steps below:
* Verify the corrosion resistance of each component of the pump, and do NOT expose the pump to any uid for which it does
not have proper corrosion resistance.
* The exhaust should be redirected outside, not into the uid in which the pump is submerged. For information on how to
arrange the exhaust, see [Arranging outside exhaust] below.
・ Use a hose that has larger diameter than the pump's connection size. It may cause performance degradation and also cause
the pump to malfunction if using smaller diameter.
!
!
!
!
!
・When operating the pump, operational noise will be generated, and the level will depend upon the following conditions of use (type
of uid being pumped, the supply air pressure and liquid discharge pressure). If there are specic regulatory sound level rules
that apply to your country or region, provide appropriate acoustic counter measures. (For the noise levels of this product, see [1.
Specications].)
・ When airline operation is to be controlled by a solenoid valve, then a three way type valve is recommended. A three-way
solenoid valve allows any trapped air to bleed off, in turn improving pump performance.
・ Use a exible hose that has grounding wires so that it can absorb the vibration of the pump.
In particular, make sure that the pump is not subjected to external force at each connection due to the weight and vibration of
the hose and piping.
・ When moving the pump, make sure that the pump will not fall. NEVER try to move the pump by pulling the hoses connected to
the pump. Either the hose or the pump may be damaged.
・ Before starting the pump, make sure that all the bolts are securely tightened/re-torqued.
(Refer to the Service Book for the correct bolt torque values.)
・ If you use the pump intermittently the pump will not require lubrication. However lubrication is recommended if running the
pump continuously for long periods or using very dry air or at high temperatures. This will guarantee the life of the pumps
seals.
If you decide to use a lubricator, please use only turbine oil, Class 1(equivalent to ISO VG32).
!
!
!
NOTICE
* High temperature operation: When transferring liquids whose temperature exceeds 70℃ [158 ℉ ]
* Continuous operation: When the pump operates continuously for longer than 1 hour and is stopped for less than 15 minutes.
* Lubrication: Use only turbine oil Class 1(equivalent to ISO VG 32), under the following conditions;
Oil concentration at 50mg/m³, Absolute pressure at 0.1MPa [14psi]. Maximum temperature of 20℃ [68 ℉ ] and Humidity at 65%.
* Operating in the condition a uid temperature is at 70℃ or above might cause an early degradation of performance and required
to change the material of air motor seal parts. Please contact your nearest distributor for details.
- 11 -

Installation
WARNING
!
Arranging outside exhaust
Pump
Ground
Hose
Protection box
Silencer
2.Recommended Liquid piping connection diagram
1) Connect a ow valve and a drain valve to the liquid discharge side (outlet) of the pump.
2) Connect a ow valve for maintenance purposes to the suction side (inlet) of the pump.
3) Connect hoses to both the suction side and to the discharge side of the pump and attach them to the respective vessels.
Pump
Air supply
Airline ball valve
Flow valve
Flow valve for maintenance
Drain valve
- 12 -
・ If a diaphragm is damaged, uid may be ejected along with the air from the exhaust port. In cases when the pump is positioned
below the liquid so that hydraulic pressure is acting on the pump, pushing the diaphragms etc, if a diaphragm fails then uid
can ow out of the pump under gravity. Please carryout protective measures, for example, place the pump in a pit, or set the
pump into a protection box, use liquid detection through the use of a spill sensor, etc, and at the same time, provide visible
warnings signs around the pump.
* Pump exhaust should be directed to a safe place, away from people, animals and food if there is a risk that transferring
liquids may affect the human body.
* Connect a hose with an electrical ground wire to the pump's exhaust port, and attach the silencer to the end of the hose.
Use a hose of the same diameter as the exhaust port. (If the hose is longer than 5 meters [16.4 feet] , consult your local
distributor or our company directly.) Place the exhaust outlet in a pit, or a protection box, etc.

Installation
CAUTION
・ When tting liquid hoses to the pump, make sure to use a sturdy hose that will not collapse when strong suction pressure is
applied from the pump. Also make sure the hose has a sufcient pressure rating to cope with the required discharge pressure.
・ When installing a standby pump or two pumps in parallel, be sure to provide a Flow valve on each of the IN and OUT liquid
material manifolds and perform pump switchovers by rstly shutting off both pumps and separating them through the liquid
material valves. If a Liquid line valve of the stopped pump remains open, the diaphragms could be inverted or stretched and
possibly broken by the discharge pressure produced by the operating pump, thus resulting in damage in an early stage.
!
!
!
!
!
・ When pumping a uid that contains slurry, verify that the particle size is below the Max solid size (see[1.Specications]). If it
exceeds the limitation of slurries indicated in the main specications, attach a strainer to the pump to stop larger particles.
Otherwise, such particles may cause a malfunction.
・ Depending upon changes in pumping conditions such as expanding liquids or changes in liquid temperature the pressure inside
the pump could change drastically. In such cases install a relief valve on the liquid discharge side, to bring the pressure down
below the maximum permissible value.
・ When testing piping for leakage, do NOT apply pressure to the pump's inlet and outlet sides with compressed air from outside.
It may cause abnormal breakage to the diaphragm or the switching portion.
CAUTION
・ The piping and the peripheral equipment may become clogged with foreign matter such as dust dirt or sludge. Clean the inside
of the piping for 10 to 20 seconds before connecting it to the pump.
!
3.Recommended air piping connection diagram
・ Connect an air valve, air filter, regulator and if necessary
a lubricator (Make sure they are rated to provide sufficient
air volume passage as required to run the pump correctly)
Connect hoses to the pump and compressor.
Air valve
Regulator
Ground
Airline ball valve
Pump
- 13 -

Operation
1.Pump start up
1) Open the air valve in front of each piece of peripheral equipment, and adjust the supply air pressure with a regulator to within the
permissible range.
2) Open the ow valve on the discharge side.
3) Press the RESET BUTTON, and then slowly open the air valve of the pump.
4) Before allowing the pump to run at full pressure, rst, verify that the pump is primed and uid is owing inside the piping and is being
pumped to the discharge side, and then fully open the air valve.
WARNING
• If air pressure and discharge pressure exceed the allowable working pressure, it may cause liquid leaks, damaged pump casings
or diaphragms and could cause a fatal accident.
2.Liquid ow adjustments
・ Adjust the ow valve on the discharge side. To see the relationship between the ow rate, supply air pressure and discharge pressure,
see [Performance curves].
CAUTION
・ As you start closing the liquid discharge ow valve, the supplied air pressure may rise. Make sure that the pressure is kept
within the normal operating range.
!
!
!
・ Depending upon the viscosity and specic gravity of the uid, the suction stroke and other conditions, the permissible suction
ow speed of uid into the pump will vary; however, if the pump speed (ow speed of uid) increases greatly, cavitation could
occur, and this will not only reduce pump performance, but it may cause a malfunction. To prevent cavitation adjust the supply
air pressure as well as the Discharge ow valve.
・ If uid is not discharged after you start the pump, or if you hear an abnormal noise or notice any irregularity, shut down the
pump immediately (see [Troubleshooting]).
3.Stopping the Pump
・ Close the air valve of the pump and shut off the supplied air.
CAUTION
・ It is permissible to shut down the pump by closing the liquid discharge ow valve even while air is still being supplied to the
pump. However, if this condition continues for a long period without supervision, the pump may start running if there is a leak
from the pump or piping, and therefore uid may continue owing out of the position of leakage.
- 14 -

Operation
CAUTION
・ When the pump is shut down while pumping liquids containing slurry, particulate slurry matter contained in the liquid can settle
and become deposited inside the bottom of the liquid chambers. If the pump is started again in the condition, the diaphragm
may be damaged or the center disk may be overloaded, and this may cause damage such as bending or breaking of the center
disk or center rod. As a counter measure, after finishing work, it is recommended to purge the remaining fluid and slurry
particulate from the pump.
4.Releasing pressure
1) Make sure that the airline ball valve of the pump is closed.
2) Close the valve on the air-supply side of the peripheral equipment.
3) Close the ow valve on the discharge side, start opening the drain valve slowly, and discharge the pressurized uid.
4) Open the airline ball valve of the pump, and run the pump until all the remaining pressurized air and liquid inside the pump is expelled.
CAUTION
・ Fluid under pressure will gush out as soon as you open the valve, so take extreme care.
!
5.Method of cleaning the pump
WARNING
・ Before starting operation, make sure that the pump is not pressurized.
!
!
・ Be careful when removing any piping from the pump as any remaining uid may gush out.
1) Remove the inlet hose from the suction side of the pump.
2) Close the ow valve on the discharge side, open the drain valve, and then operate a pump by opening the air pressure valve for a while
to discharge any uid remaining inside the pump.
3) Remove the outlet hose from the discharge side, and attach different hoses to the suction side and the discharge side for cleaning
purposes.
4) Prepare a vessel with cleaning solution, select a cleaning solution which is appropriate for the type of uid being pumped, and then
connect the suction-side and the discharge-side hoses to the pump.
5) Operate the pump by starting the air pressure slowly, and let the cleaning solution circulate for a sufcient period to thoroughly clean
the pump. (Finally, ush the pump with clean water.)
6) Remove the hose from the suction side of the pump, run the pump for a while and purge the pump of all remaining uid.
7) After ushing with clean water, turn the pump upside-down to drain out any remaining water contained in the pump.
- 15 -

Maintenance
・ Daily maintenance checks
- 16 -
A) Make sure the air lter drain is empty and working correctly.
B) When using a lubricator, verify that the quantity of lubricating oil is sufcient.
C) Make sure that there is no leakage of uid from any hose connections or the pump body.
D) Check that all the bolts have the correct torque value.
E) Make sure that there are no cracks in the pump casing or piping.
F) Make sure that the pipe connections are not loose.
G) Make sure that high ware parts have not past their life expectancy. Replace such parts at regular intervals. For details, refer to the
Service Book.
Some special tools can help when disassembling and reassembling the pump. Please contact your local distributor or our company
directly.

- 17 -
Maintenance
Troubleshooting
Problem Probable Cause Actions to be taken
Pump does not run
The exhaust port (silencer) of pump is clogged with
Dirt or sludge.
Check and clean the exhaust port or replace the
silencer.
Air is not supplied
Start the compressor, open the airline ball valve and
air Regulator. Check functionality of solenoid valves (if
tted).
The supplied air pressure is too low
Raise the supplied air pressure to the pump. Check the
compressor and regulator settings and check that the
conguration of the air piping is correct.
The supplied air volume is too low
Increase the supplied air volume to the pump. Check
the compressor size, ttings & air piping inner diameter
and air regulators are of sufcient size. Make sure air is
not being syphoned off used to power other pumps or
equipment.
The spool stopped in neutral position Press the RESET button.
The Discharge line is closed or blocked
Open the discharge valve. Check functionality of
solenoid valves (if tted). Check for blockage caused by
slurry etc. Check that the liquid line back pressure is
not higher than the supplied air pressure.
Air motor section is corroded or damaged
Check for liquid contamination, chemical attack or
corrosion to the moving components inside the air
motor section. Clean or replace as necessary.

Maintenance
Troubleshooting
- 18 -
Problem Probable Cause Actions to be taken
Pump runs, but uid does not
come out
or ow decreased, or stop.
The suction lift or discharge head is too long Conrm the piping conguration and shorten the length.
One or more Ball Guides are tted upside down Check that all 4 ball guides are assembled correctly and
rectify as necessary.
One or more Ball Guides are worn out Inspect Ball Guides for excess ware and replace as
necessary.
Supply tank is empty or inlet valve is closed or piping is
crimped
Change or rell tank, check that inlet valves are fully
open.
Air leak on (inlet) suction side
Check that inlet hose or hose ttings are not loose or
broken and pump manifold torque values are correct.
Check the Inlet Manifold O-rings are not damaged or
missing.
The suction-side uid piping (including the strainer) is
clogged with slurry or sludge Check and clean the uid piping and lters (if tted).
The supply air pressure is low
Raise the supplied air pressure to the pump. Check the
compressor and regulator settings and check that the
conguration of the air piping is correct.
Cavitation occurs
Adjust the correlation between supply air pressure inlet
and discharge ow or pressure, or shorten the suction
lift length.
Chattering occurs (ball valves not seating properly)
Check and adjust the correlation between supplied air
pressure and inlet pressure and discharge pressure or
ow. Decrease the inlet ow rate or increase the back
pressure by slightly closing the discharge valve. Check
the ball valve material is sufciently heavy compared to
the liquid being pumped.
Icing on air-switching portion
Check that the air lter and exhaust are clean and not
blocked or restricted. Check and adjust the air ow rate
and the correlation between the liquid ow rates. Fit a
speed control mufer. Manually remove ice from air-
switching valve before restarting.
The exhaust port (silencer) of pump is clogged with
sludge. Or the air lter is blocked
Check and clean the exhaust port or replace the
silencer. Check and replace the air lter as necessary.
Air valve seals or sleeve or sleeve O-rings worn out or
damaged
Inspect air valve and sleeve and replace components as
necessary.

- 19 -
Problem Probable Cause Actions to be taken
Liquid leakage from exhaust port
(silencer)
The diaphragm is damaged Disassemble and check the pump and replace the
diaphragm.
The fastening nuts for the center disk are loose Disassemble and check the pump. Tighten the nuts.
The center disk O-rings are damaged or missing Disassemble and check the pump. Replace the O-rings
if necessary.
Excessive airline moisture or oil lubrication
Check and repair the compressor. Fit or empty an
airline moisture drainer. Reduce or remove the oil
lubrication.
Air is mixed into the liquid
The diaphragm is perforated cut or torn Disassemble and check the pump check and replace the
diaphragms as necessary.
The center disk fastening nuts are loose Disassemble and check the pump. Tighten the nuts.
The diaphragm is not seated correctly within the
chambers or the O-ring is missing
Check the positioning of the diaphragm is correct, and
check the diaphragm is not deformed due to under
torque of the chamber bolts. Check the O-ring is not
missing or damaged and replace as necessary. Re-
Torque the chamber bolts t the correct value.
Air leak on (inlet) suction side
Check that inlet hose or hose ttings are not loose
or broken and the pump manifold torque values are
correct. Check the Inlet manifold O-rings are not
damaged or missing.
Irregular noise
The supply air pressure is too high Lower the supply air pressure to the pump. (Check the
compressor and the conguration of air piping.)
The spool oscillates and ball chattering occurs
Adjust the supply air pressure and discharge pressure.
Reduce inlet ow valve to adjusting liquid pressure and
volume.
The pump is clogged with sludge with particles of larger
than the permissible diameter Disassemble the casing, check and clean.
Pilot valve(s) are faulty or damaged Inspect and replace pilots, seals or bushings as
necessary
Exhaust (mufer) is missing or broken Inspect replace or t a new mufer.
Maintenance
Troubleshooting
This manual suits for next models
5
Table of contents
Other IWAKI Water Pump manuals

IWAKI
IWAKI APN-05-W User manual

IWAKI
IWAKI IX-C150 TC/TE R User manual

IWAKI
IWAKI EJ-B09 User manual

IWAKI
IWAKI MDM 50 User manual

IWAKI
IWAKI APN-S041-D3 User manual

IWAKI
IWAKI EHN-YN User manual

IWAKI
IWAKI LK-F Series User manual

IWAKI
IWAKI FW-H Series User manual

IWAKI
IWAKI TC-X102P Series User manual

IWAKI
IWAKI EHN-B21SH User manual

IWAKI
IWAKI TC-X400A M Series User manual

IWAKI
IWAKI EWN-B31 VC User manual

IWAKI
IWAKI MDE32-100 User manual

IWAKI
IWAKI MX-70 User manual

IWAKI
IWAKI EK Series User manual

IWAKI
IWAKI TC-X030V User manual

IWAKI
IWAKI EH-E User manual

IWAKI
IWAKI MDM Series User manual

IWAKI
IWAKI MDK Series User manual

IWAKI
IWAKI EH-E 31 User manual