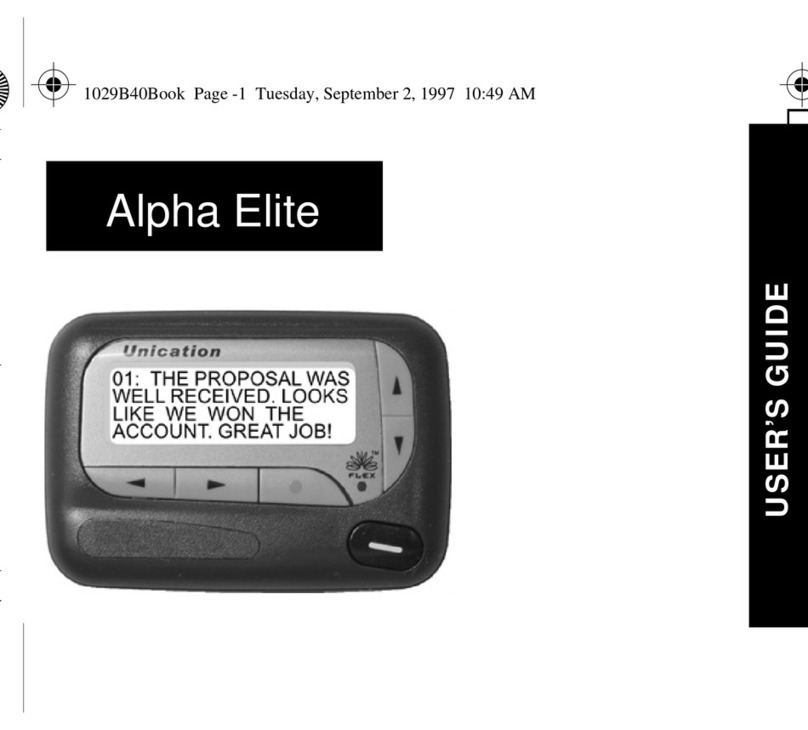
J-TECH RT-760GER User manual

800.321.6221
RT-760GER
ALPAHNUMERIC PAGER
2 and 4 Line

Page 2
Features:
Smart LCD screen that displays 112 x 32 dots, 4 lines for English display, 2 lines for bigger
character
6 Independent Cap Code/RIC can be set for personal or mail drop
Message Capacity Total 25,000 characters
* Personal message : 20 sets messages, dynamic characters memory per message
* Mail-Drop message : 48 sets mail-drop, dynamic characters memory per message
Two lines large size Bold Alpha display, 2x14 =28 English characters
Four lines normal size Alpha display, 4x18 = 72 English characters per screen
Word wrap
Memory retention, memory back-up under main battery replacement
Unread message remainder alert selectable 0-9 minutes
User Logo on power-up
Timer function count down or up
Battery voltage measuring function with insertion of battery
Low battery indication
Adjustable LCD contrast
Date and Time display DD/MM or MM/DD
Date and Time Stamping of messages
Message Lock/protection
Duplicate message indication
Message full indication
Message error indication
Option to delete individual message or delete all
Selectable alert mode, 9 kinds of beep, 7 Melodies, Vibration & silent, Beep & Vibrate
Alert Lengths 7, 14sec, Continuous Beep and Priority Alert.
Alerts programmable independently for each cap code
Alarm function, 3 sets of alarms with 10 event setting
Adjustable LCD contrast
Illumination backlight for easy night reading
Turn Laud speaker automatically on/off for silent receiving
Oldest Message over written automatically by new message when memory is full
Out off Range indicator 0-9 minutes
On Air Programming
Multi Lingual
FCC, CE Approval
Page 3
KEYS
ICONS
Delete All Messages
Mail-drop (alert setting menu)
Normal message (alert setting menu)
ALPHANUMERIC
READ KEY
FUNCTION KEY SHIFT RIGHT KEY
SHIFT LEFT KEY
In-Range indicator
Tone Alert Indicator
Vibration alert Indicator
Silent Alert Indicator
Message Indicator
Low Battery Indicator
Alarm Function Active Indicator
Escape
Set Alert
Set Time
Duplicate Message
Pager On / Off
Set Vibrator Alert
Silent Receiving
Set Alarm
Auto On / Off set

Page 4
New Unread Normal Message
Read Normal Message Indicator
Protect / Lock Message
New unread Mail-drop Message
Read Mail-drop Message
Duplcate Message Indicator
Timer
Power on Indicator
LCD contrast adjustment

Page 5
READING NORMAL MESSAGES
From stand-by press the READ KEY twice to view message icons. When a normal message is
received pager will display for each unread message. Use the SHIFT RIGHT KEY or SHIFT LEFT
KEY to select the message to be read. Once the message is read display will show for the read
messages
READING MAIL-DROP MESSAGES
If the pager programmed to receive Mail-Drop message this will be indicated with a different alert tone
and pager will display for each unread message. From stand-by press READ KEY twice to select
message icon. To read the message, press and hold the RIGHT SHIFT KEY to remove the cursor to
Mail-Drop icon if the cursor is under normal message icon. Press the READ KEY” to read the
message. If there are more then one message then press Left or Right shift keys to select and read the
other messages
SAVING MESSAGES TO NOTEBOOK
Select the message to be read either from Normal Message or Mail Drop then press the FUNCTION
KEY once. Move cursor to using the SHIFT RIGHT KEY. Press the FUNCTION KEY once and
the message will be stored in the notebook memory.
READING NOTEBOOK MESSAGES
From standby-by, press READ KEY” twice to view message icon. When a notebook message is
stored notebook icon is displayed. Move cursor to note book icon using the SHIFT RIGHT
KEY. Then press READ KEY to read stored message. To read additional messages stored in Note
book continue press the READ KEY.

Page 6
12:31
10/25 SAT
STARTING TO OPERATE PAGER
Insertion of Battery:
FUNCTIONS
Time Date Year Setting :
Press FUNCTION KEY twice from stand by mode
Press SHIFT RIGHT KEY and move cursor to
SET TIME
Move cursor to SET TIME
Press FUNCTION KEY screen will display
Press FUNCTION KEY to set the right data and
press SHIFT KEY to move the cursor. Then press
READ KEY to return to stand-by mode after setting
the correct time and date.
FO P1 1.515V
Aa
ESCAPE
Aa
SET TIME
ESCAPE
SET TIME
00 :37
01-01 SUN
Insert AAA battery. Screen will display Condition of battery. After
a short period screen will change automatically and will display
Supplier Name/User name/Company Name etc., and then screen
will change to normal receive/stand by mode mode.
UNICOM

Page 7
ALERT FUNCTIONS:
Press FUNCTION KEY twice from stand by mode
Press SHIFT RIGHT KEY and move cursor to
SET ALERT
Press FUNCTION KEY on SET ALERT
Press FUNCTION KEY to change the alert functions
press SHIFT KEY to move the cursor.
ALERT ICONS:
Move cursor to each option
Note:Mail Drop function may not be displayed on some pagers if not programmed
..
..
TURNING PAGER ON/OFF:
TO TURN PAGER OFF
Press FUNCTION KEY twice from stand by mode
Press SHIFT RIGHT KEY to move cursor to
Press FUNCTION KEY to turn the pager OFF
TO TURN PAGER ON Press READ KEY once to turn the pager ON
Aa
ESCAPE
SET ALERT
Personal Message Alert Settings
Mail-drop Message Alert Settings
Audible Alert + Vibrator
Silent receiving
Vibrator Only
Aa
ESCAPE
Aa
ON / OFF PAGER
Audible Alerts + Melody settings

Page 8
DELETING MESSAGES
Messages can be deleted individually or ALL
DELETING SELECTED/INDIVIDUAL MESSAGE
Select the message to be deleted. While the message is displayed
press the FUNCTION KEY, in sub menu move the curser to
Delete Icon with Shift Right Key. Press FUNCTION KEY to delete
The message
DELETING ALL MESSAGES
Press FUNCTION KEY twice under stand-by mode
Press SHIFT RIGHT KEY to DEL ALL MSG
Press FUNCTION KEY to delete all messages
in the memory except that unread and protected messages
Press FUNCTION KEY again to delete all messages
PROTECT / LOCK MESSAGE
Select the message to be stored/protected by pressing READ KEY
Press FUNCTION KEY and move curser with SHIFT RIGHT KEY to
Message Protect Icon then press FUNCTION KEY
To UNLOCK the message repeat above PROTECT function
ALARM ALERT FUNCTION
If alarm function has been activated pager will automatically alert with a different sound and selected
alarm Icon displayed
To stop Alarm Press READ KEY to return to standby mode
Alarm Alert Icons US$
Aa
ESCAPE
Aa
DEL ALL MSG.
DELL ALL MSG
?
02: MEETING AT
02:MEETING AT

Page 9
SETTING ALARMS :
Press FUNCTION KEY twice from stand by mode
Move cursor with SHIFT RIGHT KEY to SET TIME
Press SHIFT RIGHT KEY and move cursor to SET ALARM
Press FUNCTION KEY again
Press FUNCTION KEY to change between 3 Alarm settings then
move cursor with SHIFT RIGHT KEY to Time and Alert settings. Use
FUNCTION KEY to change Alarm Alert Icons US$
ALERT AUTO ON/OFF
Press FUNCTION KEY twice from stand by mode
Press SHIFT RIGHT KEY and move cursor to SET TIME
.
Press FUNCTION KEY on SET TIME
Press SHIFT RIGHT KEY and move cursor to SET AUTO
Press FUNCTION KEY on Set Auto
Press SHIFT RIGHT OR LEFT KEY to move the cursor between
digits and press FUNCTION KEY to set the time
Press SHIFT RIGHT KEY to move the cursor to 00:00
set the time for alert to be turned ON
Continue to Press SHIFT RIGHT KEY to move cursor
to 00:00 set the time alert to be turned OFF
To activate Auto ON/OF move cursor to Auto ON
OFF Icon simply pressing the FUNCTION KEY
TIMER SETTING
Press FUNCTION KEY twice from stand by mode
Press SHIFT RIGHT KEY and move cursor to SET TIME
Press FUNCTION KEY once on Set Time
Press SHIFT RIGHT KEY and move cursor to SET TIMER
Press FUNCTION KEY on Set Timer
Press SHIFT RIGHT KEY to move cursor to digits and change digits
with FUNCTION KEY
To activate ON/OF move cursor to ON
OFF Icon simply pressing the FUNCTION KEY
Aa
ESCAPE
Aa
TIME SET
ALARM SET
1-00:00
Aa
ESCAPE
Aa
SET TIME
AUTO SET
00:00
00:00
Aa
ESCAPE
Aa
SET TIME
00:00:00
SET TIMER

Page 10
LCD CONTRAST ADJUSTMENT
Press FUNCTION KEY twice from stand by mode
Press SHIFT RIGHT KEY and move cursor to SET TIME
Press FUNCTION KEY on Set Time
Press SHIFT RIGHT KEY and move cursor to LCD
CONTRAST
Press FUNCTION KEY to adjust the contrast
Press READ KEY to go back to receive mode
PHONE BOOK
Press FUNCTION KEY TWICE from stand by mode
Move cursor with SHIFT RIGHT KEY to DIRECTORY
Press FUNCTION KEY on Directory.
Display will show 00
Press FUNCTION KEY then Shift Right Key to advance to directory
position i.e. 00-99
Press FUNCTION KEY then Shift Right Key, display shows
Data Entry
Press FUNCTION KEY, then press Shift Right Key to enter required
digit to continue the same procedure to complete the entry.
Press READ KEY to return to standby mode
To Read stored info:
Press FUNCTION KEY twice from stand by
Move cursor with SHIFT RIGHT KEY to Directory
Press FUNCTION KEY, Press FUNCTION KEY again then Press
Shift Right Key to select the number stored under directory 00-99
Aa
ESCAPE
LCD CONTRAST
Aa
ESCAPE
Aa
DIRECTORY
00
01
2
1 3
Aa
SET TIME
LCD CONTRAST
14

Page 11
ZOOM 2/4 LINE SETTING Aa
Press FUNCTION KEY twice from stand by mode
Press SHIFT RIGHT KEY and move cursor to ZOOM
Press FUNCTION KEY on Zoom
Display will show 2 LINE
Press FUNCTION KEY to change 2 or 4 Line
Press READ KEY to return to stand by mode
GENERAL FUNCTIONS
Message Receiving
If a message is received, the pager will alert with a specific tone according to selection made by
user, either: Tone, Music, Vibration, Silent.
Duplicate Message Receiving
After a message is received, the pager will display on the right top corner of the LCD. If the
same message is received a second time, then Duplicate Message Indicator will be
displayed.
Unread Message Alert
Pager will alert user every 0-9 minutes depending on the programming for any unread messages.
Backlight Function
Press and hold « READ KEY » for 2 seconds while reading a message. This will automatically
turn the backlight on, allowing you to read under dark conditions.
Low Battery Indicator
Replace battery when the low battery indicator is displayed on the LCD.
Type of Battery
Use only good quality AAA Alkaline 1.5V battery
Service
Pager to be serviced only an authorized service agent
Aa
ESCAPE
2 LINE
Aa
ZOOM
4 LINE

FCC ID: RSQRT-760
FCC Compliance and Advisory Statement
This device complies with Part 15 of the FCC rules. Operation is subject to the following two
conditions:(1) this device may not cause harmful interference, and (2) this device must accept
any interference received, including interference that may cause undesired operation.
This equipment has been tested and found to comply with the limits for a Class B digital device,
according to Part 15 of the FCC rules. These limits are designed to provide reasonable
protection against harmful interference in a residential installation. This equipment generates,
uses and can radiate radio frequency energy and if not installed and used in accordance with
the instructions, may cause harmful interference to radio communications. However, there is
no guarantee that interference will not occur in a particular installation. If this equipment does
cause harmful interference to radio or television reception, which can be determined by turning
the equipment off and on, the user is encouraged to try correct the interference by one or more
of the following measures:
1.Reorient the receiving antenna.
2.Increase the separation between the equipment and receiver.
3.Connect the equipment into and outlet on a circuit different from that to which the receiver is
connected.
4.Consult the dealer or an experienced radio/TV technician for help.
Any special accessories needed for compliance must be specified in the instruction manual.
Warning: A shielded-type power cord is required in order to meet FCC emission limits and
also to prevent interference to the nearby radio and television reception. It is essential that
only the supplied power cord be used. Use only shielded cables to connect I/O devices to this
equipment.
CAUSION: Any changes or modifications not expressly approved by the party responsible for
compliance could void your authority to operate the equipment.
Table of contents
Other J-TECH Pager manuals

J-TECH
J-TECH GuestCall CommPass J1701 User manual

J-TECH
J-TECH QuikCall 321045B5 User manual

J-TECH
J-TECH Premises Assembly instructions

J-TECH
J-TECH ServerCall J1703 User manual

J-TECH
J-TECH GuestCall Coaster J1707 User manual

J-TECH
J-TECH GuestCall IQ J1705 User manual

J-TECH
J-TECH ServerCall J1703 User manual

J-TECH
J-TECH GuestCall IQ User manual

J-TECH
J-TECH ServerCall J1703 User manual

J-TECH
J-TECH CommPass User manual