manuals.online logo
Brands
  1. Home
  2. •
  3. Brands
  4. •
  5. unication
  6. •
  7. Pager
  8. •
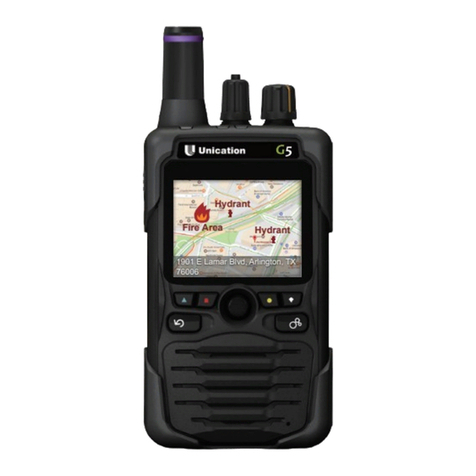
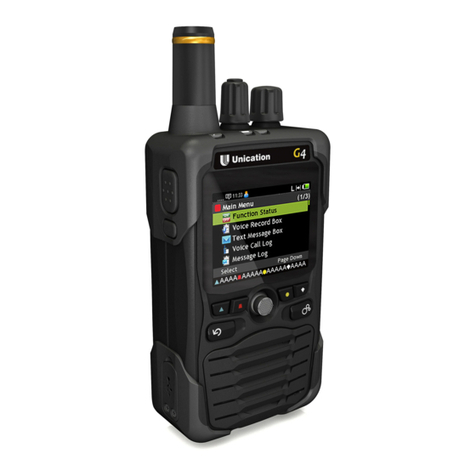
  9. unication G4 User manual

unication G4 User manual

Page 1
Configuring the G4/5 For QCII over P25 Operation
1. Overview
QCII over P25 offers a number of advantages for implementing a paging solution on a P25 System.
They are:
•Minimizes use of TGIDs
•Minimal Dispatching process change
•Pager behavior closely matches that of the Minitor/G1 Analog pagers
•Works over Motorola ABME++ Capable RF
•Uses the identical QCII Tone set as Motorola
•Works with Wireless and IP connected Console environments
In the following sections a detailed review of QCII coding, Tone Sets and ways to configure the G4 or
G5 to support various behaviors are provided.
2. How Does QCII over P25 Work?
QCII over P25 uses a Talk Group ID (TGID) and it is over this TGID’s assigned Talk Channel that the
QCII, 2-Tone, ID is sent. Many Dispatch Centers will patch analog VHF/UHF Channel traffic to a P25
TGID so Portable and Mobile users can hear these transmissions. In such applications adopting to
QCII over P25 paging should be straightforward.
There are differences between a standard analog 2-Tone frequency set and the set used for QCII
over P25 paging. Refer to Figures 1 and 2 on the following pages.
Figure 1 is an example of a Motorola analog 2-Tone set and one can see the tone frequencies are
defined and their spacing runs 3-6%.
In Figure 2, QCII over P25 defines frequency range of 31.25 to 62.5Hz for each of its 72 groups.
Any frequency that falls into a specific range is decoded the same. So, for example, if an analog
tone of 349Hz is patched to a P25 TGID, it will get decoded as Index 3. And, an analog tone of
330.5Hz will also get decoded as Index 3.
The significance of these differences and how one programs a G4/5 for QCII over P25 will be
explained in a later section.
Page 2
Figure 1:
Page 3
Figure 2:
Page 4
3. What Steps are Required in Preparation for Implementing QCII Over
P25?
In preparation for implementing the QCII Over P25 paging solution the following must be taken into
consideration.
a. Does your system use Motorola AMBE++ capable Base Stations?
The G4/5 solution makes use of the Motorola QCII Tone Set and testing on Motorola AMBE++
capable Base Stations allows for a high degree of reliably decoding the QCII tone. The P25
System Administrator or Group responsible for the maintenance of the Dispatch Center and RF
Base Stations can assist with this information.
b. Do you have an assigned TGID over which the QCII Tones are transmitted over?
This can be a dedicated TGID used just for Dispatched paging messages or it can be a currently
used TGID over which the QCII tones are to be transmitted over. Take into consideration, if there
is too much traffic on a currently used TGID it may delay the sending of a QCII page.
c. What 2-Tone Coding Plan is going to be used?
The answer to the above question depends on if current analog 2-Tone VHF/UHF traffic is going
to “patched” over P25 or if a new coding plan is to be developed.
If the plan is for current analog 2-Tones to be used to page a G4/5 pager then as mentioned
earlier, care must be taken in the assignments to ensure there is a “one to one” relationship.
i. Review existing 2-Tone coding plan
ii. Match 2-Tone IDs with the QCII Tone Index Ranges
iii. There may be existing 2-Tone IDs that will not have a unique QCII ID
iv. Options are:
1. Change a 2-Tone ID
2. Create a new one for QCII
Figure 3 below shows an example where a current 2-Tone Plan has a conflict. There are two 2-
Tone IDs (CCII Code 9460 and 9960) whose Tone B frequencies fall into QCII Index 3 (refer to
Figure 2) so the G4/5 would treat these as the same page and not two different ones.
Figure 3:
Page 5
d. If there is no existing 2-Tone coding plan this allows one the opportunity to create one that may be
more efficient and straightforward than a legacy plan that has evolved over time. To begin creating
a plan;
v. List all the entities that need to be paged.
vi. Once this is identified one may want to assign a common Tone B to specific entity for ease of
determining different whose ID it is.
vii. If there are different entities that would be paged out for an incident one may want to assign
that combination of entities to one ID (instead of “stacking” 2-Tone IDs which adds to the time
to dispatch).
viii. A suggestion is one use the standard Motorola 2-Tone Groups to create the above IDs
keeping in mind the “one to one” relationship described in paragraph 3.c.
e. Once the above steps are completed and reviewed with the System Administrator and Director of the
Dispatching Center the process of programming the pager can begin.
4. Programming the G4/5
A. Assigning the TGID(s) and the QCII over P25 Codes
With the G4/5 Programming Software select Tab D.4 to assign the TGID(s) and the QCII over P25
Codes. Refer to Figure 4 below, where an example is provided. Refer to the bottom three rows
where the P25 Sub-Group ID are set. In this example standard 2-Tone ID are set and from these it is
easy to select the corresponding QCII over P25 Index in the P25 Sub-Group ID column.
Figure 4:
Page 6
B. Setting the Zone and Channel Setting
In Tab D.5 there are several new settings and a new Talk Group List. Figures 5-9 represent one
Selector Knob setting and each new setting and the Talk Group List will be explained in detail.
Figure 5:
Figure 6:
Page 7
Figure 7:
Figure 8:
Page 8
Figure 9:
C. The following is detailed explanation of the new settings for QCII over P25.
1. Binding Feature- There are three settings; None, Sub-Group Feature and Call Alert Feature. For
TGID paging “None” is selected, for QCII over P25 paging “Sub-Group Feature” is selected and
for Call Alert paging “Call Alert Feature” is selected.
2. Reset Mode- If the Binding Feature is set for “Sub-Group Feature" there are five selections.
a. Auto Reset- At the end of the page’s voice message the G4/5 goes back to Stand-By
mode awaiting another QCII page.
b. Selective Timeout Reset- This is similar to an analog pager’s Selective Call with Revert
mode. In this case, after the pager receives the QCII page’s message it will continue to
monitor TGIDs programmed in the Revert- Talk Group List until the Timeout Reset Timer
value expires. The pager will then go back to stand-by mode awaiting a QCII page.
c. Selective Manual Reset- Same as the above except one must depress the pager’s Reset
Key Button to cause the pager to return to the stand-by mode.
d. Monitor Timeout Reset-Monitors all TGIDs programmed Talk-Group List until the Timeout
Reset Timer value expires. If a TGID with QCII IDs is programmed in this list then upon
detection of a valid QCII ID the pager will monitor all TGIDs affiliated to the Site for the
duration of the Timeout Reset Timer.
e. Monitor Manual Reset- Same as the above except one must depress the pager’s Reset
Key Button to cause the pager to return to the stand-by mode.
3. Timeout Reset Timer- Works in conjunctions with the Timeout Reset Modes described above.
4. Delay N Function- This works similar to the Delay N function in analog paging. If there is a
drop-in carrier after Tone B being sent and the beginning of the associated voice message this
function ensures the voice message get stored.
5. Delay N Timer- Works in conjunction with the Delay N Function setting.
Page 9
6. Talk Group List- This table lists the TGIDs to be listened to. How the pager behaves is explained
in Figure 11.
7. Revert- Talk Group List- This list is only available when Selective Reset modes are chosen. How
the pager behaves is explained in Figure 11.
8. Sub-Group Setting- This is a setting associated with the Talk Group Lists and it allows the
assignment of QCII IDs to specific TGIDs. In Figure 10 the Sub-Group is selected and , for this
example, a TGID assigned multiple QCII IDs is shown. Another important setting is Alternatives
and its function is explained in Figure 11.
Figure 10
5. Configuring the G4/5 for Different Behaviors
Figure 11 provides different Use Case Scenarios and the associated settings.
A. Scenario 1- is identical to the analog Selective Call operation. In this case the pager is mute until it
detects a programmed QCII ID and stores the paging voice message. After the voice message, the
pager goes to stand-by mode awaiting a new page.
However, if a TGID is assigned to either Table that is not associated with a QCII ID then the pager
will unmute if there is traffic. NOTE: only consider programming a non-paging TGID to a Table if the
System supports TGID Priority.
Scenario 2- This is similar to the analog Monitor Mode where the pager is monitoring traffic on one or
more TGIDs. However, if a TGID is assigned to either Table that is not associated with a QCII ID then
the pager will unmute if there is traffic. NOTE: only consider programming a non-paging TGID to a
Table if the System supports TGID Priority.
Scenario 5- This is similar to Selective Call with Revert analog mode. Multiple TGIDs can be
programmed in the Revert- Talk Group List however, if a TGID that is not associated with a QCII ID or
has its Alternate Setting enabled is programmed then the pager will unmute if there is traffic on these
Page 10
TGIDs. NOTE: only consider programming multiple TGIDs if the System supports TGID Priority to
ensure an incoming page is not missed.
B. Scenarios 3 and 4 are special cases and may not apply to paging applications.
Figure 11
Scenario Binding Feature Reset Mode TGIDs In Talk Group List TGIDS in Revert Talk Group List Behavior
1
Sub-Group Selective Manual Alternative Setting= Disabled Alternative Setting= Disabled
No traffic on the QCII TGID is heard
unless a QCII Id is detected. If there is a
non paging TGID assigned to either Talk
Group list all its related traffic will be
heard.
2
Sub-Group Selective Manual Alternative Setting= Enabled Alternative Setting= Enabled
The pager plays all traffic from TGID's
assigned to the Talk Group List. After
receiving a QCII page it then follows the
Revert- Talk Group List and hears traffic
on all TGIDs programmed in this list. This
behavior is similar to the Minitor
Monitor Mode, but in a P25
environment. Multiple TGID's (i.e. the
QCII and the Traffic TGIDs) must be in
both lists for the pager to behave like
the Minitor Pager's Monitor Mode, but
only if the system supports TGID priority.
If the sytem does not support TGID
Priority only the QCII associated TGID
should be assigned to both lists. Once in
Revert, the pager will continue to check
TGID transmissions for its assigned QCII
IDs and , if detected, will alert and store
the message.
3
Sub-Group Monitor Manual Alternative Setting= Disabled N/A
No traffic on the QCII associated TGID is
heard unless QCII ID is detected. If a non
paging TGID is assigned to the Talk Group
List, all its traffic will be heard. Upon
detecting a QCII ID the pager will, alert
,store the message and then begin to
monitor ANY TGID traffic affiliated on
thst Site, regardless if programmed into
the unit.
4
Sub-Group Monitor Manual Alternative Setting= Enabled N/A
Unit hears all traffic on the QCII TGID and
other Non Paging TGIDs assigned to the
Talk Group List Upon detecing a QCII ID
the pager will, alert ,store the message
and then begin to monitor ANY TGID
traffic affiliated on thst Site, regardless
if programmed into the unit.
5
Sub-Group Selective Manual Alternative Setting= Disabled Alternative Setting= Enabled
To configure for Selective Call with
Revert mode the QCII TGID should be the
only TGID assigned to the Talk Group List.
Upon page detection the pager will
alert, store the message and then
monitor traffic on the TGIDs assigned to
the Revert-Talk Group List. It will
continue to check for QCII IDs on the
associated TGID and upon detection,
alert, store the message and go back to
the Revert Mode.
In conclusion, if Alternates is enabled then you will hear all traffic on that TGID. When Alternates is disabled only traffic accompanied by the correct QCII tone pair is
heard. All TGID's with no QCII assigned operate as though Alternates was enabled regardless of which list they are in.
Page 11
APPENDIX
In the following several examples will be provided to help understand the settings for different
behaviors.
1. Selective Call Mode
In this mode, the pager is mute until a programmed QCII ID is decoded. Once
decoded the pager will generate the alert assigned to the QCII ID and after the alert
cycle the voice message is played. After the message is heard the pager will go mute
awaiting any traffic on the TGID assigned the QCII IDs.
Key programming settings to configure the G4/5 for Selective Call Mode are shown in
Figures 1A-5A below. Below, several of the Key settings are reviewed.
a. Voice Prompt- This is not a key setting, but may be useful for the User. In in this
a prompt labelled Selective Call using the Custom Voice Prompt button was
created.
b. Binding Feature- Sub-Group Feature must be selected.
c. Reset Mode- Selective Manual Reset must be selected.
d. Delay N Function- To ensure the received voice message is stored this must be
enabled.
e. Delay N Timer- This setting works in tandem with the Delay N Function. The
value selected is to cover any gap in a voice transmission after the QCII ID is
sent and ensure the voice message is stored.
f. Talk Group List- (Figure 2A) Select the TGID to be used for QCII transmissions.
g. Binding Setting- Located at the bottom of the Talk Group List, click on Sub-
Group Setting and a list showing the TGID is displayed. Click on Edit and Figure
3A will be displayed. It is here where one selects the QCII IDs to decode.
NOTE: The Alternatives setting cannot be selected.
h. Revert Talk Group List- Select the TGID to be used for QCII transmissions
(Figure 4A). Located at the bottom of the Revert Talk Group List, click on Sub-
Group Setting and a list showing the TGID is displayed. Click on Edit and Figure
5A will be displayed. Selects the same QCII IDs to decode that were selected in
the Talk Group List. NOTE: The Alternatives setting cannot be selected.
Page 12
Figure 1A
.
Figure 2A
Page 13
Figure 3A
Figure 4A
Page 14
Figure 5A
2. Selective Call with Revert Mode
In this mode, the pager is mute until a QCII ID is decoded. When decoded, the pager alerts, the
voice message is heard and stored. Since it is in Revert Mode the pager will unmute, but not store,
any non-QCII transmissions on the selected TGID. If a valid QCII ID is decoded the pager will alert,
play/store the message and revert back to listening all transmissions on the TGID.
To configure the G4/5 for this behavior follow the same procedure for Selective Call Mode except in
Figure 5A ENABLE the Alternative setting.
3. Monitor Mode
In this mode, the pager unmutes on all transmissions to the selected TGID. If a valid QCII ID is
detected the pager will alert, play/store the message and then continue to monitor all transmissions to
the selected TGID. Any non-QCII transmissions on the selected TGID are not stored.
To configure the G4/5 for this behavior follow the same procedure for Selective Call with Revert
Mode in addition:
a. Voice Prompt- Create a prompt for monitor to differentiate this selector knob position from
that of the Selective Call.
b. In Figure 3A, ENABLE the Alternatives setting.
4. Multiple TGIDs to be Listened to when in Revert and/or Monitor Modes
If one wants to listen to TGID traffic other than the TGID that the QCII IDs are transmitted over this is
possible if the P25 System supports TGID Priority. In this case the TGID with the QCII IDs would be
assigned the highest priority to ensure the page is not missed. The Priority Talk Group ID Option
setting must be enabled.
NOTE: If the P25 System does not support TGID Priority one can still listen to multiple TGIDs, but it is
possible a page will be missed.

Other manuals for G4

3

This manual suits for next models

1

Other unication Pager manuals

unication E5 User manual

unication

unication E5 User manual

unication Alpha Gold User manual

unication

unication Alpha Gold User manual

unication Alpha Legend User manual

unication

unication Alpha Legend User manual

unication G4 User manual

unication

unication G4 User manual

unication E3 User manual

unication

unication E3 User manual

unication Messenger m90 User manual

unication

unication Messenger m90 User manual

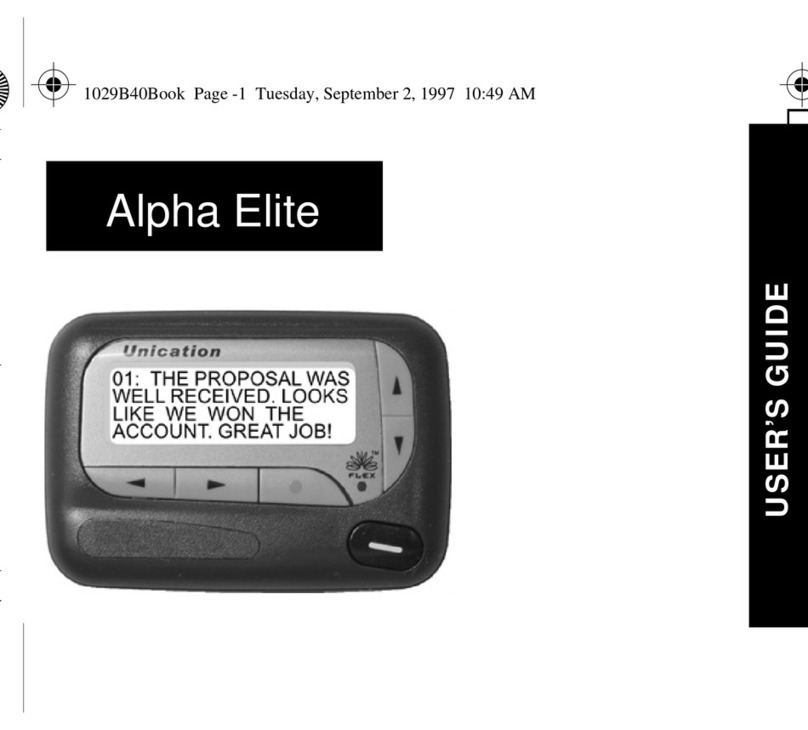
unication Alpha Elite Manual

unication

unication Alpha Elite Manual

unication G Series User manual

unication

unication G Series User manual

unication Alpha Elegant User manual

unication

unication Alpha Elegant User manual

unication G4 User manual

unication

unication G4 User manual

unication Alpha Elegant User manual

unication

unication Alpha Elegant User manual

unication Alpha Elegant User manual

unication

unication Alpha Elegant User manual

unication G Series User manual

unication

unication G Series User manual

Popular Pager manuals by other brands

US Alert NP40 Hand Programming Manual

US Alert

US Alert NP40 Hand Programming Manual

jablotron CA-1202 installation manual

jablotron

jablotron CA-1202 installation manual

Timex Beepwear user guide

Timex

Timex Beepwear user guide

pagertec Smart Stack EVO user guide

pagertec

pagertec Smart Stack EVO user guide

Tunstall 9000/60A Installation and user manual

Tunstall

Tunstall 9000/60A Installation and user manual

scope GEO40A user manual

scope

scope GEO40A user manual

Eagle Patriot PG-2568PS user manual

Eagle Patriot

Eagle Patriot PG-2568PS user manual

PageOne Alpha Elite user guide

PageOne

PageOne Alpha Elite user guide

Motorola BRAVO LX user guide

Motorola

Motorola BRAVO LX user guide

WaveWare WT 802 Programming guide

WaveWare

WaveWare WT 802 Programming guide

Flex Br502 user manual

Flex

Flex Br502 user manual

Predatory Instincts BiteMinder quick start guide

Predatory Instincts

Predatory Instincts BiteMinder quick start guide

Motorola LS550 user guide

Motorola

Motorola LS550 user guide

Bravo 500 user guide

Bravo

Bravo 500 user guide

Gold Apollo AL-A25 Programming guide

Gold Apollo

Gold Apollo AL-A25 Programming guide

TR Telecom Iridium pager user manual

TR Telecom

TR Telecom Iridium pager user manual

Motorola LS350 Manual do usuário

Motorola

Motorola LS350 Manual do usuário

NIXXO Maxima user guide

NIXXO

NIXXO Maxima user guide

manuals.online logo
manuals.online logoBrands
  • About & Mission
  • Contact us
  • Privacy Policy
  • Terms and Conditions

Copyright 2025 Manuals.Online. All Rights Reserved.