manuals.online logo
Brands
  1. Home
  2. •
  3. Brands
  4. •
  5. Jamara
  6. •
  7. Motorized Toy Car
  8. •
  9. Jamara MB Arocs 2,4 GHz User manual

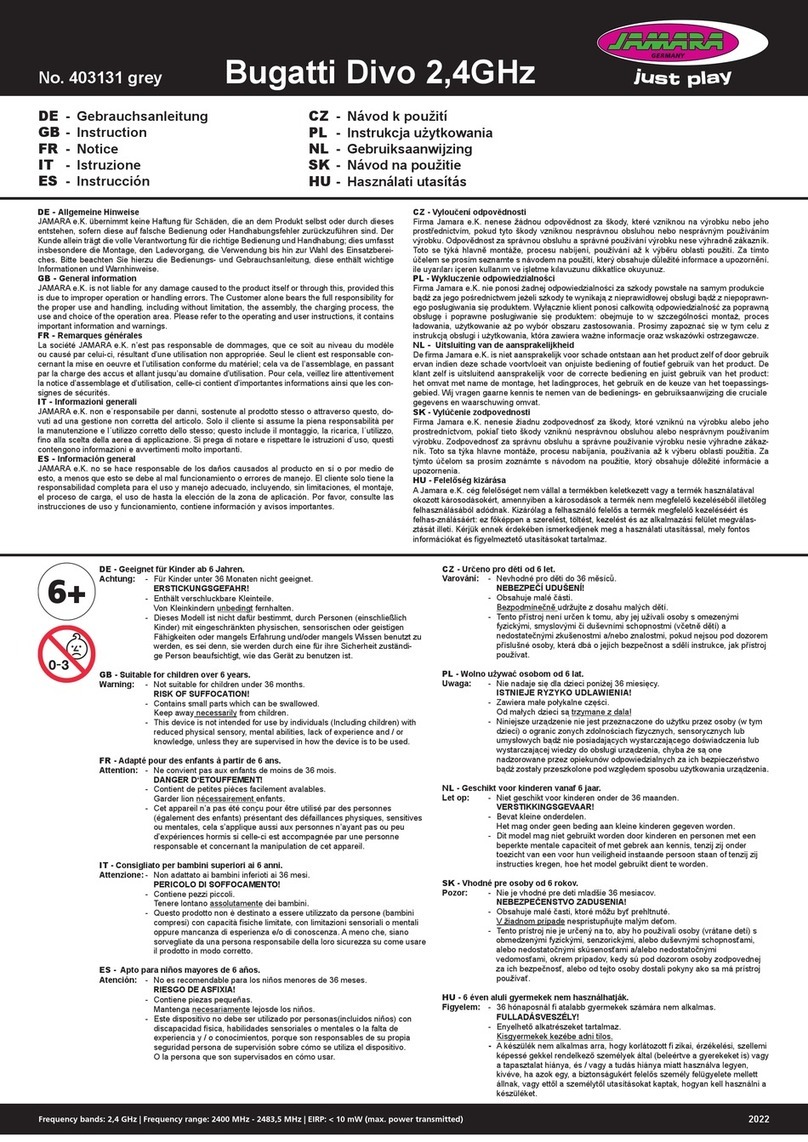
Jamara MB Arocs 2,4 GHz User manual

No. 405148
Container TruckContainer Truck
Mercedes-Benz Arocs 2,4GHzMercedes-Benz Arocs 2,4GHz
05/21
Frequency bands: 2,4 GHz Frequency range: 2405 ~ 2475 MHz EIRP: < 1 mW (max. power transmitted)
DE - Gebrauchsanleitung
GB - Instruction
FR - Notice
IT - Istruzione
ES - Instrucción
CZ - Návodkpoužití
PL - Instrukcjaużytkowania
NL - Gebruiksaanwijzing
SK - Návodnapoužitie
DE - Allgemeine Hinweise
JAMARA e. K. übernimmt keine Haftung für Schäden, die an dem Produkt selbst oder durch dieses
entstehen, sofern diese auf falsche Bedienung oder Handhabungsfehler zurückzuführen sind. Der
Kunde allein trägt die volle Verantwortung für die richtige Bedienung und Handhabung; dies umfasst
insbesondere die Montage, den Ladevorgang, die Verwendung bis hin zur Wahl des Einsatzberei-
ches. Bitte beachten Sie hierzu die Bedienungs- und Gebrauchsanleitung, diese enthält wichtige
Informationen und Warnhinweise.
GB - General information
JAMARA e.K. is not liable for any damage caused to the product itself or through this, provided this
is due to improper operation or handling errors. The Customer alone bears the full responsibility for
the proper use and handling, including without limitation, the assembly, the charging process, the
use and choice of the operation area. Please refer to the operating and user instructions, it contains
important information and warnings.
FR - Remarques générales
La société JAMARA e. K. n’est pas responsable de dommages, que ce soit au niveau du modèle
ou causé par celui-ci, résultant d’une utilisation non appropriée. Seul le client est responsable con-
cernant la mise en oeuvre et l’utilisation conforme du matériel; cela va de l’assemblage, en passant
par la charge des accus et allant jusqu’au domaine d’utilisation. Pour cela, veillez lire attentivement
la notice d’assemblage et d’utilisation, celle-ci contient d’importantes informations ainsi que les con-
signes de sécurités.
IT - Informazioni generali
JAMARA e. K. non e´responsabile per danni, sostenute al prodotto stesso o attraverso questo,
dovuti ad una gestione non corretta del articolo. Solo il cliente si assume la piena responsabilità per
la manutenzione e l´utilizzo corretto dello stesso; questo include il montaggio, la ricarica, l´utilizzo,
no alla scelta della aerea di applicazione. Si prega di notare e rispettare le istruzioni d´uso, questi
contengono informazioni e avvertimenti molto importanti.
ES - Información general
JAMARA K. no se hace responsable de los daños causados al producto en sí o por medio de
esto, a menos que esto se debe al mal funcionamiento o errores de manejo. El cliente solo tiene la
responsabilidad completa para el uso y manejo adecuado, incluyendo, sin limitaciones, el montaje,
el proceso de carga, el uso de hasta la elección de la zona de aplicación. Por favor, consulte las
instrucciones de uso y funcionamiento, contiene información y avisos importantes.
CZ-Vyloučeníodpovědnosti
Firma Jamara e. K. nenese žádnou odpovědnost za škody, které vzniknou na výrobku nebo jeho
prostřednictvím, pokud tyto škody vzniknou nesprávnou obsluhou nebo nesprávným používáním
výrobku. Odpovědnost za správnou obsluhu a správné používání výrobku nese výhradně zákazník.
Toto se týká hlavně montáže, procesu nabíjení, používání až k výběru oblasti použití. Za tímto
účelem se prosím seznamte s návodem na použití, který obsahuje důležité informace a upozornění.
ile uyarıları içeren kullanım ve işletme kılavuzunu dikkatlice okuyunuz.
PL -Wykluczenieodpowiedzialności
Firma Jamara e. K. nie ponosi żadnej odpowiedzialności za szkody powstałe na samym produkcie
bądź za jego pośrednictwem jeżeli szkody te wynikają z nieprawidłowej obsługi bądź z niepoprawn-
ego posługiwania się produktem. Wyłącznie klient ponosi całkowitą odpowiedzialność za poprawną
obsługę i poprawne posługiwanie się produktem: obejmuje to w szczególności montaż, proces
ładowania, użytkowanie aż po wybór obszaru zastosowania. Prosimy zapoznać się w tym celu z
instrukcją obsługi i użytkowania, która zawiera ważne informacje oraz wskazówki ostrzegawcze.
NL - Uitsluiting van de aansprakelijkheid
De rma Jamara e. K. is niet aansprakelijk voor schade ontstaan aan het product zelf of door gebruik
ervan indien deze schade voortvloeit van onjuiste bediening of foutief gebruik van het product. De
klant zelf is uitsluitend aansprakelijk voor de correcte bediening en juist gebruik van het product:
het omvat met name de montage, het ladingproces, het gebruik en de keuze van het toepassings-
gebied. Wij vragen gaarne kennis te nemen van de bedienings- en gebruiksaanwijzing die cruciale
gegevens en waarschuwing omvat.
SK-Vylúčeniezodpovednosti
Firma Jamara e. K. nenesie žiadnu zodpovednosť za škody, ktoré vzniknú na výrobku alebo jeho
prostredníctvom, pokiaľ tieto škody vzniknú nesprávnou obsluhou alebo nesprávnym používaním
výrobku. Zodpovednosť za správnu obsluhu a správne používanie výrobku nesie výhradne zákaz-
ník. Toto sa týka hlavne montáže, procesu nabíjania, používania až k výberu oblasti použitia. Za
týmto účelom sa prosím zoznámte s návodom na použitie, ktorý obsahuje dôležité informácie a
upozornenia.
DE
Geeignet für Kinder ab 6 Jahren.
Achtung: - Für Kinder unter 36 Monaten nicht geeignet.
ERSTICKUNGSGEFAHR!
- Enthält verschluckbare Kleinteile. Von Kleinkindern unbedingt fernhalten.
- Dieses Modell ist nicht dafür bestimmt, durch Personen (einschließlich
Kinder) mit eingeschränkten physischen, sensorischen oder geistigen
Fähigkeiten oder mangels Erfahrung und/oder mangels Wissen benutzt zu
werden, es sei denn, sie werden durch eine für ihre Sicherheit zuständige
Person beaufsichtigt, wie das Gerät zu benutzen ist.
GB
Suitable for children over 6 years.
Warning: - Not suitable for children under 36 months.
RISK OF SUFFOCATION!
- Contains small parts which can be swallowed.
Keep away necessarily from children.
- This device is not intended for use by individuals (Including children) with
reduced physical sensory, mental abilities, lack of experience and / or
knowledge, unless they are supervised in how the device is to be used.
FR
Adapté pour des enfants à partir de 6 ans.
Attention: - Ne convient pas aux enfants de moins de 36 mois.
- DANGER D‘ETOUFFEMENT!
- Contient de petites pièces facilement avalables.
Garder lion nécessairement enfants.
- Cet appareil n’a pas été conçu pour être utilisé par des personnes
(également des enfants) présentant des défaillances physiques, sensitives
ou mentales, cela s’applique aussi aux personnes n’ayant pas ou peu
d’expériences hormis si celle-ci est accompagnée par une personne
responsable et concernant la manipulation de cet appareil.
IT
Consigliato per bambini superiori ai 6 anni!
Attenzione: - Non adattato ai bambini inferioti ai 36 mesi.
PERICOLO DI SOFFOCAMENTO!
- Contiene pezzi piccoli. Tenere lontano assolutamente dei bambini.
- Questo prodotto non è destinato a essere utilizzato da persone (bambini
compresi) con capacità siche limitate, con limitazioni sensoriali o mentali
oppure mancanza di esperienza e/o di conoscenza. A meno che, siano
sorvegliate da una persona respon sabile della loro sicurezza su come
usare il prodotto in modo corretto.
ES
Apto para niños mayores de 6 años.
Atención: - No es recomendable para los niños menores de 36 meses.
- RIESGO DE ASFIXIA!
- Contiene piezas pequeñas. Mantenga necesariamente lejosde los niños.
- Este dispositivo no debe ser utilizado por personas(incluidos niños) con
discapacidad física, habilidades sensoriales o mentales o la falta de
experiencia y / o conocimientos, porque son responsables de su propia
seguridad persona de supervisión sobre cómo se utiliza el dispositivo. O la
persona que son supervisados en cómo usar.
CZ
Určenoprodětiod6let!
VAROVÁNÍ: - Nevhodné pro děti do 36 měsíců.
- NEBEZPEČÍUDUŠENÍ!
- Obsahuje malé části. Bezpodmínečně udržujte z dosahu malých dětí.
- Tento přístroj není určen k tomu, aby jej užívali osoby s omezenými
fyzickými, smyslovými či duševními schopnostmi (včetně dětí) a
nedostatečnými zkušenostmi a/nebo znalostmi, pokud nejsou pod
dozorem příslušné osoby, která dbá o jejich bezpečnost a sdělí instrukce,
jak přístroj používat.
PL
Wolnoużywaćosobomod6lat!
Uwaga: - Nie nadaje się dla dzieci poniżej 36 miesięcy.
ZAWIERAMAŁEPOŁYKALNECZĘŚCI!
- Istnieje ryzyko udławienia! Od małych dzieci są trzymane z dala!
- Niniejsze urządzenie nie jest przeznaczone do użytku przez osoby (w tym
dzieci) o ograniczonych zdolnościach zycznych, sensorycznych lub
umysłowych bądź nie posiadających wystarczającego doświadczenia lub
wystarczającej wiedzy do obsługi urządzenia, chyba że są one
nadzorowane przez opiekunów odpowiedzialnych za ich bezpieczeństwo
bądź zostały przeszkolone pod względem sposobu użytkowania
urządzenia.
NL
Geschikt voor kinderen vanaf 6 jaar!
Let op: - Niet geschikt voor kinderen onder de 36 maanden.
VERSTIKKINGSGEVAAR!
- Bevat kleine onderdelen.
Het mag onder geen beding aan kleine kinderen gegeven worden.
- Dit model mag niet gebruikt worden door kinderen en personen met een
beperkte mentale capaciteit of met gebrek aan kennis, tenzij zij onder
toezicht van een voor hun veiligheid instaande persoon staan of tenzij zij
instructies kregen, hoe het model gebruikt dient te worden.
SK
Vhodné pre osoby od 6 rokov!
Pozor: - Nie je vhodné pre deti mladšie ako 36 mesiacov.
NEBEZPEČENSTVOZADUSENIA!
- Obsahuje malé časti, ktoré môžu byť prehltnuté.
V žiadnom prípade výrobok nesmie byť spristupnený deťom
- Tento prístroj nie je určený na to, aby ho používali osoby (vrátane detí) s
obmedzenými fyzickými, senzorickými, alebo duševnými schopnosťami,
alebo nedostatočnými skúsenosťami a/alebo nedostatočnými
vedomosťami, okrem prípadov, kedy sú pod dozorom osoby zodpovednej
za ich bezpečnosť, alebo od tejto osoby dostali pokyny ako sa má prístroj
používať.
2
DE - Bitte lesen Sie die komplette Bedienungsanleitung und Sicherheits-
hinweise sorgfältig durch bevor Sie das Produkt in Betrieb nehmen.
Achtung! Warnhinweise / Sicherheitshinweise unbedingt komplett
lesen. Diese dienen Ihrer Sicherheit und können Unfälle /
Verletzungen vermeiden.
GB - Read the complete instructions and security instructions carefully before
using the product.
Caution! Please fully and carefully read warnings/ safety instructions.
These are for our own security and can avoid accidents/injuries.
FR - Veuillez lire attentivement et entièrement la notice et les consignes de
sécurités avant tout utilisation de ce produit!
Attention! La mise en garde et les consignes de sécurités sont à lire
entièrement pour votre sécurité et éviter tout accidents et blessures.
IT - Vi preghiamo di leggere attentamente la istruzione completa e Istruzioni
per la sicurezza prima di usare il prodotto.
Attenzione! Leggere completamente le avvertenze / istruzioni di
sicurezza, questi sono per la vostra sicurezza può prevenire
incidenti / infortuni.
ES - Lea atentamente la instruccion completa y seguridad antes de poner el
producto en funcionamiento
Atención! Leer completamente las notas de advertencia /
instrucciones de seguridad estos son para su seguridad y puede
evitar accidentes / lesiones
CZ - Před použitím tohoto modelu si pečlivě přečtěte návod k použití a
bezpečnostní upozornění.
  Upozornění!Varování/bezpečnostnípokynymusíbýtpřečtenyv
  plnémrozsahu!Sloužívašíbezpečnostiamohouzabránitnehodám/
  zraněním.
PL - Przed użyciem modelu zapoznaj się dokładnie z instrukcją obsługi oraz
instrukcją bezpieczeństwa.
  Uwaga!Proszęuważnieprzeczytaćostrzeżenia/instrukcjedotyczące
  bezpieczeństwa.Sąonedlanaszegowłasnegobezpieczeństwai
  mogąpomócuniknąćwypadków/urazów.
NL - Lees de volledige instructies en veiligingheidsinstructies zorgvuldig door
voordat u het model in gebruik neemt.
Voorzichtig! Lees aandachtig en zorgvuldig de waarschuwingen /
veiligheidsinstructies. Deze zijn voor uw eigen veiligheid en kunnen
ongevallen / verwondingen voorkomen.
SK - Pred uvedením modelu do prevádzky si prosím pozorne prečítajte celý
návod na použitie a bezpečnostné informácie.
Upozornenie!Varovania/bezpečnostnépokynymusiabyťprečítanév
  celomrozsahu!SlúžianaVašubezpečnosťamôžuzabrániť
nehodám/zraneniam.
DE - Konformitätserklärung
Hiermit erklärt JAMARA e.K., dass das Produkt‚ “Container Truck Mercedes-Benz
Arocs, No. 405148“ den Richtlinien 2014/53/EU, 2011/65/EU und 2009/48/EG
entspricht.
Der vollständige Text der EU-Konformitätserklärung ist unter der folgenden
Internetadresse verfügbar: www.jamara-shop.com/Konformitaet
GB-CerticateofConformity
Hereby JAMARA e.K. declares that the product „Container Truck Mercedes-Benz Arocs,
No. 405148“ complies with Directive 2014/53/EU, 2011/65/EU and 2009/48/EC.
The full text of the EU Declaration of Conformity is available at the following Internet address:
www.jamara-shop.com/Conformity
FR - Déclaration de conformité
Par la présente, JAMARA e.K. déclare que le produit „Container Truck Mercedes-Benz Arocs, No.
405148“ est conforme à la Directive 2014/53/UE, 2011/65/UE et 2009/48/CE.
Le texte intégral de la déclaration de conformité CE est disponible via l‘adresse Internet suivante:
www.jamara-shop.com/Conformity
IT - Dichiarazione di conformità
Con la presente JAMARA e.K. dichiara che il prodotto „Container Truck Mercedes-Benz Arocs,
No. 405148“ è conforme alla Direttiva 2014/53/UE, 2011/65/UE e 2009/48/CE.
Il testo integrale della dichiarazione di conformità UE è disponibile al seguente indirizzo Internet:
www.jamara-shop.com/Conformity
ES - Declaración de conformidad
Por la presente JAMARA e.K. declara que el producto „Container Truck Mercedes-Benz Arocs,
No. 405148“ cumplen con las Directivas 2014/53/UE, 2011/65/UE y 2009/48/CE.
El texto completo de la declaración de conformidad de la UE está disponible en la siguiente
dirección de Internet: www.jamara-shop.com/Conformity
CZ -Prohlášeníoshodě
Společnost JAMARA e.K. tímto prohlašuje, že Produkt, „Container Truck Mercedes-Benz Arocs,
No. 405148„ odpovídá směrnicím 2014/53/EU, 2011/65/EU a 2009/48/ES.
Úplné znění EU prohlášení o shodě je k dispozici na následující internetové adrese:
www.jamara-shop.com/Conformity
PL-Deklaracjazgodności
Niniejszym rma JAMARA e.K. oświadcza, że Produkt‚ „Container Truck Mercedes-Benz Arocs,
No. 405148“ jest zgodny z dyrektywami 2014/53/UE, 2011/65/UE i 2009/48/WE.
Pełny tekst deklaracji zgodności UE jest dostępny pod następującym adresem internetowym:
www.jamara-shop.com/Conformity
NL - De rma JAMARA e.K. verklaart hiermee dat de Product‚ „Container Truck Mercedes-Benz
Arocs, No. 405148“ aan de richtlijnen 2014/53/EU, 2011/65/EU en 2009/48/EG voldoen.
De volledige tekst van de EU-conformiteitsverklaring is beschikbaar op het volgende internetadres:
www.jamara-shop.com/Conformity
SK - Vyhlásenie o zhode
Týmto rma JAMARA e.K. vyhlasuje, že Produkt‚ „Container Truck Mercedes-Benz Arocs,
No. 405148“ je v súlade so smernicami 2014/53/EÚ, 2011/65/EÚ a 2009/48/ES.
Úplné znenie vyhlásenia o zhode EÚ je dostupné na nasledovnej internetovej adrese:
www.jamara-shop.com/Conformity
DE - Achtung!
Vor dem Betrieb: Erst Sender und dann das Modell einschalten.
Bei Beendigung: Erst das Modell und dann den Sender ausschalten.
● Betreiben Sie Ihr Modell niemals in Distanzen die außer halb Ihrer Sichtweite liegen. Sowohl die
maximale Sichtweite als auch die max. Reichweite Ihres Modells hängen von vielen Faktoren wie
Witterung, Einsatzort und vorhandenen Störfrequenzen ab. Führen Sie deshalb vor jedem
Einsatz mit einer zweiten Person, die das Modell während des Tests sicher xiert hält, einen
Reichweitentest durch und prüfen Sie auch wie sich das Modell während des Betriebs bei einem
Signalausfall wie z.B. bei leeren Senderbatterien oder ausgeschaltetem bzw. ausgefallenem
Sender verhält.
GB - Attention!
Before operating: Switch the transmitter on rst then the model.
Whennished:  First switch o󰀨 the model then the transmitter.
● Never operate your model beyond sight. Both the maximum visibility as well as the max. range of
your model will depend on many factors such as weather, location and interfering frequencies.
Therefore, before each use perform a range test with a second person securely holding the model
and also check how the model reacts if there is a signal failure e.g. when empty transmitter
batteries are installed.
FR - Attention!
Avant l’utilisation: Allumez en premier l’émetteur puis seulement votre modèle.
Après utilisation: Arrêtez le modèle en premier puis votre radiocommande.
● N’utilisez jamais le modèle à une distance hors de votre visibilité. La visibilité maximale ainsi
que la portée maximale dépendent de plusieurs facteurs tels que le temps, le lieu d’utilisation et
les présentes fréquences perturbatrices. Pour cela, avant chaque usage, veuillez e󰀨ectuer un
test de visibilité et de portée avec une deuxième personne qui tient le modèle xé et vériez les
réactions du modèle en usage en cas de pertes de signal due par exemple à des piles usées ou
à un émetteur éteint.
IT - Attenzione!
Prima dell‘uso: Accendete prima la trasmittente e poi il modello.
Dopo l‘uso: Spegnere prima il modello e poi la trasmittente.
● Non utilizzare il suo modello fuori della distanzia di vista. Sia la visibilità come la portata massima
del vostro modello dipendono da molti fattori, come il tempo, disturbo di frequenza e il luogo di
utilizzo. Eseguire un test prima di ogni utilizzo del modello con una seconda persona che tiene
ssato il modello. Con questa procedura potete testare come reagisce il modello durante la per
dita del segnale causato per esempio da una batterie scarica oppure la radio spenta.
ES - Atención!
Antes del uso: Encender primero la emisora, y después el modelo .
Después del uso: Apagar primero el modelo, y después la emisora.
● No utilizar su modelo fuera de la distancias de visibilidad. Tanto la visibilidad como la capacidad
máxima de su modelo depende de muchos factores, tales como el tiempo, frecuencia de
interferencia y el lugar de utilización. Realice una prueba antes de cada uso del modelo con una
segunda persona que ja el modelo. Con este procedimiento se puede comprobar cómo el
modelo reacciona durante la pérdida de señal causada por ejemplo por una batería descargada
o la emisora apagada.
CZ - Varování!
Přizapínání:   Nejdříve zapněte dálkový ovladač a teprve potom model
Přivypínání:   Nejdříve vypněte model a teprve potom dálkový ovladač.
● Nikdy nepoužívejte váš model ve vzdálenostech mimo váš dohled. Maximální viditelnost i dosah
vašeho modelu je závislá na mnoha faktorech, jako je počasí, místo provozu a případné rušivé
frekvence. Před každým použitím proto s jinou osobou, která model během testu pevně přidrží,
proveďte test dosahu a vyzkoušejte si, jak se model chová při výpadku signálu, např. při vybití
baterie vysílačky nebo při vypnutí/výpadku vysílačky.
PL - Uwaga!
Przed uruchomieniem: Najpierw włączyć nadajnik, potem włączyć model.
Pozakończeniu:Najpierw wyłączyć model, potem wyłączyć nadajnik.
● Nigdy nie należy używać modelu w odległości poza polem widzenia. Zarówno maksymalna
widoczność, jak i maks. zasięg modelu zależą od wielu czynników, takich jak pogoda, miejsce
działania i częstotliwości zakłócające. W związku z tym przed każdym użyciem należy
przeprowadzić test zasięgu z druga osobą, która będzie trzymać model w sposób bezpieczny.
Należy skontrolować także zachowanie modelu przy braku sygnału w czasie pracy, jak np.
przy pustych bateriach nadajnika lu wyłączonym bądź uszkodzonym nadajniku.
NL - Let op!
In het begin: eerst de zender en dan het model inschakelen.
Bij beëindiging: eerst het model en dan de zender uitschakelen.
● Het model nooit buiten het gezichtsveld gebruiken. Zowel het maximale zicht veld als ook de max.
afstand van het model zijn afhankelijk van vele factoren zoals het weer, de werkingsplaats en
storende frequenties. Daarom dient, voor elk gebruik, een afstandtest met een andere persoon te
worden uitgevoerd die het voertuig op een veilige manier vasthoudt. Hier wordt het functioneren
van het model bij ontbrekend signaal tijdens de werking gecontroleerd als bv. bij lege batterijen
van de zender of bij een defecte zender of bij een zender die uit staat.
SK - Pozor!
Pred prevádzkou: Najprv zapnite vysielač a potom až model.
Poukončení:   Najprv zapnite model a potom až potom vysielač.
● Nikdy sa nepokúšajte použivať model mimo dohľadu. Zároveň maximálna viditeľnosť, ako aj
maximálny signál modelu závisia od viacerých faktorov, ako je počasie, rušivé frekvencie a
miesto, kde je výrobok používaný. Preto pred každým použitím je nutné urobiť skúšku pokrytia
signálom s pomocou druhej osoby, ktorá bude držať model bezpečným spôsobom. Mali by ste
skontrolovať aj správanie modelu pri žiadnom signále v čase prevádzky napr. pri vybitej batérii
vysielača, vypnutom alebo poškodenom vysielaču.
3
1
3
5
7
9
2
4
6
8
10
11 12
13
DE - Komponenten
1. Abkoppeln
2. Ankoppeln
3. Geschwindigkeit
4. Hupe / Sound
5. Vorwärts / Rückwärts
6. Links / Rechts
7. Bindetaste Truck
8. Bindetaste Auieger
9. Abstützung ▲hoch / ▼runter
10. Keine Funktion
11. Power LED
12. Ein-/Ausschalter
13. Batteriefach
GB - Components
1. Uncoupling
2. Coupling
3. Speed
4. Horn / Sound
5. Forward / Backward
6. Left / Right
7. Binding button truck
8. Binding button trailer
9. Flat bed trailer support -
▲up / ▼down
10. No function
11. Power LED
12. On/O󰀨 Switch
13. Battery compartment
FR - Composants
1. Désaccouplement
2. Accouplement
3. Vitesse
4. Klaxon et e󰀨ets sonores
5. avant / arriére
6. droite / gauche
7. Touche de synchronisation -
Camion
8. Touche de synchronisation -
Remorque
9. Support de la remorque
▲haut / ▼bas
10. Aucune fonction
11. Power LED
12. Interrupteur On/O󰀨
13. Compartiment à piles
IT - Componenti
1. Disaccoppiamento
2. Accoppiamento
3. Velocità
4. Clacson e suono
5. avanti / indietro
6. sinistra / destra
7. Tasto di collegamento - Camion
8. Tasto di collegamento -
Rimorchio
9. Supporto del rimorchio -
▲su / ▼giù
10. Senza funzione
11. Power LED
12. Interruttore On/O󰀨
13. Compartimento batteria
ES - Componentes
1. Desacoplamiento
2. Acoplamiento
3. Velocidad
4. Claxon y sonido
5. adelante / atrás
6. izquierda / derecha
7. Tasto di collegamento - Camión
8. Tasto di collegamento -
Remolque
9. Suporte del remolque -
▲arriba / ▼abajo
10. Ninguna función
11. Power LED
12. Interruptor On/O󰀨
13. Compartimento de la batería
CZ - Komponenty
1. Připojení
2. Odpojení
3. Rychlost
4. Klakson & Zvuk
5. Dopředu/dozadu
6. Doleva/doprava
7. Tlačítko pro spojení vozidla
8. Tlačítko pro spojení návěsu
9. Podpěry návěsu
▲Nahoru/ ▼dolu
10. Bez funkce
11. LED
12. Přepínač ON/OFF
13. Krytka baterie
PL-Składniki
1. Odczepiać
2. Przyczepiać
3. Prędkość
4. Klakson i dźwięki
5. Do przodu/do tyłu
6. W lewo/w prawo
7. Przycisk do połączenia
ciągnika
8. Przycisk do połączenia
przyczepy
9. Wspornik przyczepy
10. Brak funkcji
11. Dioda LED
12. Włącznik/wyłącznik
13. Komora na baterie
NL - Onderdelen
1. Loskoppelen
2. Aankoppelen
3. Snelheid
4. Hoorn / geluid
5. Vooruit - achteruit
6. Links / rechts
7. Knop voor aankoppelen van de
vrachtwagen
8. Knop voor het aankoppelen van
de aanhangwagen
9. Steun ▲omhoog / ▼omlaag
10. Geen functie
11. LED
12. Aan/uit schakelaar
13. Baterijvakje
SK - Prvky
1. Odpájanie
2. Spájanie
3. Rýchlosť
4. Klaksón/zvuk
5. Dopredu - dozadu
6. Vľavo/vpravo
7. Tlačidlo na spájanie nákladného
auta
8. Tlačidlo na spájanie prívesu
9. Podpera ▲ hore/ ▼dole
10. Absencia funkcie
11. LED dióda
12. Zapínač/vypínač
13. Priehradka na batérie
DE - Funktionen
1. Ausrichtungshebel:
Sollte das Modell nach rechts
bzw. links ziehen, können Sie
dies mit dem Regler an der
Unterseite des Modells
feinjustieren.
2. EIN/AUS Schalter
3. Batterie
A. Haltebolzen
B. Stützen
C. EIN/AUS Schalter
D. Sicherungsstifte
GB - Functions
1. Trim Lever:
The directional guide on the
bottom of the model can
beused to adjust the models
straight-line-running
performance.
2. On/O󰀨 Switch
3. Batteries
A. Holding bolt
B. Flat bed trailer support
C. On/O󰀨 Switch
D. Safety pins
FR - Fonctions
1. Levier directionnel:
Si votre modéle devait tourner
à droite ou à gauche
d‘elle-même, vous pouvez
compenser cela grâce au
bouton de réglage sous la
modéle.
2. Interrupteur On/O󰀨
3. Piles
A. Téton de maintien
B. Support de la remorque
C. Interrupteur On/Of
D. Goupilles de verrouillage
IT - Funzioni
1. Leva:
Se il modello con lo sterzo al
centro non va diritto potrete
regolare la sua traiettoria con il
regolatore ubicato sotto il
modello.
2. Interruttore On/O󰀨,
3. Batteria
A. Bullone
B. Supporto del rimorchio
C. Interruttore On/O󰀨
D. Perni di bloccaggio
ES - Funciones
1. Palanca de alineación:
Si el modelo se tira hacia la
derecha o izquierda, puede
ajustarlo con el regulador en la
parte inferior del modelo.
2. Interruptor On/O󰀨
3. Batería
A. Pasador de retención
B. Suporte del remolque
C. Interruptor On/O󰀨
D. Pasadores de bloqueo
CZ - Funkce
1. Trim páčka:
Směrové vodítko na spodní
straně modelu lze použít k
nastavení výkonu modelů s
lineární funkcí.
2. Přepínač ON/OFF
3. Krytka baterií
A. Upevňovací šroub
B. Podpěry návěsu
C. Přepínač ON/OFF
D. Zavírací špendlíky
PL - Funkcje
1. Dźwignia kalibracji:
Jeśli model ściąga w prawo lub
w lewo, to można to poprawić
wykonując dokładną regulację
za pomocą regulatora w dolnej
części modelu.
2. włącz/wyłącz model
3. komora na baterie
A. Śruba mocująca
B. Wspornik przyczepy
C. Włącz/wyłącz
D. Agrafki
NL - Functies
1. Hefboom voor het nivelleren de
grond:
Als het model naar rechts of
links trekt, kan het gecorrigeerd
worden met behulp van een
nauwkeurige afstelling met de
regelaar onderaan.
2. Aan/uit schakelaar
3. batterij
A. Bevestigingsschroef
B. Steunstukken
C. Aan/uit schakelaar
D. Veiligheidspen
SK - Funkcie
1. Sklopný mechanizmus:
Ak model odbača doprava alebo
doľava, môžete ho nastaviť
ovládacím prvkom v spodnej časti
modelu.
2. Prepínač zap./vyp.
3. Batérie
A. Upevňovacia skrutka
B. Podpery
C. Prepínač zap./vyp.
D. Aretovací čap
1 2 3 3
B
A
C
D
DD
D
4
3x AA
3 4
2x AA
4x AA
DE - Einlegen der Batterien
1. Sender
Nehmen Sie den Batteriefachdeckel ab.
Legen Sie 2 x AA Batterien ein, achten Sie auf die richtige
Polung. Setzen Sie den Batteriefachdeckel wieder auf.
2. Modell
Ö󰀨nen Sie das Batterriefach. Legen Sie 4 x AA Batterien ein,
achten Sie auf die richtige Polung. Schließen Sie den
Batteriefachdeckel und verriegeln ihn.
3.-4.Auieger
Drehen Sie die vier Sicherungsstifte nach vorne auf und
nehmen Sie den Container vom Auieger ab (3). Entfernen
Sie den Batteriefachdeckel und legen Sie 3 AA Batterien ein
(4). Schrauben Sie den Batteriefachdeckel wieder fest und
setzen Sie den Container auf den Auieger. Achten Sie
darauf ihn mit den Sicherungsstiften zu sichern.
GB - Insert the batteries
1. Transmitter
Remove the battery compartment cover. Fit the 2 x AA
batteries, observe the correct polarity. Replace the battery
hatch
2. Car
Remove the battery compartment cover. Fit the 4 x AA
batteries, observe the correct polarity. Replace the battery
hatch.
3. - 4. Trailer
Turn the four locking pins forward and remove the container
from the trailer (3).Remove the battery cover and insert
3 x AA batteries (4). Screw the battery compartment cover
back on again and place the container on the trailer. Make
sure to secure it with the safety pins.
FR - Mise en place des piles
1. Radiocommande
Retirez le couvercle de la batterie. Insérer les piles 2 x AA,
respectez la polarité. Remplacer le couvercle du
compartiment.
2. Voiture
Retirez le couvercle de la batterie. Insérer les piles 4 x AA,
respectez la polarité. Remplacer le couvercle du
compartiment.
3. - 4. Semi-remorque
Tournez les quatre goupilles de verrouillage vers l‘avant et
retirer le conteneur de la remorque (3). Retirez le couvercle
du compartiment des piles et insérez 3 piles AA (4).
Revissez le couvercle du compartiment à piles et remettez le
conteneur sur la remorque. Veillez à le sécuriser avec les
goupilles de sécurité
IT - Inserimento delle batterie
1. Trasmittente
Togliere il coperchio del scomparto batterie. Inserire 2 x AA
batterie nella giusta posizione, facendo attenzione ai poli.
Rimettere il coperchio del scomparto batterie.
2. Macchina
Togliere il coperchio del scomparto batterie. Inserire 4 x AA
batterie nella giusta posizione, facendo attenzione ai poli.
Rimettere il coperchio del scomparto batterie.
3. - 4. Rimorchio
Ruotare in avanti i quattro perni di bloccaggio e rimuovere il
container dal rimorchio (3). Rimuovere il coperchio delle
batterie e inserire 3 x batterie AA (4). Avvitare nuovamente il
coperchio del vano batterie e riposizionare il container sul
rimorchio. Assicurarsi di ssarlo con i perni di sicurezza.
ES - Colocar las pilas
1. Emisora
Retire la tapa del compartimiento de la batería. Coloque 2 x
AA baterías, respetando la polaridad. Reemplace la tapa
del compartimiento de la batería.
2. Coche
Retire la tapa del compartimiento de la batería. Coloque 4 x
AA baterías, respetando la polaridad. Reemplace la tapa del
compartimiento de la batería.
3. - 4. Remolque
Gire los cuatro pasadores de bloqueo hacia adelante y retire
el container del remolque (3). Retire la tapa de la batería y
inserte 3 x baterías AA (4). Vuelva a apretar la tapa de la
batería y coloque el container en el remolque. Asegúrese de
jarlo con los pasadores de seguridad.
CZ-Vloženíbaterií
1. Funkce
Sundejte kryt bateriového prostoru. Vložte 2 x AA baterie se
správnou polaritou. Zavřete kryt.
2.Modelů:
Sundejte kryt bateriového prostoru. Vložte 4 x AA baterie se
správnou polaritou. Zavřete kryt.
3.-4.Přívěs
Otočte čtyři zajišťovací kolíky dopředu a vyjměte kontejner z
přívěsu (3). Sejměte kryt baterie a vložte 3 x Baterie AA (4).
Zašroubujte baterii kryt zavazadlového prostoru znovu
nasaďte a umístěte kontejner na přívěs. Udělat zajistěte jej
pomocí bezpečnostních kolíků.
PL - Umieszczanie baterii
1. Pilota
Zdejmij pokrywę baterii. Włóż 2 baterie AA, zwróć uwagę na
prawidłową biegunowość. Załóż pokrywę baterii.
2. Modelu
Zdejmij pokrywę baterii. Włóż 4 baterie AA, zwróć uwagę na
prawidłową biegunowość. Załóż pokrywę baterii.
3. - 4. Przyczepa
Obróć cztery sworznie blokujące do przodu i wyjmij pojemnik
z przyczepy (3). Zdejmij pokrywę baterii i włóż 3 x Baterie AA
(4). Przykręć baterię Ponownie załóż pokrywę przedziału i
umieść pojemnik na przyczepie. Robić zabezpieczyć za
pomocą agrafek.
NL - Batterij zetten
1. Zender
Verwijder de batterijdeksel. Plaats 2 x AA batterijen. Zorg
ervoor dat de batterijen met de juiste polariteit worden
geplaatst. Sluit het batterijdeksel.
2. Model
Open het deksel van het batterijvakje. Plaats 4 x AA
batterijen. Zorg ervoor dat de batterijen met de juiste polariteit
worden geplaatst. Sluit en vergrendel het batterijdeksel.
3. - 4. Aanhangwagen
Schroef de vier borgpennen naar voren los en neem de
container van de aanhangwagen (3). Open het deksel van het
batterijvakje en plaats 3 AA-batterijen (4). Schroef het deksel
van het batterijvakje weer en plaats de container op de
aanhangwagen. Zorg ervoor dat het met de borgpennen is
vastgemaakt.
SK -Vkladaniebatérií
1. Vysielač
Zložte kryt na batérii. Vložte 2 batérie x AA. Uistite sa, že
batérie boli vložené v správnej polarite. Zatvorte kryt na
batérii.
2. Model
Otvorte kryt priehradky na batérie. Vložte do nej 4 batérie
x AA. Uistite sa, že batérie boli vložené v správnej polarite.
Zatvorte kryt na batérii a zablokujte ju.
3.-4.Príves
Odmontujte štyri aretovacie čapy smerom dopredu a zložte
kontajner z prívesu (3). Otvorte kryt priehradky na batérie a
vložte do nej 3 batérie AA (4). Primontujte opätovne kryt
priehradky na batérie a umiestnite kontajner na príves. Uistite
sa, že bol zabezpečený aretovacími čapmi.
12
5
DE - Batteriehinweis:
Nicht wiederauadbare Batterien dürfen nicht aufgeladen werden!
Nicht ö󰀨nen!
Nicht ins Feuer werfen!
Alte und neue Batterien nicht mischen!
Keine alkalischen, Standard-(Kohlensto󰀨-Zink) oder wiederauf-
ladbare Batterien mischen!
Auadbare Batterien sind aus dem Spielzeug herauszunehmen,
bevor sie geladen werden!
Auadbare Batterien dürfen nur unter Aufsicht Erwachsener
geladen werden!
Die Anschlussklemmen dürfen nicht kurzgeschlossen werden!
GB - Battery warning:
Non-rechargeable batteries are not to be recharged!
Do not open!
Do not dispose of in re!
Do not mix old and new batteries!
Do not mix alkaline batteries, standard (carbon-zinc) or rechar-
geable batteries!
Rechargeable batteries are to be removed from the toy before
being charged!
Rechargeable batteries are only to be charged under adult
supervision!
The supply terminals are not to be short-circuited!
FR - Informations concernant l‘accumulateur:
Les batteries non rechargeables ne doivent pas être rechargées!
Ne pas ouvrir!
Ne pas jeter au feu!
Ne pas utiliser des piles neuves et usées à la fois!
Ne pas utiliser en même temps des piles alcalines, standard
(zinc-charbon) et des
accumulateurs!
Les piles rechargeables doivent être retirées du jouet!
Les batteries rechargeables ne peuvent être rechargées que
sous la surveillance d‘un adulte!
Les connexions ne doivent pas être court-circuitées!
IT - Informazioni relative alle pile:
Le batterie non ricaricabili non devono essere caricate!
Non aprire!
Non gettare nel fuoco!
Non usare contemporaneamente pile nuove e pile usate!
Non usare contemporaneamente pile alcaline, standard (zinco-
carbone) e ricaricabili!
Le batterie ricaricabili devono essere rimosse dal giocattolo!
Le batterie ricaricabili possono essere ricaricate solo sotto la
supervisione di un adulto!
I morsetti di collegamento don devono essere cortocircuitati!
ES - Advertencia sobre las baterías:
Las baterías no recargables no se pueden cargar!
No abrir!
No arrojar al fuego!
No mezcle baterías nueva y viejas!
No mezcle baterías alcalinas, estándar (carbono-zinc) o
baterías recargables!
Las baterías recargables deben retirarse del juguete!
Las baterías recargables sólo pueden cargarse bajo la supervi-
sión de un adulto!
Los conectores de conexión no deben estar en cortocircuito!
CZ - Informace ohledně akumulátoru:
Nenabíjejte jednorázové baterie!
Neotvírejte!
Nevhazujte do ohně!
Nedávejte dohromady staré a nové baterie.
Nedávejte dohromady alkalické a standardní (carbon-zinc) nebo
nabíjecí baterie.
Před nabíjením vyjměte nabíjecí baterie z hračky!
Nabíjecí baterie lze nabíjet pouze pod dohledem dospělé
osoby!
Nezkratujte připojovací svorky!
PL - Informacja dotycząca akumulatora:
Nie ładować baterii jednorazowego użytku!
Nie otwierać!
Nie wrzucać do ognia!
Nie mieszać starych i nowych baterii.
Nie mieszać baterii alkalicznych, zwykłych (węglowo-
cynkowych) lub akumulatorowych/
ładowalnych – używać baterii jednego rodzaju.
Przed rozpoczęciem ładowania należy wyjąć akumulatorki z
zabawki!
Akumulatorki można ładować tylko pod nadzorem osoby
dorosłej!
Nie wolno zwierać zacisków przyłączeniowych!
NL - Informatie over de batterij:
Laad geen wegwerpbatterij op!
Niet openen!
Gooi niet op het vuur!
Gebruik geen oude en nieuwe batterijen tegelijk!
Gebruik geen alkaline, standaard (zink-koolstof) batterijen
tegelijk!
Verwijder de batterijen uit het speelgoed voordat het wordt
opgeladen!
Laad de batterijen op enkel onder toezicht van een volwassene!
Voorkom kortsluiting van de aansluitingsklemmen!
SK - Informácia ohľadom akumulátora:
Nenabíjajte jednorazové batérie!
Neotvárajte!
Nehádžte do ohňa!
Nepoužívajte staré a nové batérie súčasne!
Nepoužívajte alkalické, štandardné (zinkovo-uhlíkové) batérie a
akumulátory súčasne!
Pred začatím nabíjania vyberte batérie z hračky!
Batérie je možné nabíjať len pod dohľadom dospelej osoby!
DE - Achtung!
Lassen Sie dem Modell nach jedem Einsatz genügend Zeit um abzukühlen bevor Sie
es wieder in Betrieb nehmen. Beim Austausch der Batterien muss eine Abkühlphase
von mindestens 10 Minuten eingehalten werden bis das Modell wieder betrieben wird.
Bei Überhitzung kann Beschädigung der Elektronik oder Brandgefahr die Folge sein.
GB - Attention!
Let the model cool o󰀨 su󰀩ciently after each use before putting it back into operation.
Let the model cool o󰀨 su󰀩 ciently after each use before putting it back into operation.
When changing batteries there has to be a cooling phase of at least 10 min before model
can be operated again. Overheating can damage the electronics or may result in re.
FR - Attention!
Après chaque utilisation, avant de remettre le modèle en marche, laissez-le su󰀩 sam-
ment le temps de refroidir. Lors du changement des piles, une phase de refroidissement
de 10 minutes doit être respectée jusqu´á que votre modèle soit de exploité. En cas
de surchau󰀨e, les composants électroniques peuvent être endommagés ou un risque
d´incendie peut survenir.
IT - Attenzione!
Lasciate che il modello dopo ogni utilizzo il tempo su󰀩 ciente per ra󰀨reddarsi prima di
rimetterlo in funzione. Durante la sostituzione delle batterie deve essere rispettata un
periodo di ra󰀨reddamento di almeno 10 minuti  no a quando il modello viene nuova-
mente azionato. Il surriscaldamento può danneggiare l’elettronica o pericolo d’incendio
possono esssere le conseguenze.
ES - ¡Atención!
Deje que el modelo después de cada uso el tiempo su ciente para enfriarse antes
de volver a ponerlo en funcionamiento. Al sustituir las baterías debe ser respetada un
período de enfriamiento de al menos 10 minutos hasta que se hace funcionar de nue-
vo el modelo. El sobrecalentamiento puede dañar la electrónica o peligro de incendio
puden ser la consecuencia.
CZ-Upozornění!
Po každém použití chvíli počkejte. Během této doby se model ochladí a bude připraven
k dalšímu použití. Po výměně baterie a před opětovným spuštěním modelu, zachovejte
nejméně jeden chladicí cyklus trvající min. 10 minut. Přehřátí může způsobit poškození
elektroniky nebo nebezpečí požáru.
PL - Achtung!
Po każdym użyciu należy chwilę odczekać. W tym czasie model schłodzi się i będzie
gotowy do kolejnego użycia. Po wymianie baterii i przed ponownym uruchomieniem
modelu należy zachować co najmniej jeden cykl chłodzenia trwający min. 10 minut.
Przegrzanie może spowodować uszkodzenie elektroniki lub zagrożenie pożarowe.
NL - Let op!
Wacht een tijdje na elk gebruik. Gedurende deze tijd zal het model afkoelen en wordt
klaar voor het volgende gebruik. Voordat het model opnieuw wordt gestart, houd mins-
tens één koelfase van 10 minuten. Oververhitting kan schade aan de elektronica of
brand veroorzaken.
SK - Upozornenie!
Po každom použití je potrebné chvíľu počkať. Počas tejto doby sa model ochladí a bude
pripravený na ďalšie použitie. Po výmene batérie a pred opätovným uvedením modelu
do prevádzky, je potrebné zachovať priebeh aspoň jedného chladiaceho cyklu, trvajúce-
ho min. 10 minút. Prehriatie môže spôsobiť poškodenie elektroniky
OFFON
1 1.1
OFF ON
OFF ON
1.2 1.3
DE
1. ON/OFF | Binden
Schalten Sie den Sender (1) und dann den Truck (1.1) und
den Auieger (1.2) ein. Die Scheinwerfer beginnen zu
blinken. Drücken Sie nun die jeweilige Bindetaste (1.3;
 A=Truck,B=Auieger). Die Scheinwerfer am Truck bzw.
Auieger erlöschen.
GB
1. ON/ OFF | Binding
Switch on the transmitter (1), then the truck (1.1) and the
trailer (1.2). The headlights start to ash. Press the
respective binding button (1.3; A = Truck, B = Trailer). The
headlights on the truck or trailer switch o󰀨.
FR
1. ON/OFF | Synchroniser
Allumez la radiocommande (1), puis le camion (1.1) et la
remorque (1.2). Les phares commencent à clignoter.
Appuyez sur les touches respectives de synchronisation.
(1.3 ; A = Camion, B= Remorque). Les phares du camion ou
de la remorque s´éteignent.
IT
1. ON/OFF | Binding
Accendere la radio (1) poi il Truck (1.1) e il rimorchio (1:2).
I fari iniziano a lampeggiare. Ora premere il pulsante
relativo di binding (1.3; A = Truck, B= Rimorchio). I fari sul
Truck ossia rimorchio si spengono.
ES
1. ON/OFF | Binding
Encender la emisora (1) luego el Truck (1.1) y el remolque
(1.2). Los faros empiezan a parpadear. Ahora pulse el botón
respectivo de binding (1.3; A = Truck, B= Remolque). Los
faros en el Truck o remolque se apagan.
CZ
1. ON/ OFF | Vazba
Zapnout vysílač (1), pak vůz (1.1) a přívěs (1.2). Reektory
začínají blikat. Stiskněte příslušné tlačítko vazby (1.3;
 A=Truck,B=Přívěs).Reektory na vozíku nebo
přívěsu se vypnou.
PL
1. ON/OFF|Wiązania
Włączanie nadajnika (1), następnie ciężarówka (1.1) i przy
czepy (1.2). Reektory zaczynają migać. Naciśnij
odpowiedni przyciskwiązania(1.3A=Ciężarówka,
B = Trailer). Reektory na ciężarówcelub przyczepie
wyłączą się.
NL
1. AAN/UIT | Koppeling
Schakel de zender (1) aan en vervolgens de vrachtwagen
(1.1) en de aanhanger (1. 2 ). Nu knipperen de koplampen.
Druk nu op de juiste koppelingsknop (1.3; A = vrachtwagen,
B= aanhanger). Nu gaat de koplamp op de vrachtwagen of
aanhanger uit.
SK
1. ZAP./VYP.|Pripojenie
Zapnite vysielač (1) , a následne nákladné auto (1.1) a príves
(1. 2 ). V tomto momente reektory začínajú blikať. Ďalej je
potrebné stlačiť príslušné zapínacie tlačidlo (1.3; A = nákladi
 ak,B=príves). Reektory v nákladiaku alebo prívese
zhasínajú.
AB
6
2
DE
3. Vorwärts/rückwärts
Drücken Sie den Gashebel nach vorne oder zurück, wird das
Modell vorwärts bzw. rückwärts fahren, dabei leuchten die
Scheinwerfer.
GB
3. Forward/Reverse
Push the throttle stick forward or backward, the model will
drive forward or backward and the headlights will light up.
FR
3. Avant/arrière
Poussez le levier du gaz vers l‘avant ou vers l’arrière et le
modèle fera une marche avant ou une marche arriére.
Pendant que le véhicule avance, les phares s’allument.
IT
3. Avanti/indietro
Spingere l‘acceleratore in avanti o indietro e il modello andrà
avanti o indietro, mentre questo manovra i fari sono accesi.
ES
3. Adelante/atrás
Primer la palanca de gas hacia adelante o hacia atrás, el
modelo seguirá adelante o hacia atrás y los faros brillan.
CZ
3. Vpřed/zpět
Zatlačte páku plynu dopředu nebo dozadu, model se bude
pohybovat dopředu nebo dozadu a přitom budou svítit
světlomety.
PL
3. Doprzodu/dotyłu
Naciśnięcie dźwigni gazu do przodu lub do tyłu spowoduje,
że model poruszy się do przodu lub do tyłu z zapalonymi
światłami.
NL
3. Vooruit / achteruit
Zet het gashendel naar voren of naar achteren, het model zal
vooruit of achteruit rijden. De koplichten branden.
SK
3. Vpred / vzad
Ak budete ťahať za páku dopredu alebo plyn späť, bude
model pohybovať dopredu späť, a to zapne lampu.
DE
4. Links bzw. Rechts abbiegen
Drücken Sie den Gashebel vor bzw. zurück und den
Richtungshebel nach links oder rechts, biegt das Modell
vorwärts bzw. rückwärts nach links oder rechts ab.
GB
4. Turn left /right
If you push the throttle stick forward or backward and the
direction stick to the left or right, the model will drive forward
or backward to the left or right.
FR
4. Tourner à gauche ou à droite
Poussez la manette du gaz vers l‘avant ou vers l’arrière en
n’oubliant pas d’actionner le levier de direction vers la droite
ou vers la gauche. Le véhicule va prendre la direction
commandée.
IT
4. Girare a sinistra o destra
Se si tiene premuto l‘acceleratore, in avanti o indietro e la
leva di direzione a sinistra o a destra, il modello gira a destra
o sinistra.
ES
4. Giro a la izquierda o derecha
Primer la palanca de gas hacia adelante o atrás y la palanca
de dirección hacia izquierda o derecha, el modelo se gira
adelante o atrás hacia izquierda o drecha.
CZ
4. Odbočitvlevonebovpravo
Zatlačte páku plynu dopředu nebo dozadu a směrovou páku
doleva nebo doprava, mixér betonu pojede dopředu nebo
dozadu, doleva nebo doprava.
PL
4. Skręcaniewlewolubwprawo
Naciśnięcie dźwigni gazu do przodu lub do tyłu oraz dźwigni
kierunkowej w lewo lub w prawo spowoduje, że model skręci
do przodu lub do tyłu bądź w lewo lub w prawo.
NL
4. Linksaf of rechtsaf
Zet het gashendel naar voren of naar achteren en het hendel
links of rechts dan rijdt het model linksaf / rechtsaf naar voren
of naar achteren.
SK
4. Ohýbaniedoľavaalebodoprava
Pre pohyb miešačky na betón dopredu, dozadu, doľava
alebo doprava, potiahnutím páčky plyn dopredu alebo
dozadu, a rukoväť pre nastavenie doľava alebo doprava.
3
DE - Bedienung
GB - Operation
FR - Fonctionnement
IT - Funzionamento
ES - Funcionamiento
CZ - Obsluha
PL-Obsługa
NL - Bewerking
SK - Operácie
44.2
DE
4. Ankoppeln / Abkoppen
Starten Sie den Truck. Drücken Sie die obere linke Taste (A)
solange bis sich die Verriegelung der Haltebolzenaufnahme
geö󰀨net hat (4.1).Steuern Sie den Truck rückwärts an den
Auieger (4.2) bis der Haltebolzen an der Auiegerunterseite
in der Haltebolzenaufnahme ist. Durch Drücken der oberen
rechten Taste (B) verriegeln Sie die Haltebolzenaufnahme
(4.3).
GB
4. Coupling/ decoupling
Start the truck. Press the upper left button (A) until the
locking bolt has opened (4.1). Steer the truck backwards to
the trailer (4.2) until the locking bolt on the bottom side of
the trailer is in the holding position. Press the upper right
button (B) to lock the pin (4.3).
FR
4. Accouplement / Désaccouplement
Allumez le camion. Appuyez sur la touche en haut à gauche
(A) jusqu´á que le logement de boulon soit déverrouillé (4.1).
Guidez le camion en marche arrière à la remorque (4.2)
jusqu´à que le boulon de xation sur le dessus de la
remorque soit placer sur la tige de maintien. En appuyant
sur la touche supérieure droite (B), le logement de boulon de
xation sera verrouillé (4.3).
IT
4. Accoppiamento /Disaccoppiamento
Avviare il Truck. Premere il pulsante in alto a sinistra (A) no
a quando si apre la serratura del perno di ssaggio (4.1).
Manovrare il Truck verso indietro al rimorchio (4.2) no a
quando il perno di ssaggio e sul fondo del rimorchio nel
supporto del perno di ssaggio. Premendo il pulsante in alto
a destra (B) si blocca il supporto del perno di ssaggio (4.3).
ES
4. Acoplamiento / Desacoplamiento
Iniciar el Truck. Pulse el botón izquierdo superior (A) hasta
que se abre la cerradura del perno de jación (4.1).
Maniobrar el Truck hacia atrás al remolque (4.2) hasta que el
perno de jación en la parte inferior del remolque está en el
soporte del perno de jación. Al pulsar el botón superior
derecho (B) se bloque el soporte del perno de jación (4.3).
CZ
4. Připojení/odpojení
Zapněte vozidlo. Stiskněte horní levé tlačítko (A), až se
spojo vací hák uvolní (4.1). Posuňte vozidlo směrem k
návěsu dozadu (4.2), až bude spojovací hák na zadní části
návěsu ve spojovací poloze. Stiskněte horní pravé tlačítko
(B) pro zamknutí pojistky (4.3).
PL
4. Sprzęganie/rozsprzęganie
Uruchomić ciężarówkę. Wciskać górny lewy przycisk (A)
do momentu otwarcia śruby blokującej (4.1). Przesunąć
ciężarówkę tyłem do przyczepy (4.2) do momentu, aż śruba
blokująca na dole przyczepy znajdzie się w pozycji
gotowości. Wciskać górny prawy przycisk (B) w celu
zablokowania sworznia (4.3).
NL
4. Aankoppelen/loskoppelen
Zet de vrachtwagen aan. Druk op de knop linksboven (A) tot
de vergrendeling van de borgpenhouder (4.1) opengaat. Rij
de achterkant van de vrachtwagen tegen de aanhanger (4.2)
tot de borgpen aan de onderkant van de aanhanger in de
bus van de borgpen zit. Door op de bovenste rechter knop
(B) te drukken, wordt de vergrendelingspen (4.3)
vergrendeld.
SK
4. Spájanie/odpájanie
Zapnite nákladiak. Stláčajte ľavé horné tlačidlo (A) do
momentu, až kým sa odblokuje úchyt istiaceho čapu (4.1).
Podíďte zadnou časťou nákladiaka k prívesu (4.2) do
momentu, až sa istiaci čap na spodku prívesu objaví
v zasúvacej časti istiaceho čapu. Stlačením pravého
horného tlačidla (B) spôsobíte zablokovanie úchyt
blokujúceho čapu (4.3).
AB
4.1 4.3
ungesichert
unsecured
sans bloquée
non assicurato
sin protegido
nezabezpečenou
niezabezpieczonych
gesichert
secured
bloquée
assicurato
protegido
zajištěné
zabezpieczone
7
DE - Bedienung
GB - Operation
FR - Fonctionnement
IT - Funzionamento
ES - Funcionamiento
CZ - Obsluha
PL-Obsługa
NL - Bewerking
SK - Operácie
DE
5.Abstützung▲hoch/▼runter
Zum Fahren mit dem Auieger müssen die Abstützungen
hochgefahren sein. Dazu drücken Sie die linke Taste solange
nach oben (▲)bis die Abstützungen ganz eingefahren sind.
Drücken Sie die Taste nach unten (▼) bis die Abstützungen
ausgefahren sind.
GB
5.Support▲up/▼down
The braces must be raised to drive with the trailer. To do so,
press the left button upwards (▲) until the supports are fully
retracted. Press the button down (▼) until the supports are
extended.
FR
5.Soutien▲haut/▼bas
Pour conduire le camion avec la remorque, les stabilisateurs
doivent être montés. Il su󰀩t pour ce faire de faire un appui
long de la touche gauche, vers le haut (▲) jusqu´á que les
stabilisateurs soient complétement rétractés.Appuyez sur la
touche vers le bas (▼) pour faire poser les stabilisateurs
IT
5.Supporto▲su/▼giù
Per la guida con il rimorchio devono essere saliti i supporti.
Basta premere il pulsante a sinistra verso l´alto(▲)nché i
supporti sono completamente rientrati. Premere il tasto verso
il basso (▼) no a quando i supporti sono estesi.
ES
5. Soporte▲arriba/▼abajo
Para conducir con el remolque, los soporte se deben subir.
Sólo tiene que pulsar el botón izquierdo hacia arriba (▲)
hasta que los soportes estén completamente retraídos.
Presione el botón hacia abajo (▼) hasta que los soportes
estén extendidos.
CZ
5.Ovládánípodpěr▲nahoru/▼dolů
Zvedáky musí být zdviženy, aby mohly být řízeny návěsem.
Abyste toto provedli, stiskněte tlačítko nahoru, (▲) dokud se
podpěry plně ne vysunou. Stiskněte tlačítko dolu (▼), dokud
se podpěry plně nezasunou.
PL
5. Podpora▲wgórę/▼Bwdół
Aby można było jeździć przyczepą należy podnieść jej
podpory. W tym celu należy naciskać lewy przycisk „w górę”
(▲) do momentu, aż podpory zostaną całkowicie wciągnięte.
Wciskać przycisk „w dół” (▼) do momentu, aż podpory
zostaną wysunięte.
NL
5.Steunstukken▲omhoog/▼omlaag
Het is alleen mogelijk met de aanhangwagen te rijden
wanneer de steunen zijn ingetrokken. Hiervoor de linker
knop omhoog (▲) drukken tot de steunen volledig zijn
ingetrokken. Druk de toets omlaag (▼) tot de steunen
worden uitgeschoven.
SK
5.Podpery▲hore/▼dole
Jazda prívesom je možná len po vsunutí podper. Pre tento
účel je potrebné stláčať ľavé tlačidlo nahor (▲) do momentu,
až kým sa podpery úplne nasunú. Stláčajte tlačidlo nadol (▼)
do chvíle, až kým sa podpery vysunú.
▲
5
▲
DE
6. Geschwindigkeit
Drücken Sie die Geschwindigkeit-Taste, das Modell kommt
in den Turbo-Modus und fährt aggressiver. Durch erneutes
drücken der Taste, kommt das Modell in den Normalmodus
zurück.
7. Hupe/Sound abschalten
Durch drücken der Hupe ertönt ein realistischer LKW-Hup-
Ton. Durch längeres drücken der Hupe wird der Ton abge--
schaltet.
8. Motor aus
Wenn dem Modell länger als 50 Sek. keine Befehle
gesendet werden, schaltet sich das Modell automatisch aus
und muss neu gestartet werden. Drücken Sie hierfür die
jeweilige Bindetaste A=Truck,B=Auieger.
GB
6. Speed
Press the speed button, the model takes up speed and
moves more aggressively. By pressing the button again, the
model drives at a slow speed.
7. Horn/Soundo󰀨
By holding down the horn-button the sound will be switched
o󰀨. By pressing the button a realistic truck-horn sound will be
heard.
8. Engineo󰀨
If the model does not get any input within 50 sec., the model
turns o󰀨 automatically and must be restarted. Press the
respective binding button A = Truck, B = Trailer.
FR
6. Vitesse
Le modèle augmente son allure et roule plus agressivement
si vous faites la touche le bouton de vitesse. En appuyant à
nouveau sur le bouton, le modèle revient en mode normal.
7. Klaxon/Éteindre le klaxon
Si vous appuyez longtemps sur le klaxon, le son en est
coupé. En appuyant sur le klaxon, vous entendrez le son
réaliste d’un klaxon de camion.
8. Moteur coupé
Si vous n’envoyez plus d’ordre pendant plus de 50
secondes, le véhicule s’éteint automatiquement et il faudra le
redémarrer. Appuyez sur les touches respectives de
synchronisation. A = Camion, B= Remorque
IT
6. Velocità
Premere il tasto velocità, la modello prende velocità e guida
aggressiva. Premendo di nuovo il tasto, la modello va in una
bassa velocità.
7. Clacson/Spegnim. suono
Premendo per un tempo prolungato il clacson si spegne il
suono. Premendo il clacson, si sente un suono realistico di
clacson da camion.
8. Spegnimento motore
Se il motore non riceve comandi per più di 50 secondi, si
spegne automaticamente e deve essere riavviato.Ora
premere il pulsante relativo di binding A = Truck,
B= Rimorchio.
ES
6. Velocidad
Pulse el botón velocidad, el modelo leva la veloidad y
conduce agresivo. Pulsando de nuevo el botón, el coche va
en una velocidad lenta.
7. Claxon/Apagar el sonido
A través de primer más el claxon se apaga el tono. Al pulsar
el claxon suena un sonido realista
8. Motor apagado
Si no le vas a dar mas de 50 segundos nigun comandos, el
modelo se apaga en automáticamente y se debe reiniciar.
Ahora pulse el botón respectivo de binding A = Truck,
B= Remolque
CZ
6. Rychlost
Stiskněte tlačítko rychlosti a model se bude pohybovat
rychleji a agresivněji. Pokud tlačítko stisknete znovu, bude
se pohybovat opět pomalou rychlostí.
7. Houkačka|Vypnutízvuku
Stlačením houkačky zazní realistický zvuk houkačky
náklaďáku. Delším podržením houkačky se zvuk vypne.
8. Vypnutímotoru
Pokud se modelu déle jak 50 sekund nevyšle žádný příkaz,
model se automaticky vypne a musí se znovu nastartovat.
Stiskněte příslušné vázací tlačítko A = Truck, B = Trailer.
PL
6. Prędkość
Po wciśnięciu przycisku prędkości model zacznie
przyspieszać i poruszać się bardziej agresywnie. Ponowne
wciśnięcie przycisku spowoduje, że model zwolni.
7. Klakson|Wyłączaniedźwięków
Po wciśnięciu klaksonu zabrzmi realistyczny dźwięk
klaksonu ciężarówki. Dłuższe wciśnięcie klaksonu
spowoduje wyłączenie dźwięku.
8. Wyłączaniesilnika
Jeżeli przez okres dłuższy niż 50 sek. model nie otrzyma
żadnych poleceń, wtedy wyłączy się automatycznie i musi
zostać uruchomiony ponownie. Naciśnij odpo wiedni
przycisk wiązaniaA=ciężarówka,B=przyczepa.
NL
6. Snelheid
Nadat de snelheidsknop is ingedrukt, schakelt het model
naar de turbomodus over en rijdt het agressiever. Door
opnieuw op deze toets te drukken, keert het model naar de
normale rijmodus terug.
7. Claxon/geluid uitschakelen
Wanneer op de claxon is gedrukt, klinkt een realistisch
claxongeluid. Door langer de claxontoets ingedrukt te
houden, wordt het geluid uitgeschakeld.
8. Motor uitzetten
Wanneer het model gedurende meer dan 50 seconden
geen opdracht ontvangt, wordt het automatisch
uitgeschakeld en moet het opnieuw worden opgestart. Druk
hiervoor op de juiste koppelingsknop
(A = vrachtwagen, B= aanhanger).
SK
6. Rýchlosť
Po stlačení rýchlostného tlačidla, vchádza model do režimu
turbo a jazdí agresívnejšie. Opätovné stlačenie tohto tlačidla
spôsobí návrat modelu do normálneho jazdného režimu.
7. Vypínanieklaksónu/zvuku
Po stlačení klaksónu zaznie realistický zvuk klaksónu
nákladného auta. Dlhšie stlačenie klaksónu spôsobí vypnutie
zvuku.
8. Vypínaniemotora
Ak model počas doby viac než 50 sek. nedostane žiadne
pokyny, tak sa vypne automaticky a musí sa spustiť znovu.
Na tento účel je potrebné stlačiť príslušné zapínacie tlačidlo
A=nákladiak,B=príves.
6 7 8
A B
8
DE - Sicherheitsmaßnahmen
GB - Safety Notes
FR - Consignes de sécurités
IT - Precauzioni
ES - Recomendaciones de seguridad
CZ -Bezpečnostníopatření
PL -Środkibezpieczeństwa
NL - Veiligheidsmiddelen
SK-Bezpečnostnéopatrenia
DE - Halten Sie Ihre Hände von
beweglichen Teilen fern.
GB - Keep hands away from moving parts.
FR - Garder vos mains hors de portées
des pièces mobiles.
IT - Tenere le mani lontane dalle parti
in movimento.
ES - Mantenga las manos alejadas de
las piezas móviles.
CZ - Držte se v bezpečné vzdálenosti
od pohybujících se částí modelu.
PL - Nie dotykać ruchomych części
NL - Houd uw handen uit de buurt van
bewegende delen.
SK - Nedotýkajte sa pohyblivých častí.
DE - Benutzung nur unter unmittelbarer
Aufsicht von Erwachsenen.
GB - Use only under direct supervision
of an adult!
FR - Utiliser uniquement sous la
surveillance d’un adulte!
IT - Utilizzare solo sotto la diretta
sorveglianza di un adulto!
ES - Usado bajo la supervisión directa
de un adulto!
CZ - Použití jen pod přímým dozorem
dospělých.
PL - Użytkowanie tylko pod bezpośrednim
nadzorem osób dorosłych.
NL - Gebruiken enkel onder direct
toezicht van een volwassene.
SK - Použitie iba pod priamym
dohľadom dospelej osoby.
DE - Sind die Batterien leer, wechseln
Sie sie aus.
GB - The batteries are nearly, replace
the batteries.
FR - Si ce les piles sont vides, changez
ceux-ci.
IT - Controllare il stato delle batterie,
potrebbero esserescariche.
ES - Las pilas estarán agotadas, sustituya las
pilas por otras nuevas.
CZ - Pokud jsou baterie prázdné, vyměňte je.
PL - Jeśli baterie są wyczerpane, to
należy je wymienić.
NL - Indien de batterijen leeg zijn,
moeten deze worden vervangen.
SK - Ak sú batérie vybité, musia byť
vymenené.
DE - Auf Polarität achten!
GB - Pay attention to the polarity!
FR - Prêter attention aux la polarité!
IT - Prestare attenzione alla polarità!
ES - Preste atención a la polaridad!
CZ - Dbejte na polaritu!
PL - Należy zwrócić uwagę na biegunowość!
NL - Op de polariteit letten!
SK - Dávajte pozor na polaritu!

X
DE - Auf die Frequenzen in Ihrem
Umfeld achten!
GB - Pay attention to the frequencies in
your environment!
FR - Faites attention aux fréquences
dans votre environnement!
IT - Prestare attenzione alle frequenze
nel proprio ambiente!
ES - Preste atención a las frecuencias
en su entorno!
CZ - Dávejte pozor na frekvence ve
vašem okolí!
PL - Należy zwrócić uwagę na
częstotliwości w waszym
otoczeniu!
NL - Op de frequentie in de omgeving
letten!
SK - Dávajte pozor na frekvenciu vo
vašom prostredí!
DE - Betreiben Sie das Modell nicht bei
Regen, Schnee, Nässe oder Sand.
GB - Do not drive in rain, snow, wetness
or sand.
FR - Ne pas conduire sous la pluie, la
neige, humidité ou sable.
IT - Non guidare sotto la pioggia, neve,
umidità o sabbia.
ES - No conduzca bajo la lluvia, la
nieve, humedad o arena.
CZ - Nepoužívejte model za deště,
sněhu, mokra nebo v písku.
PL - Nie należy korzystać z modelu na
deszczu, na śniegu, na mokrej
powierzchni oraz na piasku.
NL - Het model mag niet worden
gebruikt in de regen, sneeuw en op
natte grond of zandgrond.
SK - Nepoužívajte model v daždi, v
snehu, na mokrom povrchu a
piesku. de regen, sneeuw en op
natte grond of zandgrond.
DE - Nicht auf befahrenen Straßen und
Plätzen fahren.
GB - Never drive on roads or areas used
by real vehicles.
FR - Ne roulez jamais sur la voie
publique ou des endroits
fréquentés.
IT - Non giocare sulle strade comuni.
ES - No utilice en calles o plazas
transitadas.
CZ - Nejezděte na rušných ulicích a
místech.
PL - Nie należy jeździć na ulicach i
placach (z ruchem drogowym).
NL - Niet op drukke straten en pleinen
rijden.
SK - Nejazdite na uliciach a námestiach
(s prevádzkou).
DE - Fahren Sie nie außerhalb der
Reichweite Ihrer Fernsteuerung
GB - Never run out of the reach of your
remote control.
FR Laissez jamais celle-ci sortir de la
portée de votre émetteur.
IT - Non utilizzare il modello fuori la
portata della trasmittente.
ES - No conduzca más allá del alcance
de su emisora.
CZ - Vždy mějte model v dohledu a
nedovolte, aby došlo ke ztrátě
signálu.
PL - Nigdy nie należy jeździć poza
zasięgiem pilota zdalnego
sterowania
NL - Niet buiten het bereik van de
afstandsbediening rijden
SK - Nikdy nejazdite mimo dosah
diaľkového ovládania.
X X X X
DE - Nicht direkter Sonnenbestrahlung
oder Wärme aussetzen.
GB - Do not leave in very strong
sunlight.
FR - N‘exposez jamais votre modèle
directement aux rayons du soleil.
IT - Non disporre il modello sotto il sole
oppure nel caldo.
ES - No exonga el modelo a los rayos
solares directos o fuentes de calor.
CZ - Pryč od přímého slunečního záření
nebo tepla vystavit.
PL - Z dala od bezpośredniego światła
słonecznego lub ciepła wystawiać.
NL - Niet blootstellen aan direct zonlicht
of hitte
SK - Vyhýbate sa priamemu slnečnému
žiareniu alebo teplu.
DE - Verschmutzungen mit einem
feuchten Tuch entfernen.
GB - Clean by using a damp cloth.
FR - Essuyez la boue avec un tissu hu
mide.
IT - l‘inquinamento possono essere
rimossi con un panno umido.
ES - Polución se puede eliminar con un
paño húmedo.
CZ - Znečištění odstraňujte vlhkým
hadříkem.
PL - Zanieczyszcenia należy usuwać a
pomocą wilgotnej ściereczki.
NL - Verontreinigingen moeten worden
verwijderd met een vochtige doek.
SK - Znečistenia by mali byť odstránené
vlhkou handričkou.
DE - Batterien/Akku niemals im Modell
lagern.
GB - Store batteries/battery packs
separately when not in use.
FR - La piles/accu ne doit jamais être
stockée dans la modèle.
IT - Conservare le batterie/
accumulatore separatamente
quando non sono in uso.
ES - Sacar siempre las batería/
acumulador y guárdarlo por
separado.
CZ - Baterie/Akumulátory nikdy
neskladujte v modelu.
PL - Nigdy nie należy przechowywać
baterii/akumulatorów w modelu.
NL - Batterijen/ accu`s niet in het model
bewaren.
SK - Nikdy nenechávajte akumulátor/
batériu v modeli..
9
DE - Entsorgungshinweise
Batterien und Akkumulatoren dürfen nicht im Hausmüll entsorgt werden sondern müs-
sen getrennt entsorgt werden. Sie sind verpichtet, Altbatterien der fachgerechten
Entsorgung (getrennte Sammlung) zuzuführen. Nach Gebrauch können Sie Batterien
unentgeltlich im Handelsgeschäft zurückgeben. Nachdem Batterien Sto󰀨e enthalten,
die reizend wirken, Allergien auslösen können oder hochreaktiv sind, ist die getrennte
Sammlung und ordnungsgemäße Verwertung wichtig für die Umwelt und Ihre Gesundheit. Sofern
die Batterien unterhalb der durchgestrichenen Abfalltonne auf Rädern mit einem chemischen Zei-
chen Hg, Cd oder Pb gekennzeichnet ist, bedeutet dies, dass diese mehr als 0,0005 % Quecksilber
(Hg), mehr als 0,002 % Cadmium (Cd) oder mehr als 0,004 % Blei (Pb) enthält.
GB - Disposal restrictions
Batteries and accumulators must not be disposed of in domestic waste. You are obliged to dispose
of batteries (seperate collection) appropriately. After use you can return batteries free of charge to
the retail store. As batteries contain substances that can be irritant, can cause allergy and are highly
reactive, separate collections and proper recycling is important to the environment and to your
health. If the batteries are marked with a chemical symbol Hg, Cd or Pb below the crossed-out waste
bin on wheels it refers to that more than 0.0005% of mercury (Hg), more than 0.002% of cadmium
(Cd) or more than 0.004% Lead (Pb) is included.
FR - Consignes de recyclage
Les piles et les accumulateurs ne doivent strictement pas être jetés avec les ordures ménagères,
mais doivent être jetés séparément. Vous êtes tenues de déposer vos piles usagés dans les cen-
tres communaux de collecte (collecte sélective). Après tout utilisation, vous avez la possibilité de
retourner vos piles gratuitement chez des commerçants. Dès lors que les piles contiennent des
substances qui peuvent causés des irritations et pouvant provoquer des allergies, il est recom-
mandé d´e󰀨ectuer la collecte et le recyclage comme recommandé, ce qui est très important pour
l´environnement et votre santé. Dans la mesure où vous visualiser un symbole de poubelle avec
roulettes et une croix, mis en évidence avec un symbole chimique Hg, Cd ou Pb, cela signie que
ces piles contiennent plus de 0,0005% de mercure (Hg), plus de plus de 0,002% de cadmium
(Cd),ou plus de 0,004% de plomb (Pb).
IT - Istruzioni per lo smaltimento
Batterie e gli accumulatori non devono essere smaltiti nei riuti domestici, ma devono essere smal-
titi separatamente. Siete obbligati di eseguire lo smaltimento professionale delle batterie vecchie
(raccolta di󰀨erenziata). È possibile restituire le batterie dopo l’uso gratuitamente nelle attività com-
merciali. Dato che le batterie contengono delle sostanze, che provocano irritazione, possono cau-
sare allergie o sono altamente reattivi, la raccolta di󰀨erenziata e il riciclaggio sono importanti per
l’ambiente e la sua salute. Se le batterie, a disotto del “bidone a ruote cancellato” sono segnati con
un simbolo chimico Hg, Cd o Pb, signica che questi contengono più di 0,0005 % Mercurio (Hg), più
di 0,002 % Cadmio (Cd) o piu di 0,004 % Piombo (Pb).
ES - Notas sobre el reciclado
Baterías y acumuladores no deben desecharse en la basura doméstica, pero se deben desechar
de forma separada. Usted está obligado, a realizar la eliminación profesional de las baterías viejas
(recogida selectiva). Es posible devolver las baterías después de su uso de forma gratuita en las
actividades comerciales. Dado que las baterías contienen sustancias que causan irritación, pueden
causar alergias o son altamente reactivos, la recogida selectiva y el reciclaje son importantes para
el ambiente y su salud. Si las baterías, por debajo del “bidón con ruedas borrado” están marcados
con un símbolo químico, Hg, Cd o Pb, signica que contiene más de un 0,0005 % de Mercurio (Hg),
más de 0,002 % de Cadmio (Cd) o más de 0,004 % de Plomo (Pb).
CZ -Informacetýkajícíselikvidace
Baterie a akumulátory se nesmí vyhazovat spolu s komunálním odpadem, ale je nutné je likvidovat
zvlášť. Uživatel je povinen likvidovat použité baterie v souladu s předpisy (samostatný sběr
odpadů). Po použití je možné baterie zdarma odevzdat v obchodě. Baterie obsahují látky, které
působí dráždivě, mohou způsobit alergické reakce a jsou velmi reaktivní, proto je samostatný sběr
a využití v souladu s předpisy velmi důležité pro životní prostředí a Vaše zdraví. Pokud baterie, pod
přeškrtnutým odpadkovým košem na kolečkách, jsou označeny chemickým symbolem Hg, Cd nebo
Pb, to znamená, že obsahují více než 0,0005% rtuti (Hg), více než 0,002% kadmia (Cd) nebo více,
než 0,004 % olova.
PL-Informacjedotycząceutylizacji
Baterii i akumulatorów nie wolno wyrzucać z odpadami z gospodarstw domowych lecz należy
usuwać je oddzielnie. Użytkownik jest zobowiązany do usuwania zużytych baterii zgodnie z przepi-
sami (oddzielna zbiórka odpadów). Po zużyciu można zwrócić baterie nieodpłatnie w sklepie. Bate-
rie zawierają substancje które działają drażniąco, mogą wywoływać alergie i są wysoce reaktywne,
dlatego oddzielna ich zbiórka i ich wykorzystanie zgodnie z przepisami są ważne dla środowiska i
Państwa zdrowia. Jeżeli baterie, poniżej przekreślonego kosza na odpady na kółkach, oznaczone
są znakiem chemicznym Hg, Cd lub Pb, oznacza to, że zawierają one więcej niż 0,0005% rtęci (Hg),
więcej niż 0,002% kadmu (Cd) lub więcej niż 0,004% ołowiu.
NL - Informatie over recycling
Batterijen en accu‘s mogen niet bij het huishoudelijk afval worden weggegooid, maar moeten apart
worden afgevoerd. De gebruiker is verplicht om de gebruikte batterijen afvoeren in overeenstem-
ming met de regels (gescheiden inzameling van afval). Na gebruik kunnen de betterijen kosteloos
aan de winkel worden teruggegeven. De batterijen bevatten sto󰀨en die irriterend zijn, kunnen tot
allergieën leiden en zeer reactief zijn, daarom hun gescheiden inzameling en het gebruik ervan in
overeenstemming met de bepalingen zijn belangrijk voor het milieu en de gezondheid. Als de bat-
terijen op gekruiste afvalbak, zijn gemarkeerd met chemische teken Hg, Cd en Pb, betekent dat ze
meer dan 0,0005% kwik (Hg), meer dan 0,002% cadmium (Cd) of meer dan 0,004% lood bevatten.
SK -Informácietýkajúcesalikvidácie
Batérie a akumulátory sa nesmú vyhadzovať spolu s komunálnym odpadom, ale je nutné ich
likvidovať zvlášť. Užívateľ je povinný likvidovať použité batérie v súlade s predpismi (samostatný
zber odpadov). Po použití je možné batérie zadarmo odovzdať v obchode. Batérie obsahujú látky,
ktoré pôsobia dráždivo, môžu spôsobiť alergické reakcie a sú veľmi reaktívne, preto ich samostatný
zber a využitie v súlade s predpismi sú dôležité pre životné prostredie a Vaše zdravie. Ak batérie,
pod preškrtnutým odpadkovým košom na kolieskach, sú označené chemickou značkou Hg, Cd
alebo Pb, to znamená, že obsahujú viac ako 0,0005 % ortuti (Hg), viac, ako 0,002 % kadmia (Cd)
alebo viac, ako 0,004 % olova.
DE - Entsorgungshinweise
Elektrogeräte dürfen nicht im Hausmüll entsorgt werden, sondern müssen getrennt
entsorgt werden. Sie sind verpichtet, die Batterien – wenn möglich – herauszuneh-
men und das Elektroaltgerät bei den kommunalen Sammelstellen abzugeben. Sollten
sich personenbezogene Daten auf dem Elektroaltgerät benden, müssen diese von
Ihnen selbst entfernt werden.
GB - Disposal restrictions
Electrical appliances must not be disposed of in domestic waste and must be disposed of separately.
You are obliged to take out the batteries, if possible, and to dispose of the electrical equipment at
the communal collection points. Should personal data be stored on the electrical appliance you must
remove them by yourself.
FR - Consignes de recyclage
Les appareils électriques ne doivent strictement pas être jetés dans les ordures ménagères, mais
doivent être jetés séparément. Vous êtes tenues – dans la possibilité – de déposer vos piles et
appareils électriques dans les centres communaux de collectes. Si des informations personnelles
sont présents sur les appareils électriques, celles-ci doivent être retirés par vous-même avant tout
élimination du produit.
IT - Istruzioni per lo smaltimento
Apparecchi elettrici non devono essere smaltiti nei riuti domestici, ma devono essere smaltiti se-
paratamente. Siete obbligati di rimuovere le batterie e portare l´apparecchi elettrici vecchi ai punti di
raccolta comunali. Qualora ci sono dati personali sul apparecchio elettrico, devono essere rimossi
da voi stessi.
ES - Notas sobre el reciclado
Aparatos eléctricos no pueden desecharse en la basura doméstica, pero se deben desechar de
forma separada. Usted está obligado, a quitar las baterías y llevar los aparatos eléctricos viejos en
los puntos de recogida comunales. En caso de que hay datos personales en el aparato eléctrico se
deben remover de usted mismo:
CZ-Informacetýkajícíselikvidace
Elektrická zařízení se nesmí vyhazovat spolu s komunálním odpadem, ale musí být likvidována
zvlášť. Uživatel je povinen - pokud je to možné - odstranit baterii a odevzdat elektrické zařízení
do sběru odpadů. Pokud se na zařízení nacházejí osobní údaje, ty je nutné odstranit samostatně.
PL-Informacjedotycząceutylizacji
Urządzeń elektrycznych nie wolno wyrzucać ze śmieciami z gospodarstw domowych, lecz
należy usuwać je oddzielnie. Użytkownik jest zobowiązany– jeżeli jest to możliwe – do
wyciągnięcia baterii oraz do oddania urządzenia elektrycznego w komunalnym punkcie
zbiórki odpadów. Jeżeli na urządzeniu znajdują się dane osobowe, wtedy należy usunąć
je samodzielnie.
NL - Informatie over recycling
Elektrische apparatuur mag niet worden afgevoerd met het huishoudelijk afval, maar moet apart
worden afgevoerd. De gebruiker moet- indien mogelijk - om de accu,suit te haln en afgeven elekt-
rische apparaten bij stedelijk afvalverzamelpunt. Als het apparaat de persoonlijke gegevens bevat,
dan moet je ze zelf verwijderen.
SK-Informácietýkajúcesalikvidácie
Elektrické zariadenia sa nesmú vyhadzovať spolu s komunálnym odpadom, ale musia byť likvido-
vané
zvlášť. Užívateľ je povinný – ak je to možné – odstrániť batériu a odovzdať elektrické zariadenie
do zberu odpadov. Ak sa na zariadení nachádzajú osobné údaje, tie je nutné odstrániť samostatne.
10
DE - Servicehändler
GB - Service centre
FR - Revendeur de service
IT - Centro assistenza
ES - Servicio asistencia
CZ-Servisnípartner
PL - Partner serwisowy
NL - Servicecentrum
SK-Servisnýpartner
Reitter Modellbau Versand
Patricia Reitter
Degerfeldstrasse 11
72461 Albstadt
Tel 07432 9802700
Fax 07432 2009594
Mail [email protected]
Web www.modellbauversand.de
Modellbau-Zentral
Peter Hofer
Bresteneggstrasse 2
CH -6460 Altdorf,
Tel. +41 794296225
Fax +41 418700213
[email protected]
www.modellbau-zentral.ch
PenTec s.r.o.
distributor Jamara for Czech Republic and Slovakia
Veleslavínská 30/19
CZ -162 00 Praha 6
Tel +420 235 364 664
Mobil. +420 739 075 380
Mail servis@topdrony.cz
Web www.topdrony.cz
Bay-Tec
Martin Schaaf
Am Bahndamm 6
86650 Wemding
Tel 07151 5002192
Fax 07151 5002193
Mail [email protected]
Web www.bay-tec.de
DE DE
JAMARA e.K.
Manuel Natterer
Am Lauerbühl 5
DE-88317 Aichstetten
Tel +49 (0) 75 65/94 12-0
Fax +49 (0) 75 65/94 12-23
Mail [email protected]
Web www.jamara.com EU
CH CZ
11
JAMARA e.K.
Inh. Manuel Natterer
Am Lauerbühl 5 - DE-88317 Aichstetten
Tel. +49 (0) 75 65/94 12-0 - Fax +49 (0) 75 65/94 12-23
[email protected] ●www.jamara.com
Service - Tel. +49 (0) 75 65/94 12-777
kundenservice@ jamara.com
Irrtum und technische Änderungen vorbehalten. Copyright JAMARA e.K. 2021
Kopie und Nachdruck, auch auszugsweise, nur mit Genehmigung von JAMARA e. K.
All rights reserved. Copyright JAMARA e.K. 2021-
Copying or reproduction in whole or part, only with the expressed permission of JAMARA e.K.
Fordern Sie noch Heute den aktuellen Hauptkatalog mit
unserem gesamten Warensortiment an.
Name _______________________________
Vorname _______________________________
Straße _______________________________
Wohnort _______________________________
Telefon _______________________________
E-mail _______________________________
Bitte senden Sie den Katalog für mich an folgenden
Fachhändler:
Ihr Fachhändler
_______________________________________________
_______________________________________________
_______________________________________________
_______________________________________________
Der Katalog wird mit der nächsten Bestellung des Händ-
lers auf Ihren Namen mitgeliefert.
Order the current catalogue with our complete
assortment of modelling goods today.
Name _______________________________
First name _______________________________
Street _______________________________
City _______________________________
Phone _______________________________
E-mail _______________________________
Please send the catalogue to the following specialist
dealer:
Yourdealer
_______________________________________________
_______________________________________________
_______________________________________________
_______________________________________________
We will include a catalogue for your attention with the
next order placed by your dealer.
Gutschein Coupon

Other manuals for MB Arocs 2,4 GHz

2

This manual suits for next models

1

Other Jamara Motorized Toy Car manuals

Jamara Dakar User manual

Jamara

Jamara Dakar User manual

Jamara Robot Spaceman User manual

Jamara

Jamara Robot Spaceman User manual

Jamara 460447 User manual

Jamara

Jamara 460447 User manual

Jamara 404435 User manual

Jamara

Jamara 404435 User manual

Jamara Dakar EP 2,4 GHz User manual

Jamara

Jamara Dakar EP 2,4 GHz User manual

Jamara Cocoon EP RTR 2,4 GHz User manual

Jamara

Jamara Cocoon EP RTR 2,4 GHz User manual

Jamara Shiro EP RTR 2,4 GHz User manual

Jamara

Jamara Shiro EP RTR 2,4 GHz User manual

Jamara 404035 User manual

Jamara

Jamara 404035 User manual

Jamara Myron Monstertruck BL User manual

Jamara

Jamara Myron Monstertruck BL User manual

Jamara BMW M4 Coupe 2,4GHz User manual

Jamara

Jamara BMW M4 Coupe 2,4GHz User manual

Jamara VW Käfer User manual

Jamara

Jamara VW Käfer User manual

Jamara Ford GT 2,4GHz User manual

Jamara

Jamara Ford GT 2,4GHz User manual

Jamara BMW i8 User manual

Jamara

Jamara BMW i8 User manual

Jamara Mercedes-AMG GT R User manual

Jamara

Jamara Mercedes-AMG GT R User manual

Jamara Lamborghini Urus User manual

Jamara

Jamara Lamborghini Urus User manual

Jamara Mover Stuntcar User manual

Jamara

Jamara Mover Stuntcar User manual

Jamara Lamborghini Aventador SVJ 2,4GHz User manual

Jamara

Jamara Lamborghini Aventador SVJ 2,4GHz User manual

Jamara BMW M8 GTE User manual

Jamara

Jamara BMW M8 GTE User manual

Jamara Hillriser Crawler 2,4 GHz User manual

Jamara

Jamara Hillriser Crawler 2,4 GHz User manual

Jamara BMW i8 User manual

Jamara

Jamara BMW i8 User manual

Jamara Mercedes-AMG G63 User manual

Jamara

Jamara Mercedes-AMG G63 User manual

Jamara Protector User manual

Jamara

Jamara Protector User manual

Jamara Cocoon EP RTR 2,4 GHz User manual

Jamara

Jamara Cocoon EP RTR 2,4 GHz User manual

Jamara Power Drag Ride-On Traktor 12V User manual

Jamara

Jamara Power Drag Ride-On Traktor 12V User manual

Popular Motorized Toy Car manuals by other brands

Team C T8 manual

Team C

Team C T8 manual

Powerplus Marlin instruction manual

Powerplus

Powerplus Marlin instruction manual

Spinmaster Turbo 6023590 instructions

Spinmaster

Spinmaster Turbo 6023590 instructions

Spinmaster Meccano Erector SUPERCAR 25 IN 1 manual

Spinmaster

Spinmaster Meccano Erector SUPERCAR 25 IN 1 manual

CustomWorks INTIMIDATOR GSX2 manual

CustomWorks

CustomWorks INTIMIDATOR GSX2 manual

Funtek MT12 NEO user manual

Funtek

Funtek MT12 NEO user manual

SWorkz S350 BX1 Series instruction manual

SWorkz

SWorkz S350 BX1 Series instruction manual

KID Trax Mercedes ML 5F60AD7 owner's manual

KID Trax

KID Trax Mercedes ML 5F60AD7 owner's manual

Team C TC02C EVO instruction manual

Team C

Team C TC02C EVO instruction manual

HONEY JOY CHILDREN'S ELECTRONIC TOY ATV owner's manual

HONEY JOY

HONEY JOY CHILDREN'S ELECTRONIC TOY ATV owner's manual

protech megaMAX instruction manual

protech

protech megaMAX instruction manual

PLAYKIN FASTER instruction manual

PLAYKIN

PLAYKIN FASTER instruction manual

Carrera RC Mario Kart 8 Mario Assembly and operating instructions

Carrera RC

Carrera RC Mario Kart 8 Mario Assembly and operating instructions

Model Space Ford GT manual

Model Space

Model Space Ford GT manual

Coolster 250CC Series user manual

Coolster

Coolster 250CC Series user manual

HPI Racing Formula TEN instruction manual

HPI Racing

HPI Racing Formula TEN instruction manual

Hunter Products Motorized ZP8003 Service guide

Hunter Products

Hunter Products Motorized ZP8003 Service guide

Traxxas Slash 1:10 2WD RTR BL-2S manual

Traxxas

Traxxas Slash 1:10 2WD RTR BL-2S manual

manuals.online logo
manuals.online logoBrands
  • About & Mission
  • Contact us
  • Privacy Policy
  • Terms and Conditions

Copyright 2025 Manuals.Online. All Rights Reserved.