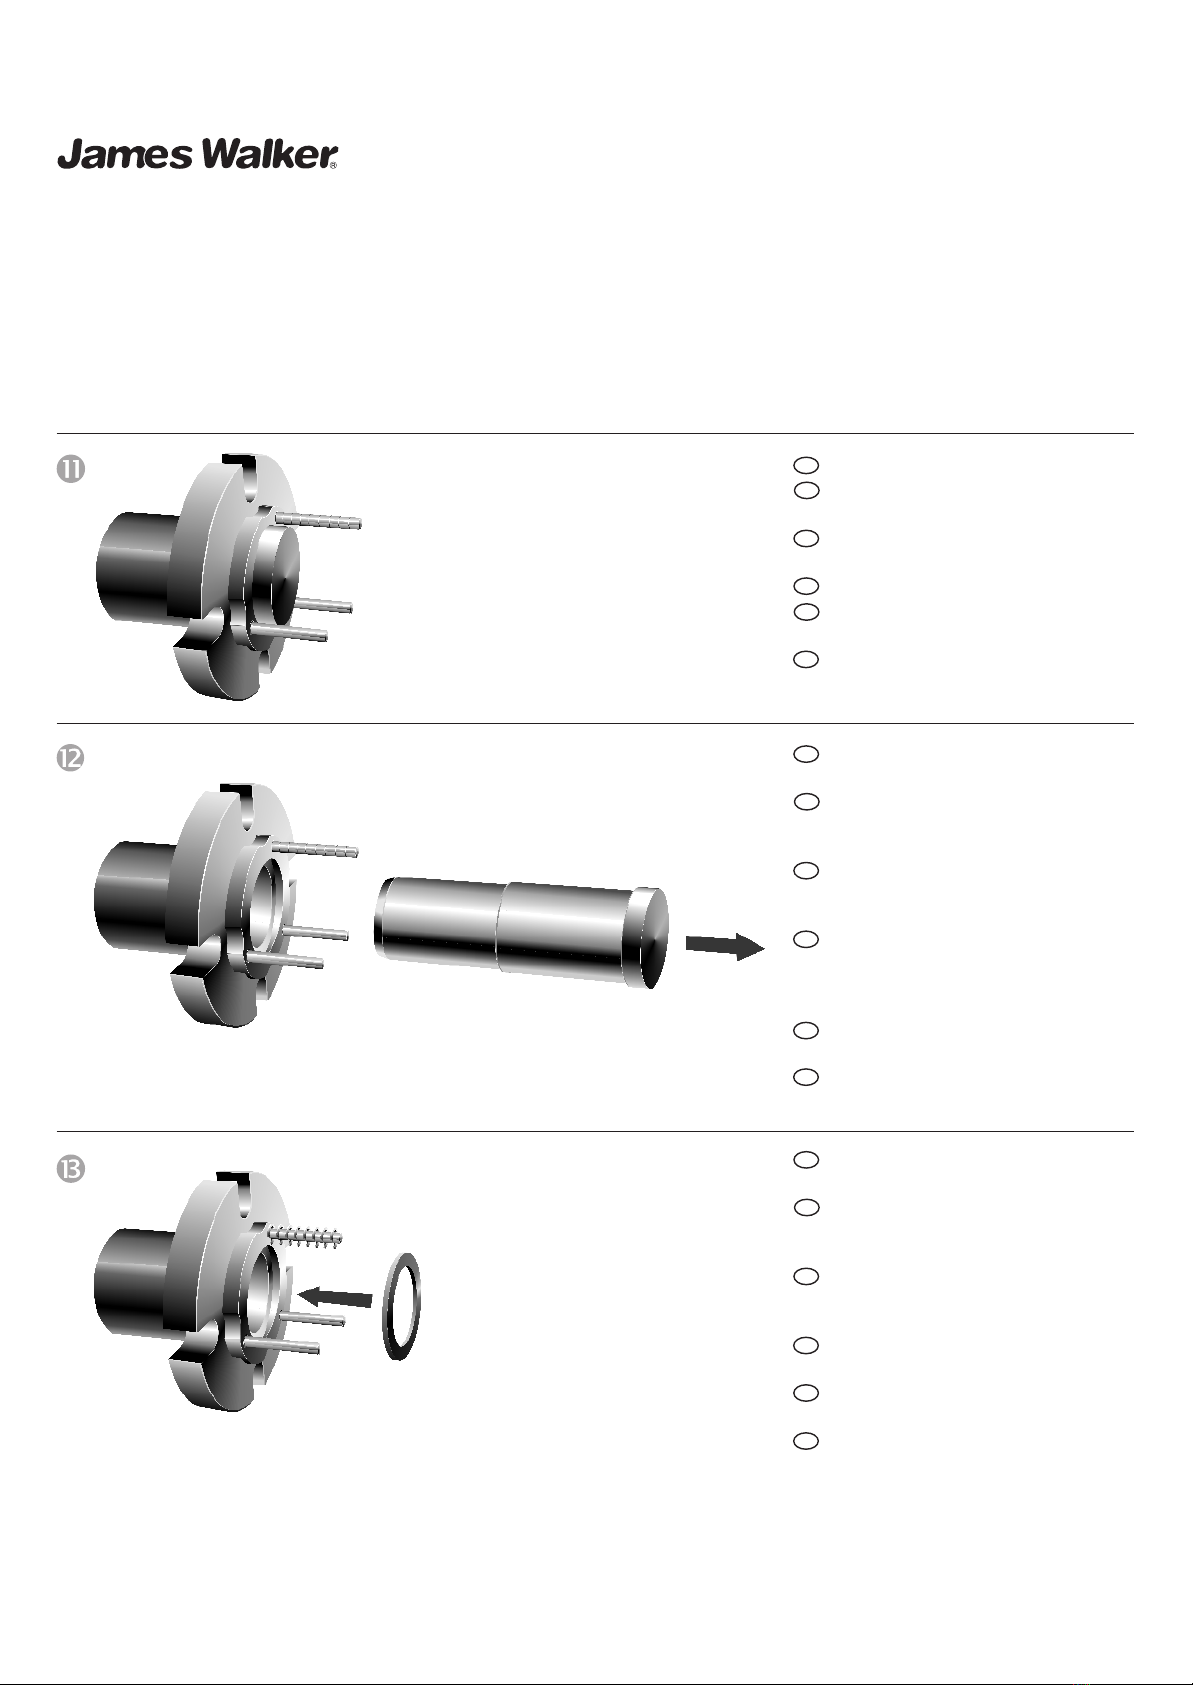
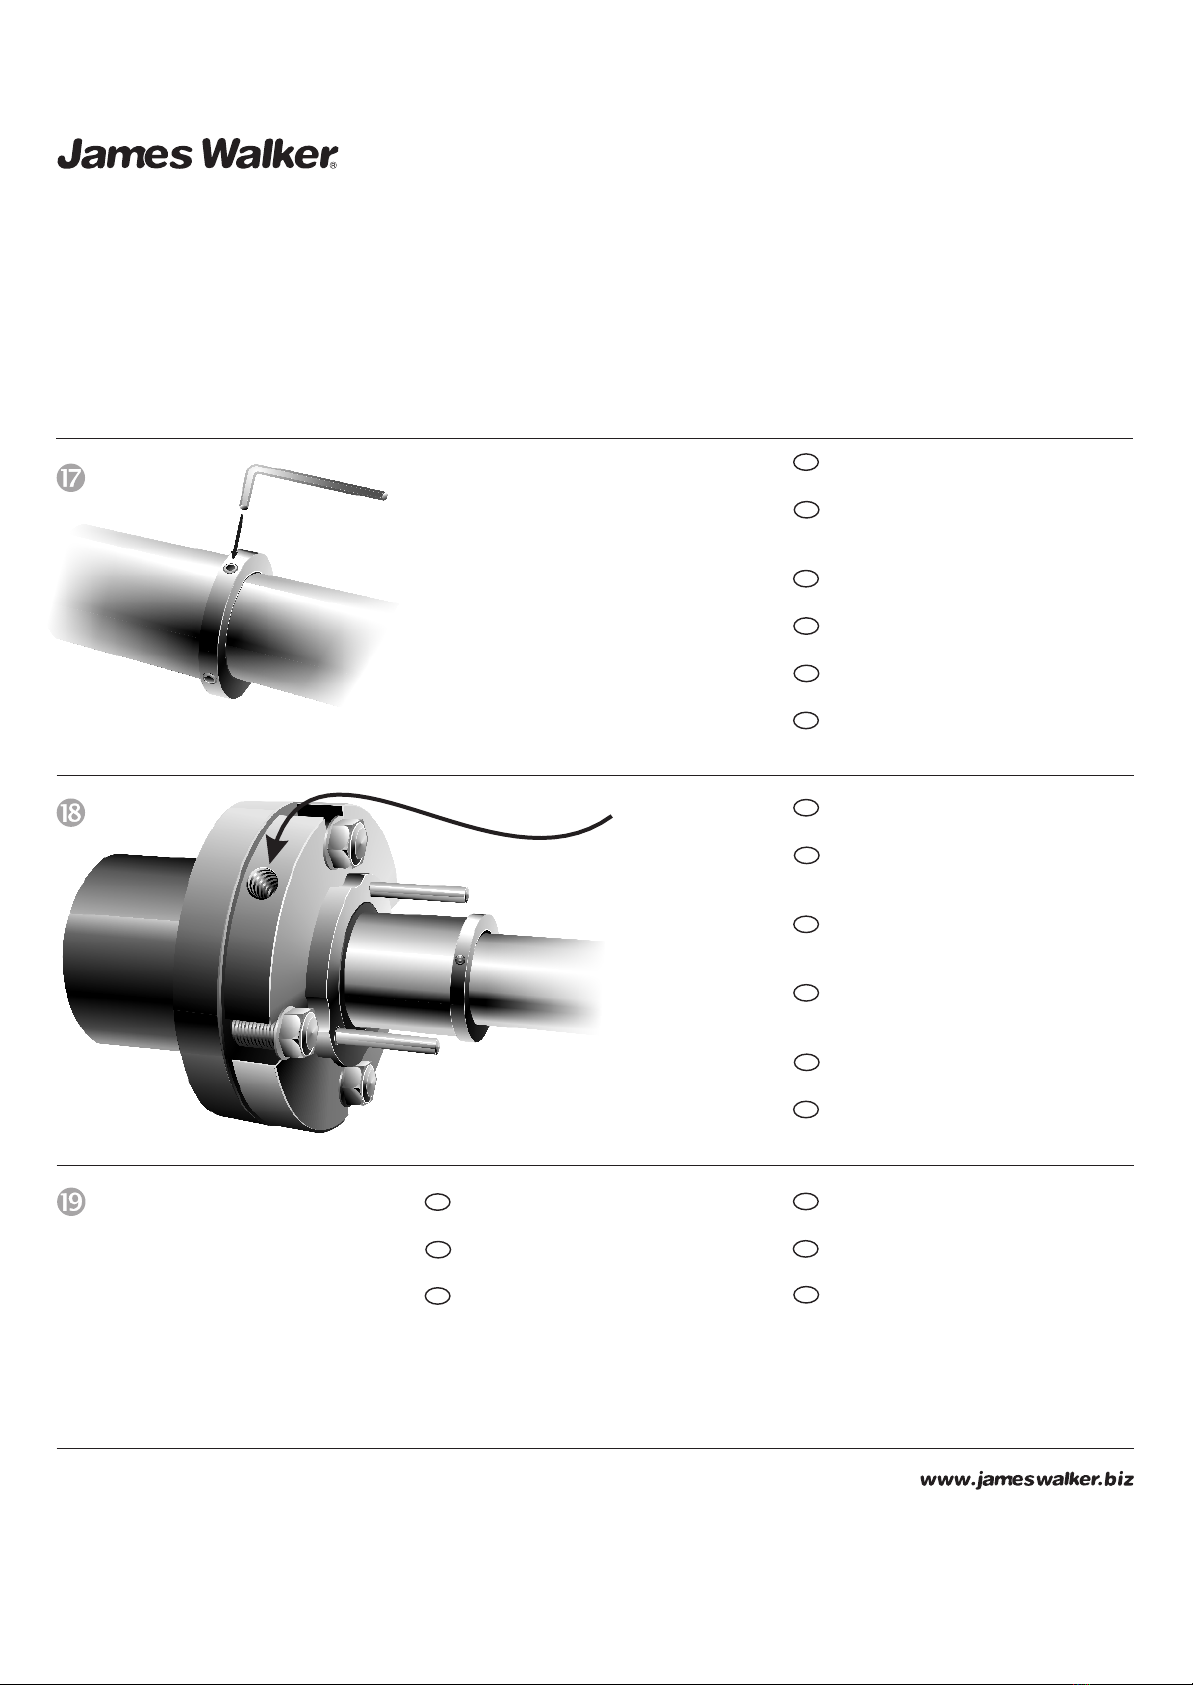
Tighten Set Screws to affix Shaft
Sleeve to shaft.
Serrare la serie di viti per fissare il
manicotto all'albero.
Draai de Set Screws vast om zo de
asbus op de as te bevestigen.
Apretar los tornillos de fijación
para fijar el casquillo del eje al eje.
Serrer l'ensemble des vis pour fixer
la douille à l'arbre ;
Ziehen Sie die Schrauben an, um
die Wellenschutzhülse auf der
Welle anzubringen.
If needed, reconnect flush system.
Start flush.
Ricollegare, se necessario, il
sistema di flussaggio. Avviare il
flussaggio.
Indien nodig, sluit de spoelleiding
weer aan. Activeer het
spoelsysteem.
Si es necesario, volver a conectar
el flujo. Poner en marcha el flujo.
Si besoin, reconnecter le circuit de
flush; mettre en pression le circuit.
Falls nötig, klemmen Sie das
Spülungs-System um. Starten Sie
die Spülung.
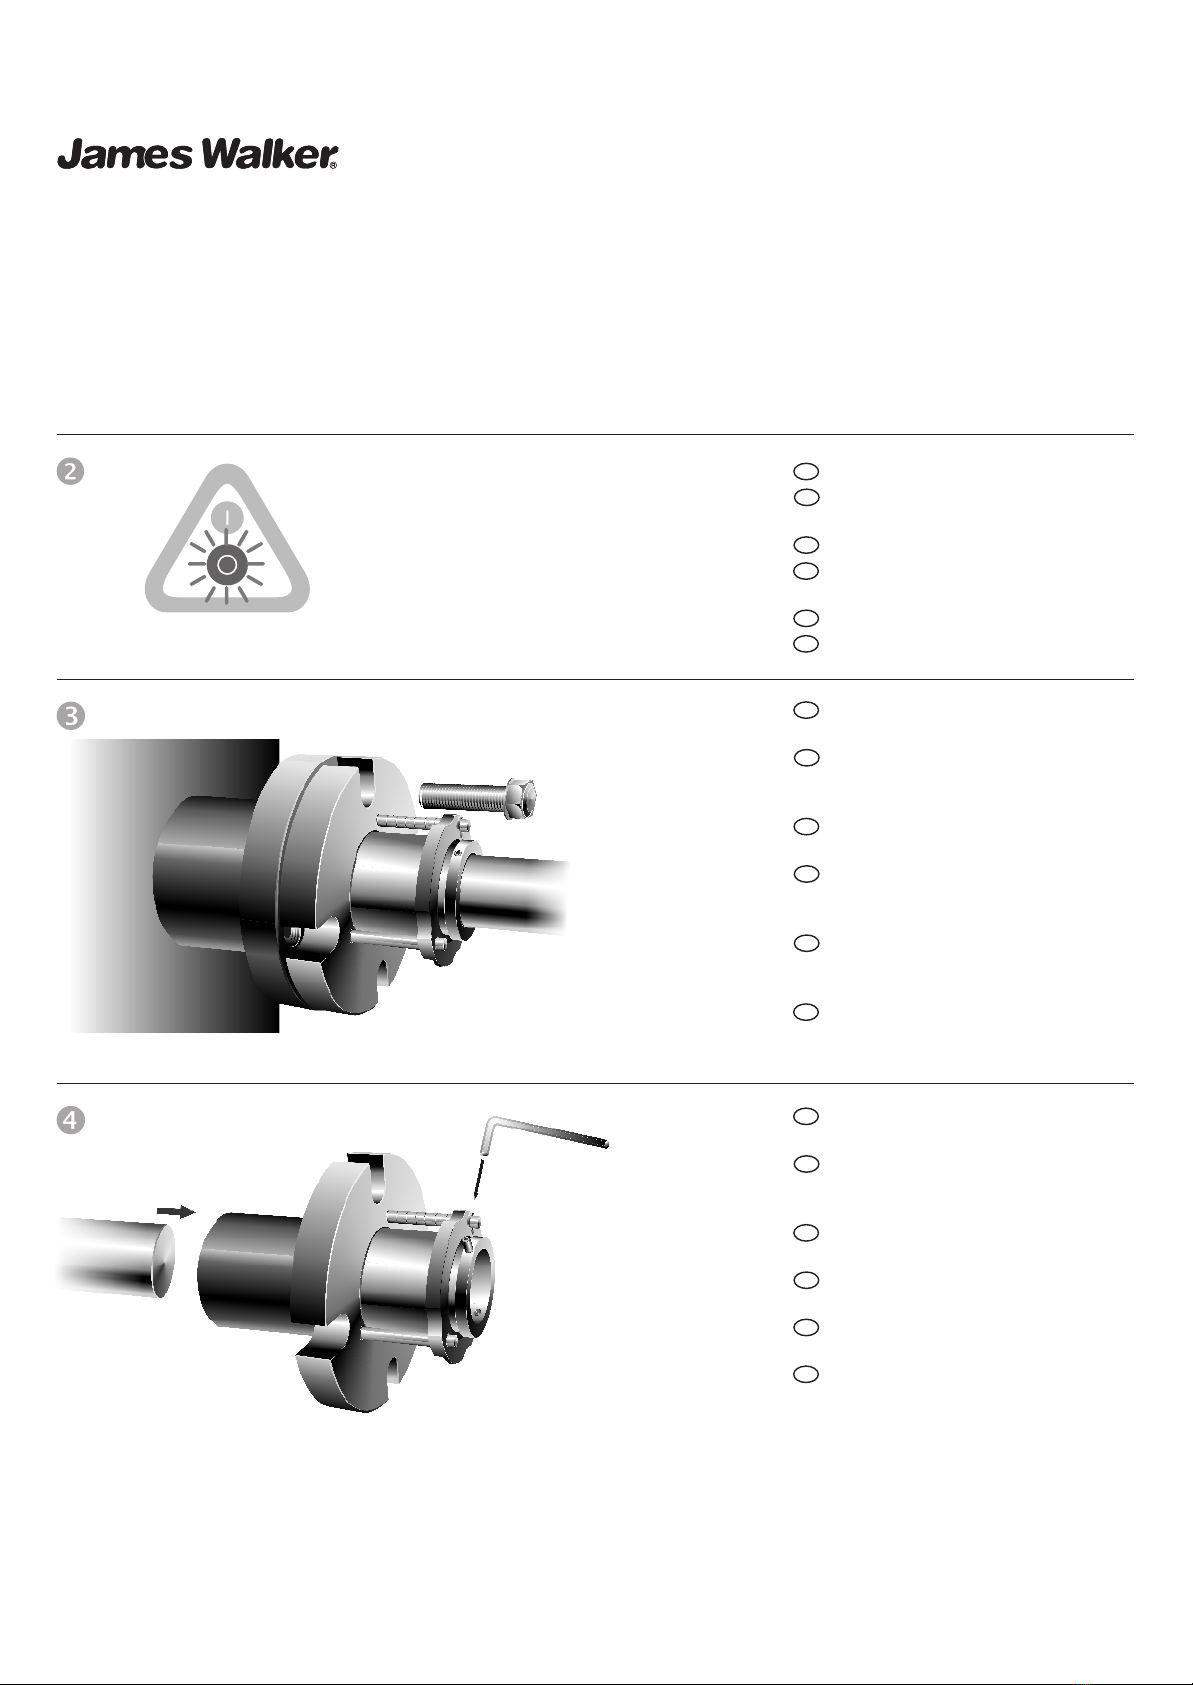
At pump start-up vent air from
chamber.
All'avviamento della pompa far
sfogare l'aria dalla camera.
Lüften Sie die Luft aus der Kammer
beim Start-up der Pumpe.
Affix the Shaft Sleeve to pump shaft by
evenly tightening each set screw until it
just touches the shaft. Then tighten set
screws until the points are embedded in
shaft surface.
Where necessary,
re-connect the
flush system and
apply flush water
to cartridge before
pump start-up.
Pump is now
ready to enter
service with the
new Sealing
Element
CPC 08 Level 08 T03 180611
James Walker & Co Ltd Customer Support Centre, 1 Millennium Gate, Westmere Drive, Crewe, Cheshire, CW1 6AY, UK
Material Safety Data Sheets are available on request
Health warning: If PTFE or fluoroelastomer (eg, FKM, FFKM, FEPM) products are heated to elevated temperatures, fumes will be produced which may give unpleasant effects, if inhaled. Whilst some
fumes are emitted below 250°C from fluoroelastomers or below 300°C from PTFE, the effect at these temperatures is negligible. Care should be taken to avoid contaminating tobacco with particles of
PTFE or fluoroelastomer, or with PTFE dispersion, which may remain on hands or clothing.
Information in this publication and otherwise supplied to users is based on our general experience and is given in good faith, but because of factors which are outside our knowledge and control and affect
the use of products, no warranty is given or is to be implied with respect to such information. Unless governed by type approval or contract, specifications are subject to change without notice. Statements
of operating limits quoted in this publication are not an indication that these values can be applied simultaneously.
To ensure you are working with the very latest product specifications, please consult the relevant section of the James Walker website: www.jameswalker.biz.
At start-up, open all valves to flood
the pump chamber. If possible, vent
any air that may be trapped in
chamber.
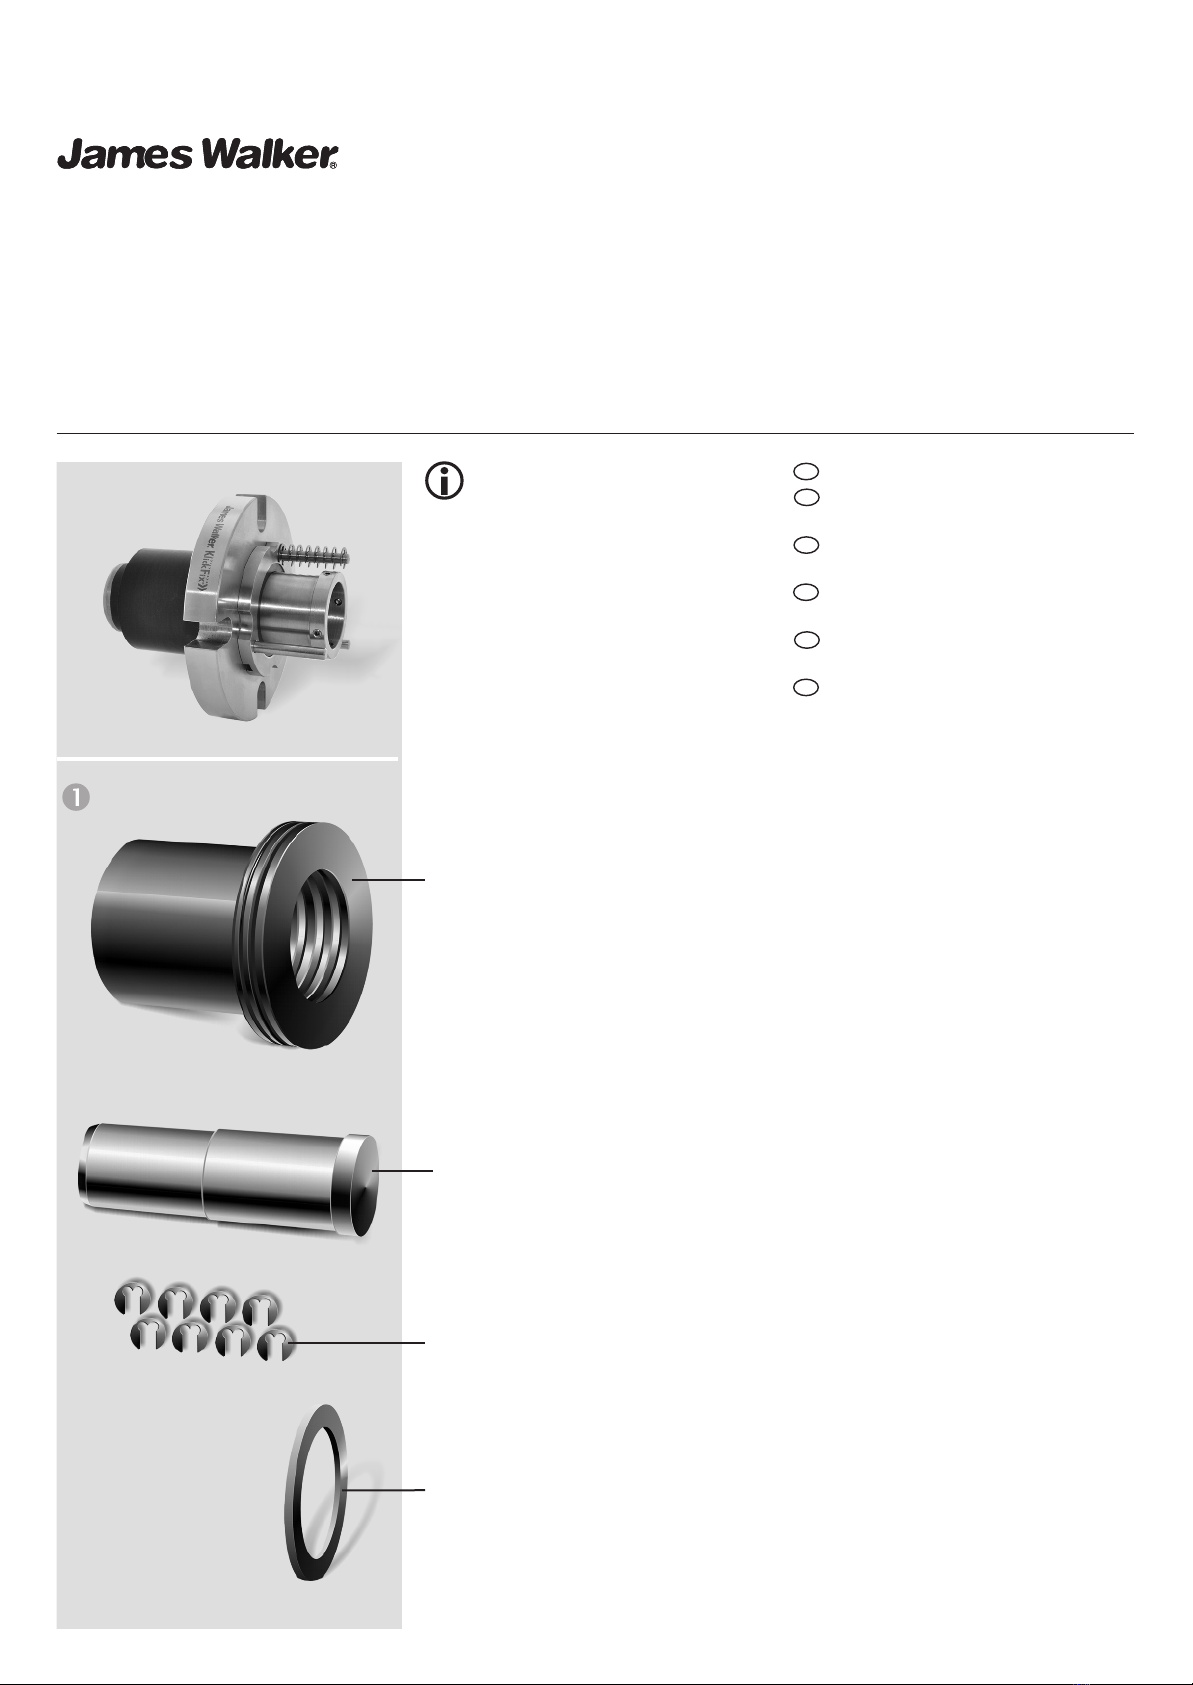
James Walker KlickFix®
On-site Refurbishment Guide for
EN
DE
IT
NL
ES
EN
DE
IT
NL
ES
EN
DE
IT
NL
ES
F
F
F
Ontlucht bij het opstarten van de
pomp de sealkamer.
Al arrancar la bomba purgue el aire
de la cámara.
Au démarrage de la pompe, laisser
échapper l'air de la chambre.