2. Safety and General Information
IMPORTANT INFORMATION FOR SAFE AND EFFICIENT OPERATION.
READ THIS INFORMATION BEFORE USING YOUR DEVICE.
Users are not permitted to make changes or modify the device in
any way. Changes or modifications not expressly approved by the
party responsible for compliance could void the user’s authority
to operate the equipment. See 47 CFR Sec. 15.21.
This device complies with part 15 of the FCC Rules. Operation
is subject to the following two conditions: (1) This device may
not cause harmful interference, and (2) this device must accept
any interference received, including interference that may cause
undesired operation. See FCC 47 CFR Sec. 15.19 (3).
ELECTROMAGNETIC INTERFERENCE/COMPATIBILITY
Note: Nearly every electronic device is susceptible to electro-
magnetic interference (EMI) if inadequately shielded, designed or
otherwise configured for electromagnetic compatibility.
FACILITIES: To avoid electromagnetic interference and/or com-
patibility conflicts, turn off your device in any facility where posted
notices instruct you to do so. Hospitals or health care facilities
may be using equipment that is sensitive to external RF energy.
AIRCRAFT: When instructed to do so, turn off your device when
on board an aircraft. Any use of a device must be in accordance
with applicable regulations per airline crew instructions.
MEDICAL DEVICES
HEARING AIDS: Some devices may interfere with some hear-ing
aids. In the event of such interference, you may want to consult
with your hearing aid manufacturer to discuss alterna-tives.
OTHER MEDICAL DEVICES
If you use any other personal medical device, consult the man-
ufacturer of the device to determine if it is adequately shielded
from RF energy. Your physician may be able to assist you in
obtaining this information.
Industry Canada Notice to Users: Operation is subject to the fol-
lowing two conditions: (1) This device may not cause inter-ference
and (2) This device must accept any interference, including inter-
ference that may cause undesired operation of the device.
FCC Notice to Users: This equipment has been tested and
found to comply with the limits for a Class B digital device, pur-
suant to part 15 of the FCC Rules. These limits are designed to
provide reasonable protection against harmful interference in a
residential installation. This equipment generates uses and can
radiate radio frequency energy and, if not installed and used in
accordance with the instructions, may cause harm-ful interfer-
ence to radio communications. However, there is no guarantee
that interference will not occur in a particular instal-lation. If this
equipment does cause harmful interference to radio or television
reception, which can be determined by turn-ing the equipment off
and on, the user is encouraged to try to correct the interference
by one or more of the following measures:
• Reorient or relocate the receiving antenna.
• Increase the separation between the equipment and
the receiver.
• Connect the equipment to an outlet on a circuit different
from that to which the receiver is connected.
• Consult the dealer or an experienced radio/TV technician
for help.
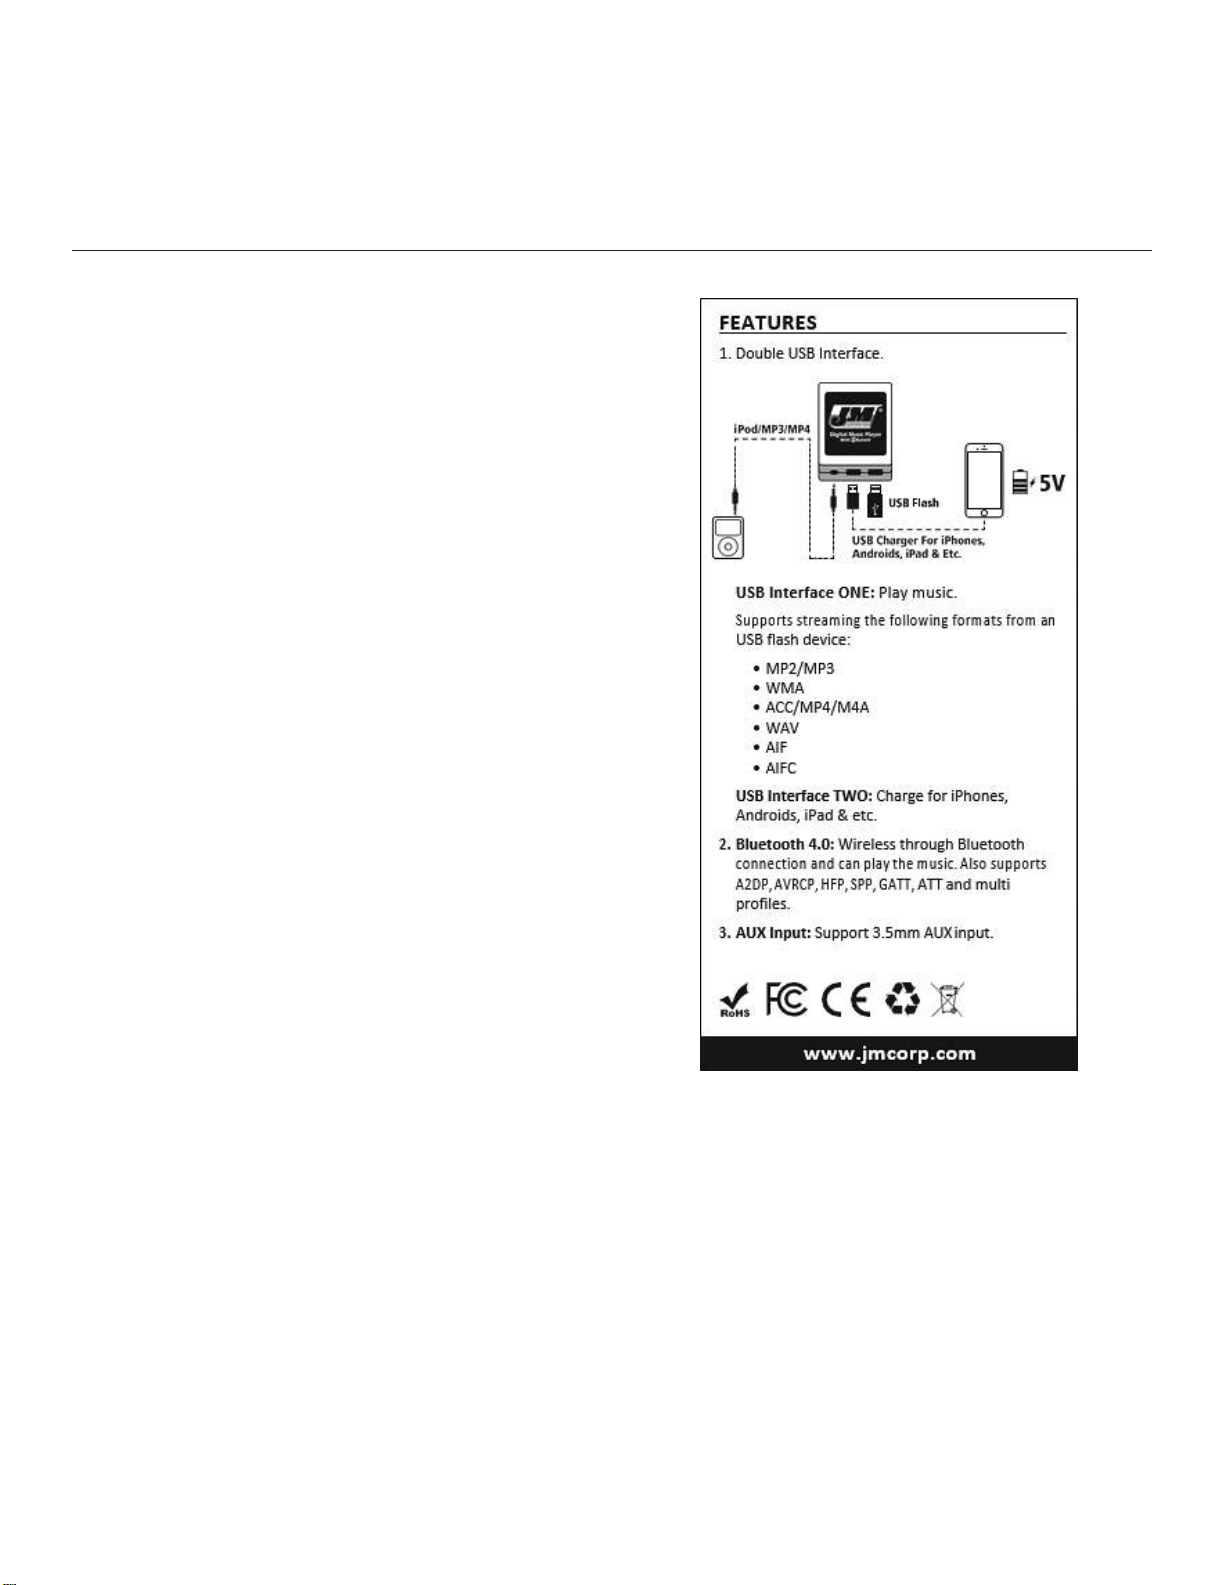
3. Package Contents
• Digital music player w/ GL-1800 connection harness
• Auxiliary extension cable
• Velcro strips for mounting