Javad TRIUMPH-2 Guide

Last revised - July 30, 2018
TRIUMPH-2
Start Guide

TRIUMPH-2 START GUIDE
2
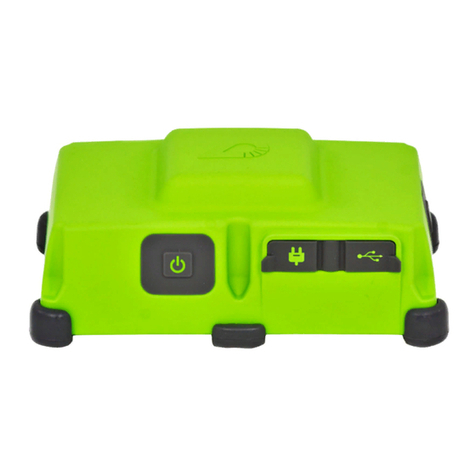
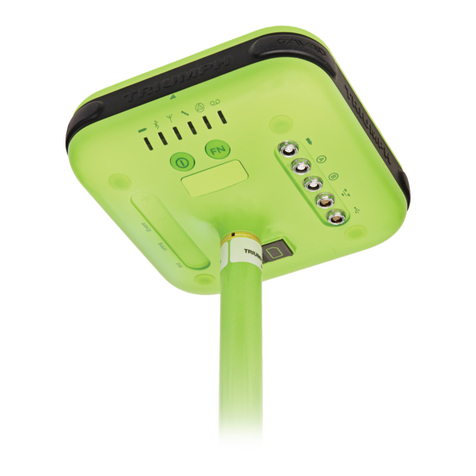
To turn ON the receiver press
the power button. To turn OFF
the receiver, press and hold the
power button until LEDs are o and
then release the button.
The Record button starts/stops data re-
cording.
The power port is used to connect the receiver
to an external power source and to charge the batteries.
Input voltage: +10...16 VDC.
The USB port is used for high-speed data transfer and com-
munication between the receiver and an external device.
How to clear NVRAM
1. Turn the receiver OFF with ON/OFF button.
2. Press and hold the Record button.
3. Turn the receiver ON by pressing ON/OFF button.
4. Wait till all LEDs will flashing yellow (except battery LED).
5. Release the Record button.
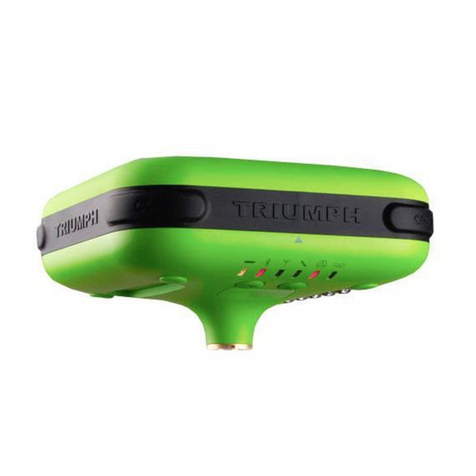
The bottom 1/4-20” thread connector allows mounting TRI-
UMPH-2 on the monopode, install 1/4-20” to 5/8-11” adapt-
er to mount TRIUMPH-2 on the pole.

HPT404BT HPT401BT/901BT HPT435BT
TRIUMPH-2 START GUIDE
3
To operate TRIUMPH-2
as RTK base station it
could be equipped with
Bluetooth® capable
external radio like either
one of three UHF 406.1-
470 MHz radio trans-
ceivers: 35W HPT435BT,
4W HPT404BT, 1W
HPT401BT or license
free frequency hop-
ping 902-928 MHz 1 W
HPT901BT radio trans-
ceiver.
TRIUMPH-2 communicates with radio via Bluetooth wireless link. Up to 50
(~15 m) is the practicable range of the communication between TRIUMPH-2
and HPT401BT/HPT404BT. Actually in the field they keep reliable connection
up to 130 (~40 m). TRIUMPH-2 and radio are paired at the factory, so they
automatically connect together aer power applied.
To turn ON the radio without the internal battery, connect the external power
using the cable included to the kit.
To turn ON the radio with the internal battery, either connect the external
power or press and hold the power button for more than 5 seconds to operate
from the battery. To charge the internal battery, connect the external power.
External radio status indication:
WARNING!
To avoid serious damage
of the equipment, do not
use the radio without the
antenna!

1.Blinking every 1 sec according to the battery means receiver is ON without external power. LED solid
according to the battery means external power is connected.
2. Eective number of satellites are total number of satellites tracked minus the number of non-GPS sys-
tems tracked. For example if 8 GPS and 5 GLONASS are tracked the eective number of satellites is 12.
3. RECORDING LED blinks on each recording.
TRIUMPH-2 START GUIDE
4

TRIUMPH-2 START GUIDE
5
MANAGING AND OPERATING RECEIVER USING IPAD/IPHONE
Connection to TRIUMPH-2
To connect your iPad/iPhone to
TRIUMPH-2, perform the following steps:
1. Use the NetView&Modem soware to
configure the access to TRIUMPH-2.
2. Start the NetView&Modem on your
PC, connect to TRIUMPH-2 using USB or
Bluetooth, then click Networking-WLAN
(Figure 1).
Note: How to connect your TRIUMPH-2 to
PC see Appendix A.
3. Set WLAN Mode to adhoc.
4. Assign the WLAN Access Point SSID
name, e.g. triumph103.
5. Enter the IP address (e.g. 192.168.0.1),
gateway (e.g. 192.168.0.1) and Network
mask (e.g. 255.255.255.0).
6. Set the WLAN Key N values to “”.
7. Set the DHCP parameters: client to o,
and server to on. Click Apply.
8. Open Server tab (Figure 2). Configure ac-
cess to the TRIUMPH-2: enter TCP Port (e.g.
8002) and your own TCP/FTP Password
(e.g. “apple”). Click Apply.
Figure 1. WLAN parameters
Figure 2. Server tab parameters

TRIUMPH-2 START GUIDE
6
7. Reset TRIUMPH-2.
8. On the iPhone tap Settings-WiFi and
turn on the WiFi.
9. Just created WiFi access point SSID
name (triumph103) should appear in the
list of the available networks. Click the in-
formation icon near its name; the Configu-
ration screen appears (Figure 3).
10. Select Static and type in the IP address,
subnet mask, DNS the same you have
assigned for TRIUMPH-2 in NetView&mo-
dem.
11.NowyoucanconnecttotheTRIUMPH-2.
In the list of available WiFi networks tap
triumph103.
12. The WiFi connection is established.
Now your TRIUMPH-2 is ready to be man-
aged sing your iPhone.
13. Run the PP application on your iPhone
(available in App Store).
14. In the Connection dialog enter the
same IP port and IP address as you set for
TRIUMPH-2 or click the Set Default button.
15. On the Connection page type the IP ad-
dress of the internal network, its port and
login/password.
The application will connect to your
TRIUMPH-2 receiver.
Surveying
Aer the connection is successfully es-
tablished, you can see the receiver’s
ID and serial number. Click Connect to
configure your receiver for the survey.
If a survey logging is already started, you
will see the appropriate information: log-
ging file name and time remaining till auto
finish.
Use the Go to Survey button to
switch to the Survey screen to mon-
itor the survey progress or to stop it.
The Setup Survey window (Figure 4) al-
lows setting the antenna type and height,
logging rate, occupation time, elevation
mask, file name and enabling/disabling
Figure 3. WiFi Settings

TRIUMPH-2 START GUIDE
7
site finishing without closing receiver file
(it is may be useful for Stop&Go surveying
but unnecessary for OPUS processing).
To start the Static site surveying or Kine-
matic Trajectory surveying, tap the need-
ed button. The Surveying page will appear,
and you will be able to monitor your sur-
veying progress (Figure 5).
The application will instructs the receiver
to finish the logging automatically if the
Static surveying is selected and occupa-
tion time is set, you can close the app or
disconnect your iPhone/iPad from the
receiver and wait till the recording light
is blinking on the receiver, that means
the data recording is on. Alternatively,
you can connect at any time to the re-ceiver to monitor its status and to cancel
the surveying using the Close File button.
For the Trajectory surveying, you have
to close the recording file by tap-
ping the Close File or pressing the
recording button on the receiver.
Satellites and receiver files
Aer the connection with the receiver is
established, you can monitor the status of
the satellites. Go to the Satellites tab to see
the Satellites table and SkyPlot. Use the
buttons on the bottom, to switch between
SkyPlot and Satellites (Figure 6).
The Satellites table includes satellite num-
ber (PRN for GPS and FCN for GLONASS),
receiver status (H means Healthy (OK) and
Figure 4. Setup Survey Figure 5. Surveying
Figure 6. Sttelites and Sky Plot

TRIUMPH-2 START GUIDE
8
I means Invalid), elevation and azimuth,
signal-to-noise rations for each satellite
signal. There is the status code with its de-
scription for each satellite at the end of the
table.
On the SkyPlot screen the sign for the sat-
ellite (yellow for GPS, blue for GLONASS,
green fop Galileo, blue for BeiDou and pur-
ple for SBAS) and its number are shown.
Note: If a satellite is ok it is signed with the
“wings”; unhealthy satellites are without
such wings.
Receiver files downloading
Aer the survey is complete, switch to the
Files tab. There is the list of receiver’s raw
files in this tab. The raw file name and the
file size with creation date are shown. Se-
lect the file by tapping. The unneeded files
can be deleted y tapping Delete. To down-
load the files to the iPhone/iPad, select
them and tap Download (Figure 7).
OPUS Processing
The files downloaded to your device can
be processed on the OPUS server. Tap the
OPUS tab to see the list of the raw files
(local files). Select the needed files by tap-
ping. The files can be deleted by tapping
Delete or sent to the OPUS (by tapping the
Process button) (Figure 8).
By tapping Process the soware converts
the files to the RINEX. Add the following in-
formation to the selected files:
• e-mail address to get the answer from the
OPUS server;
• antenna ID;
• antenna height (OPUS does not support
slant antenna, so the application converts
slant antenna type to vertical);
• Select the process mode: Static or Rapid
Static.
• Tap Send to OPUS.
The processed coordinates will be re-
ceived via email to the address specified
above (Figure 8).
Figure 7. Files Figure 8. OPUS process
TRIUMPH-2 START GUIDE
9
Data exchange
There are two abilities to get the data from
the application: you can export loaded files
to a cloud server like DropBox, OneDrive
etc., or to activate the FTP server and con-
nect to the device from PC.
Cloud exchange
To send loaded jps file to another applica-
tion e.g. to a cloud service use the Export
button. List of the installed application will
appear and you can select the needed ap-
plication(Figure 9).
Figure 9. Sending files to a server
FTP Connection
To get data from your iPhone/iPad use the
embedded FTP server. You can switch to
FTP tab to see current device IP address
and configure the access. On your desktop
you can use any FTP client application (e.g.
your browser). Just type the IP address in
format: e.g. p://172.22.0.27 and select
anonymous as name.
You will have full access to all raw files in
your device and in Settings folder you can
access to application settings.

TRIUMPH-2 START GUIDE
10
MANAGING AND OPERATING THE RECEIVER USING THE
ANDROID-BASED DEVICE
Connection to TRIUMPH-2
1. Run the JAVAD Post.Proc for Android ap-
plication (available at Google Play) and se-
lect the preferred connection type on the
first page. Android-based devices can be
connected to TRIUMPH-2 using:
• Bluetooth direct connection;
• WiFi (mobile access point)
• Ethernet (remote connection).
2. If the Bluetooth connection is select-
ed, the application starts searching for
available devices. Select TRIUMPH-2 in the
blue list (Figure 10). The Bluetooth PIN-
code will be required.
Aer the pairing TRIUMPH-2 will be always
in this list (till manual disconnection) with-
out new search.
3. If WiFi connection is selected, config-
ure your Android device as Mobile Access
Point (aka HotSpot).
Note: This procedure may dier depend-
ing on device.
Connect to TRIUMPH-2 initially using Blue-
tooth and then tap Reconnect to WiFi but-
ton. Select the WiFi (with MobileAP) radio
button on the Connection page to try to
find TRIUMPH-2 connected via WiFi. Aer
that you can connect to TRIUMPH-2 by
selecting it from the green list. (Figure 11).
Login and password to access TRIUMPH-2
will be required.
4. The Ethernet connection requests the
manual IP address, port, and login/pass-
word setup. Tap Connect (Figure 12). You
Figure 10. Bluetooth connection to TRIUMPH-2

Figure 11. WiFi connection Figure 12. Ethernet connection
Figure 13. Surveying
TRIUMPH-2 START GUIDE
11
can save all settings to the profile. Next
time you need to select the profile from list
of profiles.
Note: Each connection will be stored as a
connection profile. List of the connection
profiles are on the top of the connection
screen. Select the needed profile to start
the connection.
Surveying
The Data collection is performed in the
Survey screen. Set the following parame-
ters before starting the surveying:
• Receiver file name;
• Antenna ID;
• Antenna Height;
• Occupation Time;
• Logging Rate;
• Elevation Mask.
Tap Static, Trajectory or Stop and Go but-
ton to start the survey.
The screen with remained surveying time
and number of collected epochs appears
(Figure 13). The screen will be closed au-
tomatically according your settings, or tap
the Close File button to stop the survey at
any time.

TRIUMPH-2 START GUIDE
12
Downloading raw data from
TRIUMPH-2
The raw data can be downloaded from
TRIUMPH-2 with File Manager. There are
two buttons: Delete and Download. Check
the needed file(s) and tap Download, to
download it from receiver to your Android
device, or tap Delete to delete the file(s).
Refresh button updates the file list.
To specify the path to the folder to store
the files, tap “…” button (Figure 14).
Sending files to OPUS
You can use standard Internet browser
in your device to sent *.jps files to OPUS.
RINEX files can be send for processing as
well.
To convert the *.jps file to RINEX, select
it, set required parameters of conversion
and tap Convert button. RINEX file(s) will
be stored in the same folder as initial *.jps
file(s).
OPUS Processing
For working with NGS OPUS server you
can use standard web-browser on your
Android device. Follow the on-screen in-
structions to upload your data file to the
system. Select the antenna, specify an-
tenna height. The solution will be sent to
specified e-mail address.
Export data to desktop
To export data to desktop, connect your
Android device to your PC and copy the
files. Alternatively you can use cloud-based
solutions like DropBox, OneDrive or e-mail.
Figure 14. File manager

TRIUMPH-2 START GUIDE
13
TRIUMPH-2 can be configured as RTK Base
using NetView&Modem application.
Note: NetView&Modem is a free JAVAD
soware for PC available for downloading
at www.javad.com.
Note: How to connect your TRIUMPH-2 to
PC see Appendix A.
An external modem connects automatical-
ly to TRIUMPH-2 via Bluetooth.
Note: How to connect modem to the re-
ceiver see Appendix B. To setup receiver
and modem use NetView&Modem.
1. Click Networking-Modems and ensure
the value /dev/blt/b is selected in Receiver
Port... Click Apply (Figure 15).
2. Set auto in Modem Mode.
3. Configure the modem parameters (dif-
ferent for UHF and FH modems):
CONFIGURING TRIUMPH-2 AS RTK BASE WITH AN
EXTERNAL MODEM
Figure 15. NetView&Mo-
dem. Modems tab

TRIUMPH-2 START GUIDE
14
UHF modem configuration
Open UHF Radio tab and set parameters:
• Output power for base: a value in dBm
with 1 dB step in UHF Modem Output Pow-
er field.
Output power settings depend on the UHF
transmitter model and could be selected
from the following ranges:
• HPT401BT from 15 to 30 dBm (from 32 to 1000 mW)
• HPT404BT from 15 to 36 dBm (from 32 to 4000 mW)
• HPT435BT from 25 to 45.44 dBm (from 320 to 35000
mW)
The correspondence between dBm and
mW for the most frequently used power
values is represented in the Table 1:
mW 30 100 250 500 1000 2000 4000
dBm 15 20 24 27 30 33 36
mW 10000 15000 20000 25000 32000 35000
dBm 40 42 43 44 45 46
• Operation frequency in UHF Modem Fre-
quency field in Hz (the frequency should
be a multiply of 6500Hz)
• Protocol Type “simtx” for base.
• Call sign in UHF Call Sign field.
Switch to Simplex protocol tab and set
protocol parameters (Figure 16):
• Modulation type: dqpsk
• Channel spacing: 12500
• Scrambling: 255
• Forward Error Corrections: on
Click Apply to save the settings.
Frequency, output power, channel band-
Figure 16. NetView&Mo-
dem. Modems tab

TRIUMPH-2 START GUIDE
15
width, and call sign shall be configured in
accordance with your FCC licence
FH modem configuration
Open FH Radio tab and set parameters:
• Specify zone in the Zone drop-down list
(USA, Australia, EU).
• Protocol Type “simtx” for base.
• Hopping algorithm: a number from 0 to 9
in Rule field.
• Forward Error Corrections: on
• Scrambling: 1
• Output power for base: a value in dBm
from 15 to 30 with 1 dB step in Power field
Click Apply to save the settings.
4. To load new configuration to modem
you have to set Modem mode to O and click Apply.
Then set Modem Mode to auto. Click Apply again.
You will see fast blinking modem’s Bluetooth blue
LED indicating that TRIUMPH-2 is configuring the
modem.
5. To turn on corrections go to Ports 4 Bluetooth and
enable data output for Bluetooth b (port the UHF
modem is connected to): e.g. you can use RTCM 3.x
correction and select “RTK RTCM3 GGD full” (Figure
19). Set Input Mode for Bluetooth b to none.
6. In the field you should set current position of the
base station. Open Base tab (Figure 17):
1. Please select appropriate Antenna type depend-
ing on mounting: for TRIUMPGH-2 receiver with
adapter to mount on pole - JAVTRIUMPH_2A; for
TRIUMPH-2 receiver without adapter to mount on
the monopod - JAVTRIUMPH_2.
Figure 17. NetView&Mo-
dem. Corrections

TRIUMPH-2 START GUIDE
16
2. Verify L1 to ARP Osets. If the height is
zero upgrade firmware to latest version.
3.Type-in the Antenna Reference Point Po-
sition (ARP) either as Geodetic or Cartesian
(ECEF) coordinates (it is bottom reference
point of the receiver).
4. Click APC<-ARP button to convert ARP
coordinates to Antenna Phase Center Po-
sition (APC) for L1 frequency.
5. Click Apply button to store both ARP
and APC positions into receiver. Both val-
ues should be set to allow base receiver
transmitting correct messages in RTCM
3.x/2.x, CMR, and CMR+ formats.
If you want to use auto-averaged APC po-
sition from receiver please click Get from
receiver and convert it to ARP by clicking
APC->ARP.
If you want to transmit WGS 84(ITRF2008)
corrections, but the coordinates entered
are expressed in dierent datum, ensure
that the correct Datum ID is selected. W84
(WGS84(ITRF2008)) - is default.
If you want to transmit corrections in an-
other datum (e.g. NAD83 or ETRS89) with-
out applying transformation, please type-
in that base coordinates in that datum and
select W84
7. Optionally you can set base Id and some
parameters depends on corrections you
set.
RTCM Settings
The Station ID edit box allows the user to
assign a separate station ID to each refer-
ence station working in the area. On the
rover side, this ID allows easy identifica-
tion of the reference station whose RTCM
messages are being received by the rover
receiver. This ID must be an integer from 0
(default) to 1023.
CMR Settings
With the Station ID the user can specify
the base station ID, which will be includ-
ed into the CMR messages transmitted by
this base station. On the rover side, this ID
allows easy identification of the reference
station whose CMR messages are being re-
ceived by the rover receiver. This ID must
be an integer from 0 (default) to 31.
The Motion list box characterizes the mo-
Figure 18. Settings for the Base tab

TRIUMPH-2 START GUIDE
17
tion of the reference station:
• Unknown – the motion state is undeter-
mined.
• Static – the receiver is motionless.
• Kinematic – the receiver is in motion.
Use the Short ID, COGO and Long ID to in-
clude the reference station’s point feature
code1 into CMR message type.
8. Your receiver starts send corrections and
your external modem should blink with Tx
LED.
Appendix A. How to connect
TRIUMPH-2 to PC
TRIUMPH-2 can be connected to PC using
the standard USB cable.
Ensure the special driver for built-in USB to
RS232 FTDI converter is downloaded from
www.javad.com and installed on your PC.
The serial port will be assigned to this con-
nection.
Start NetView&Modem.
On the Connection page select SER and
select the port from the list.
Click Connect.
Appendix B. Pairing TRIUMPH-2
and an external modem
Once TRIUMPH-2 and a JAVAD external
modem are paired, the turn-on connec-
tion will be established automatically ev-
ery time.
Use the NetView&Modem soware to pair
TRIUMPH-2 and a modem.
1. Connect TRIUMPH-2 to PC using USB
port and connect the modem to a PC’s se-
rial or USB port. Start NetView&Modem.
2. Click Parameters-Networking-Modems
and then click External Modem via Blue-
tooth.
3. Click Pair and as result you will see the
confirmation that modem is connected.
The modem’s Bluetooth address should
be shown in the Current Address in Blue-
tooth b group of Ports-Bluetooth.
The receiver’s Bluetooth LED should be
blue.
Alternatively, you can pair TRIUMPH-2 and
a modem using the PairHPTModem An-
droid application.
Connect an Android device to TRIUMPH-2
using Bluetooth or WiFi. Tap scan to find
the modem and tap to it in the list to pair
the devices.

900 Rock Avenue, San Jose,
CA 95131, USA
Phone: +1(408)770-1770
Fax : +1(408)770-1799
www.javad.com
All rights reserved © JAVAD GNSS, Inc., 2018
Other manuals for TRIUMPH-2
1
Table of contents
Other Javad Receiver manuals

Javad
Javad SIGMA Quick guide

Javad
Javad TRIUMPH-3 Guide

Javad
Javad TRIUMPH-LS User manual

Javad
Javad DELTAGNSS Receiver User manual

Javad
Javad Maxor User manual

Javad
Javad OMEGA User manual

Javad
Javad DELTA User manual

Javad
Javad TRIUMPH-3 User manual

Javad
Javad TRIUMPH-VS User manual

Javad
Javad UHFSSRx User manual

Javad
Javad TRIUMPH-LS User manual

Javad
Javad TRIUMPH-3NR User manual

Javad
Javad TRIUMPH-VS User manual

Javad
Javad Beacon User manual

Javad
Javad TRIUMPH-VS User manual

Javad
Javad DELTA-3N User manual

Javad
Javad TRIUMPH-1 User manual

Javad
Javad TriPad User manual

Javad
Javad TRIUMPH-1M User manual

Javad
Javad TRIUMPH-1M User manual